This is the promised follow-up to my article on Creating Compelling Wide-Angle Portraits Using One Off-Camera Flash. While part one discussed equipment, composition, lighting and posing, this article focuses exclusively on post-processing.
Let me start by stating the obvious. Everyone has their own unique preferences regarding post-processing. Just read the comments below a posted image that is somewhat heavy on processing and you will see the variety of opinions out there. Personally, I like creating portraits that look somewhat surreal. I achieve some of this look by lens choice and composition and the rest in Adobe Lightroom and Photoshop.
Rather than go through my entire workflow, I’ll focus on five steps in Lightroom that form the foundation for my portrait processing. If you also like portraits that look a bit surreal, my hope is that you will learn a technique or two here that you find helpful.
This article assumes that you already have some familiarity with the menus and tools in Adobe Lightroom or Bridge.

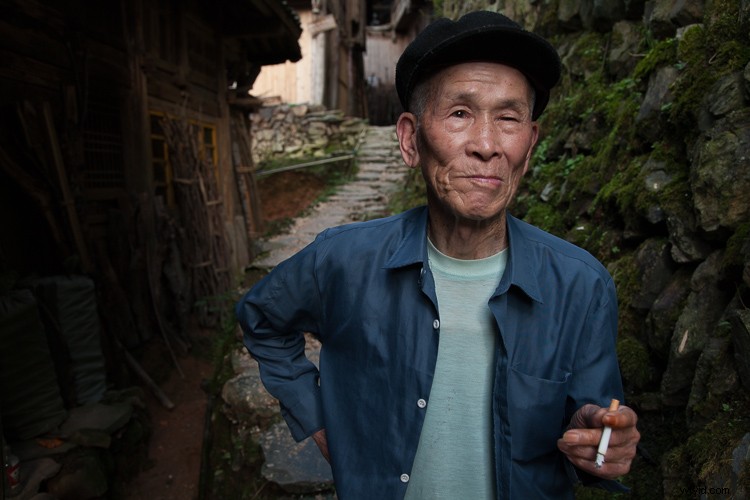
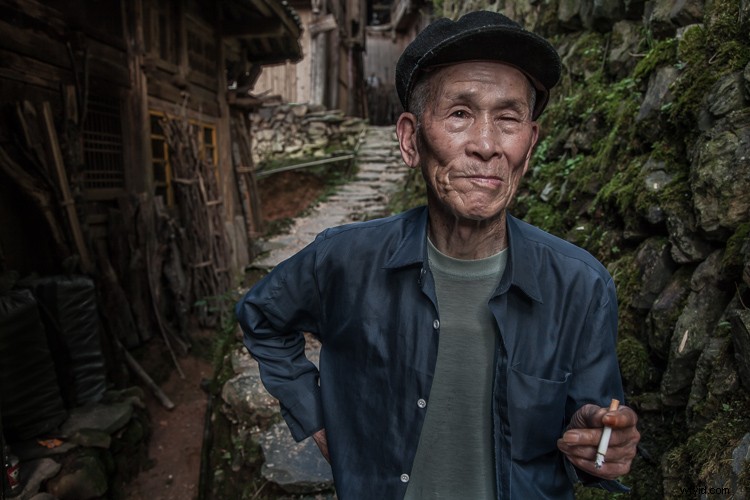
Let’s look at the work I did in Lightroom for the above portrait, shot in rural China. First, here is the image right out of camera.
Step 1. Move the contrast to the mid-tones
One of the first steps was to reduce the overall contrast in the image using the Highlights, Shadows, Whites and Blacks sliders. The image is fairly contrasty, but weighted more towards dark tones. I moved the Highlights and Whites sliders left (only a minor adjustment to Whites) to reduce some of the highlights (bright areas) in the background. I then moved the Shadows and Blacks sliders right (only a minor adjustment to Blacks) to make sure detail can be seen throughout the image, even in the gentleman’s hat.
These initial adjustments gave the image a flat (non-contrasty) look as a starting point. This was intentional, as I planned on building contrast back into the image.
Notice in the image below that the light area in the background is somewhat less distracting, and that there is more visible detail in the background shadows.

While I removed some contrast at the outer ends of the spectrum, I then added contrast into the midtones by pushing up the Clarity slider. This varies by image, but in this case I moved it to +60 in Lightroom, in order to accentuate facial features. The Clarity slider focuses on the mid-tones while mostly leaving the luminosity of the brighter and darker areas of the image as is. Here are the results:

Step 2. Reduce saturation globally
For my portraits, I always make an initial global reduction (applies to the entire image) to Saturation and Vibrance. In this case, I reduced Saturation to -10, and Vibrance to -5. The shirt is still too blue in my opinion, but I’ll target that in the next step.
Step 3. Make local adjustments using the Adjustment Brush
Using the Adjustment Brush, I made changes to luminosity, saturation and sharpness in targeted parts of the image:
Adjustments to Luminosity – Your eyes usually gravitate towards the brightest areas of an image. So, I used the Adjustment Brush to draw more attention to the subject, especially his face, and less attention to other areas.
I started by brushing over brighter areas that were competing with his face, and darkening them slightly using the local Exposure and Highlights sliders. I also brushed over some darker areas that were missing detail, and pulled the local Shadows slider up slightly. Lastly, I added some overall brightness to the face and a little more to the eyes.
Adjustments to Saturation – I used the Adjustment Brush and local Saturation slider to further desaturate the man’s t-shirt. In this case, I also darkened it, while de-saturating.
Adjustments to Sharpness – I added a bit of additional sharpness to the eyes, eyebrows, and hair using the Adjustment Brush with the local Sharpness slider.
After these local adjustments, here is the image at its next stage:
Step 4. Create a vignette using the Gradient Tool
In photography, when someone speaks of a vignette, they are usually referring to the darkening of the outer areas of the image, relative to the center of the image. The standard vignette darkens the outer edges equally, usually in an oval shape. However, using several gradients allows you to control the direction, size and strength of the vignette on each side independently.
I clicked on Lightroom’s Gradient Tool, then clicked and dragged from outside the image towards the center, overlapping the subject slightly. Then, I pulled the local Exposure slider down, until I created a subtle edge vignette. I then added a gradient from the opposite side, and a very subtle one from the bottom. Conversely, if the edge of your image is darker than you’d like, you can also increase exposure with the gradient.
Here is the image after adding a subtle gradient vignette:

Step 5. Create a virtual copy of the RAW file for the background
To add more dimension to this image, I used a different processing treatment between subject and background. I created a virtual copy of the file in Lightroom (Photo > Create Virtual Copy, or use the keyboard shortcut CMD/TRL+’) and named it “Background”. If you use Adobe Bridge, you can create a copy of the RAW file instead. Then, for this second copy, I simply pulled the Clarity slider back to zero, and backed off on the global Sharpness slider as well. No other changes were made.
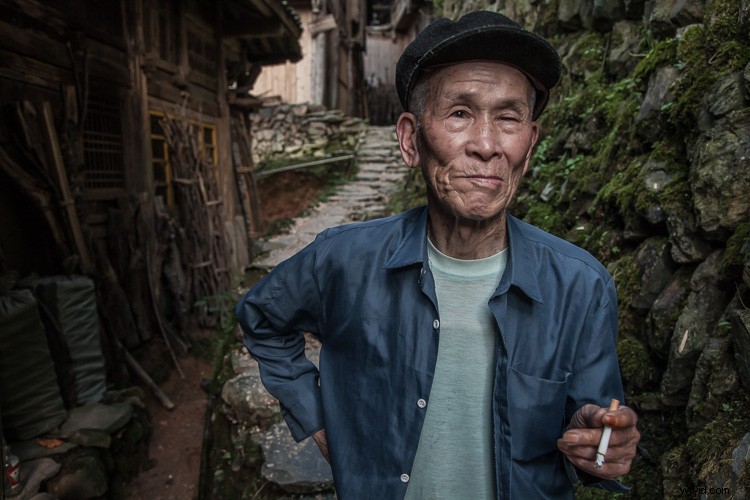
I then opened both of these file copies into Photoshop as layers, with the sharper rendition as the top layer. With the top layer active, I made a careful selection of the subject and created a mask so that the less sharp bottom layer becomes visible in the background areas. This adds a bit more dimension and helps keep your focus on the subject, as seen below.
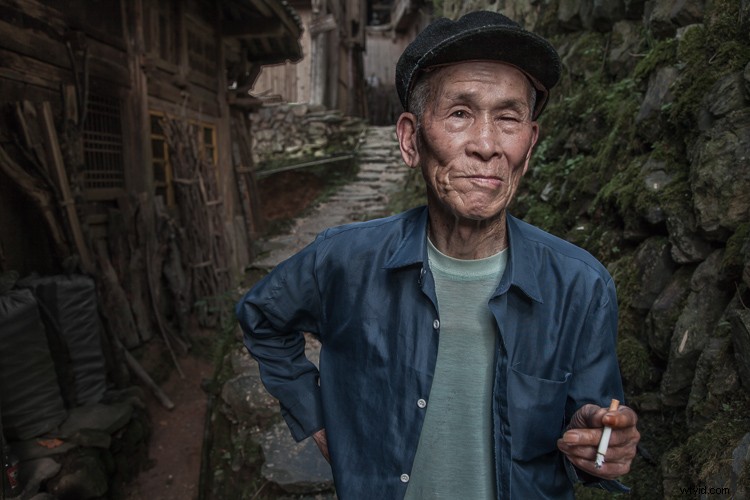
Background edits applied in Photoshop
Original out of camera for comparison
Note: If you do not have Photoshop, you can also use the Adjustment Brush inside Lightroom to paint in less Clarity and Sharpness to the background areas.
Although it is beyond the scope of this article, I continued on with processing in Photoshop, including additional adjustments to luminosity and contrast.
I hope this short overview of my five steps in Lightroom has been helpful and that there was a technique or two that will help you in your workflow.