One of the realities of Gimp is that it doesn’t have all the tools Photoshop does. In her post How To Replace A Sky In Photoshop, Helen Brady used a feature called “Blend If” in the blending options panel. This feature is great at helping replace a blown out sky but it doesn’t exist in Gimp. So, with her permission, I’ve taken her basic instructions and tweaked them to gain the same results from Gimp.
Without further ado, here is one useful method for replacing a sky in Gimp.
1) Fire up Gimp and open an image needing sky replacement and then drag in a sky image to the Layers panel. Rename the dragged image “Sky”. Click on the eye icon to the left of Sky to hide it from view for now.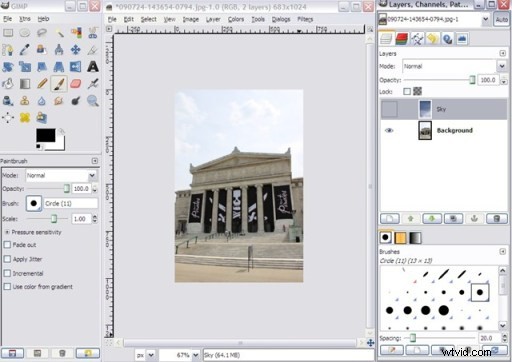
2) With the background layer highlighted, select the Fuzzy Selection Tool (for a list of tools and icons, check out Gimp – An Introduction) and click any location in the sky. This tool will select regions with similar color attributes, so the more uniform the sky, the better the results. If not all the sky is selected, hold down Shift and keep clicking sky elements until it is all selected.
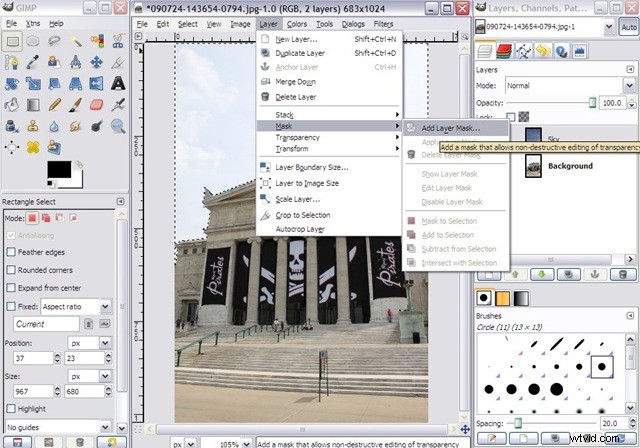
3) Select the Sky layer then click on Layers then Mask then Add Layer Mask.
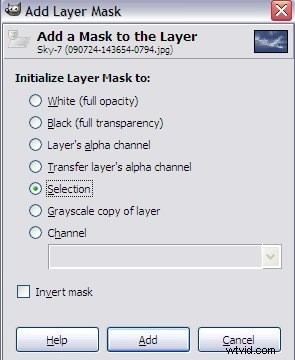
4) In the dialog box that appears, click the button for Selection and then click Add.
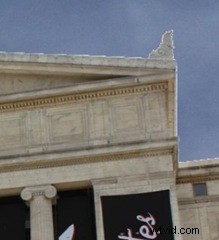
5) Click on the box next to “Sky” to make the layer visible. The sky from the Background layer will now be replaced by the sky from Sky. But you may notice there is a harsh edge left by the mask. I’ve included a zoomed crop here to show an example.
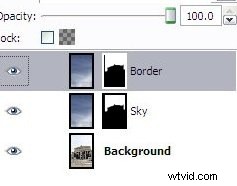
6) To get rid of that border we’ll start by clicking on the Sky layer then, on the top menu, click Layer and Duplicate Layer. Right click on the new layer and click Edit Layer Attributes. Rename this layer “Border”. Your layer section should now look like this.
7) With the Border layer selected, click Layer from the top menu, Mask and Delete Layer Mask.
8) Now select the Background layer and repeat step 2) above.
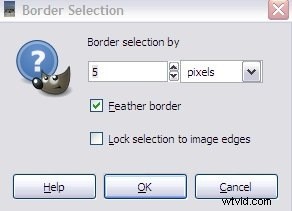
9) Select the Border layer and then, from the top menu, click Select and Border. In the selection screen that appears pick a pixel width of around 5 depending on your image. Also select Feather Border.
10) Repeat steps 3 and 4 above with the Border layer selected.
You’re just about done!!
While you will now have a passable photo, you might want to tweak the curves of the background or sky layers. Adjust as needed to match the general brightness and contrast of the foreground objects. Once you’re tweak is finished you can merge the visible layers (located under the Layer menu item) and save in any format you wish, or leave it un-merged. The choice is yours!
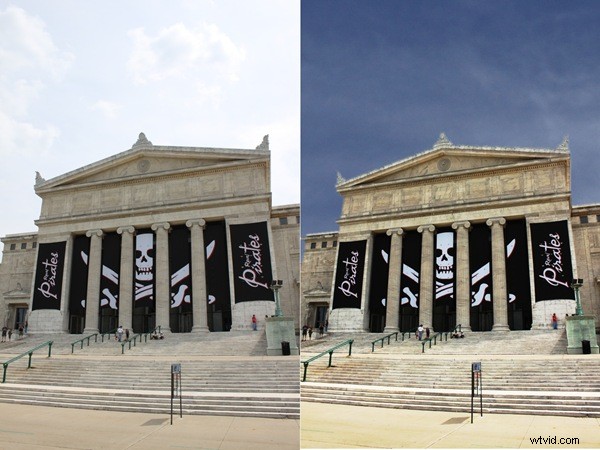
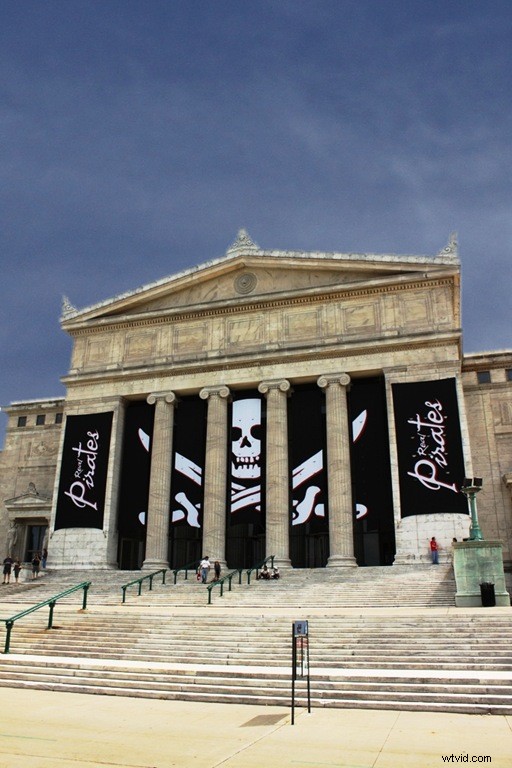
In the end, you should have an image that looks something like this:
NOTE: It would be more elegant to create two layers of the sky initially. I chose the method above to help show the effects of only using the one mask without a border enhancement. It also helps simplify things for those just starting to use Gimp. Repetition is a wonderful tutor. 🙂