
Exporting Video Correctly Is Essential to Professional Editing
Exporting can feel daunting for newcomers, especially when DaVinci Resolve introduces a fresh interface dedicated to rendering.
In this guide, we break down the fundamentals of exporting a video, step by step.
Need a quick reference? Read the transcript below—some sections reference moments in the video.
Navigate the Delivery Page
Once your edit, sound effects, and color grade are complete, head to the Delivery page. Unlike other NLEs that use pop‑ups, Resolve provides an entire workspace for rendering.
On the left, the Render Settings panel lets you configure every parameter. The center hosts a Preview Monitor so you can review the final timeline before rendering. Note: the scrub tool behaves slightly differently here, moving clip‑by‑clip rather than the full timeline.
On the right is the Render Queue, where jobs are listed and launched. Beneath this is a read‑only Timeline that mirrors the Edit page but cannot be altered during export.
Resolve’s render panel is designed for newcomers with one‑click presets. Whether you’re exporting to YouTube or an audio‑only track, presets streamline the process.
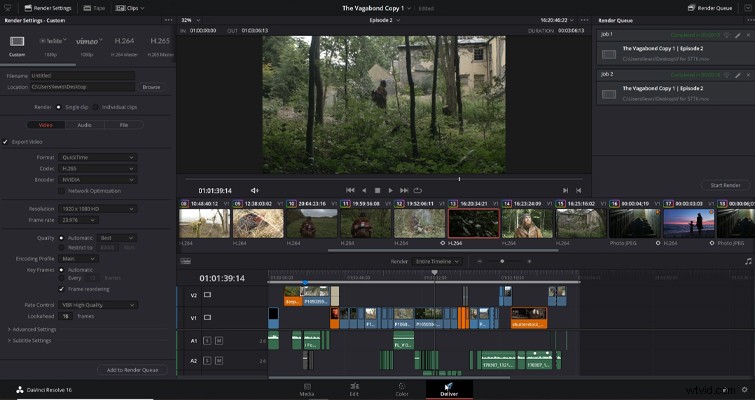 Set filename and destination, then choose a preset.
First, specify Filename and Destination Location. These determine the file’s name and where it will be saved.
DaVinci Resolve can export a single combined file or individual clips. The Individual Clips option is handy when you need low‑resolution copies for on‑device playback or client delivery of graded segments.
- Your Guide to Working with Project Files in DaVinci Resolve
When you select Individual Clips, Resolve renders each clip separately. For playback‑friendly files, navigate to the File sub‑menu:
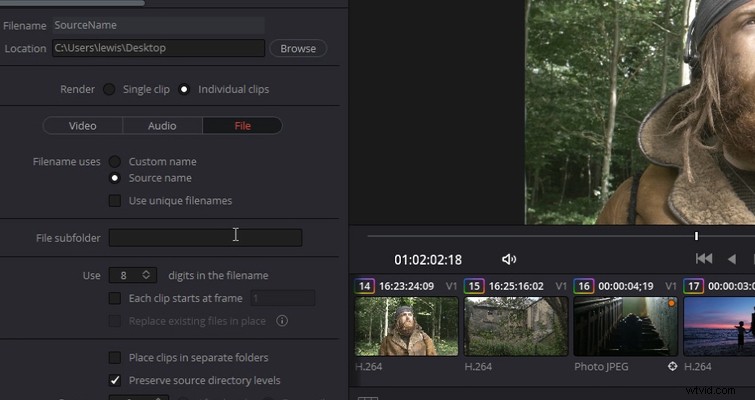 Use File Uses Source Name to keep original file names.
Enable Filename Uses Source Name so your low‑resolution exports retain their original names, simplifying replacements with high‑resolution versions.
- DaVinci Resolve’s System Requirements
The Chapters from Markers option splits your export into chapters—ideal for YouTube and client reviews. It’s a modern NLE feature that enhances viewer navigation.
Next, choose Format and Codec. For online distribution, QuickTime with H.264 is standard; H.265 offers better compression if your workflow supports it. I personally default to H.264.
Set the Encoder to match your GPU or CPU.
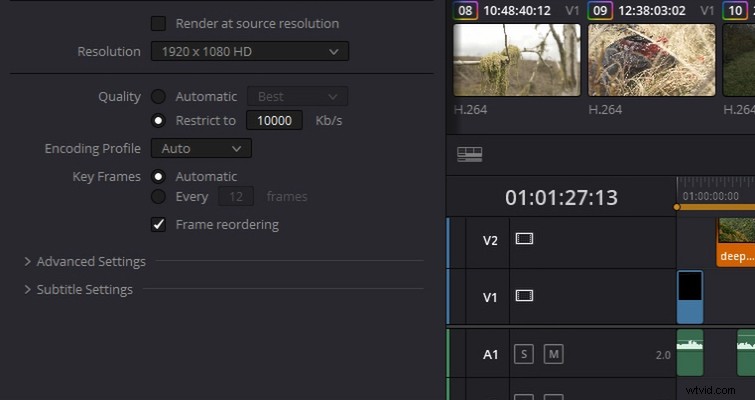 Define format, codec, and encoder settings here.
Ensure the Resolution matches your timeline; a mismatch triggers a warning (e.g., rendering 4K on a 1080p timeline). If you’re working with 4K footage in a 1080p timeline, consider resetting the timeline resolution via Edit → Project Settings → Timeline Resolution.
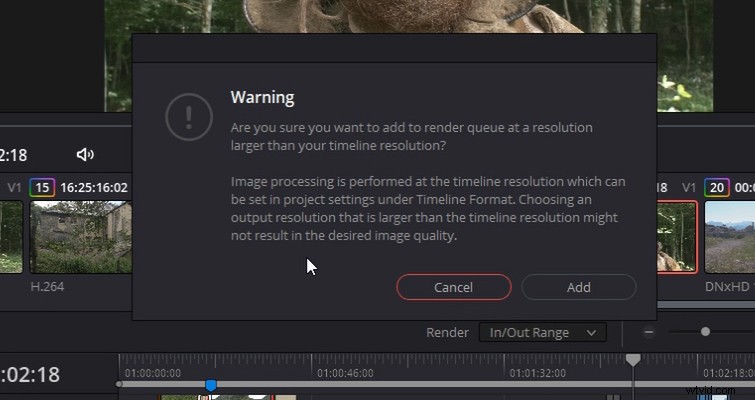 Warning: Rendering 4K on a 1080p timeline.
The Frame Rate should match your timeline. I always choose “Best” quality to avoid compression artifacts, even though it produces larger files.
Key Export Settings
The core parameters—filename, destination, format, codec, resolution, frame rate, and quality—are the only settings you need to touch if you’re new to Resolve.
To adjust audio or file options, click the corresponding tab in the Render Settings panel. If you prefer an audio‑free export, simply uncheck Export Audio—but double‑check that it remains selected if you want sound.
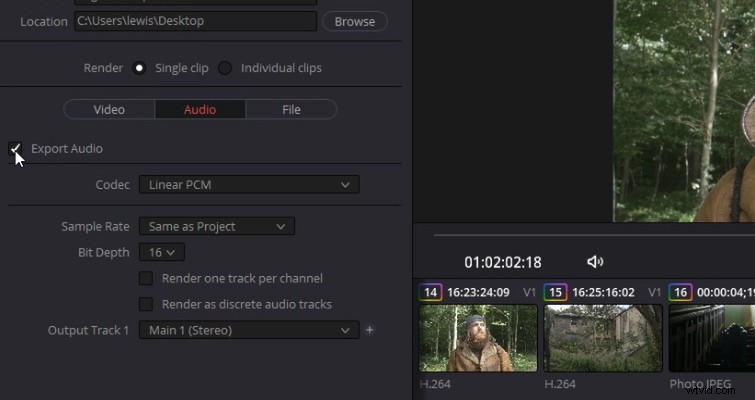 Uncheck Export Audio for silent video.
For partial renders, use Render In and Out Range and set I and O points on the timeline. You can queue multiple ranges; each will render separately.
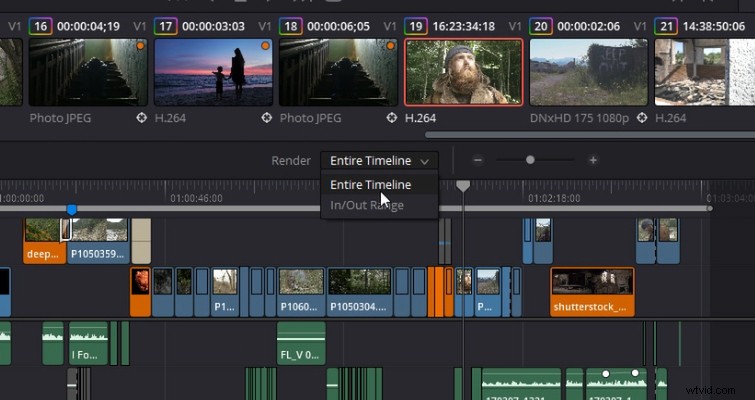 Select Render In and Out Range instead of Entire Timeline.
When you’re ready, click Add to Render Queue in the Render Settings panel, then hit Start Render in the queue. Resolve will display progress and an estimated completion time.
Resolve also offers “Straight‑to” options to upload directly to YouTube, Vimeo, or Twitter.
Quick Recap
- Open the Delivery page and review the final timeline.
- Set Filename and Destination Location.
- Choose Format, Codec, Resolution, and Frame Rate that match your project.
- Click Add to Render Queue.
- Press Start Render.
Your export will begin—watch the progress bar and wait for the completion notification.
Happy exporting!
For a deeper dive, watch Casey Faris’s walkthrough on rendering with DaVinci Resolve.
Want a complete overview? Check out Lewis McGregor’s tutorial linked below.
- Video Editing Basics for Beginners with DaVinci Resolve
Explore more Resolve topics:
- Using DaVinci Resolve on the M1 vs. a Beefy PC
- How to Add YouTube Chapters Directly from DaVinci Resolve
- One Year After Giving up Premiere Pro for DaVinci Resolve
- How to Effectively Reduce Noise in DaVinci Resolve
- How to Stabilize Footage in Post‑Production Using DaVinci Resolve