
Even with a top‑end camera and precise exposure, photos can sometimes feel flat or muted. When the lighting isn’t ideal, the powerful Curves tool in Photoshop can transform a lackluster image into a vibrant work of art.
How to Use Curves in Photoshop
The Curves tool is one of the most versatile adjustments in Photoshop, offering nuanced control over contrast far beyond the basic Contrast slider. In this guide we’ll walk through everything you need to know—from the fundamentals to advanced techniques.
Understanding the Curves Interface
When you open the Curves dialog, you’ll see a graph where the x‑axis represents input pixel values and the y‑axis represents output values. The diagonal line that runs from bottom‑left (black) to top‑right (white) is the baseline curve. Moving points along this line adjusts the tonal range of your image.
The histogram overlay shows the distribution of tones, while the baseline line sits directly over it. Manipulating this line changes contrast, brightness, and color balance.
Accessing the Curves Dialog
Always work on a new layer or an adjustment layer before opening Curves. To launch the dialog, go to Image > Adjustments > Curves or press Ctrl+M (Windows) / Cmd+M (macOS).
On the right of the graph, the Show options let you toggle the histogram, baseline, and other overlays. Enabling Channel Overlays can help you fine‑tune individual color channels, while Intersection Lines aid precise point placement.
Basic Curve Manipulation
Click on the diagonal line to create a point. Drag it up to lighten that tonal region, or down to darken it. Adding multiple points gives you granular control. Common curve shapes include:
- S‑Curve: lifts shadows and deepens highlights for increased contrast.
- Inverse S‑Curve: softens highlights while adding detail to shadows.
- N‑Curve: reduces contrast for a lighter, flatter look.
- U‑Curve: adds drama by deepening shadows and brightening highlights.
Creating Contrast Effectively
To raise contrast, pull the lower left portion of the curve downward to deepen blacks, and lift the upper right to brighten whites. The classic S‑curve is a blend of these adjustments. Keep an eye on the midpoint to preserve natural mid‑tones.

Photo by Lalmch, licensed under CC0.
Refining Endpoints and Input Range
Often the histogram’s edges are sparse. Tightening the endpoints—by dragging them closer to the histogram spikes—creates a richer tonal spread and a more dynamic image.
Undoing and Resetting Adjustments
If a point is misplaced, simply drag it off the grid or hit Delete. To revert the entire curve, press Option/Alt while clicking the Cancel button; it will switch to Reset.
Leveraging Presets and Auto Settings
Curves offers a range of presets for common contrast styles. You can also click Auto for a quick, algorithmic correction, then fine‑tune by adjusting the Auto Color Correction Options panel.
Exploiting Empty Tonal Ranges
Empty spaces in the histogram indicate underused tonal ranges. Adding anchor points at the black and white ends can deepen shadows and brighten highlights. If gaps appear between peaks, compressing the curve in those areas preserves mid‑tone integrity.
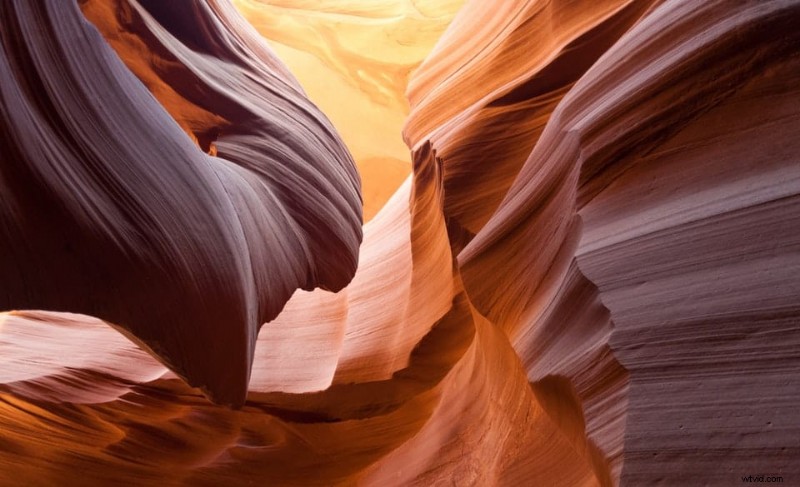
Smoothing Clipped Highlights
Bright scenes can suffer from clipped highlights that create abrupt transitions. Adjust the right‑hand side of the curve to soften steep slopes, yielding a smoother gradient.
Using Curves as an Adjustment Layer
For non‑destructive editing, add a Curves Adjustment Layer via the Layers panel (Layer > New Adjustment Layer > Curves). This isolates your changes and preserves the original image.
Selective Editing with Layer Masks
When only a portion of an image needs adjustment, use the Lasso tool with a 15 px feather. Hold Alt/Option while selecting outside the image to avoid harsh edges, then create a new Curves Adjustment Layer that automatically masks the selection.
Expanding Dynamic Range
Soft‑light shots often have a narrow dynamic range, evident as thin peaks in the histogram. Narrow the input by dragging the left and right sliders inward (Option/Alt) to broaden the tonal spread. If the image becomes overexposed, lower the white anchor and add a subtle U‑curve to re‑establish contrast.
Using the Hand Picker Tool
The hand icon on the left of the Curves dialog lets you click a spot in your image; the corresponding histogram value appears, revealing whether the area is in shadow, mid‑tone, or highlight. Adjust the curve based on this data.
Basic Color Correction
Color casts can dull images. Use the Auto button with the “Find Dark and Light Colors” algorithm to remove unwanted hues quickly.
When to Adjust Contrast
Contrast editing isn’t always necessary. Scenes with soft light or atmospheric effects often benefit from minimal intervention. Let your creative intent guide whether and how you tweak contrast.
Best Practices and Precautions
- Avoid extreme stretching of the histogram to prevent posterization and loss of detail.
- Keep RGB channel adjustments moderate to maintain natural saturation.
- Work in 16‑bit mode whenever possible; it preserves more tonal data than 8‑bit images.
Start Using Curves in Photoshop Today!
With these strategies, you’ll confidently navigate the Curves tool and elevate your photos to professional quality. Practice regularly, experiment with different curve shapes, and let your artistic vision shape the final look.