Shaky videos can undermine even the best‑planned shots. Don’t let this happen—our step‑by‑step guide shows you how to use iMovie’s built‑in stabilization, and gives a fast workaround for iPhone and iPad users who need a quick fix. The result? Smooth, professional‑looking footage in minutes.
iMovie stabilization is a native feature available on all Apple devices. It applies sophisticated algorithms that detect and correct camera shake, improving the overall quality of your footage with just a few clicks. If the in‑app tool doesn’t meet your needs, we’ll also walk you through a powerful alternative that delivers even finer control without excessive cropping.
In this article
- How Stabilization Works
- Method 1: Use iPhone’s Built‑in Stabilization (Before Recording)
- Method 2: Use iMovie on iPhone/iPad to Reduce Shakiness (Alternative Fixes)
- How to Stabilize Video with Filmora on Mac or Windows
- Pro Tips to Prevent Shaky Footage Before Editing
Part 1. Why You Need iMovie Stabilization?
Even the most careful hand‑held shoot can introduce unwanted motion. Common causes include:
- Hand‑held recording without a stabilizer
- Walking or running while filming
- Zooming in too much, which magnifies minor tremors
- Sudden pans or accidental shakes

How Stabilization Works
Video stabilization relies on two main approaches:
- Optical Stabilization: Built‑in hardware (e.g., lens‑shift motors) that dampens shake while recording.
- Digital Stabilization: Software that crops shaky edges and aligns frames after capture.
iMovie’s digital stabilization examines each frame, compensates for motion, and smooths the sequence without noticeable artifacts.
Part 2. How to Stabilize Video in iMovie on iPhone & iPad
Unlike the Mac version, iMovie on iPhone and iPad lacks a dedicated stabilization toggle. However, you can still achieve a steadier look with the following techniques.
Method 1: Use iPhone’s Built‑in Stabilization (Before Recording)
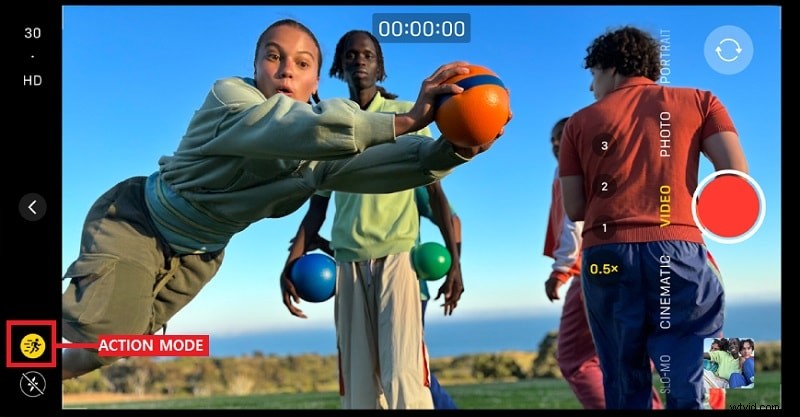
For iPhone 13 Pro and later, Apple’s Camera app provides two advanced modes that record video with hardware‑level stability.
- Open the Camera app and switch to Video mode.
- If available, enable Action Mode (delivers ultra‑smooth footage in high‑motion scenes).
- Hold the phone steady and tap Record.
For older models, shoot at 60 fps or higher resolution to reduce shake before editing.

Method 2: Use iMovie on iPhone/iPad to Reduce Shakiness (Alternative Fixes)
Although iMovie lacks a direct stabilizer, you can employ two simple tricks: slow‑motion and strategic cropping.
Option 1: Slow Down the Video for a Smoother Effect
- Launch iMovie → Create Project → Movie.
- Import the shaky clip from your gallery.
- Tap the Speed icon (speedometer) and slide left to reduce the playback speed slightly.
- Tap Done and export.

Option 2: Crop and Zoom to Minimize Shakiness
- Open iMovie and import your clip.
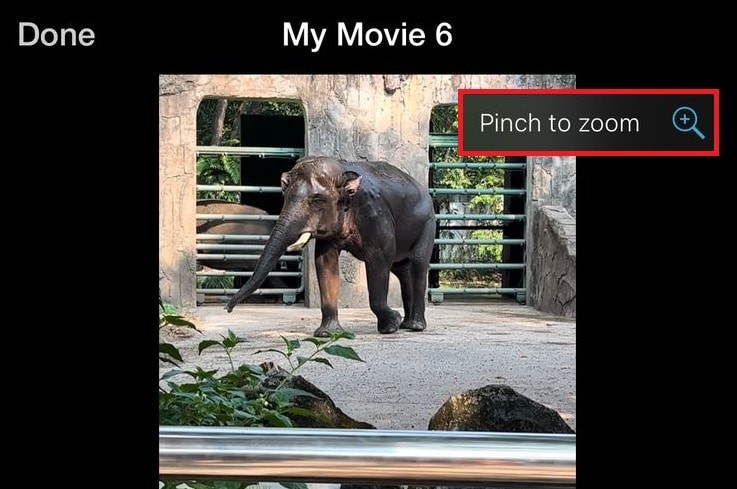
- Select the clip in the timeline, tap the Zoom button (magnifying glass).
- Pinch to zoom in slightly; this reduces visible motion by trimming the frame.
- Tap Done and export.
Note: Cropping lessens the apparent shake but does not fully eliminate it.
iMovie on Mac, however, provides a true stabilization tool that automatically corrects camera shake. Here’s how to use it:
- Open iMovie → Create New → Movie.
- Import your footage via File → Import Media and drag the clip to the timeline.
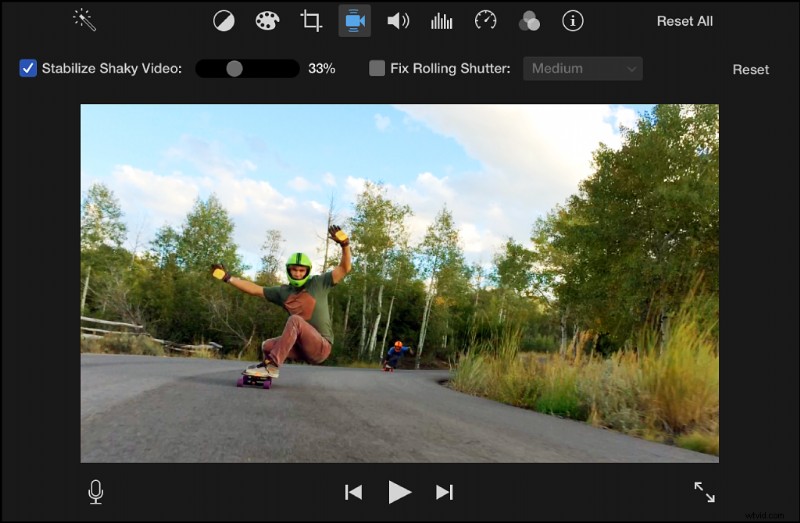
- Click the clip, then tap the Stabilization button (camera icon) above the preview window. Check Stabilize Shaky Video and adjust the slider for strength.

Higher values remove more shake but may increase cropping; experiment to find the best balance.
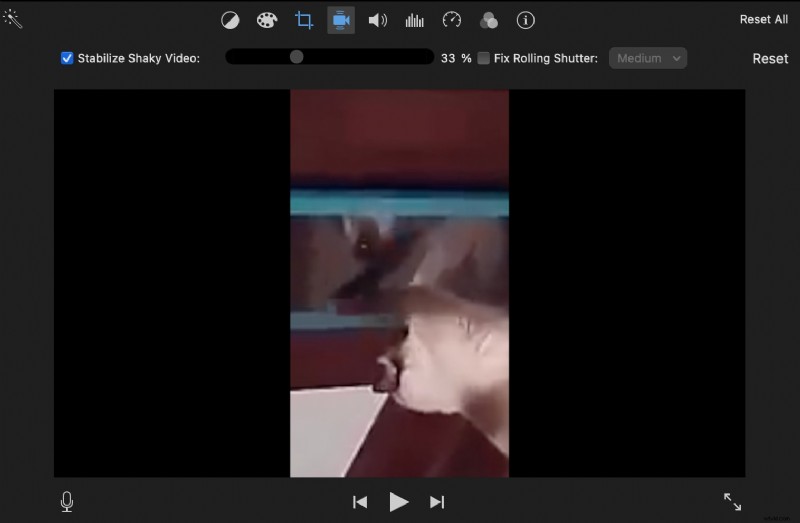
- Preview the clip. If the result feels overly zoomed or unnatural, reduce the strength or reapply at a different setting.
- Once satisfied, go to File → Share → File…, choose resolution and quality, then Save.
Part 3. Smarter Alternatives to iMovie Stabilization
While iMovie’s tool is helpful, it can be limited by cropping and coarse control. If you need finer adjustments or want to avoid cropping altogether, consider Wondershare Filmora, a cross‑platform editor that offers AI‑powered stabilization.
Filmora’s advantages include:
- AI‑driven stabilization that preserves frame integrity.
- Granular control over intensity.
- Compatible with both Mac and Windows.
- AI interpolation for smoother slow‑motion.

Feature Comparison
| Feature | iMovie | Filmora |
| Auto‑Stabilization | Yes, but limited control | Yes, AI‑powered for smoother results |
| Compatibility | Mac only (No iPhone/iPad or Windows) | Works on Mac and Windows |
| Quality | Crops video to reduce shakes | Minimal cropping, keeps video quality high |
| Extra Features | Basic stabilization only | AI‑powered enhancements, motion tracking, noise reduction |

With Filmora, you benefit from AI stabilization, superior quality, and advanced editing tools across platforms. If iMovie’s capabilities fall short, Filmora is the flexible, future‑proof alternative.
How to Stabilize Video with Filmora on Mac or Windows
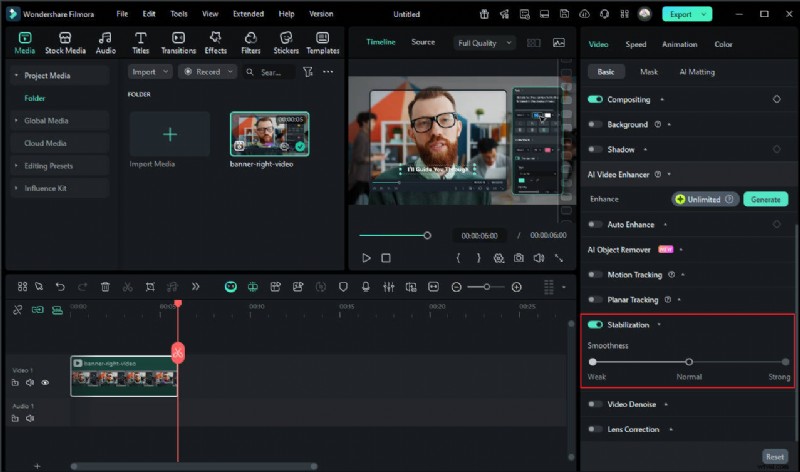
- Download and install Wondershare Filmora. Open it, click New Project, import your footage, and drag it onto the timeline.
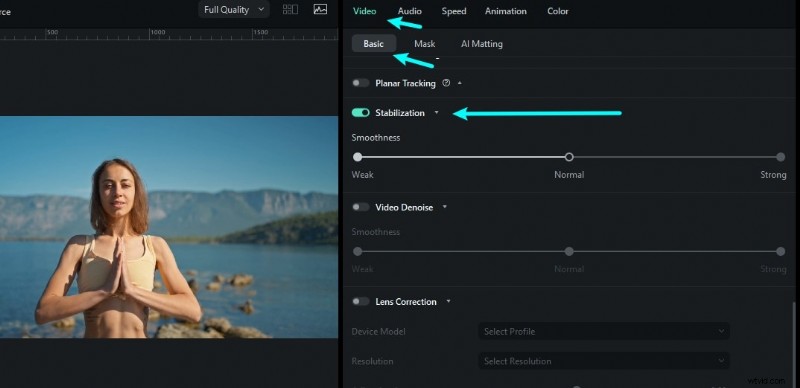
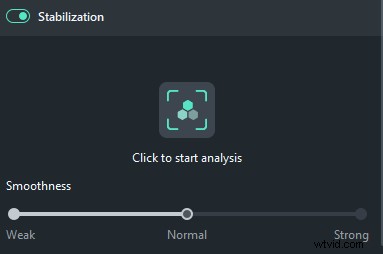
- Select the clip, go to Video → AI Tools → Stabilization. Check Stabilize and let Filmora analyze.
- Adjust the slider for the desired strength, preview, and fine‑tune as needed.
- Export the finished clip: Export → choose format, resolution, and quality, then Save.
For a visual walkthrough, check the tutorial videos linked below.


Part 4. Pro Tips to Prevent Shaky Videos Before Editing
Stabilization is powerful, but preventing shake at the source yields the best results. Consider the following:
1. Use a Tripod or Gimbal
Hand‑held footage inevitably introduces tremor. A tripod gives a steady base, while a gimbal offers smooth motion for walking or panning shots.
- Tripods are ideal for stationary shots.
- Gimbals maintain smoothness during movement.
- Without gear, hold the camera with both hands and tuck elbows into your body for extra support.

2. Enable iPhone’s Built‑in Stabilization (Cinematic & Action Modes)
For iPhone 13 or later, these modes provide automatic stabilization:
- Cinematic Mode: Focus shifts automatically and stabilizes the frame for a movie‑like feel.
- Action Mode: Designed for high‑motion scenes; perform best in bright light, avoid low‑light usage.
3. Record at Higher Frame Rates
Higher fps captures more detail per second, reducing motion blur and making subsequent slow‑motion smoother.
- 30 fps – everyday videos.
- 60 fps – smoother motion, ideal for vlogs and travel.
- 120 fps or 240 fps – ultra‑smooth action, great for sports.
4. Apply Slow Motion Creatively
Slowing down a shaky clip can make motion appear intentional and cinematic. Record at 120 fps or higher, then reduce speed in iMovie or Filmora.
- Use slow motion for dramatic, professional effects.
- Works well for sports, action scenes, and sweeping landscapes.
Conclusion
Shaky footage can mar an otherwise great shoot, but iMovie’s stabilization on Mac can salvage the situation by smoothing out motion with minimal effort. For iPhone and iPad users, combining built‑in camera modes with iMovie’s slow‑motion and cropping tricks yields surprisingly clean results. If you require higher precision or cross‑platform flexibility, Wondershare Filmora offers AI‑powered stabilization that preserves frame quality and delivers professional polish.