In this guest post guest photographer Anette Mossbacher talks us through how she processed one of her Meerkat images.
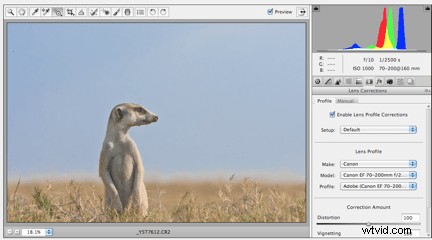
Open image in Camera RAW
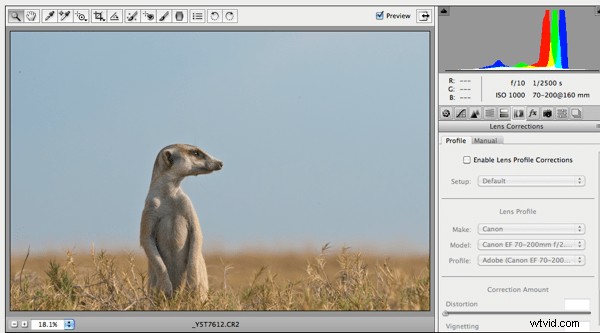
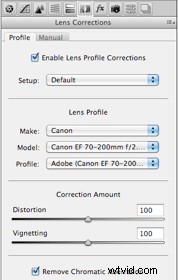
Adjust camera lens to your camera brand and lens, in Lens corrections.
Tick enable Lens Profile Corrections
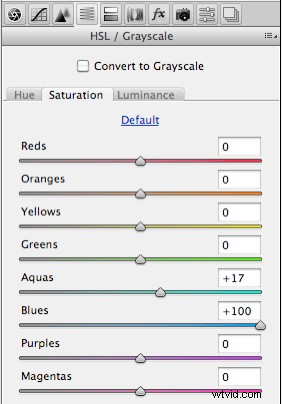
Go to the “Targeted Adjustment Tool”

Click on it and hold it clicked, a drop down menu will open. Go down to Saturation till it is highlighted than let go. You can see to the right, where the Saturation tool brought you. Click into the sky, hold it clicked and move the tool to the right or left till the color of the sky is what you like.
This tool you can use for anything in your image, Highlights, shadows, saturation overall…etc. You just need to click on it, hold it, go down in the menu which tool you want to use and off you go adjusting.
When done I go to the front page/basic of Camera Raw, adjust Clarity and Vibrance.
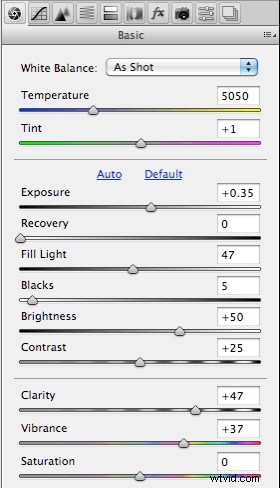
When done with all adjustments click open image. That will bring you to Photoshop.
Image is now open in Photoshop CS5.
Open a Background Layer under “Layer”, can be found on top of the Photoshop.

I also can open a duplicate layer with the shortcut “CMD +J”
Open up a Layer mask, this you can find at the bottom of the Layers palette. It is the rectangle icon with a white circle in it. Just click on it, that opens the Layer mask.
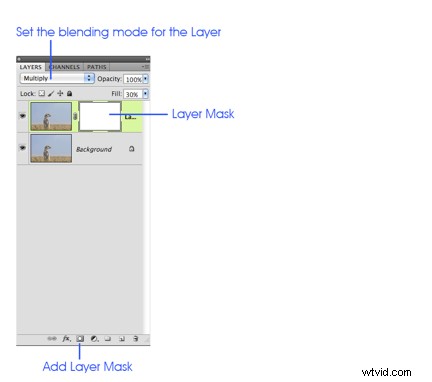
The blending mode of the Layer I set to “multiply”, this can be found beside Opacity on top of the Layers palette.
Switch Foreground and Background colors, BLACK needs to be on top! The little arrows need to be clicked for that.
We are than “black onto white”.
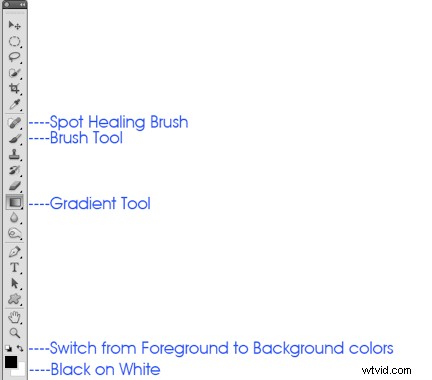
Grab gradient tool form the tools palette, start to draw a line from the bottom up to the top with the gradient tool.
In this Meerkat image I can go straight up to the top. If there is a little angle or more in your image than you need to use the gradient tool as well in that angle.
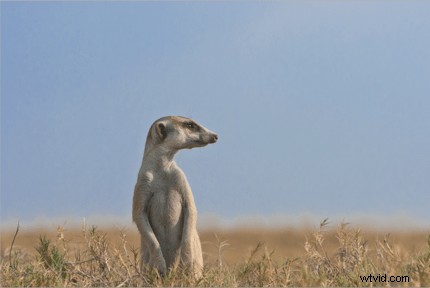
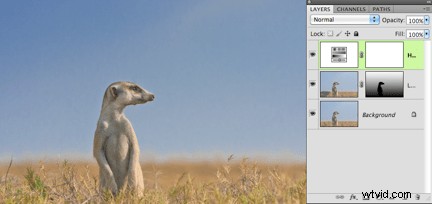
I can stop with the gradient tool at 5% > 100% of the image. Experiment with this gradient tool that you get a feeling for it. Just stop somewhere in the image, that you can explore the results and see what it does.When I draw with the gradient tool in the image you can see the Meerkat is a bit dark.
I grab a SOFT brush tool, from the tools palette or just hit the key “B” and clean up my Meerkat. The brush tool should be a soft edge. I clean the body of my Meerkat very carefully, as well the bushes. This you can see in the Layers mask, that the Meerkat is black painted / cleaned up !
I wanted to add a bit more saturation to the grass and to the Meerkat.
I click on the Saturation tool to saturate the bushes . That’s the 2nd highlighted layer in the image above.
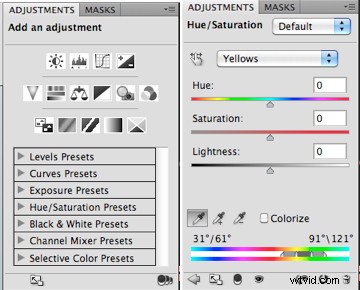
I grab the Pipette and click into a green leave which guide my Saturation tool to yellow. I add more Saturation till I am happy with the bushes and the Meerkat. Play around with Hue, Saturation and Lightness, that you get a feeling what that does to your image.
At the end I flatten the whole stack of layers under Layers and save my image in any format I need.
Anette Mossbacher is a photographer who specialises in Wildlife, Landscape and Travel Photography. She lives in Switzerland but spends a great deal of time traveling. See more of Anette’s work on her website and connect with her on Google+ here.