Color grading in Lightroom unlocks the full expressive potential of your images, turning technical snapshots into emotionally resonant stories. Whether you aim for the iconic teal‑and‑orange contrast, film‑grade warmth, or subtle tonal nuance, Lightroom’s versatile grading suite delivers the professional polish every photographer seeks.
This guide explains the core difference between color correction and color grading, walks through every essential tool, and presents a proven workflow that photographers and colorists use to create cinematic images. It also offers a practical alternative for video projects where Lightroom’s capabilities are limited.
In this article
- Introduction to Color Grading
- Key Lightroom Tools for Color Grading
- Step‑by‑Step Workflow
- Advanced Techniques & Presets
- Video Alternatives: Filmora
Part 1. What Is Color Grading vs Color Correction in Lightroom
Before diving into creative tweaks, it’s essential to distinguish the fundamentals:
| Color Correction | Corrects exposure, contrast, and white balance to produce a natural look. |
| Color Grading | Imparts mood, narrative, and artistic tone—making the image feel cinematic or stylized. |
Typical workflow:
- Set a neutral white balance for accurate skin tones.
- Adjust exposure and contrast to flatten the tonal range.
- Resolve any color casts or saturation imbalances.
Once the image is technically sound, you can begin the grading phase.
Part 2. Adobe Lightroom Color Grading Tools Overview & Why It Matters
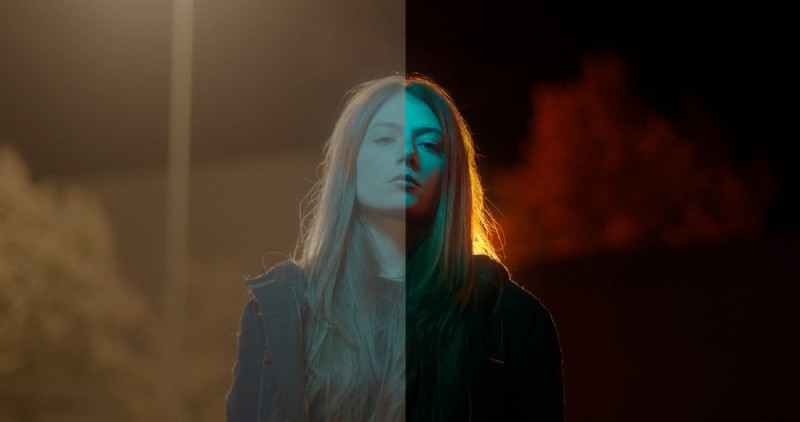
Color grading is more than a visual polish; it’s a storytelling device. A warm, golden overlay can evoke nostalgia, while deep teal shadows can heighten tension. Understanding Lightroom’s grading tools ensures you harness this power effectively.
Key Lightroom Tools for Color Grading
| Color Grading Panel (Shadows, Midtones, Highlights, Global) | Adjust hue and saturation for each tonal range independently. | Use Shadows & Midtones for cinematic depth; the Global wheel applies a uniform tint. |
| HSL / Color Panel | Fine‑tune individual color ranges. | Ideal for sculpting skin tones, skies, or foliage. |
| Tone Curve | Shape contrast and tonal distribution. | Craft S‑curves for drama or lift blacks for a vintage wash; the RGB channel lets you isolate color separations. |
| Adaptive Profiles | AI‑driven automatic adjustments. | Enhances color and tone based on the image content; supports both standard and HDR shots. |
| Select Landscape Mask | Targeted adjustments for outdoor scenes. | Automatically isolates skies, mountains, or buildings, enabling precise grading. |
| Global Color Wheel | Uniform color tint across the image. | Ensures consistent mood when combined with the tonal wheels. |
Part 3. How to Do Color Grading in Lightroom (Complete Workflow)
The following step‑by‑step process mirrors the routine of seasoned colorists. It’s broken into seven stages for clarity.
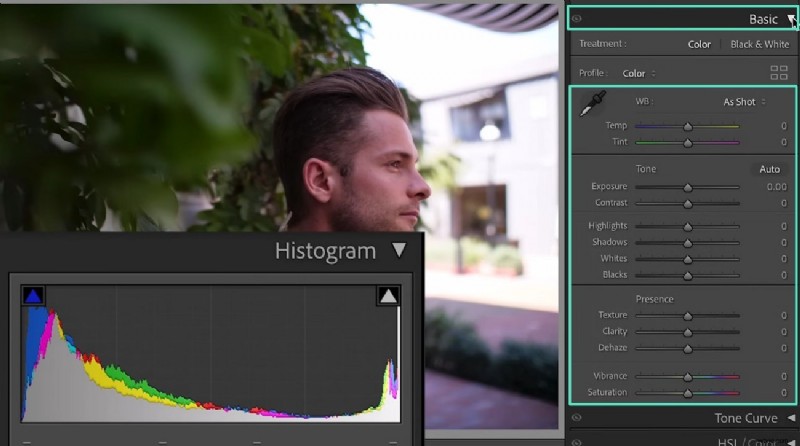
01 of 07: Load Image and Perform Basic Correction
Open the target photo in the Develop module and begin with the Basic tab. Adjust White Balance, Tone, and Presence until the image appears neutral.
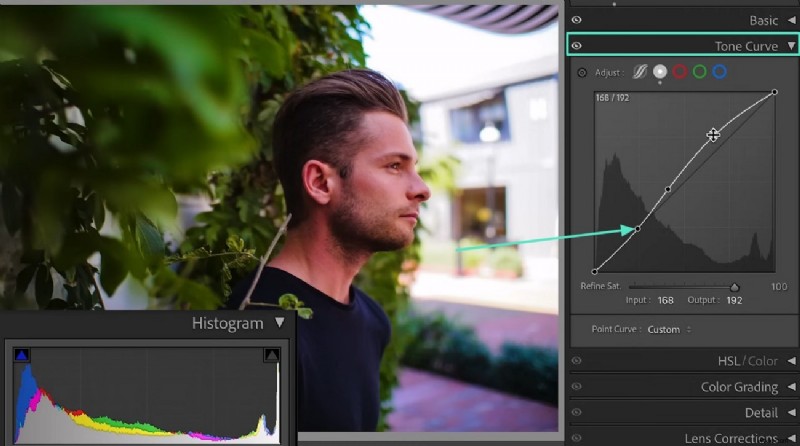
02 of 07: Tone Curve Adjustments
Navigate to the Tone Curve panel. Add points to the curve to lift shadows, deepen highlights, or sculpt contrast. Fine‑tune each RGB channel if needed.
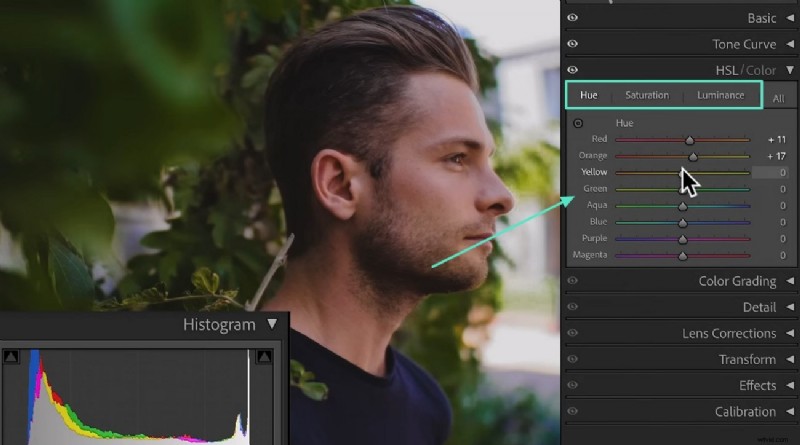
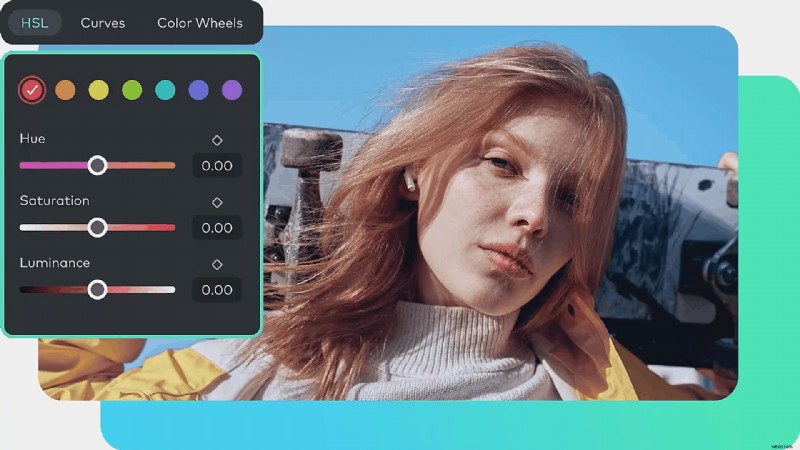
03 of 07: HSL / Color Panel
Move to the HSL panel to tweak Hue, Saturation, and Luminance for specific color swatches—such as boosting sky blues or tempering foliage greens.
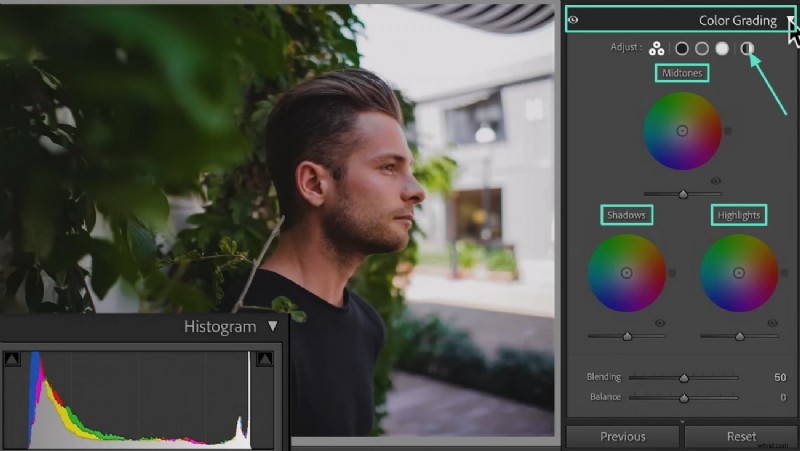
04 of 07: Color Grading Wheels
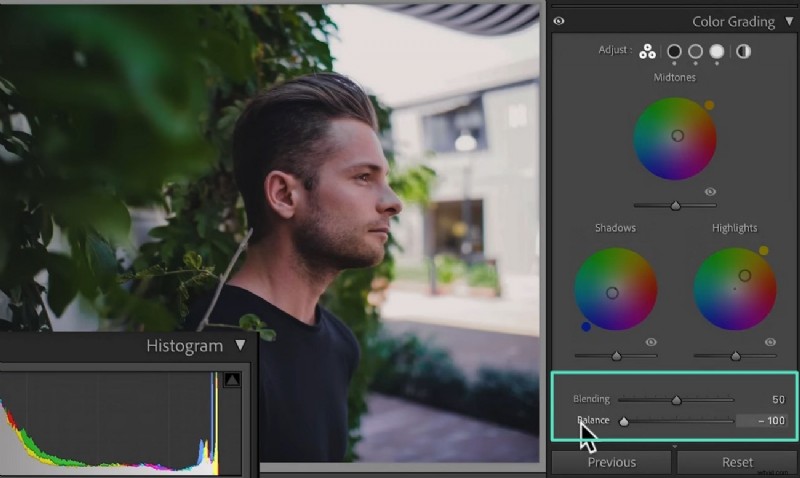
Open the Color Grading tab and begin with the Shadows, Midtones, and Highlights wheels, followed by the Global wheel for overall tint.
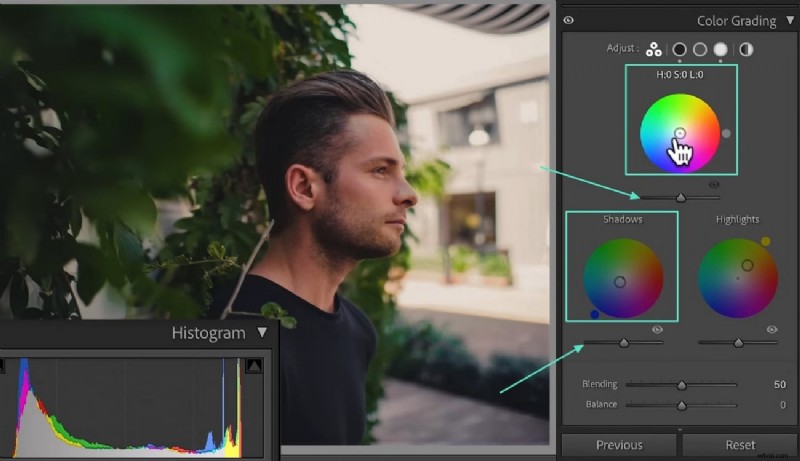
05 of 07: Shadows and Midtones
Drag the Shadows wheel toward your desired hue for deep shadows, and adjust the Midtones wheel to shape the mid‑range colors.
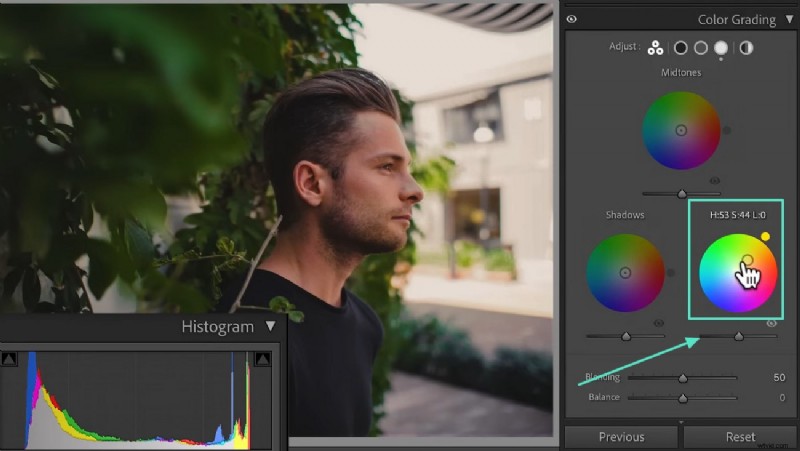
06 of 07: Highlights and Luminance
Apply the Highlights wheel to tint bright areas, then use the Luminance slider beneath each wheel to control the intensity of each tonal range.
07 of 07: Blending and Balance
Use the Blending slider to smooth transitions between tones, and adjust the Balance slider to emphasize either shadows or highlights as needed.
Part 4. Color Grading with a Simpler, Faster Alternative
While Lightroom excels in photo editing, it isn’t designed for video color grading. For filmmakers and videographers, Wondershare Filmora offers a streamlined workflow that matches the cinematic quality Lightroom delivers to stills.
Filmora’s AI Color Palette feature automatically extracts a reference image’s palette, and its native grading tools let you sculpt a custom look with ease. It’s ideal for creators who need to keep their video edits fast and effective.
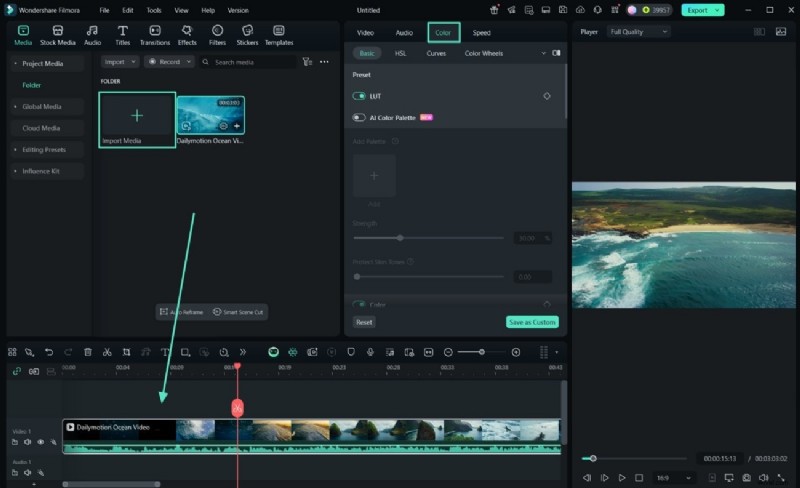
01 of 05: Import Your Clip
- Launch Filmora and create a new project.
- Import the video clip and drag it onto the timeline.
- Double‑click the clip to open the editing panel and select the “Color” tab.
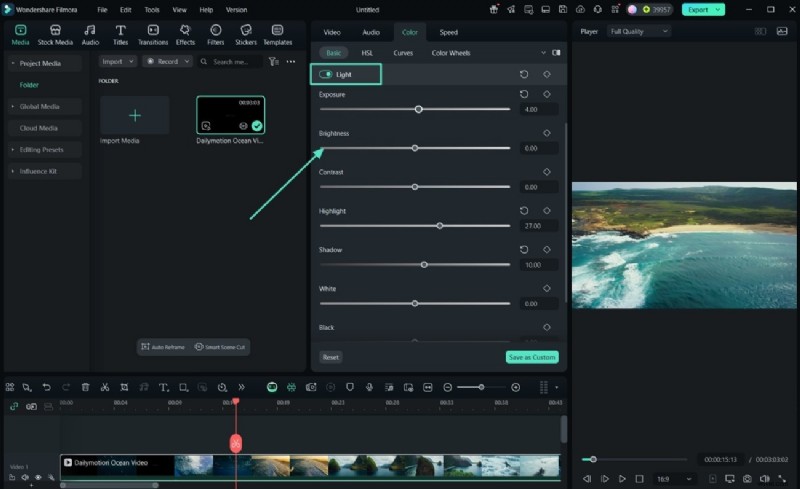
02 of 05: Perform Basic Color Corrections
In the “Light” section, adjust Brightness, Shadows, and Exposure. Then fine‑tune White Balance with Temperature and Tint sliders.
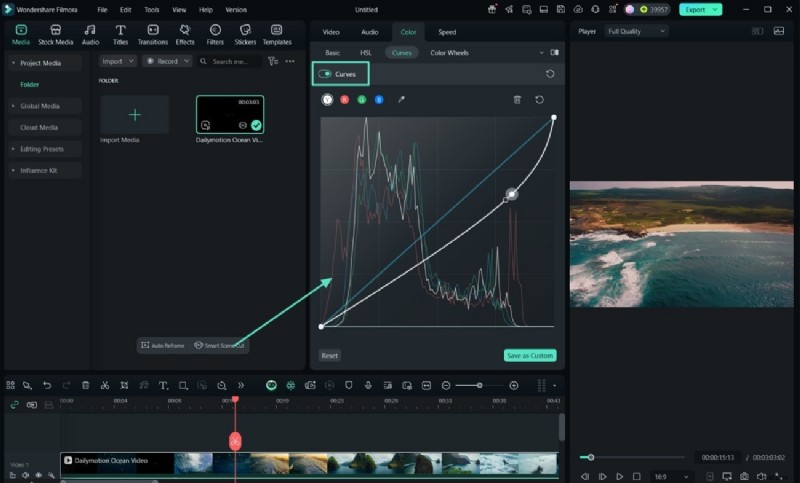
03 of 05: Use Advanced Color Grading Tools
Employ the Curves tool for contrast, apply 3D LUTs, protect skin tones, and adjust HSL sliders for targeted color control.
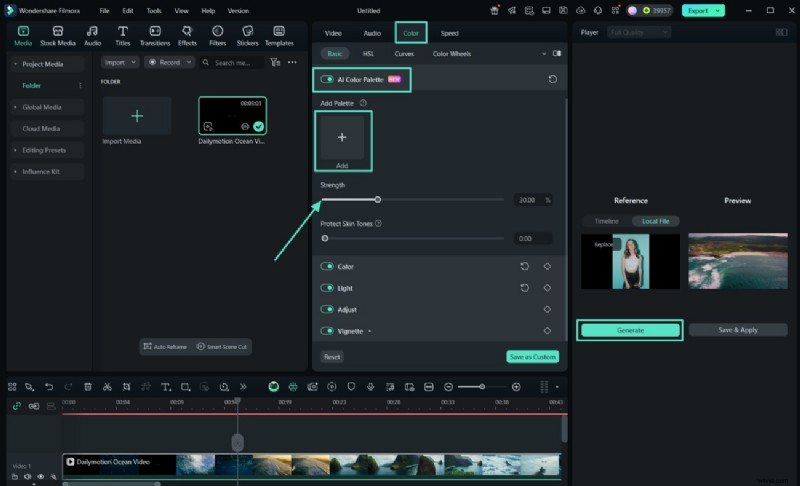
04 of 05: Implement AI Color Palette
- Turn on the AI Color Palette feature.
- Upload a reference image or select a frame.
- Filmora generates a color palette and applies it to the clip.
- Adjust the Strength slider to control intensity.
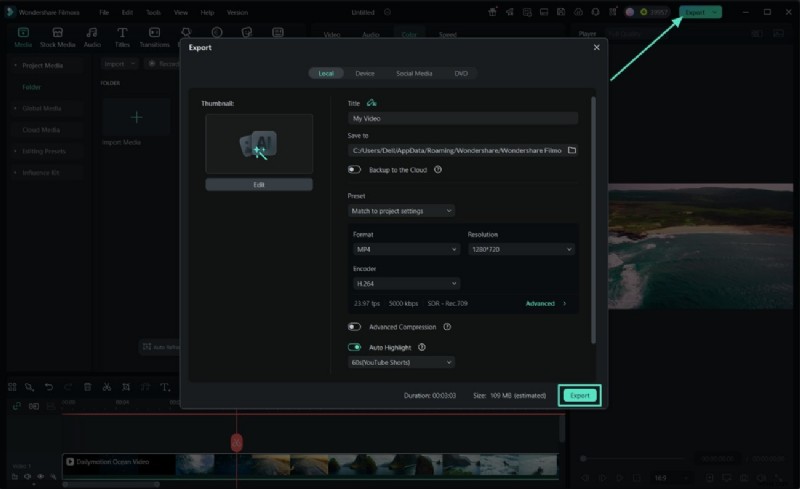
05 of 05: Preview and Export
- Use the A/B Comparison tool to compare before and after.
- Save the grading as a preset for future projects.
- Export the final video in your preferred format.
Filmora’s desktop version offers full‑scale editing, while its mobile app delivers powerful quick edits on the go.
Conclusion
In short, mastering cinematic color grading in Lightroom transforms ordinary photographs into compelling visual narratives. While Lightroom remains the go‑to platform for stills, tools like Filmora provide the necessary workflow for video projects. By combining precise correction with expressive grading, you can consistently produce images and footage that resonate with your audience.

Filmora – ⭐⭐⭐⭐⭐ The Best AI‑Powered Video Editing Software and App