Want to streamline subtitle creation for your videos? With Clipchamp auto captions, you can generate subtitles automatically via advanced speech‑recognition, making your content more accessible and engaging—even when viewers watch muted.
In addition to auto‑generation, Clipchamp allows you to fine‑tune captions manually. This gives you full control over the wording, timing, and visual style, ensuring your message is delivered exactly as intended.
In this guide we’ll walk you through both workflows—from auto‑captions to manual editing—and introduce a powerful AI‑driven alternative for even greater flexibility. Let’s dive in!

In this article
-
- Limitations of Clipchamp Auto Captions
-
- Exploring How to Generate Auto Captions Using Wondershare Filmora
Part 1. How to Automatically Add Captions on Clipchamp Videos
The Clipchamp auto captions tool leverages speech‑to‑text technology to produce subtitles quickly and accurately. It’s ideal for adding captions without manual transcription.
Follow these steps to enable auto‑captions:
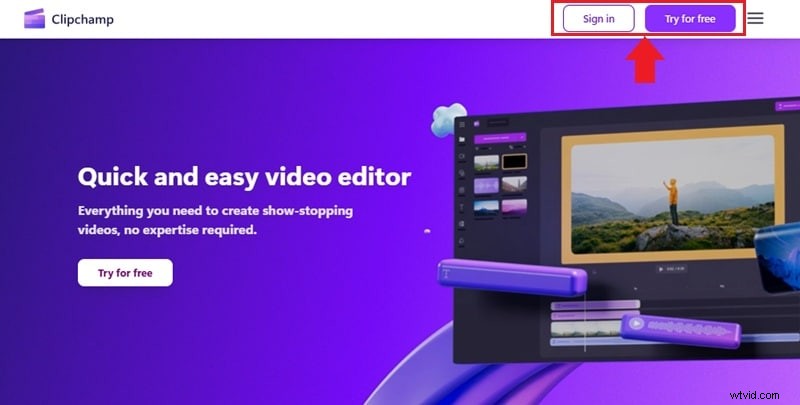
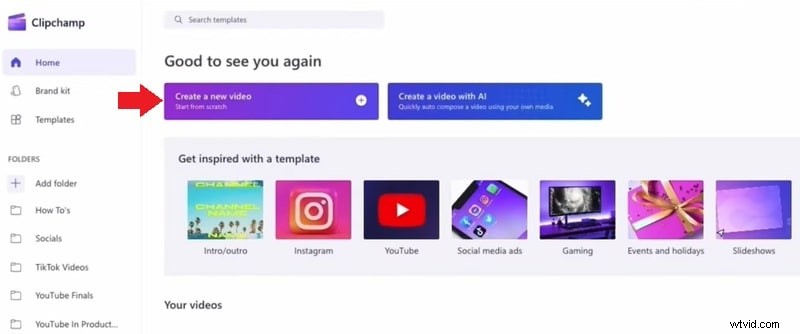
Step 1. Sign In and Start a New Project
Navigate to the Clipchamp website and click Sign in if you already have an account, or select Try for Free to create a new one.
Once logged in, go to Home > Create a New Video to launch the editor.
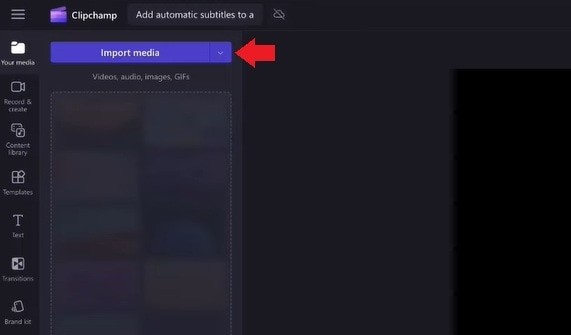
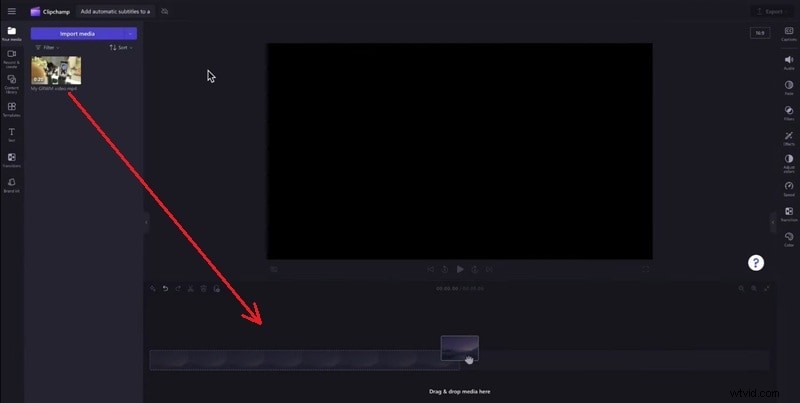
Step 2. Upload Your Video
In the toolbar, click Your Media > Import Media to bring your video from your device, or choose a cloud storage option via the dropdown.
Drag the uploaded clip onto the timeline to begin editing.
Step 3. Turn on Auto Captions
Select the clip on the timeline. On the right, open the Captions tab and click Turn on Auto Captions.
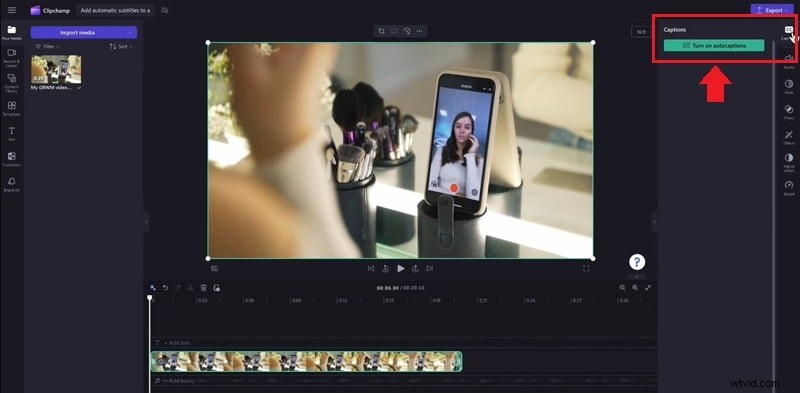
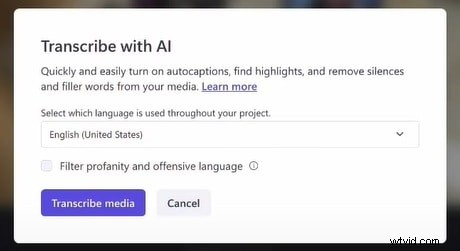
A dialog will prompt you to choose the video language and optionally enable a profanity filter. Click Transcribe Media to start the process.

Tip: Auto captions work best with clear, single‑voice audio. Background noise or overlapping speech can reduce accuracy.
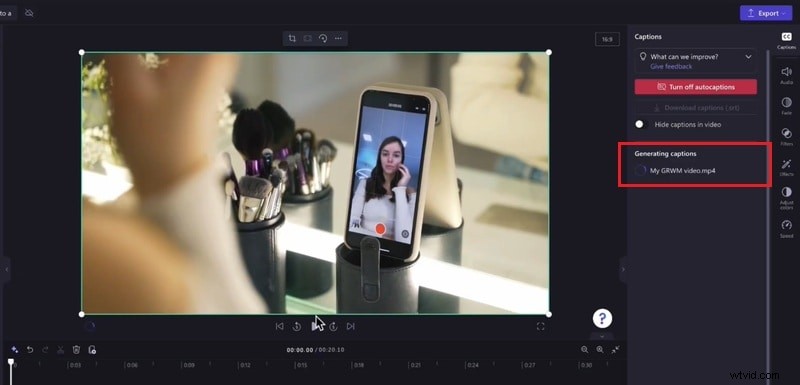
Step 4. Wait for Generation
The duration depends on clip length and internet speed. Once ready, captions appear in the Captions tab and directly in the preview window.
Part 2. How to Manually Customize Subtitles on Clipchamp
After auto‑captioning, you can refine the text, timing, and appearance to match your video’s style.
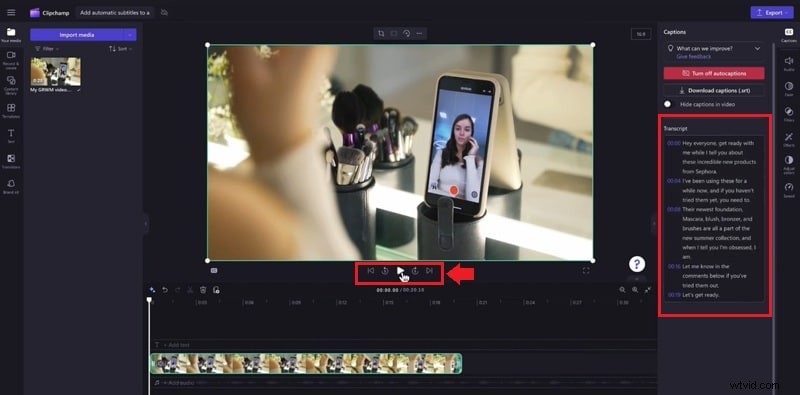
Step 1. Edit Caption Text
- Play the video to preview captions.
- In the Captions tab, click any word or sentence to correct spelling, fix typos, or rewrite phrases.
Step 2. Adjust Timing
If captions lag or lead the audio, manually shift their start and end points to align precisely.
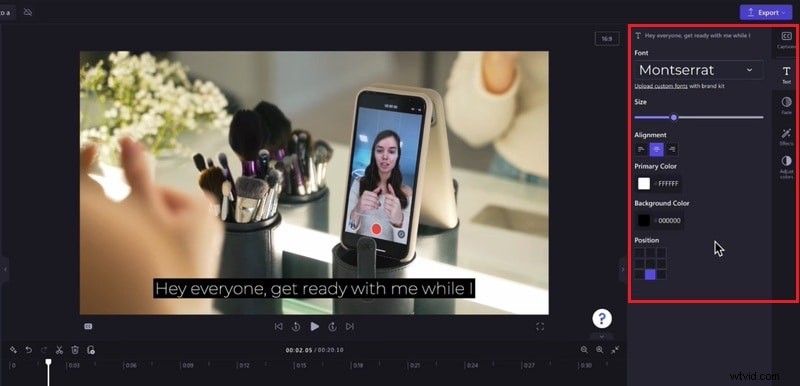
Step 3. Customize Caption Style
Navigate to the Text tab to modify font, size, color, background, alignment, and add visual effects such as outlines, shadows, or fades.
- Change the font and size.
- Adjust text and background colors.
- Modify alignment and position.
- Add effects like outlines, shadows, or fades.
Step 4. Preview Your Captions
Hit Play to review the final look. Make any last‑minute adjustments.
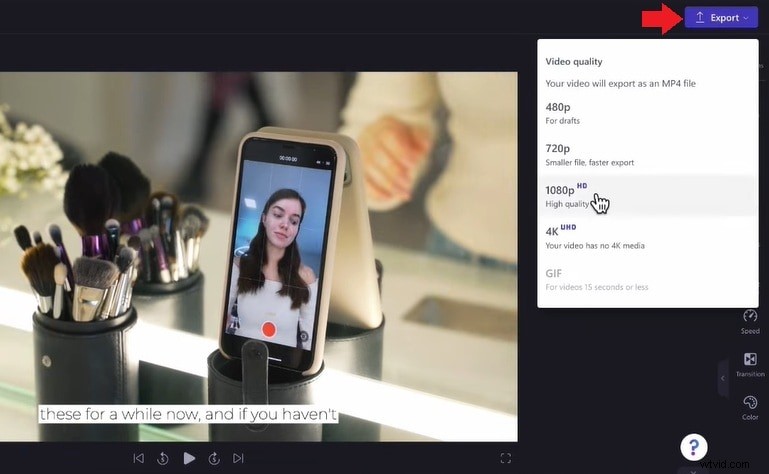
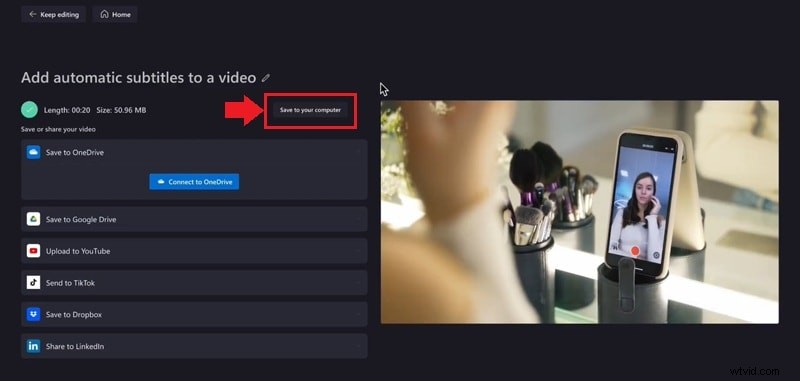
Step 5. Export with Subtitles
When satisfied, click Export and choose your desired resolution. After rendering, select Save to Your Computer to download the video with embedded subtitles.
Limitations of Clipchamp Auto Captions
While convenient, Clipchamp auto captions have some constraints:
- Single‑Language Support: Only one language per video is recognized. For multilingual content, create separate projects for each segment.
- Partial Transcription: Longer videos may stop mid‑stream, transcribing only a portion of the audio.
- Browser Compatibility: Optimal performance is on Microsoft Edge; other browsers like Chrome or Safari can cause issues.
Part 3. Want More Flexibility? Try Filmora’s AI Subtitle Tools
For users seeking advanced features, Wondershare Filmora offers a robust Speech‑to‑Text engine that supports multiple languages and dynamic subtitle templates. You can generate captions for the entire timeline or a selected segment, then convert them into animated titles.
Here’s a quick workflow:
Exploring How to Generate Auto Captions Using Wondershare Filmora
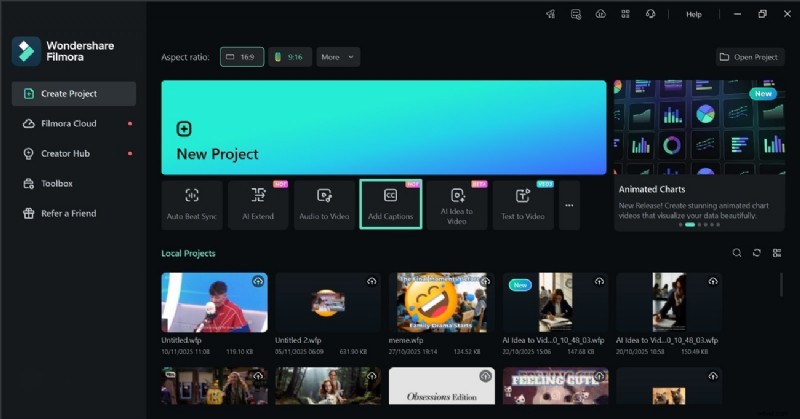
Step 1. Add Captions
Open Filmora’s home screen, click Add Captions, and import your video.
Step 2. Configure Parameters
In the Parameter Settings window, set the source and target languages, then click Generate to start transcription.

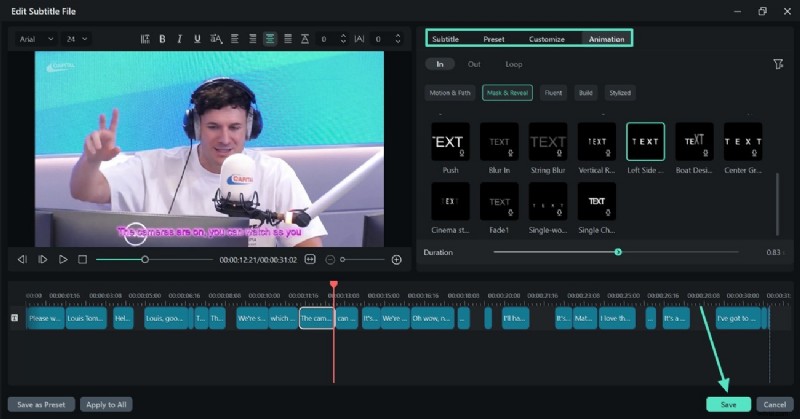
Step 3. Style the Captions
Double‑click the text track on the timeline to open the editor. Here you can edit content, apply presets, customize styles, and add animations. Hit Save to apply changes.
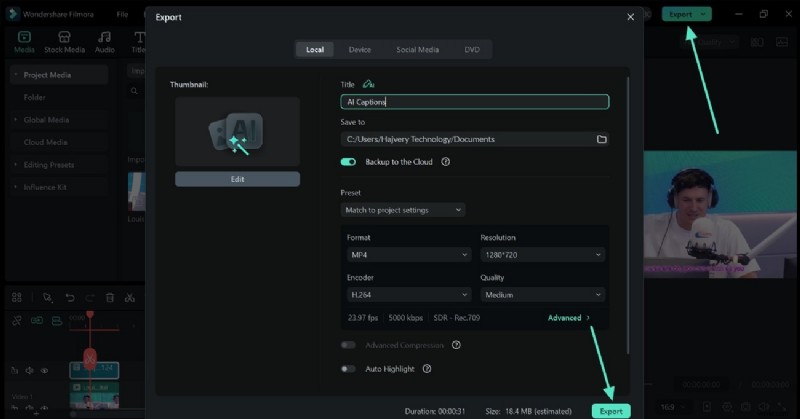
Step 4. Export
When ready, select Export and choose your output settings.
Conclusion
Clipchamp’s auto captions simplify subtitle creation, making your videos accessible and engaging. Manual editing ensures precision and stylistic alignment with your brand.
If you need more advanced features—such as multi‑language support or animated subtitle templates—Filmora’s AI tools are a strong alternative.
Ready to elevate your video content? Start adding subtitles today!