If you’re a content creator shooting footage for a new project, you’ll need a reliable post‑production tool. Lightworks delivers professional‑grade video editing with precision and speed, whether you’re crafting a cinematic trailer or polishing daily vlogs.
New to editing? Read on to uncover Lightworks’ full capabilities, from core features to pricing, pros and cons, and a practical tutorial.
Part 1: Overview of Lightworks Video Editor
What Lightworks Is and Where It Stands
Lightworks is a high‑performance video editing platform favored by professional editors worldwide. Its streamlined interface and universal timeline make it suitable for projects of any scale, from short clips to feature‑length films.
Technical Specs & Pricing
The editor supports a wide array of codecs—including ProRes, DNxHD, and H.264—ensuring compatibility with industry workflows. Lightworks offers a free tier with essential tools and paid tiers that unlock advanced features.
Part 2: Feature Breakdown
Lightworks combines creative control with technical power. Below are its standout capabilities.
Core Features
- Multi‑Track Timeline Editing
Layer multiple video and audio tracks, drag‑and‑drop media, and edit with pinpoint precision.
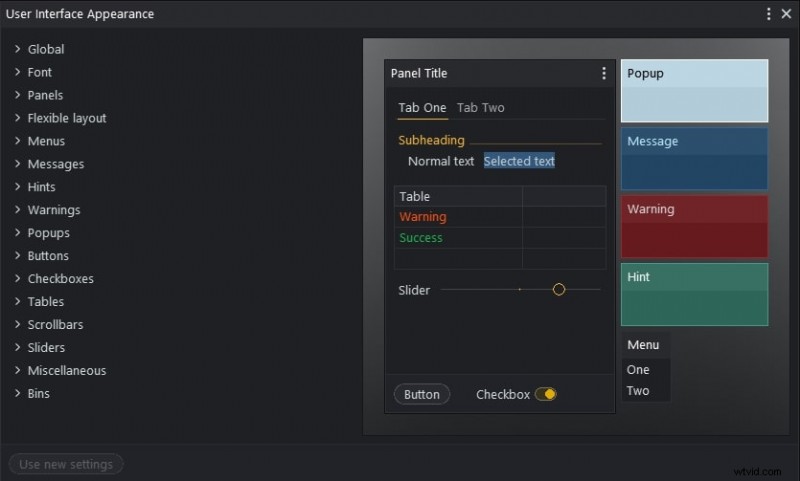
- Customizable Workspace
Save and recall interface layouts, streamlining repetitive tasks across projects.
- Precision Trimming
Remove unwanted footage swiftly, supporting multitrack adjustments for efficiency.

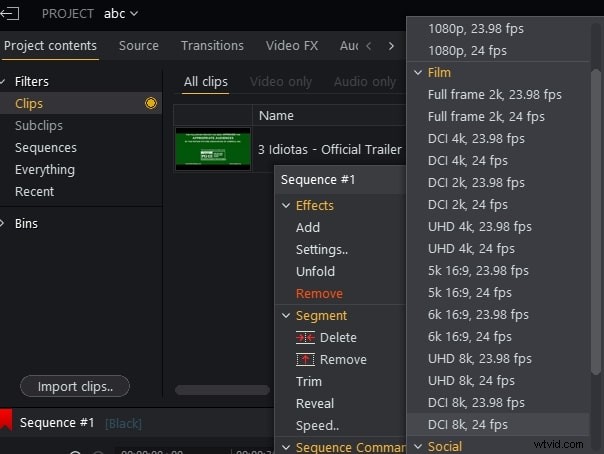
- Resolution‑Versatile Exports
Export in 2K, 4K, or 8K DCI formats, and preview at target resolution before final render.
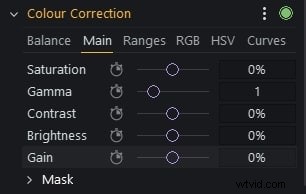
- Advanced Color Correction
Adjust saturation, brightness, and gain directly on the timeline for professional color grading.
Pricing Plans
| Plans | Pricing |
| Create | $13.99/month |
| Pro | $27.99/month |
Pros & Cons
- Highly flexible workspace that adapts to user preferences.
- Robust built‑in audio editing tools eliminate the need for external plugins.
- Direct export presets for YouTube and social media channels.
- Free tier and paid plans leave no watermark on exported videos.
- Some advanced functions require a paid subscription.
- Lacks an extensive stock or effect library compared to rivals.
- Export performance can lag with large, high‑resolution projects.
Part 3: Lightworks Tutorial
Below is a step‑by‑step guide to get you editing quickly.
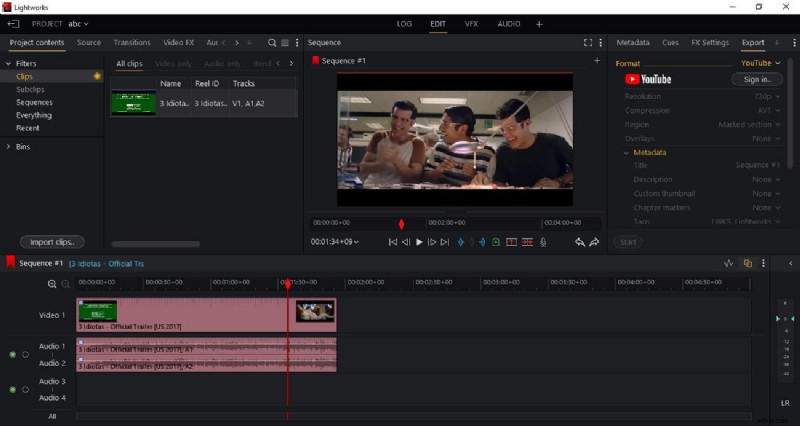
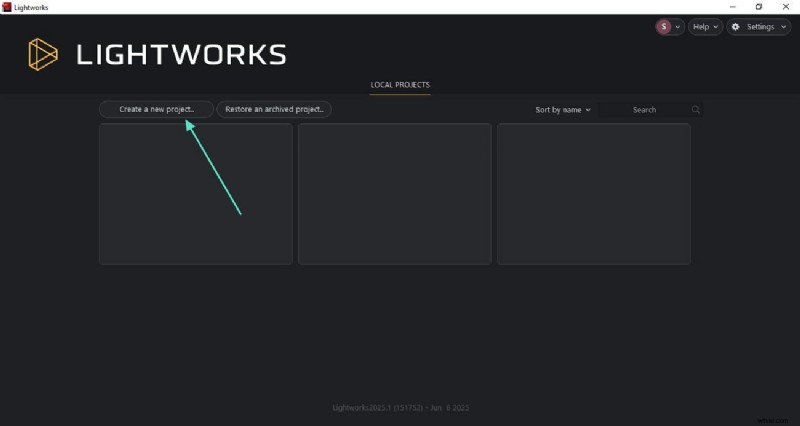
Step 1: Create a New Project
Launch Lightworks and click "Create a New Project" on the homepage.
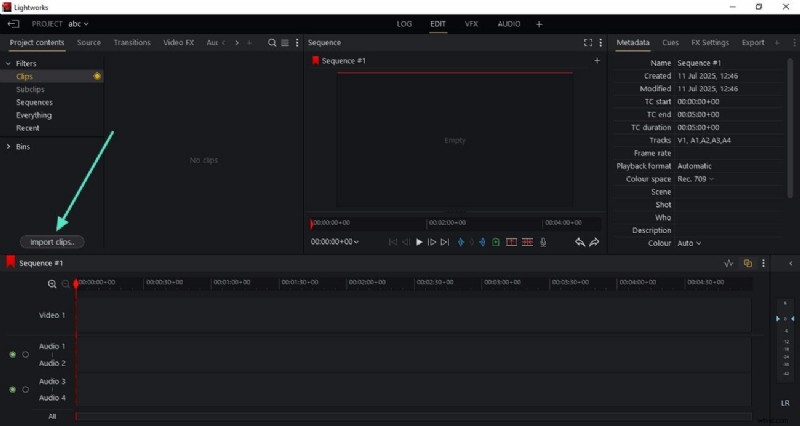
Step 2: Import Your Footage
- Click "Import Clip" and select your video file.
- Drag the clip onto the timeline to begin editing.
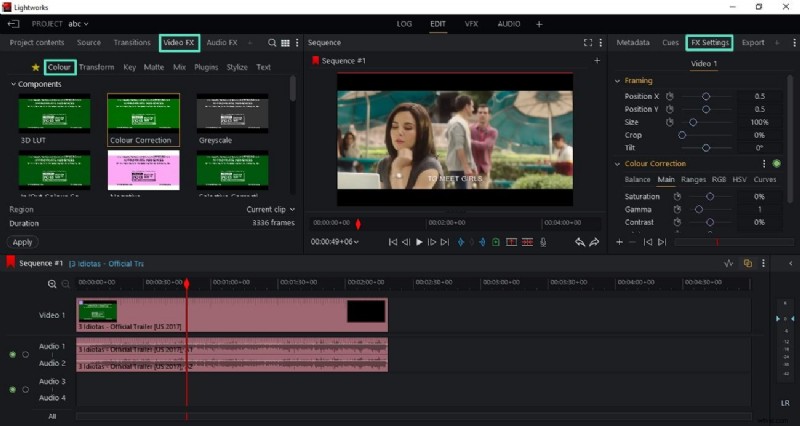
Step 3: Apply Color Corrections
- Open the Video FX panel and choose Colour.
- Adjust settings in the FX window to match your desired look.
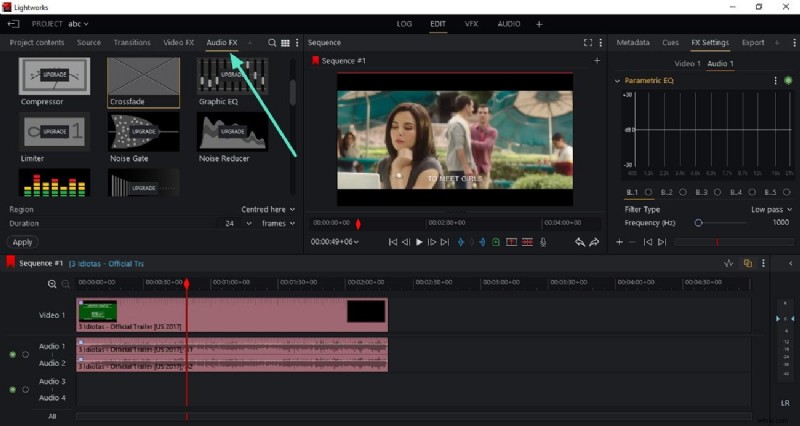
Step 4: Refine Audio
Activate Audio FX and fine‑tune levels or apply enhancements.
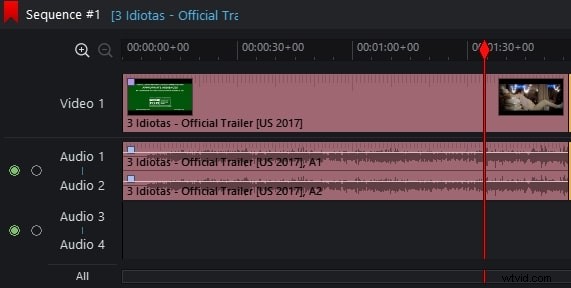
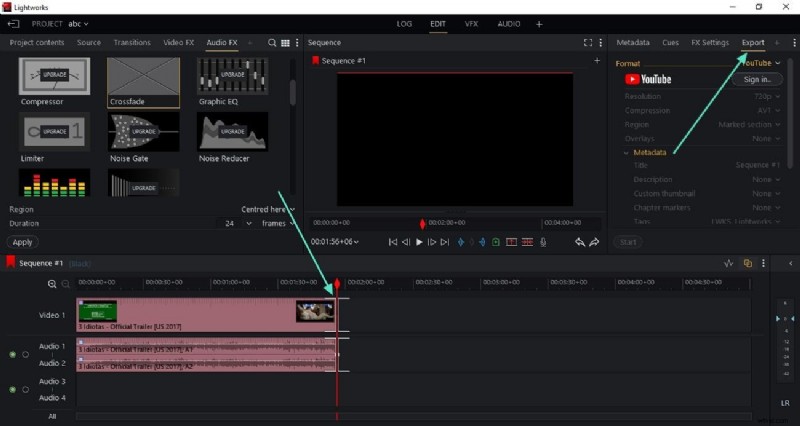
Step 5: Trim and Export
- Trim unwanted sections by dragging track edges.
- Click Export, choose format and destination, then hit Export to save.
Part 4: Wondershare Filmora – A Beginner‑Friendly Alternative
Lightworks offers deep functionality but can be steep for newcomers. Filmora balances power with simplicity, making it ideal for first‑time users and quick projects.

Key Filmora Features
- Magnetic Timeline
Organize clips effortlessly; changes in one place update the entire sequence.
- Multi‑Cam Editing
Sync and switch between multiple camera angles on the fly.
- Asset Library
Access thousands of transitions, titles, and music tracks.
- AI Video Enhancer
One‑click upscale and artifact removal for crisp visuals.
- AI Voice Enhancer
Clean background noise and boost dialogue clarity automatically.
- AI Captions
Generate subtitles via speech‑to‑text and adjust them manually.
Pros & Cons
- Pros
- Multilingual captions for wider reach.
- AI Portrait Cutout isolates subjects quickly.
- Generate video stickers from text prompts.
- AI stabilizer removes jitter in shaky footage.
- Advanced motion tracking for dynamic overlays.
- Cons
- Free version embeds a watermark on exports.
Pricing Plans
| Plans | Pricing |
| Basic | $9.99/month |
| Advanced | $34.99/year |
| Perpetual | $49.99/one‑time‑purchase |
Ratings & Reviews
G2 Ratings: 4.5/5
User Reviews
"Fantastic and very easy to use" – Spence
"Excellent tool for creating educational and personal videos" – Cindy P.
Supported Platforms
Windows: Windows 7 – Windows 11
macOS: macOS 10.11 and beyond
Part 5: Quick Filmora Tutorial
Follow these steps to edit videos in Filmora.
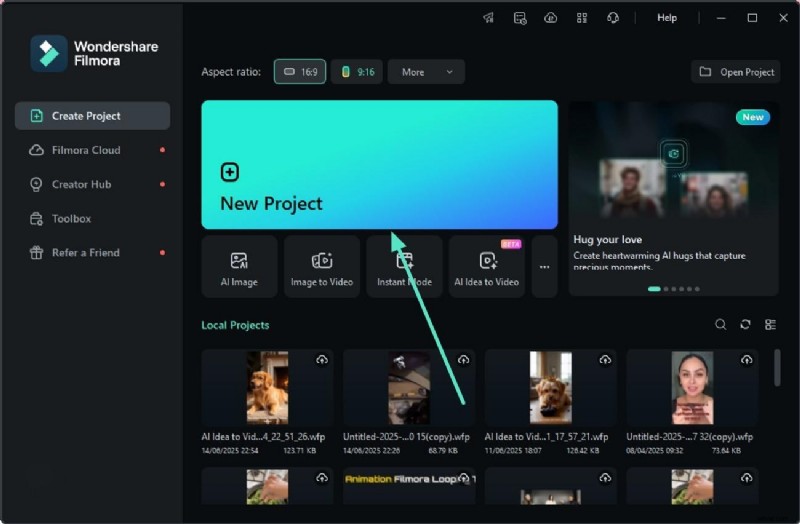
Step 1: Start a New Project
- Open Filmora, click New Project, and import your clip.
- Drag the video onto the timeline.
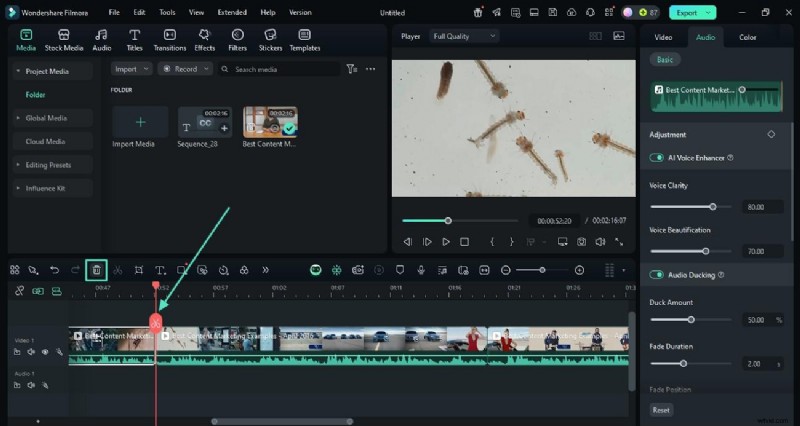
Step 2: Trim Precisely
- Position the playhead, click the Scissor icon, and cut.
- Remove unwanted sections via the Bin icon.
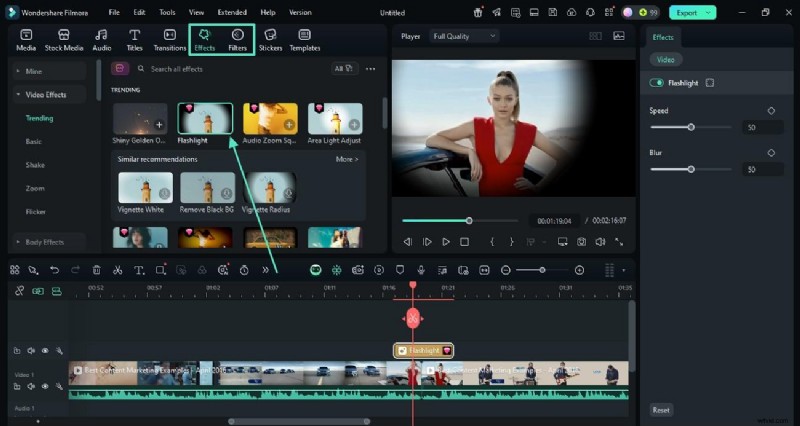
Step 3: Add Effects & Filters
- Open Effects, choose an effect, and click + to apply.
- Repeat with Filter for color presets.
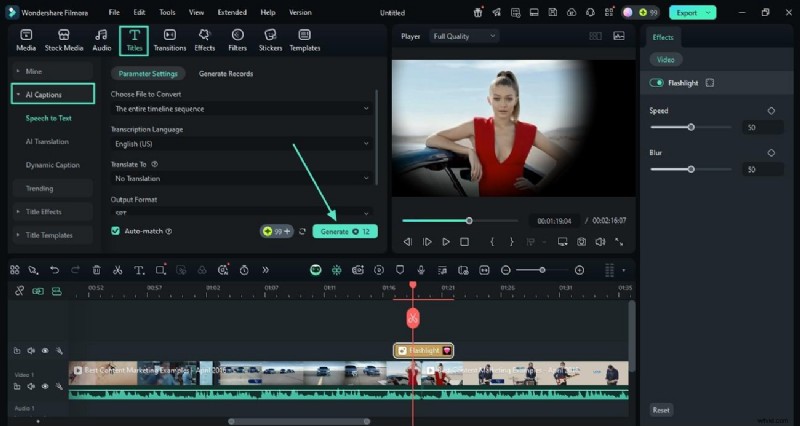
Step 4: Insert AI Captions
- Go to Titles → AI Captions, select language, and click Generate.
- Customize via the Text panel.
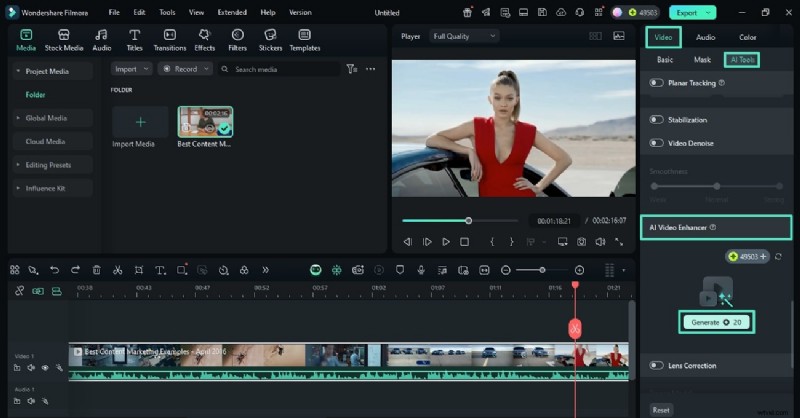
Step 5: Apply AI Video Enhancer
- Open the Video panel, enable AI Video Enhancer, and hit Generate.
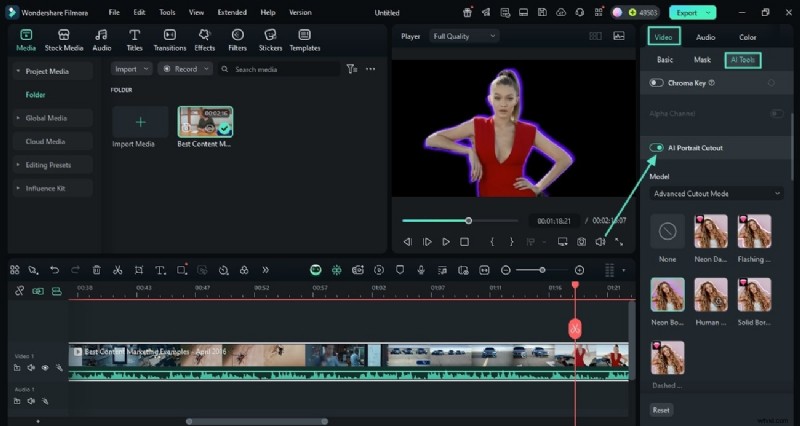
Step 6: Use AI Portrait Cutout
- Toggle AI Portrait Cutout to isolate subjects.
- Apply desired effects to the isolated layer.
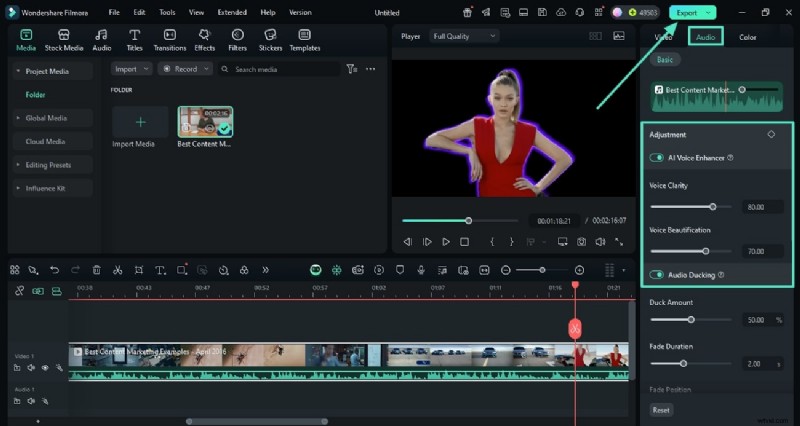
Step 7: Enhance Audio with AI
- Open the Audio panel, enable AI Voice Enhancer or Audio Ducking.
- Export the final project.
Part 6: Why Filmora Might Be the Better Fit
| Feature | How It Outperforms Lightworks |
| Drag & Drop | Intuitive media management. |
| Instant Preview | Real‑time edits without rendering. |
| One‑Click AI Tools | Automated enhancements save time. |
| Screen Recording & Voiceover | Built‑in capture tools. |
| AI Audio Ducking | Smart balance of dialogue and music. |
| Green Screen | Chroma key for background replacement. |
| Beginner Friendly | Clean UI for first‑time users. |
| Auto Reframe | Auto‑adjusts framing for different ratios. |
| Smart Short Clips | Creates social‑ready snippets. |

Filmora – AI‑Powered Video Editing App & Software
Best tool for creating videos anywhere, for all creators!
Simplify video editing with a range of AI‑powered features.
Conclusion
Lightworks delivers robust editing and audio tools for professionals, but its limited AI features and steep learning curve may push novices toward Filmora. Filmora offers a streamlined workflow, built‑in AI enhancements, and an affordable price point, making it an excellent choice for creators seeking quick, polished results.