If you have a video and just want to get part of it, what will you do? Well, you need to cut or split the large videos to get the part you like. There are many video editing software that can help you do it and here we will tell you how to split video in Windows Live Movie Maker easily and fast so that you can share your most liked video on youtube with family and friends.
Before you start, please make sure you have installed Windows Live Movie Maker. If not, you can download it from its official website. Open your Windows Live Movie Maker and follow the below guide to use Windows Live Movie Maker split functions to cut your large video files.
How to split large video files in Windows Live Movie Maker
Step 1. Add photos and videos to Windows Live Movie Maker
Click "Add videos and photos" to browse and select videos and photos from your computer to add. You can also drag and drop videos and photos to the storyboard.
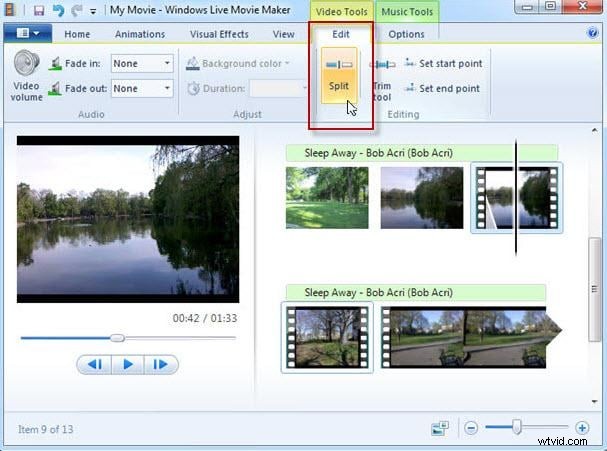
Step 2. Split videos in Windows Live Movie Maker
There are two ways to use Windows Live Movie Maker split function: 1. Choose the video point where you want to split, right-click the video clip, and click "split". 2. Select the video point you will split. Under "Video Tools", click the "Edit" tab, and then click the "split" button.
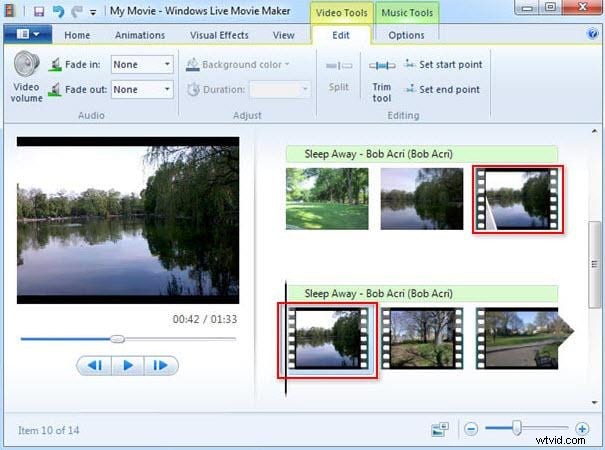
After that, your video will be split into separate sections. And you can edit separate videos as you like and drag and drop to move the location.
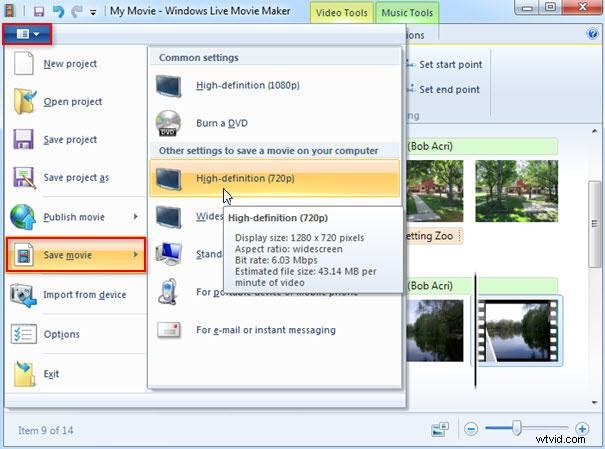
Step 3. Save and share your videos
Click the icon at the top left, then choose Save movie. There are four output video qualities to choose from. When you place your mouse cursor on each option, you can see the output video display size, aspect ratio, etc. You can also burn the videos to DVD by clicking Burn a DVD item and select a destination folder to save your video file.
If you want to share your video on YouTube with more people, you can click Publish movie and choose to Publish on YouTube, enter your YouTube account information and share your video work directly.
Conclusion:
For more powerful moviemakers to split videos, you can try the free trial version of Wondershare Filmora, which can help you split, trim, crop, rotate, and flip videos freely and smoothly. Find your preferred version of Windows or Mac below.