Although Windows Movie Maker 2012 is the latest version from Microsoft, a lot of people don’t want to use it because that it lacks a traditional timeline, long time to prepare the video files, frequent crashes, and the inability to personalize effects, titles, and transitions.
You might also be interested in:
How to remove subtitle from a video
How to add external SRT to video
Better Way to Add Subtitles With Windows Movie Maker Alternative
There’s a better way of adding subtitles to videos. Instead of using Windows Movie Maker, you can use Wondershare Filmora. It is a powerful tool that is an alternative to Windows Movie Maker. You can easily add subtitles as soon as you open the software.
Reasons Why Wondershare Filmora is better:
- More title and font options
- Supports more video file formats
- Comes with advanced editing features that include Tilt-shift, Slip Screen, PIP, and Green Screen effects.
- Color grading
- Audio Equalizer and Audio Mixer
- Royalty free music
How to Add Subtitle in Windows Movie Maker
The default Windows Movie Maker doesn’t have a feature that allows you to add subtitles; you can still place them into a movie with the use of the Title Overlay feature. Through the feature, you will be able to adjust the font text, position, and color, as well as the timings and transitions.
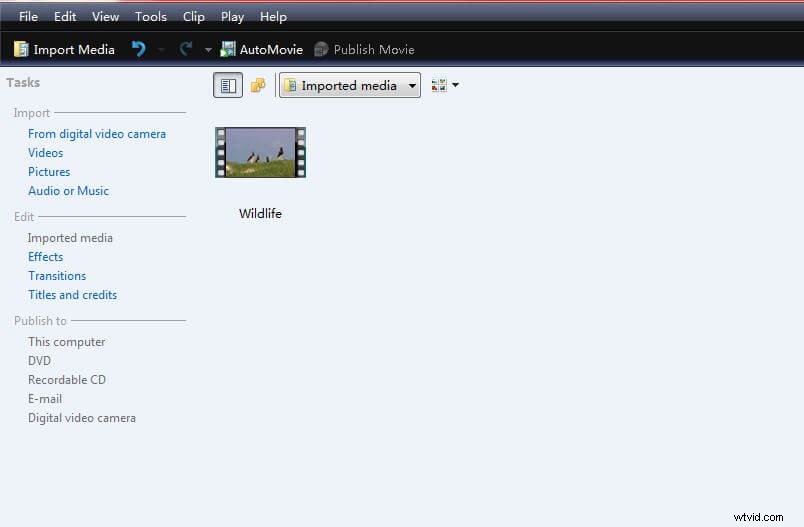
Step 1 Import the Video
The first step is to open the Windows Movie Maker and import the video that you want to add subtitles. All you need to do is locate the video file on your digital video camera or computer hard drive. Once you have imported the video, it will be found at the collections folder.
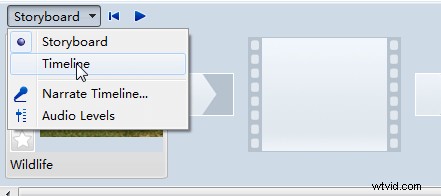
Step 2 Change to Timeline View
If you want to change the subtitle’s timing and position, you need to set the view to Timeline. All you need to do is click on the View tab found on the menu bar, and then choose Timeline. Once you have changed the view, then you can add subtitle in Windows Movie Maker.
Step3 Drag Video File to Timeline
The next step is to drag the video you want to add subtitles. When you look at the Windows Movie Maker, you will see three timelines that run horizontally across the bottom. The one on top is labeled Video. The one in the middle is Audio. And the one at the bottom is known as the Title Overlay. Choose the video file from the collections folder, and then drag it to the Video timeline. The video will be displayed inside the specified timeline.
Step 4 Apply the Subtitle Overlay

Click the Titles and Transitions button found on the left side of the window. Then choose Title on the selected clip option.

When you are asked to enter the text for the title, input the subtitles you want to add to the movie into the field.
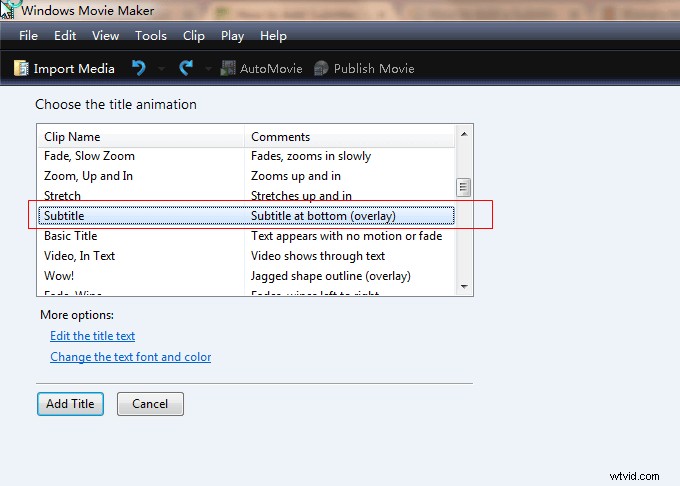
Then click on the option Change the title animation, and find the Subtitle overlay.
Step5 Adjust the Text Font, Color, and Size
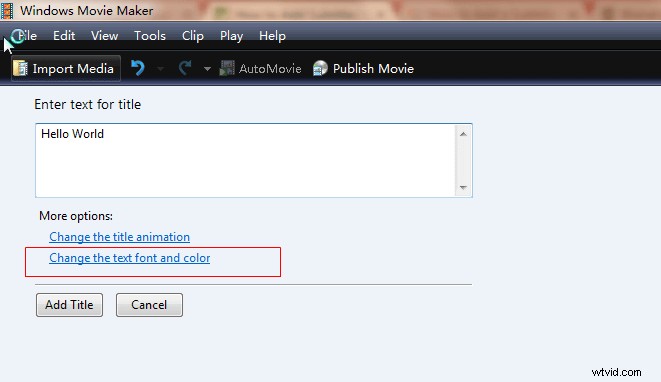
If you want to change the font and color, then choose the Change the text font and color option that is found in the Edit the Title Text settings.
A popup window will appear, and there you can change the font, color, transparency, size, position, and other options. You can see the changes that you made at the preview window found at the right side.
Step 6 Place Subtitle on the Right Position

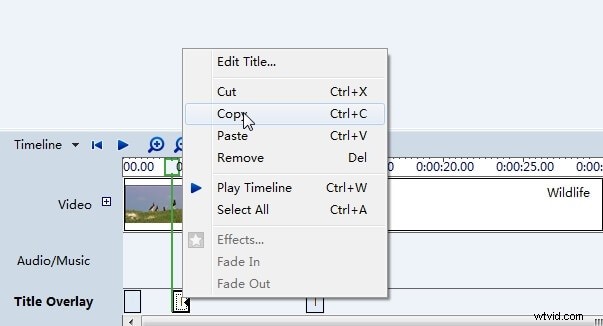
After you are done with the adjustments to the text, click the Add Title button to add subtitle in Windows Movie Maker. The subtitle will be found on the Title Overlay timeline. All you need to do is to drag and drop it to the right position.
When you right click on the subtitle, you will find several options that include edit the text, cut, Copy, Paste, Remove and more.
Step 7 Finish the Project
You will repeat the steps until all the subtitles you want to add to the video are inserted and move into the right position. Then save the movie file on your computer as a Movie Maker Project. You can also choose to export the video file as a Windows Media Video that you can upload online, along with the subtitle you have added to the video.
Related: How to Add Text to Video with Windows Movie Maker