We love movies like Space Jam and Who Framed Roger Rabbit – it’s fun and fascinating to watch cartoon characters interact with the real world.
Ever thought you could create a movie like that, too? And no, you don’t need to study filmmaking or animation for years to do so. It all comes down to choosing and using the right software – with some apps, even amateur video creators can create such a movie.
Today we’ll show you how to create your own cartoon character and insert it into a real live video.
What do you need to prepare in advance?
Think of your scenario in advance – this way, you will know how your cartoon character is supposed to move in the frame, and it will be easier for you to shoot the video. Check out this article for killer tips on writing scripts.
Second, draw your character. You can do this using any graphic design app you like. If this is your first time animating anything, don’t include a lot of detail in your picture. The more details there are, the harder it will be to animate the character. Also, your character’s “body parts” separately: torso, two legs, two arms, two wrists, and head. When you have them saved as separate images, it makes the animation process a lot easier.
Then shoot your video! You probably already have an idea of how it will look but, just in case, check our Video category to find useful lifehacks.
Finally, download the apps you will be using. You’re going to need at least two apps – one for animation, and the other for video editing. If you’re a beginner or hobbyist content maker, opt for user-friendly programs. For example, Cartoon Animator 4 Pro is a great piece of software to start your amazing journey to animation making with. For video editing, we recommend trying Movavi Video Suite, a comprehensive set of amateur-friendly video-making apps.
By the way, until the end of this month, you can get Cartoon Animator and Movavi Video Suite together at a discounted price! Take this chance and learn to make outstanding visual content with us! Learn more here: Limited-time offer Movavi + Reallusion products.
Why do we recommend Cartoon Animator 4 Pro for creating animations for live-action videos? Because it’s an easy-to-use app that helps you create your own cartoons and does most of the work for you. It comes with all the tools you might need to animate a character and make it move naturally.
How to create a character in Cartoon Animator 4
Working with Cartoon Animator is really fun! We’ve tried it ourselves and we can’t wait to show you how easy it is. So let’s get started!
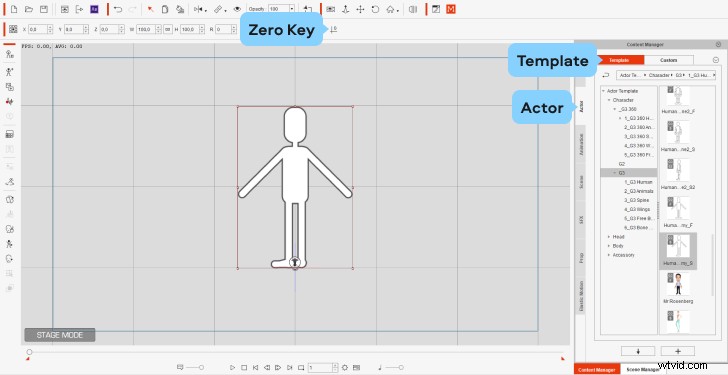
1. In the dashboard on the right, open the Actor tab, and go to Template. Here, you can choose a template – either a ready-made character, or a “dummy” to create your own. Click on the Character section, and pick whichever you prefer. We decided to go with the “dummy”.
Drag and drop your chosen option onto the work space.
2. Click the Zero Key button to make sure the character is on the scene root. That will bring your character “on the ground” and ensure that all the movements are displayed correctly.
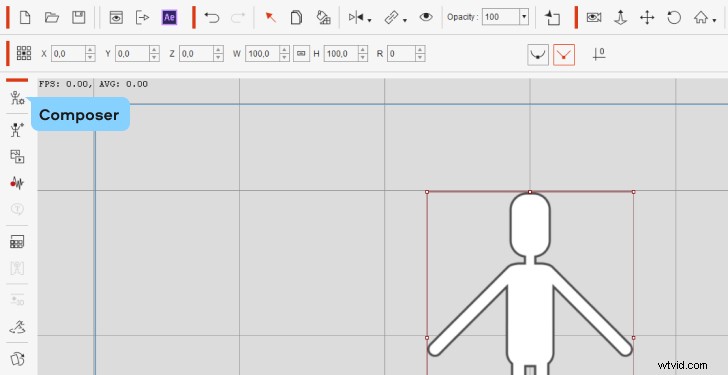
3. In the left-hand menu, click the Composer mode to see the bone structure of your character.
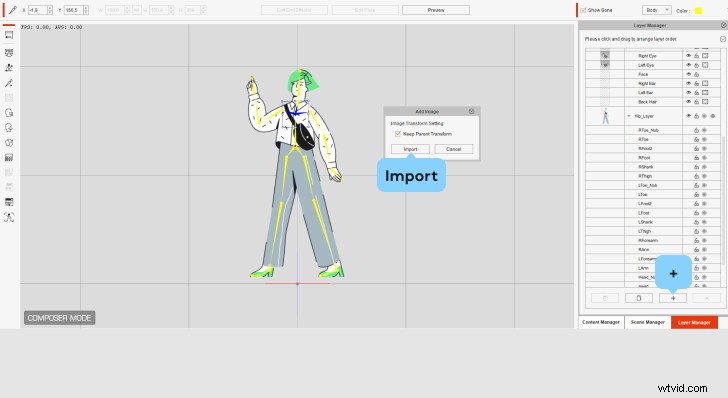
4. Select the hip bone in the “dummy” and go to the Sprite Editor to upload your own character and align it with the outline.
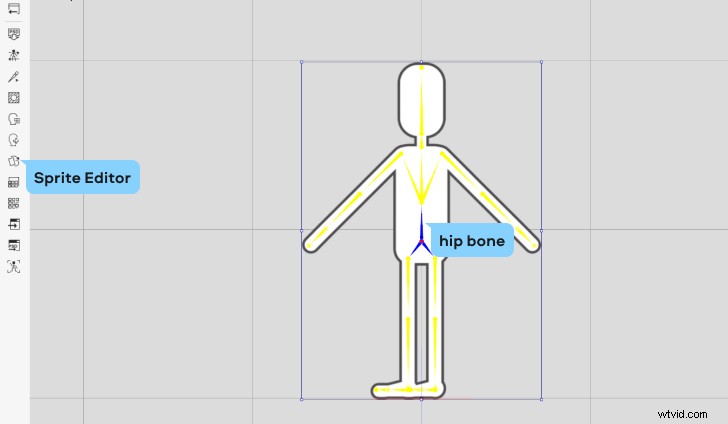
5. In the Sprite Editor window, double-click on the Hip icon and choose the picture you want to use from your files.

6. Resize the image to make it match the bone structure. Make sure the feet are placed on the scene root – the red line you can see right below the bone structure.
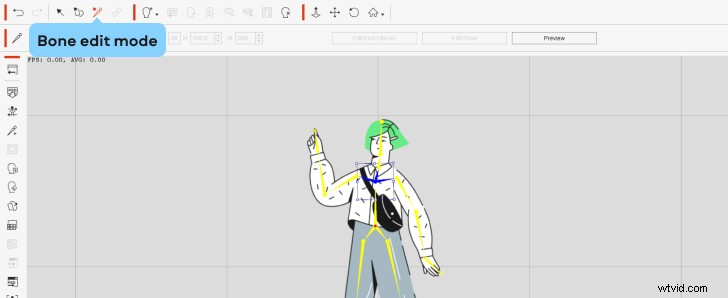
7. To set the correct bone positions, go to the Bone edit mode. Place all the bones in the corresponding positions on your picture. Select each bone bones one by one and adjust the size and position; you can also rotate them if necessary. This will take a while, but don’t rush! The result is worth it.
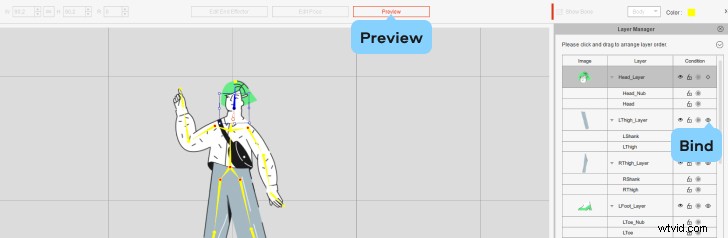
8. When everything is ready, select any of the bones and go to the Layer Manager.

9. In the Layer Manager, select the corresponding bone, hit the Plus sign, and add the picture of that bone. Make sure that the Keep Parent Transform box is checked.
10. Do the same with the rest of the bones. While importing sprites on joint spots (like the knees and shoulders of the character), hit the Bind button in the Condition column – it will then become Stretch Bind. This will make the movements of the character look smoother. You can hit the Preview button from time to time to check the in-process result.
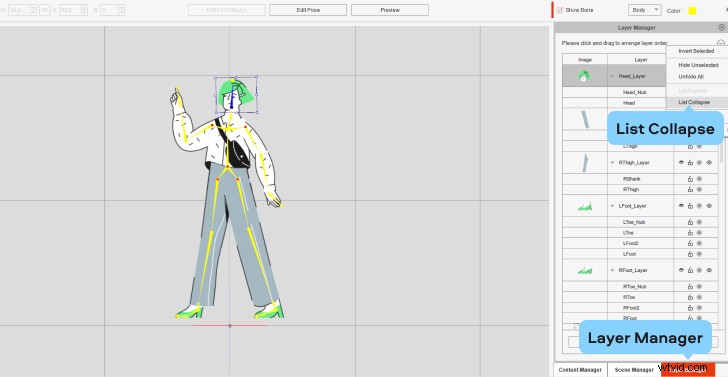
11. Modify the layers. In the same Layer Manager, drag and drop at the beginning of the layers list those sprites that should be on the top layer. For example, if you place the right hand of your character at the top of the list, that hand will cover other body parts during movement.
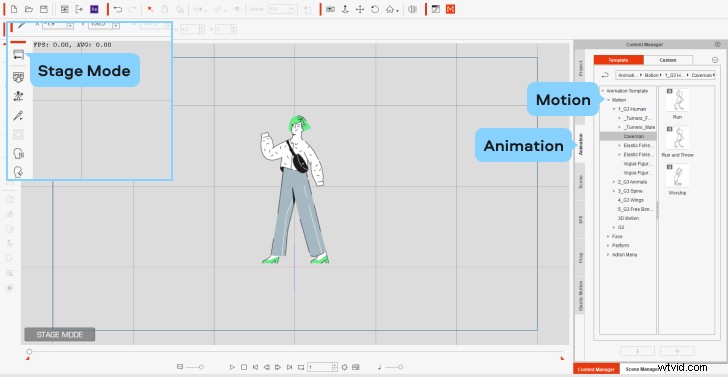
12. You’re almost done! Go to Stage Mode. In the dashboard on the right, open the Content Manager tab, go to Animations, and then Motions. Now choose the desires movement pattern.
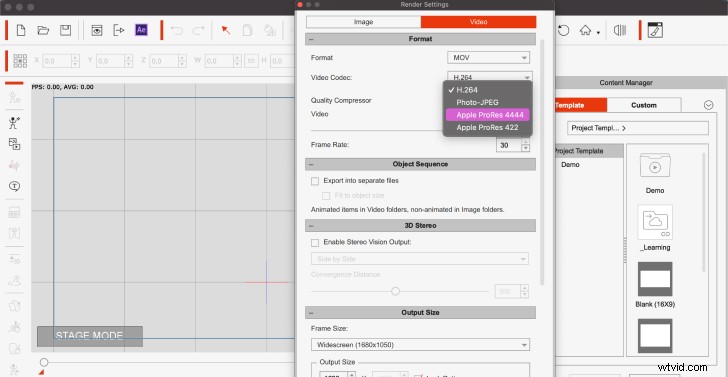
13. And that’s it! Save your video. To do this, click Render in the toolbar in the upper part of the screen, and hit Render Video. In the new window, set the codec to Apple ProRes 4444 to ensure there’s a transparent background behind your character. Then choose your desired resolution, and, finally, click Export.
How to mix 2D animation with live-action footage
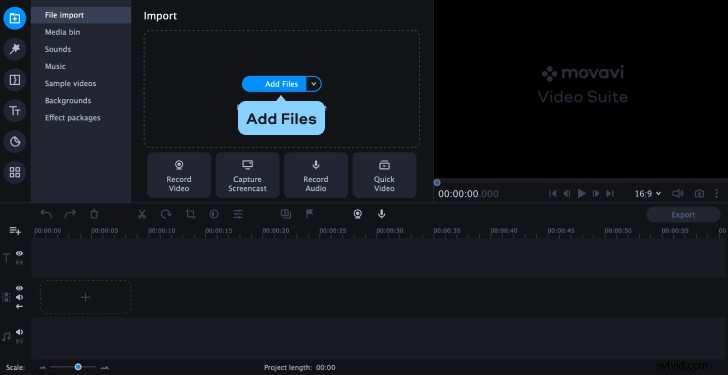
Now, let’s introduce your cartoon character to the real world! To combine animation with real-life footage, you’re going to need a video editing program. We recommend using Movavi Video Suite – a set of extremely easy-to-use and powerful apps for video creation. It will help you achieve your desired results in no time – without overcomplicating things and taking too many hours of your time.
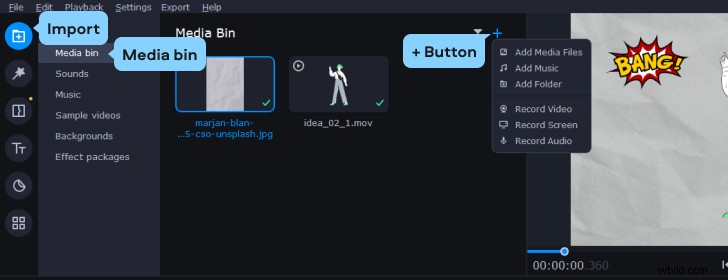
1. Upload your videos to the program. In this case, you’re going to need to add at least two video files: the one with the newly created animation, and the video you want to add it to.
2. Right-click on the Timeline, select Add Extra Track and then Add Video Track.
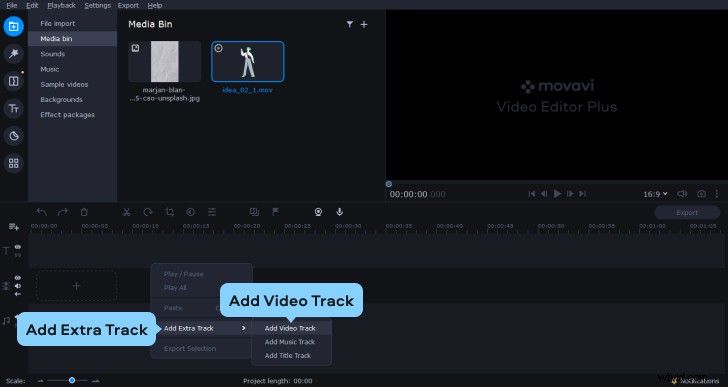
3. Now, drag and drop your videos from the Media Bin to the video tracks. To play simultaneously, each clip should have its own video track.
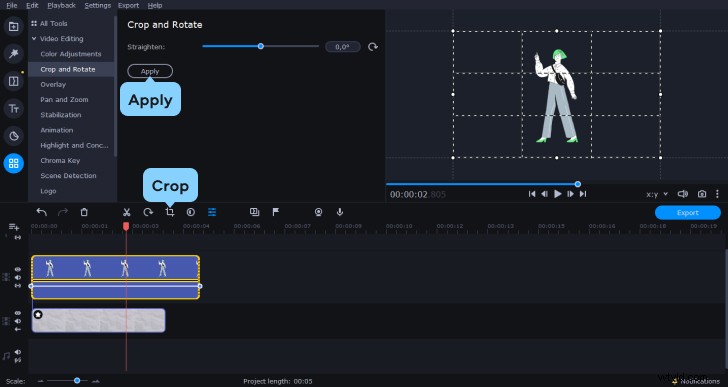
4. To adjust the size and position of your animated character in the frame, select the clip and hit Crop. In the preview window, adjust the frame ratio. The larger the frame, the smaller the character will be. Also, position your character within the frame: if you move it to the right, your cartoon person will be on the left side of the frame in the final video. When you’re done, hit Apply and check the result.
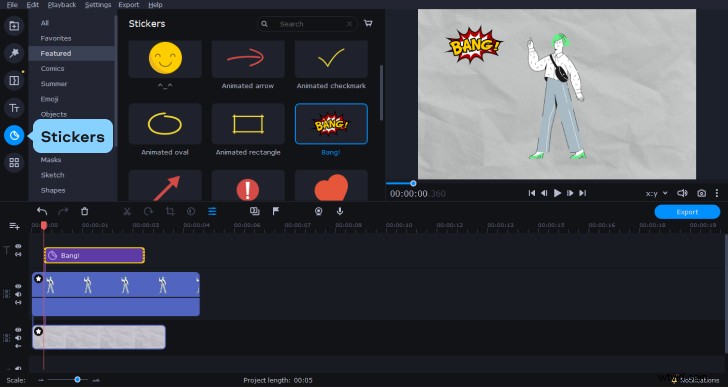
5. You can be done at this point, but let’s add something extra. If you want your character to interact with other objects in the frame, add some effects. For example, you can add a “BANG!” sticker, if your character hits something. To do that, go to the Stickers tab, and choose the desired option.
6. You can also add sound effects or a voiceover to the animation. Go back to the Media Bin, hit the + button, and Add Music or Record Audio. You will also find lots of useful effects in the Sounds tab.
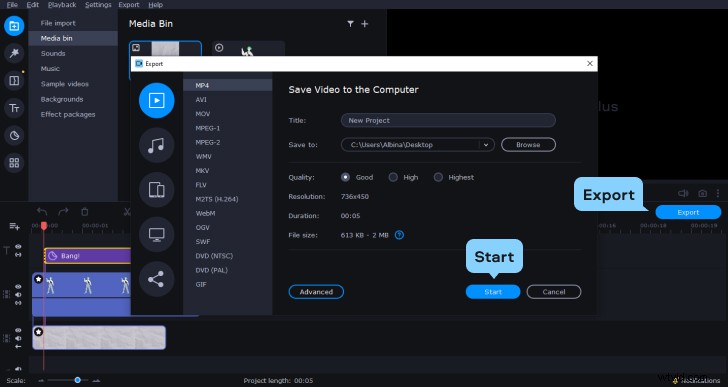
7. Preview the result one last time and, if everything looks good, export your movie! Hit Export, choose the desired resolution, and click Start.
And that’s it! Now you have a fabulous movie featuring a cartoon character. We hope you enjoyed the process as much as we did 🙂