Preparation
Before you begin, gather the following:
- A Windows or macOS computer with sufficient RAM and processing power
- Your raw video footage (audio and video tracks ready for editing)
- Filmora (any recent version; the tutorial applies to Filmora 9 and newer)
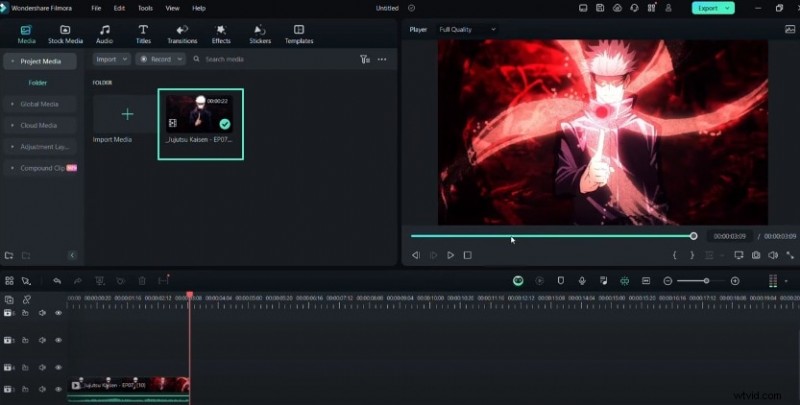
Step 1: Import Your Clip
Launch Filmora and bring your footage into the media library. You can either click Import Media or drag and drop the file directly into the project panel.
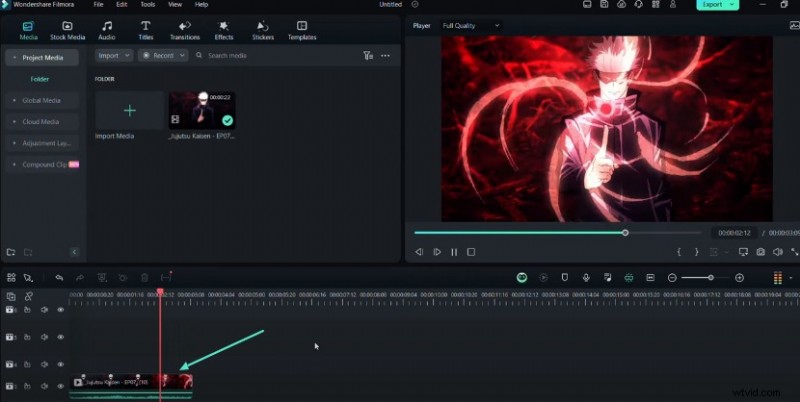
Step 2: Add the Clip to the Timeline
Drag the imported clip onto the timeline. This action locks the video into the editing sequence, allowing you to layer additional effects.
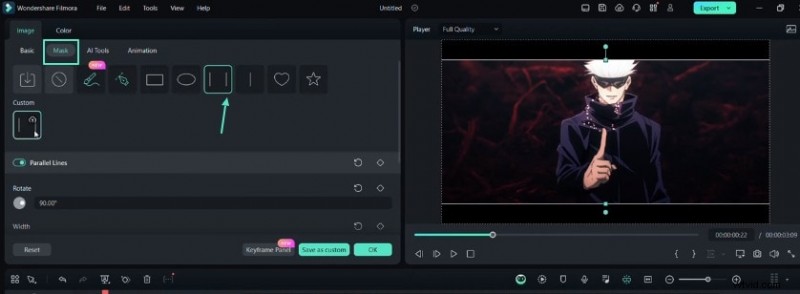
Step 3: Create Black Bars with the Parallel Lines Mask
To give your AMV a cinematic look, add a black solid layer. In the Mask settings, rotate the mask by 90 degrees to form vertical bars. Adjust the bar width until the composition feels balanced.
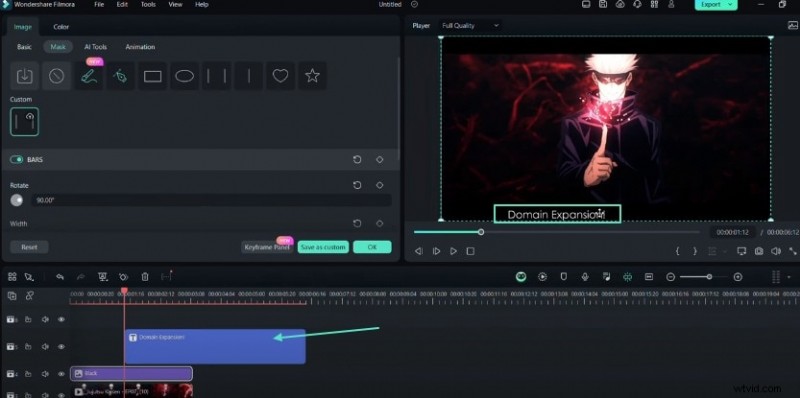
Step 4: Add Text and Adjust Bar Positions
Insert a text layer using Filmora’s Text tool. Position your caption over the black bars, then fine‑tune the bars’ placement to complement the text. This step ensures the text stands out against the background.
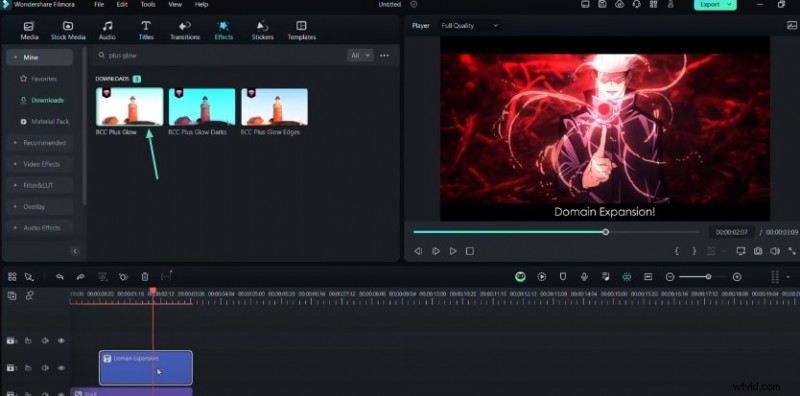
Step 5: Create a Compound Clip for Glow
Select both the text and the black bars, right‑click, and choose Create Compound Clip. Apply the BCC Plus Glow effect to this compound clip. In the effect panel, tweak brightness, Blur X, and Blur Y to achieve a subtle yet striking glow.
Step 6: Add a Graph for Smooth Motion
Navigate to the keyframe panel and keyframe the text’s position. Insert a graph curve to control the motion, ensuring the animation feels natural and fluid.

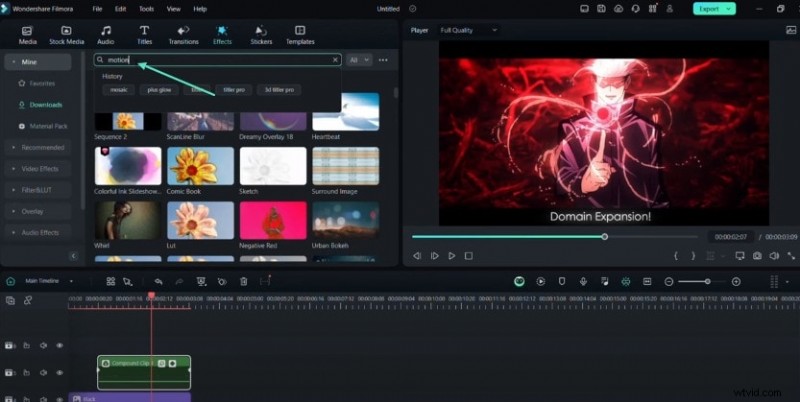
Step 7: Apply Motion Blur and Keyframe Opacity
Apply the Motion Blur effect from the effects tab, enabling BCC Blur for optimal results. Additionally, keyframe the opacity to create fade‑in and fade‑out transitions that add polish.
Step 8: Explore 3D Title Presets
Filmora offers a range of ready‑made 3D title presets. Browse the Titles tab, choose a preset that matches your style, and adjust the scale or apply VFX text presets for extra flair.

Summary
By mastering these techniques—black bars, glow, motion blur, and 3D titles—you can elevate the visual storytelling of your AMV projects. Filmora’s intuitive interface and powerful tools make it accessible for both beginners and seasoned editors. For deeper exploration, visit the Filmora Creator Hub and discover additional tutorials on text effects and motion design.