Before you begin, gather the following:
- A computer (Windows or macOS)
- Your video footage
- Wondershare Filmora installed
Step 1
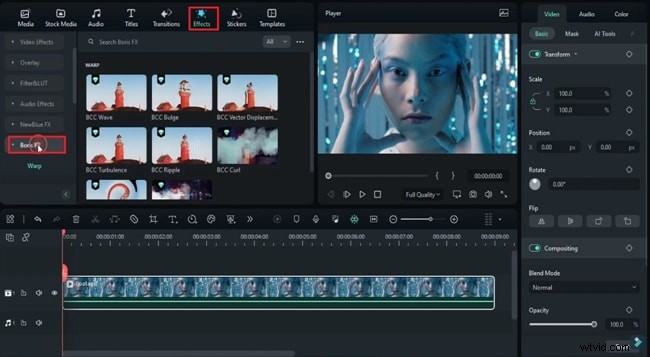
Import Your Footage and Choose a Suitable Effect
Launch Filmora and click New Project. From the Media tab, import your clips and drag them onto the timeline. Navigate to the Effects tab, search for Boris FX, and apply your chosen effect to the selected clip.
Step 2
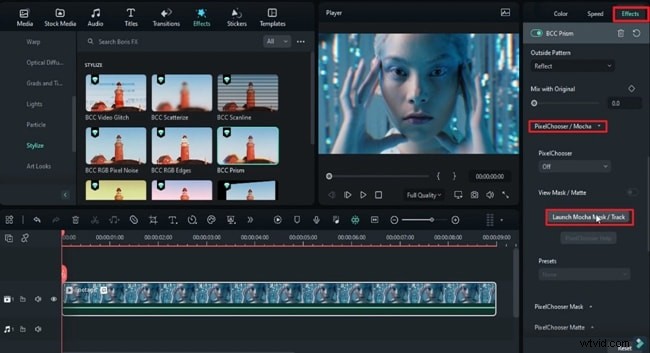
Access the Masking Tool via Mocha
Open the effect settings on the right panel and select PixelChooser/Mocha. Click Launch Mocha Mask/Track to open the dedicated tracking window.
Step 3
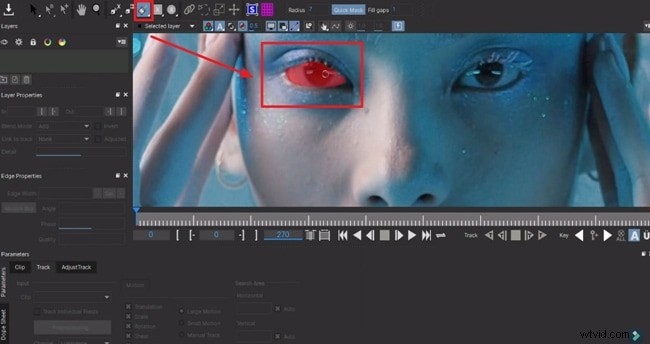
Create a Precise Mask
In the Mocha toolbar, choose the Brush tool and adjust its size to match the area you want to isolate. Paint around the object and use the Alt key to delete any stray marks.
Step 4
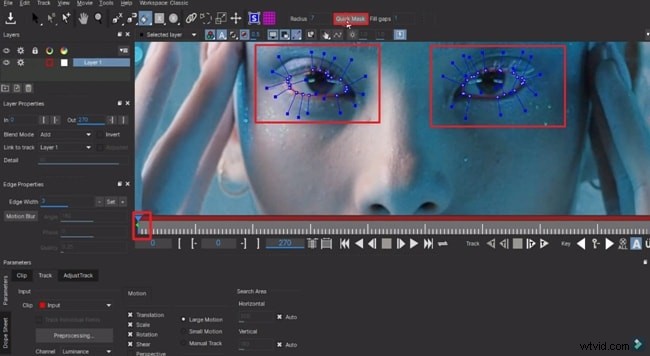
Refine the Mask Shape
Select Quick Mask from the top toolbar. Control points will appear on your mask; drag them to fine‑tune the shape. Position the playhead at the clip’s start before adjusting.
Step 5
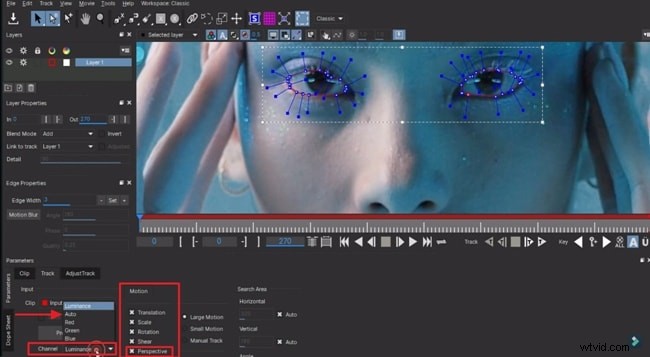
Configure Tracking Parameters and Start Tracking
Under the Motion section at the bottom, choose Perspective. Set Channel to Auto and click Track Forward to begin the tracking process.
Step 6
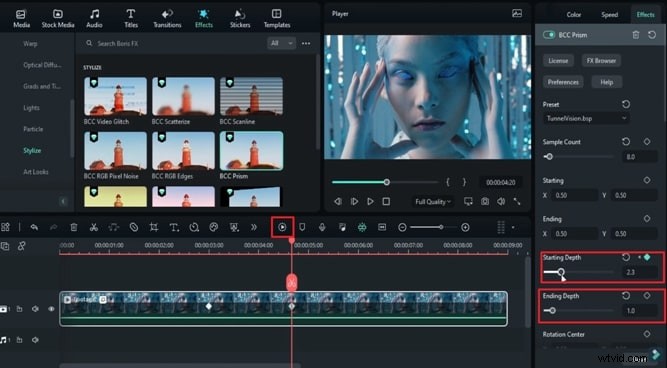
Finalize Settings and Render a Preview
After tracking, click Save and close Mocha. Advance the playhead a few frames, then return to Effects. Choose a Preset and enable PixelChooser by scrolling down.

Insert keyframes at key positions, adjusting the Starting Depth and Ending Depth to your liking. Finally, hit Render Preview to see the final result.
Summary
High‑quality visual effects elevate any project. By following this guide, you can seamlessly add a chilling zombie eye effect to your video in Filmora—quickly, accurately, and professionally.