Preparation
What you need to prepare:
- A computer (Windows or macOS)
- Your video footage
- Wondershare Filmora installed
Step 1
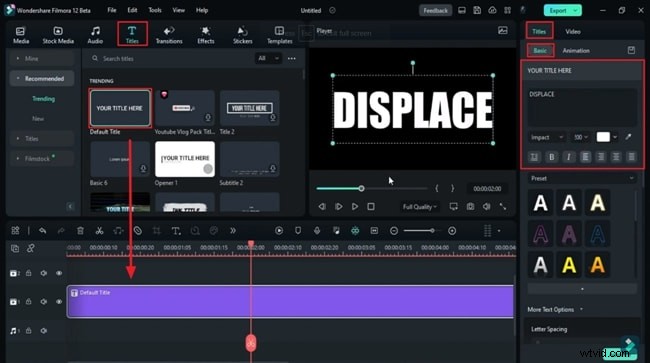
Drop the Default Title and Adjust Font and Size
After creating a new project, drag the “Default Title” clip into the timeline. Click the clip in the timeline, then in the settings panel pick a bold font, type your title text, and adjust the font size and color to match your style.
Step 2
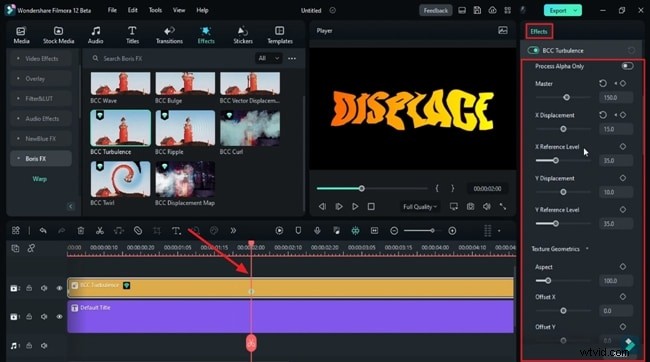
Add a Turbulence Effect to the Timeline
Navigate to the Effects tab, find a turbulence effect, and drop it onto a separate track. Place the playhead at the start of this track, enable the “Scale” keyframe and set its value, then add an “Intensity” keyframe. Adjust the “Scale” slider to create a rough edge effect, and keyframe the Master value.

Step 3
Create Your Animation
Experiment with “X Displacement,” “Y Displacement,” “Interpolation,” and “Aspect” while ensuring each parameter has keyframes. Preview the animation in real time, tweaking values until you achieve the desired turbulence.

Step 4
Reset Keyframes When Needed
When you want to remove the effect from a section, place the playhead at that point and reset the keyframes to their defaults by clicking the keyframe icons. This gives you full control over where the turbulence appears.
Summary
A compelling intro can make or break viewer engagement. By following this guide, you can add a professional‑looking turbulent displacement title to any project, giving your videos a polished and dynamic look.