Preparation
What you need to prepare:
- A computer (Windows or macOS)
- Your video materials
- Filmora video editor (download from the official site)
Step 1
Navigate to the official Filmora website and click the “Free Download” button. The installer will begin downloading automatically.
Step 2
After launching Filmora, open the Track Manager from the left side of the timeline. Add 11 video tracks above the first track. Place the default title on track 11, double‑click it, and change the font to “American Captain.” Set the size to 120 and type your desired word. Adjust spacing, then capture a snapshot.

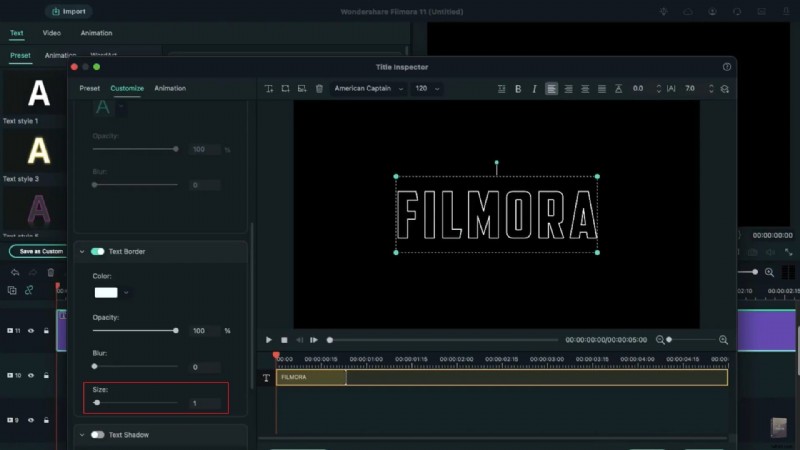
Step 3
Open the default title again, go to the Advanced panel, turn off the text fill, and select a white color. In the text border section, set the size to 1. Take another snapshot.
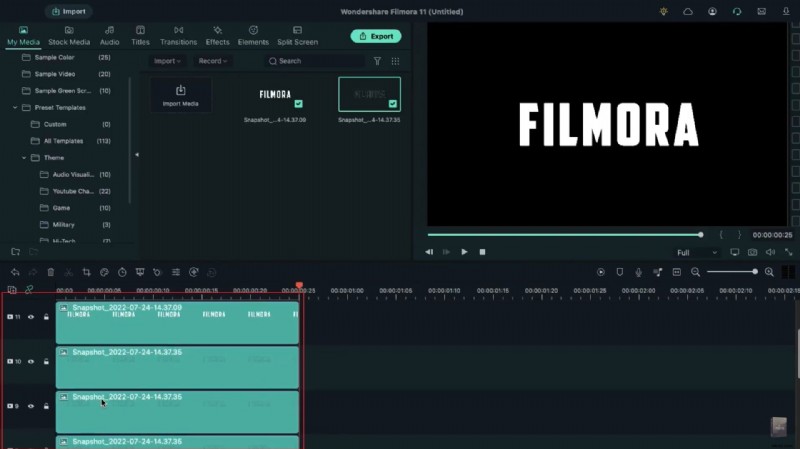
Step 4
Remove the default title from the timeline. Drag the first snapshot to track 11 and set its duration to 25 frames. Drag the second snapshot to track 10, also 25 frames. Copy the clip from track 10 and paste it onto tracks 2 through 9.
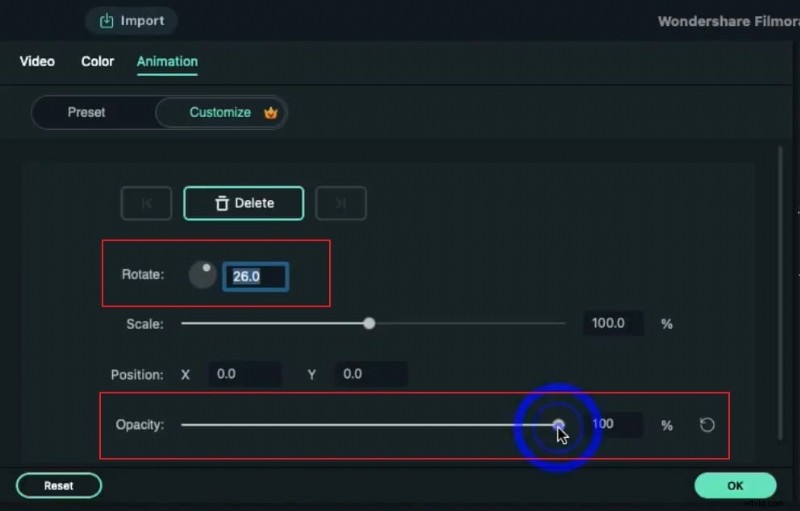
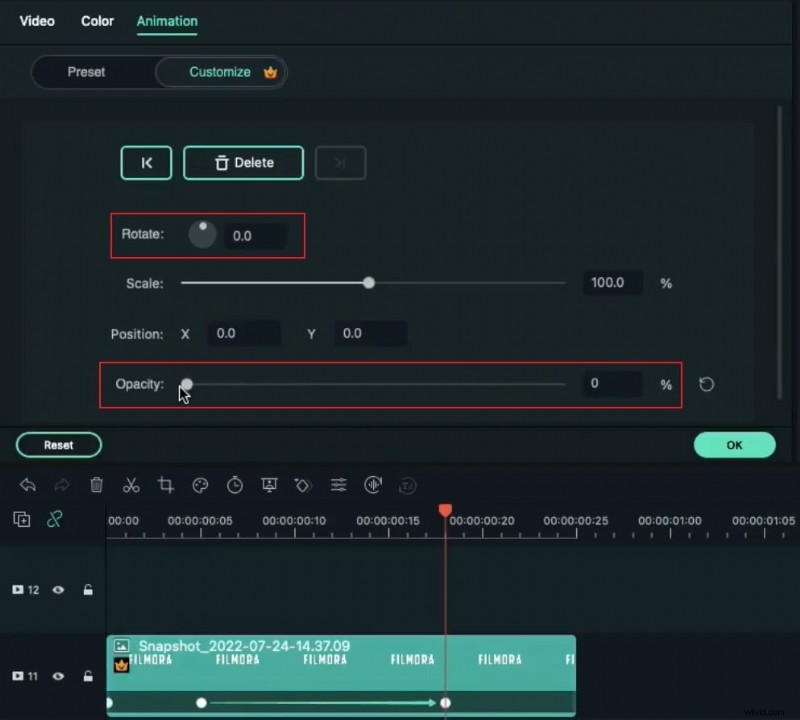
Step 5
At the start of track 11, double‑click the clip and open the “Animation” tab. Set Rotation to 26°, Opacity to 0% and add a keyframe at frame 5. Move to frame 18, change Rotation to 0° and increase Opacity to 100%.
Step 6
For the clip on track 10, set Rotation to 30°, Scale to 0% at the start. At frame 5, raise Scale to 100%. At frame 18, set Rotation to 0° and Opacity to 0%. One frame earlier, bring Opacity back to 100%.
Step 7
Apply a similar keyframing sequence to the clip on track 9: Rotation 34°, Scale 0% at the start, reset Scale at frame 5, and at frame 18 set Opacity and Rotation to 0°, restoring Opacity to 100% one frame before.

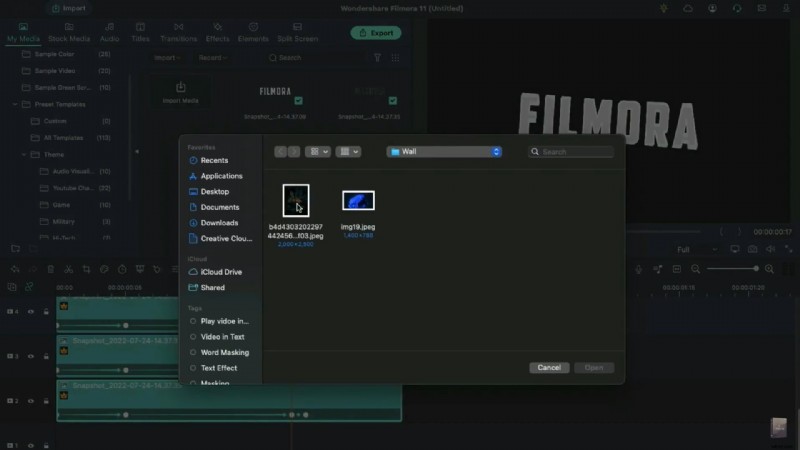
Step 8
Repeat the rotation adjustments for the remaining snapshots, incrementing Rotation by 4° on each subsequent track (32°, 36°, 40°, 44°, 48°, etc.). Once complete, import your background video into the project media and place it on track 1.
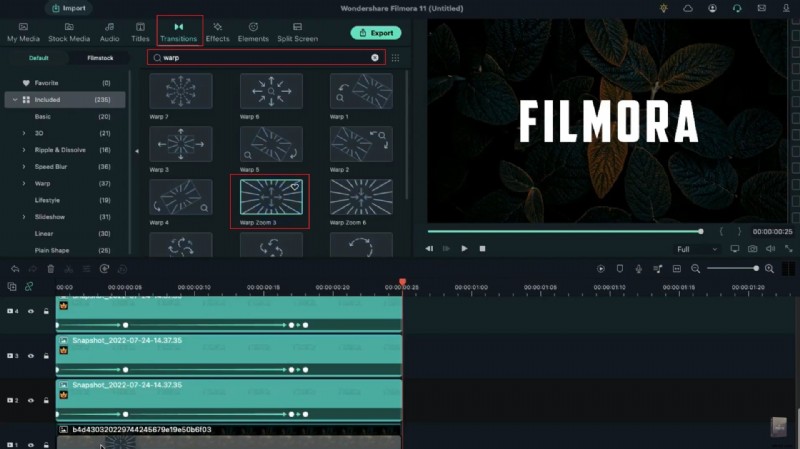
Step 9
Double‑click the background clip, scale it if needed, and set its Opacity to 50%. Keep this track at 25 frames. In the Transitions tab, search for “Warp” and apply the “Warp Zoom 3” effect to track 1, adjusting the duration to your preference. Render the project to preview the echo motion trail effect.
Summary
Key takeaways:
- Filmora’s layering and keyframing tools enable sophisticated motion trails.
- Using transitions and opacity adjustments smooths visual flow.
- Filmora offers a variety of background templates for business, sports, and social contexts.