Filmora is a free, intuitive video editor that lets you add engaging text effects with minimal effort. One of its standout features is the ability to craft a crisp outline‑text intro that grabs viewers’ attention from the first frame.
How to Make an Outline Text Intro in Filmora
Preparation
- Computer running Windows or macOS
- Your raw video footage
- Filmora installed on your desktop
Step 1 – Download and Install Filmora
Visit the Wondershare Filmora website and click the free download button. After the installer downloads, run it, accept the terms, and follow the on‑screen prompts to install. Once installed, launch Filmora and you’re ready to start editing.
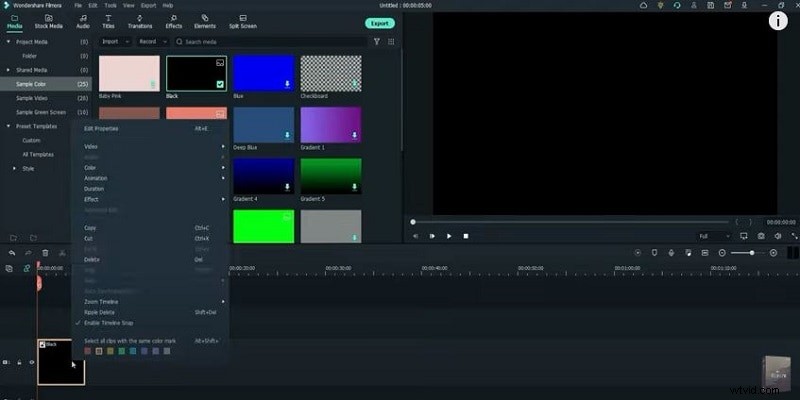
Step 2 – Add a Background Color
In the Media Library, click Sample Color and choose a solid color that will serve as your background. Drag the color block onto the timeline and right‑click to set its duration—8 seconds is a good default.
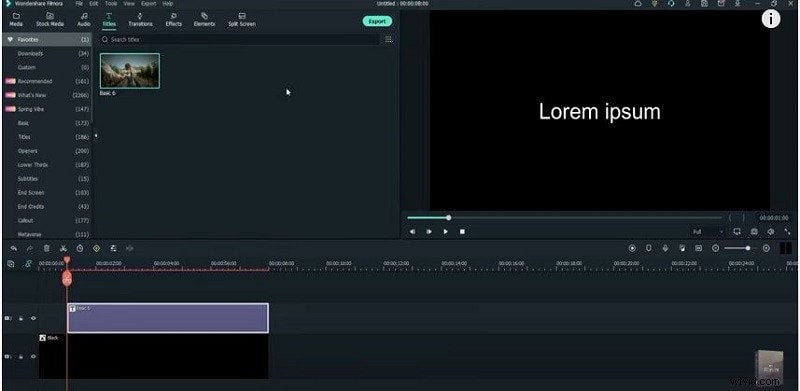
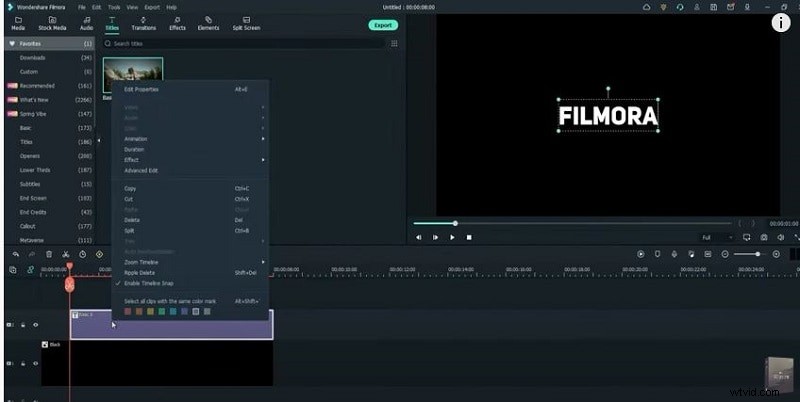
Step 3 – Insert a Title
Position the playhead at the 1‑second mark. Open the Titles tab, search for “Basic 6” (or any preferred style), and drag it onto the timeline above the color block. Match the title’s length to the background clip.
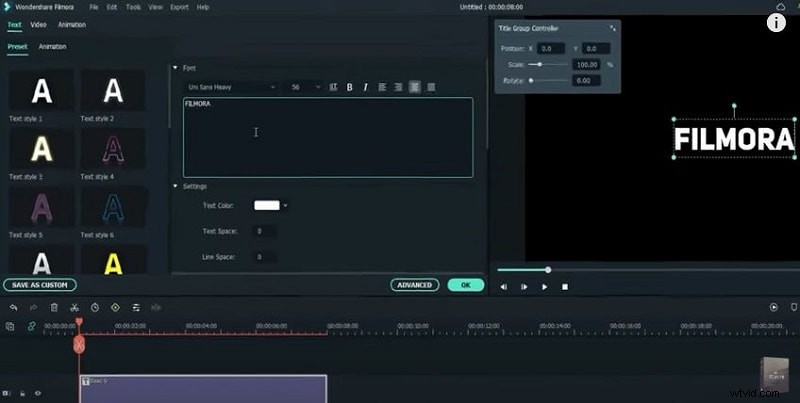
Step 4 – Customize the Title Text
Right‑click the title clip and choose Properties. Pick a bold font—e.g., Uni Sans Heavy—and type your desired text. Click OK to apply.
Step 5 – Organize Tracks
Copy the title clip and lock both the title and color layers. Open Track Manager, move the title to Track 2, and add four additional video tracks. Confirm with OK.
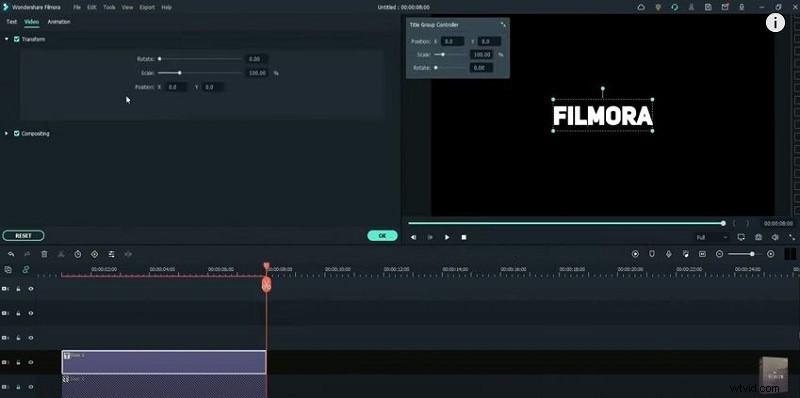
Step 6 – Create the Outline Effect
For each track, right‑click and choose Adjust Track Height → Small. Copy the title layer, paste it onto the next track, and then open its properties. Under Advanced, uncheck Text Fill, enable Text Border, set the border color to white, and adjust the border size to 1.

Step 7 – Position the Text Vertically
With the track selected, go to Video → Transform and set the Y‑axis to around 120. This centers the text vertically on the screen.
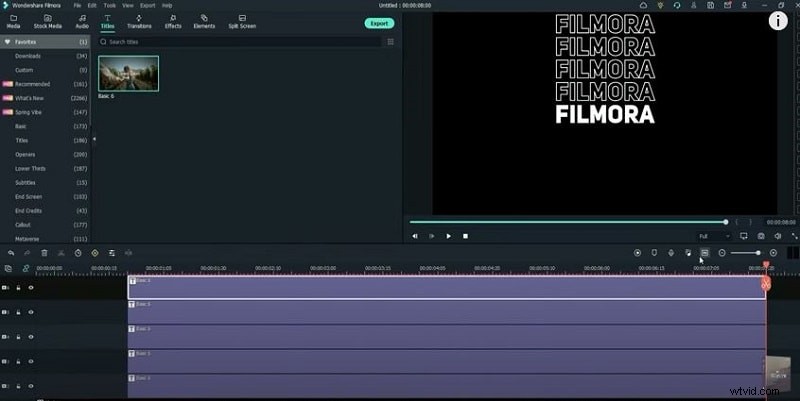
Step 8 – Layer the Outline Stages
Copy and lock each successive text layer, then paste it onto the next track. Unlock all layers except the first, then click the resize icon to fit the timeline. Ensure each layer is properly aligned.
Step 9 – Fine‑Tune Timing
At the start of each text layer, split the clip 5 frames forward. Repeat for all layers, deleting any excess footage. Align the split points so that each layer fades in smoothly. Copy the duration from one layer to another to maintain consistent timing, then render and preview.
Once satisfied, export the finished intro to your desktop.
Show More >>
Summary
What you’ve learned:
- Replacing background color with a solid color or green‑screen footage.
- Using Filmora’s built‑in transitions for smoother visual flow.
- Leveraging Filmora’s diverse background presets for various video styles.