Preparation
What you need:
- A Windows or macOS computer
- Your raw video footage
- The latest version of Filmora video editor
Step 1
Launch a New Project
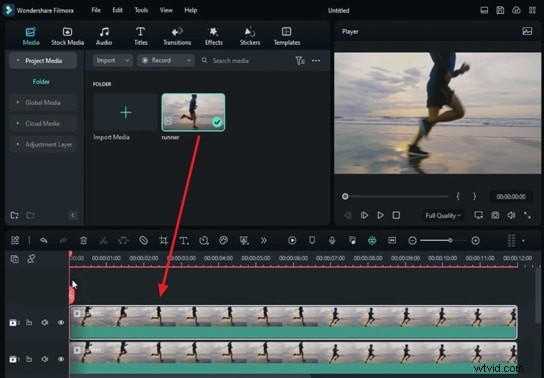
Start by importing your footage into Filmora’s media library. Drag the clip onto the timeline, then duplicate it on a higher track so you have two layers of the same video. This setup lets you isolate the moving subject from its background.
Step 2
Enable Smart Cutout on the Upper Layer
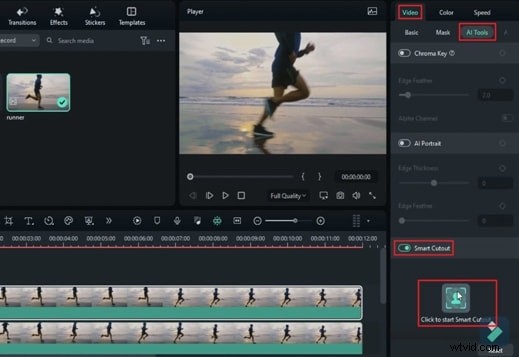
Select the top‑track clip and open the Settings panel on the right. Navigate to the Video tab, click AI Tools, and turn on Smart Cutout. Hit Click to Start Smart Cutout to launch the tracking interface.
Step 3
Track the Moving Subject
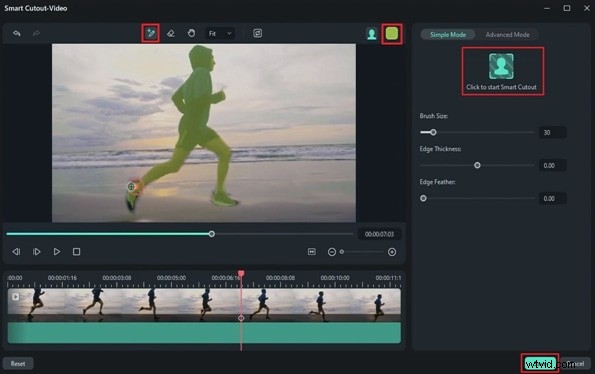
In the Smart Cutout window, move the playhead to a frame where the subject is clearly visible. Use the Smart Brush and the Overlay Color selector to highlight the object you want to isolate. Click Click to Start Smart Cutout again to let Filmora track the subject across the entire clip. Wait for the processing bar to finish, then press Save to lock in the mask.
Step 4
Split the Video Layers
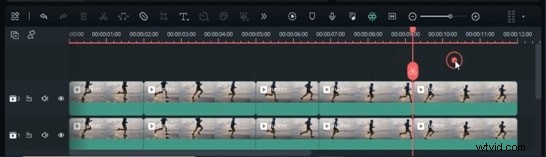
Return to the timeline. Move the playhead to the points where you plan to change background effects or apply transitions. Split both video tracks at those markers using the Split tool.
Step 5
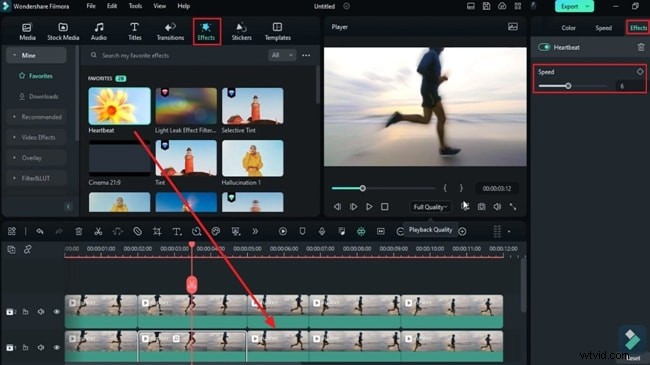
Apply Background Effects
Select the lower track (the background layer) and open the Effects panel. Drag your chosen effect onto the clip segment on the timeline. You can stack multiple effects; adjust their intensity in the right‑hand properties window. If you wish, tweak the effect’s speed from the Speed option within the same panel.
Step 6
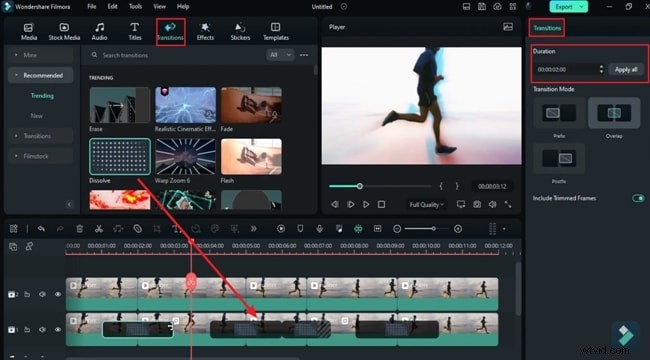
Add Transitions to the Split Segments
Navigate to the Transitions tab, choose a transition that complements your footage, and drag it onto each cut point of the first track. Modify the transition duration via the right‑hand panel to achieve a smooth visual flow.
Step 7
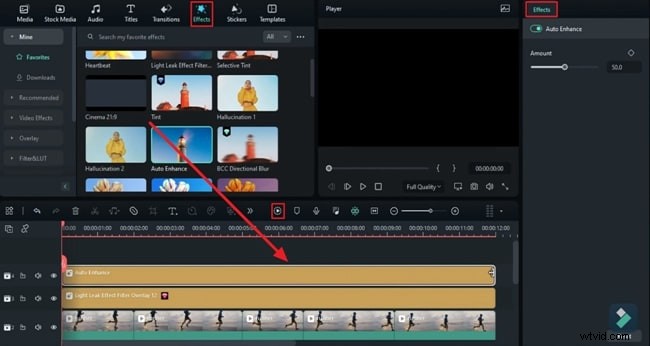
Layer Additional Visual Enhancements
To further polish the look, return to the Effects panel and apply extra effects to the upper track segments. Adjust their duration by dragging the effect edges along the timeline. Once satisfied, click Render Preview from the toolbar to see the final composite.
Summary
This guide demonstrates how to create a polished running effect in Filmora using the Smart Cutout feature and layered effects. By following these steps, you can quickly isolate moving objects and apply dynamic backgrounds or transitions to elevate your video projects.