Master Rolling Text Animation in Filmora 13
Elevate your video projects with a polished rolling text effect. This tutorial walks you through each phase—from initial text setup to motion blur and zoom‑out—using Filmora 13’s intuitive tools.
Transcript
00:15 Welcome back. In this tutorial, I’ll show you how to create a rolling text animation in Filmora 13. The process is straightforward, so let’s dive in.
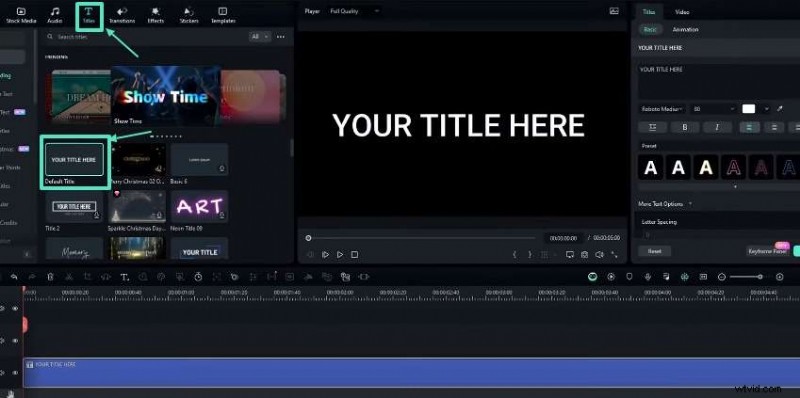
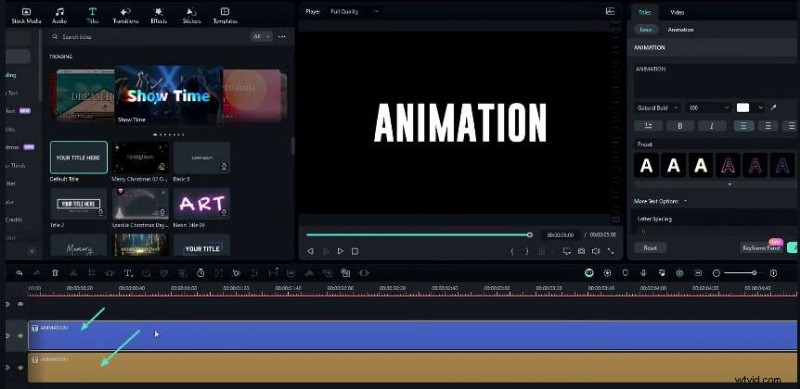
00:35 First, create the main text layer. Select the Default Title from the Text menu and drag it onto the timeline. Change the color to your preference—yellow in this example. In the Text Settings, type your desired phrase, choose the GoBold Bold font, and set the font size to 100.
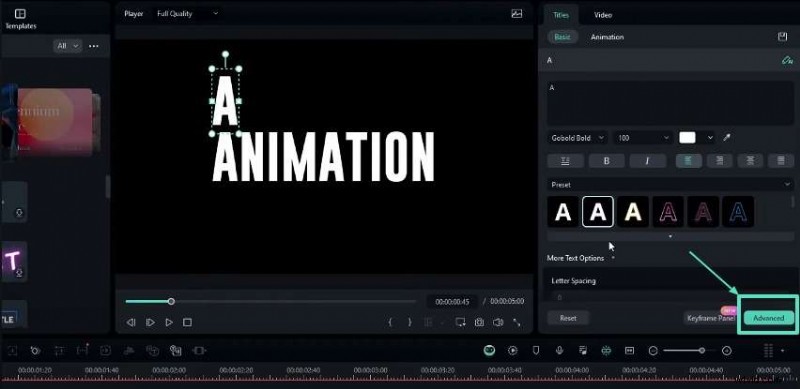
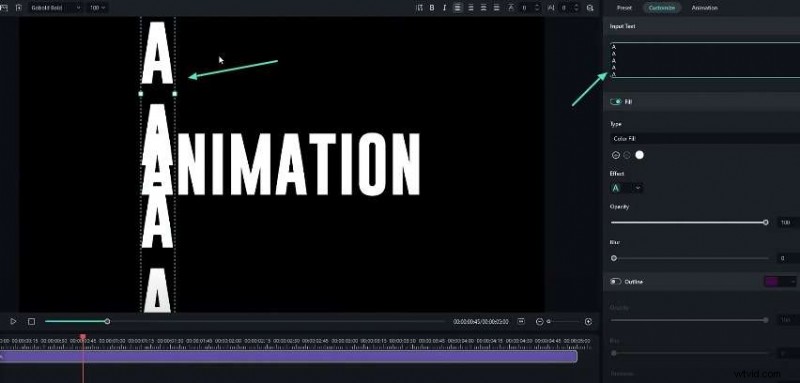
01:03 Duplicate this layer and paste a second copy. Alter its color, then delete all characters except the first letter (e.g., “A”). In the Advanced Settings, repeat that single letter 20 times to form a vertical line. Reduce the line spacing to –20 and apply the changes. Position this new layer above the original.
01:45 Repeat the duplication and editing process for each letter in your phrase. Once all individual letter layers are created, delete the original main text layer. Apply a mask effect to hide any unwanted areas: navigate to the Effects tab, choose Shape Mask, and add it to the timeline.
02:04 In the Effect Settings, adjust the mask height, set the radius to zero, and apply your preferred blur strength.
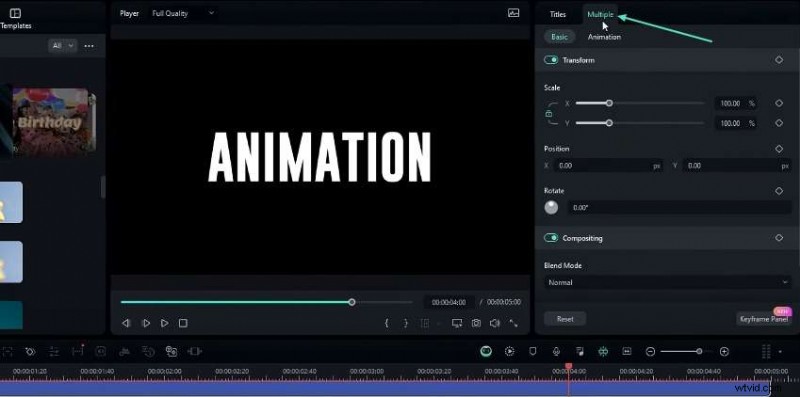
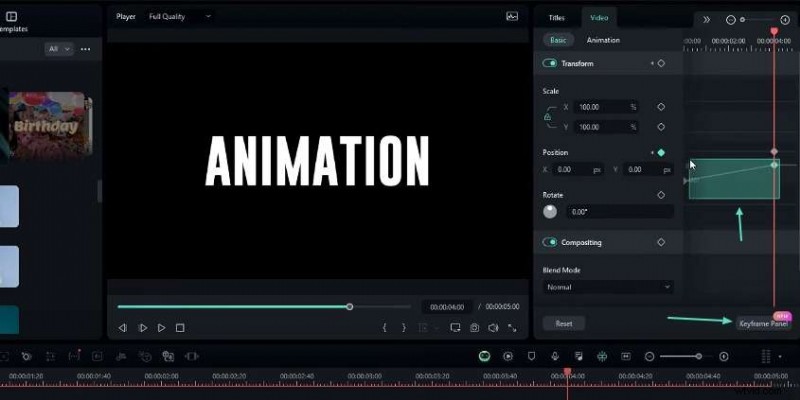
02:21 Create the rolling animation by selecting all letter layers and choosing Multiple Sections to add a keyframe on Position. At the start of the timeline, adjust each layer’s Y‑position to stagger them vertically, producing the rolling effect.
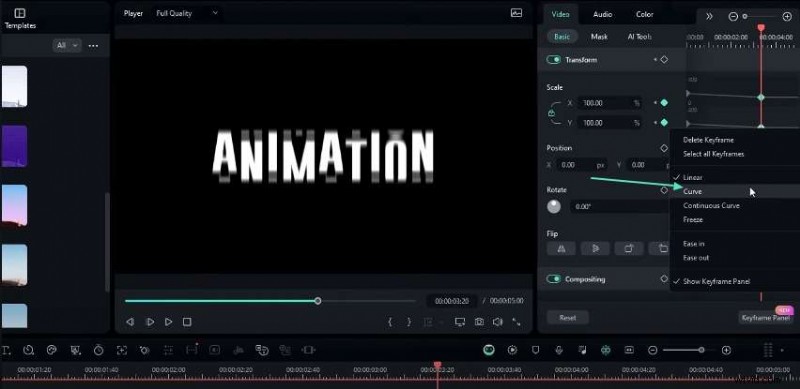
02:58 Refine the motion by adjusting the keyframe curves. Select the keyframes in the Keyframe panel and apply a curve preset to each letter layer.
03:47 Group the layers into a compound clip by pressing Alt+G and naming it “Text.” Add motion blur by selecting NewBlue FX → Stylizer → Motion Blur from the Effects tab. Configure the blur amount, angle (90°), direction (0), blend (100), and edge mode (Blank).
04:15 Animate the blur effect: at the start, keyframe the blur value at 0; a few seconds later, set it to 20; then back to 0 at the end.
05:03 Add a zoom‑out effect by keyframing the scale: start at 160%, then reduce to 100% with a smooth curve preset.
05:37 To change a letter’s color, open the compound clip, duplicate the target letter layer, and edit its color in Text Settings.
06:19 That’s the complete rolling text animation workflow in Filmora. Download the full project file from the description and explore more Filmora tutorials in my playlist. Like, subscribe, and let me know which tutorial you’d like next!
Preparation
What you need to prepare:
- A computer (Windows or macOS)
- Your video materials.
- Filmora video editor
Step 1: Create the Main Text Layer
Begin by adding a Default Title to your timeline from the Text menu. Personalize the layer’s color and type your phrase in the Text Settings. Adjust font style, size, and other attributes as desired.
Step 2: Duplicate and Edit Each Letter
Duplicate the main text layer, change its color, and delete all characters except the first letter. In Advanced Settings, type the single letter 20–30 times, then set a negative line spacing to create a vertical line.
Adjust the line spacing to a negative value (e.g., –20) and apply. Stack this layer above the original.
Step 3: Repeat for All Letters
Repeat the duplication process for each letter in your phrase. Once all layers are ready, delete the original main text layer.
Step 4: Apply a Mask Effect
Hide unwanted areas by adding a Shape Mask from the Effects tab. Adjust mask height, radius, and blur strength in the Effect Settings.

Step 5: Create the Rolling Animation
Select all vertical letter layers, then use Multiple Selection to add a keyframe on Position. At the timeline’s start, adjust each layer’s Y‑position to stagger them and achieve the rolling effect.
Step 6: Refine the Animation Curves
Open the Keyframe panel, select relevant keyframes, and apply a preset curve to smooth the motion.
Step 7: Add Motion Blur (Optional)
Apply NewBlue FX → Stylizer → Motion Blur from the Effects tab. Adjust blur amount, angle, direction, blend value, and edge mode. Animate the blur by keyframing its value over time.

Step 8: Adjust Scale and Create a Compound Clip
Introduce a zoom‑out effect: keyframe the scale at 160% at the start, then reduce to 100% later, applying a curve preset for a smooth transition. Group all layers into a compound clip with Alt+G and name it.

Summary
Creating a rolling text animation in Filmora is simple yet powerful. Experiment with colors, fonts, and animation curves to customize the effect. With practice, you’ll become an expert text animator and elevate your videos to new heights.