How to Create Stranger Things Upside‑Down Effect in Filmora
The upside‑down effect turns a regular clip into a memorable visual treat. Wondershare Filmora’s AI‑powered tools make it simple to replicate the iconic scene from Stranger Things.
Preparation
- Windows or macOS computer
- Video clips you want to edit
- Wondershare Filmora installed
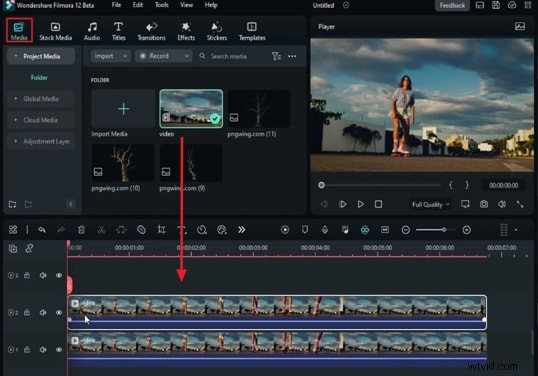
Step 1: Import Your Files
Launch Filmora and create a new project. Drag your video files from the Media tab into the timeline, placing each on a separate track.
Step 2: Enable Motion Tracking
Select a clip on the timeline, go to the right‑hand panel, and turn on Motion Tracking under the Video tab’s AI Tools section. Anchor the clip at a stable background point, then click Start Motion Tracking. Repeat for any additional clips.

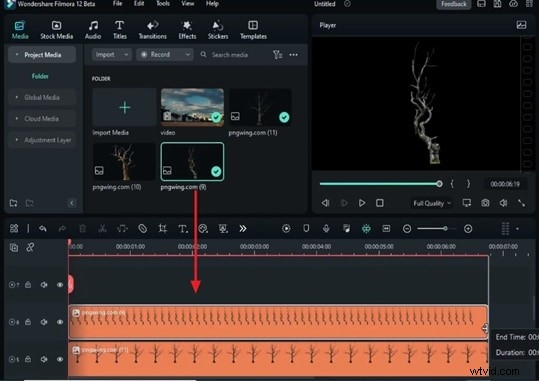
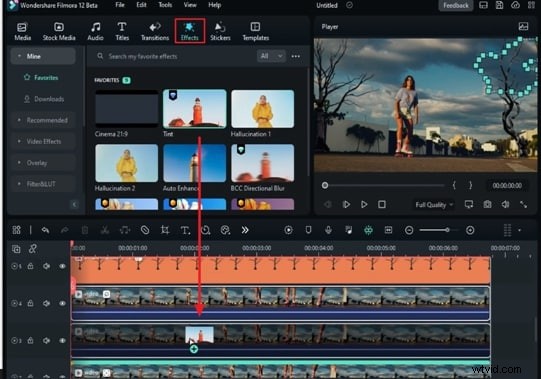
Step 3: Add PNG Elements
Import PNGs (e.g., the dead tree from pngwing.com) and drop them onto tracks above your video layers. Extend the PNG’s duration to match the clip length. Use the Link Element feature to bind each PNG to its respective video clip, then adjust Scale and Position as needed.
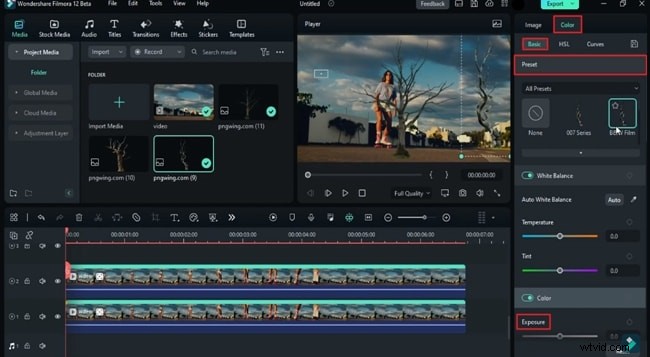
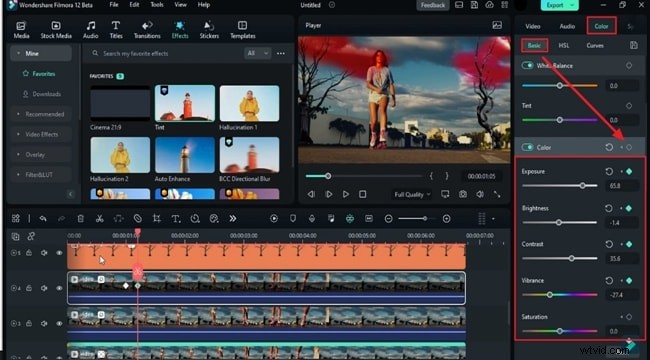
Step 4: Color Grading for Night Mode
Open the Color tab and apply a black‑and‑white preset. Reduce Exposure to create a nighttime atmosphere. Repeat the same adjustments for each PNG track.
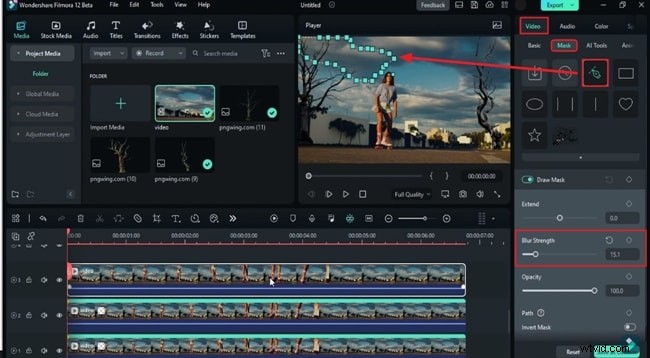
Step 5: Masking Clouds
Drop a duplicate of your video onto a new track. Use the Draw Mask tool to outline cloud areas you want to modify. Increase Blur Strength (e.g., 15–18) to soften edges.
Step 6: Colorize the Masked Layers
Apply a Tint effect to each masked track. Set the tint color to red, raise Tint % to 100%, adjust Saturation, and set Blend around 84%. Experiment with different values on each track to add visual variety.
Step 7: Add Lightning Effects
With keyframes enabled on the Color tab, craft quick flashes: raise Exposure and Contrast, then drop them back to zero in a few frames. Repeat this sequence to simulate lightning across the cloud layers.
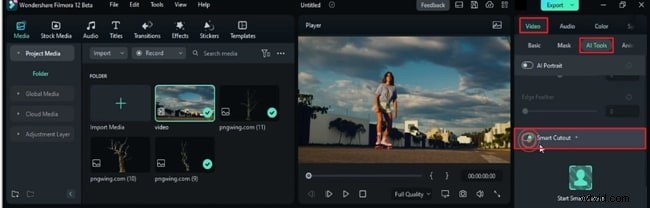
Step 8: Smart Cutout for Moving Subjects
Place a new clip on the timeline and activate Smart Cutout from the AI Tools menu. Draw a mask around the moving subject, fine‑tune the brush size, and click Start Smart Cut to track the subject throughout the clip.
Step 9: Apply Strange Effects
Drag an Adjustment Layer to the top of the timeline. Overlay effects like Strange Collection Blue and Strange Red, adjusting their opacity (e.g., 53% and 63%) to create a subtle purple hue that mimics the Upside‑Down ambience.

Render and Review
When satisfied, export your project to see the final upside‑down effect in action. Your video now mirrors the eerie atmosphere of Stranger Things.