This tutorial shows you how to recreate the iconic Stranger Things black void effect using Wondershare Filmora. Follow the clear, step‑by‑step instructions to achieve a professional‑looking result.
Tools & Setup
Before you begin, make sure you have:
- A computer running Windows or macOS
- Your raw footage (green‑screen clips and scene shots)
- The latest version of Filmora installed
Transcript (Key Steps)
00:47 – 01:05 – Record a green‑screen video of yourself in a dark room, reacting to unseen sounds, and capture clips of putting on and removing a blindfold.
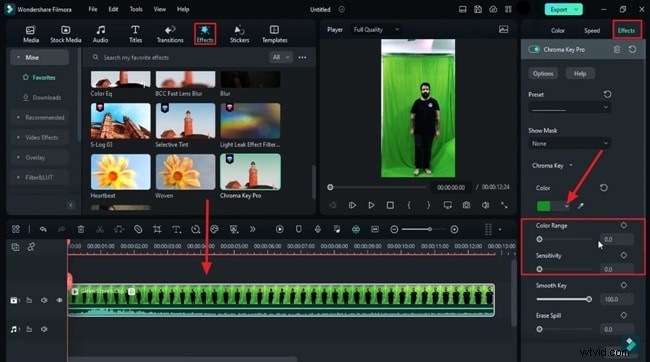
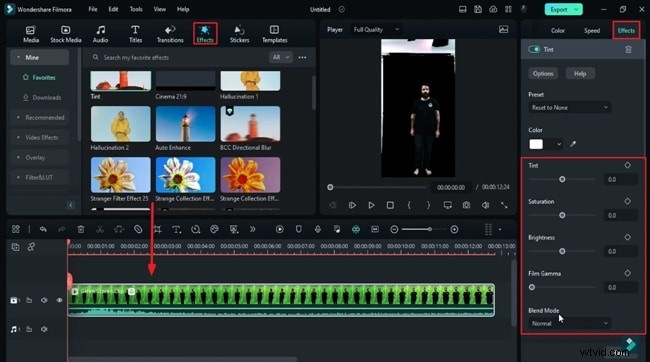
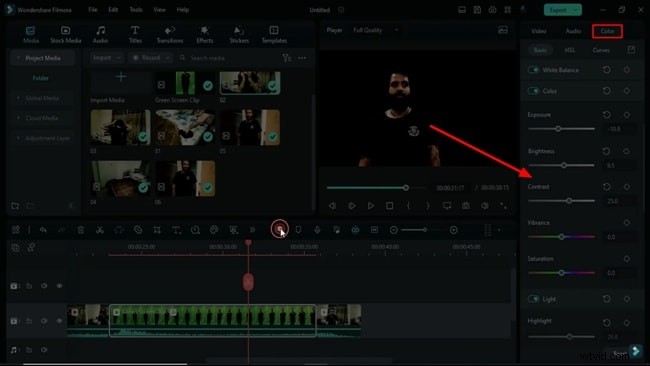
01:05 – 01:34 – Import the footage to Track 1. Apply the Chroma Key Pro effect from the New Blue FX library. Adjust Color Range to 100 and Sensitivity to 57.7. Add a Tint effect: Tint 6.3, Saturation 3.1, Brightness 9.4, Film Grain 35.9.
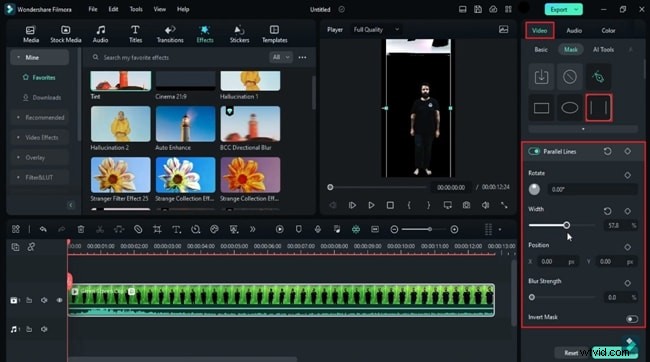
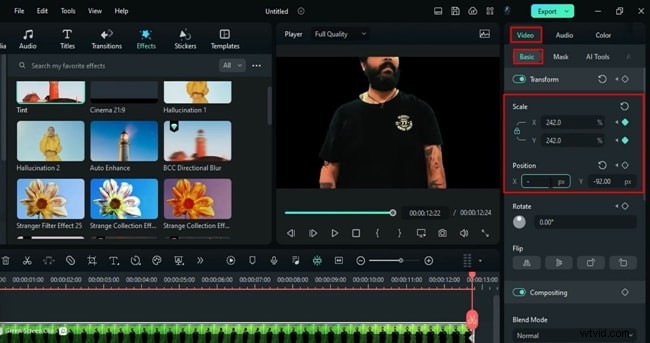
01:34 – 02:22 – Use the Mask tool to remove residual white areas. Change the project to a 16:9 widescreen ratio. Fine‑tune color: Temperature 37.5, Exposure -12.5, Highlight -20.3, Shadow -87.5, White -37.5, Black -10.9. Add Transform keyframes: start Scale 197.8, center the clip, end Scale 242, X -71.16, Y -379.05.
02:22 – 02:36 – Set an Opacity keyframe to 0 % at the clip start, then 100 % at 1 s 23 f. Move the clip to Track 2 and hide it.
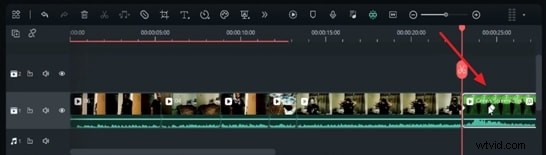
02:36 – 03:16 – Continue building the sequence: drop each scene clip onto Track 1, apply Transform keyframes for zoom‑in effects, and position them so the blindfold appears centered. Use Opacity keyframes to create smooth transitions.
03:16 – 03:55 – Finalize the edit: place the green‑screen clip after the last scene, set Y to 1200 at start, and apply final color adjustments to all clips.
Render the project to review your black void effect.
Step‑by‑Step Guide to Building the Effect in Filmora
Preparation
Gather your gear and footage before launching Filmora.
Step 1 – Set Up the Scene and Import Media
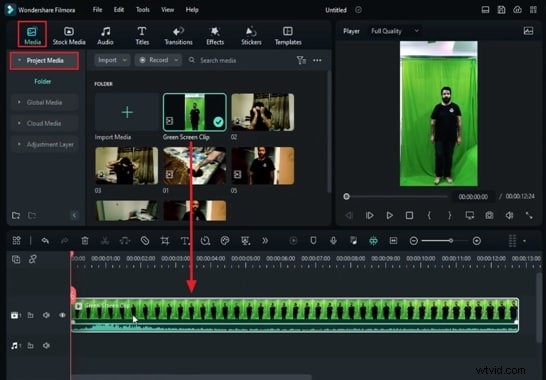
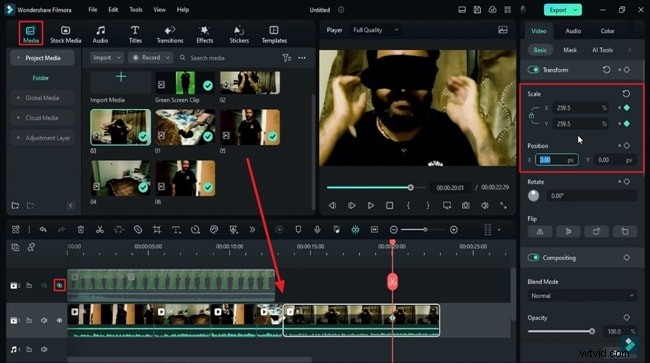
Record yourself against a green background in a dim room. Open a new Filmora project, import your clips into the Project Media panel, and drag the green‑screen footage onto the timeline.
Step 2 – Apply and Fine‑Tune Chroma Key
Select the Chroma Key effect from the Effects library, drag it onto your clip, and adjust the Color Range and Sensitivity settings to cleanly remove the green background.
Step 3 – Add a Tint Effect (Optional)
For a more cinematic look, apply a Tint effect and tweak its parameters to match the mood of the scene.
Step 4 – Remove Residual White Areas
If white artifacts remain, use the Mask tool to eliminate them.
Step 5 – Set the Aspect Ratio
Navigate to File > Project Settings and choose a 16:9 ratio for a widescreen finish.

Step 6 – Fine‑Tune Color and Position
Adjust the Color panel to balance exposure, shadows, and highlights, then position your clip at the center of the frame using Scale and Position controls.
Step 7 – Add Supporting Clips
Place the green‑screen clip on a separate track and hide it. Add other scene clips to the timeline, applying zoom‑in effects with Transform keyframes.
Step 8 – Build the Narrative Flow
Insert additional footage as needed, making sure each transition feels natural. Re‑introduce the green‑screen clip where it blends seamlessly with the story.
Step 9 – Color Correct and Export
Ensure all clips share a consistent look, perform a final review, then export your finished video.
Summary
By following these steps, you can recreate the signature black void effect from Stranger Things using Filmora’s intuitive tools. The process is straightforward, yet it delivers a polished, cinematic result.