Transform Your Music Videos into Epic Visuals with Filmora 11
With Filmora 11’s powerful AI portrait and warp‑transition tools, you can turn a simple performance into a dynamic, eye‑catching music video. This guide walks you through each step, from installation to final export, ensuring a professional finish that will captivate your audience.
What You’ll Need
- A computer running Windows or macOS
- Your raw music‑video footage (ideally featuring a single dancer for simplicity)
- Filmora 11 (the latest version for optimal performance)
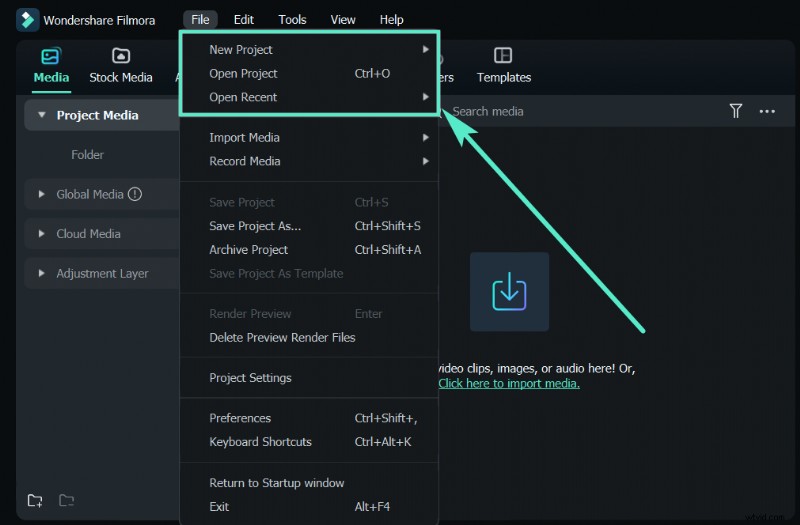
Step 1: Download and Install Filmora 11
Head to the official Filmora download page and choose the edition that matches your operating system. Follow the on‑screen prompts to complete the installation.
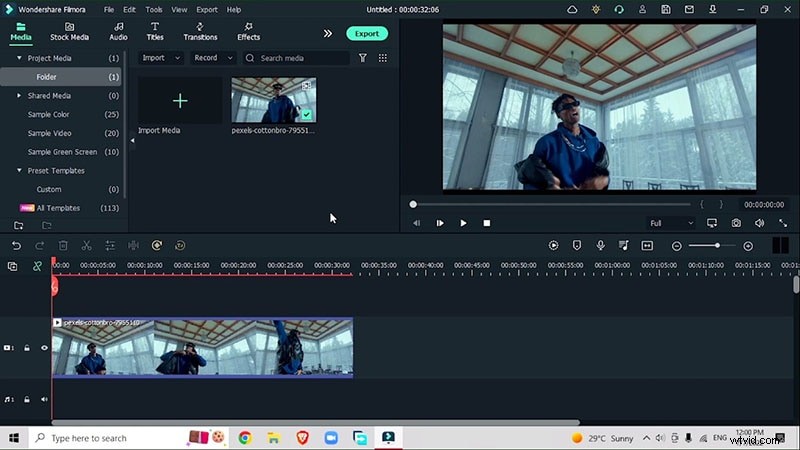
Step 2: Import Your Footage
Launch Filmora and drag your video file onto the timeline. Duplicate the clip onto a second track; this layering will allow you to isolate the subject while preserving the original background.
Step 3: Identify Rotation Keyframes
Scrutinize the clip to pinpoint moments where the dancer’s arm rises or falls—ideal spots for a rotation effect. Use the keyboard shortcut M to mark these frames for later reference.

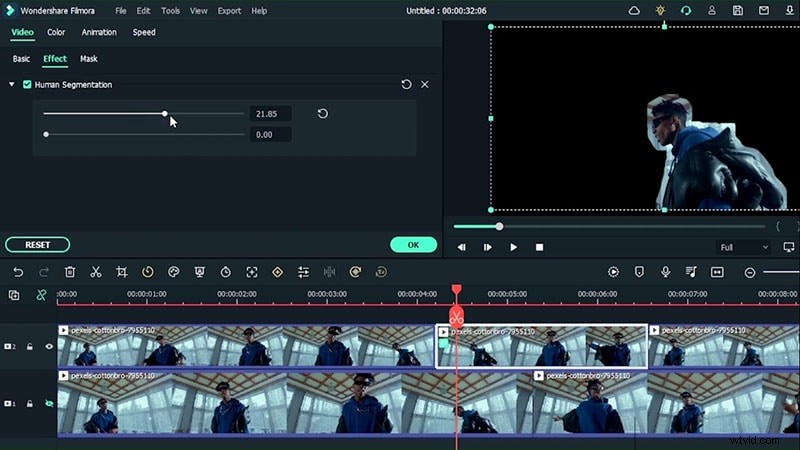
Step 4: Isolate the Subject with AI Portrait
Navigate to Effects > AI Portrait > Human Segmentation and apply it to the top track. Adjust the intensity slider until the dancer is cleanly separated from the background. Feather the edges to blend the cut more naturally.
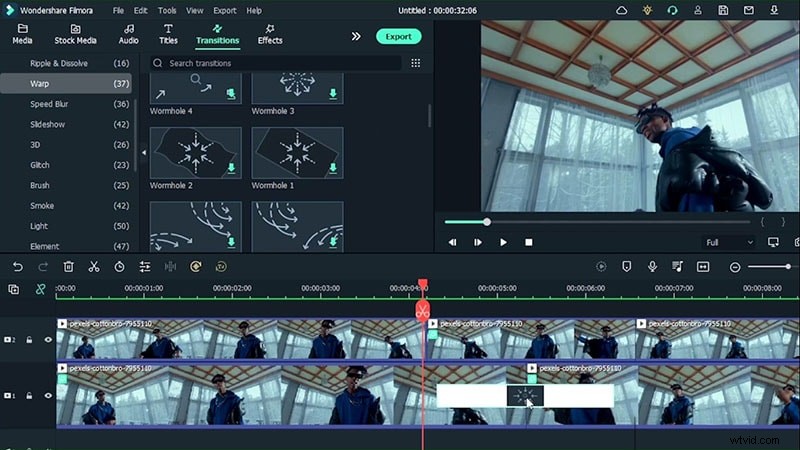
Step 5: Apply Warp Transitions
In the Transitions > Warp panel, select the Wormhole effect (or any warp transition that fits your style). Insert the transition between the two keyframes identified earlier. This will create a seamless spin that moves the dancer left and right.
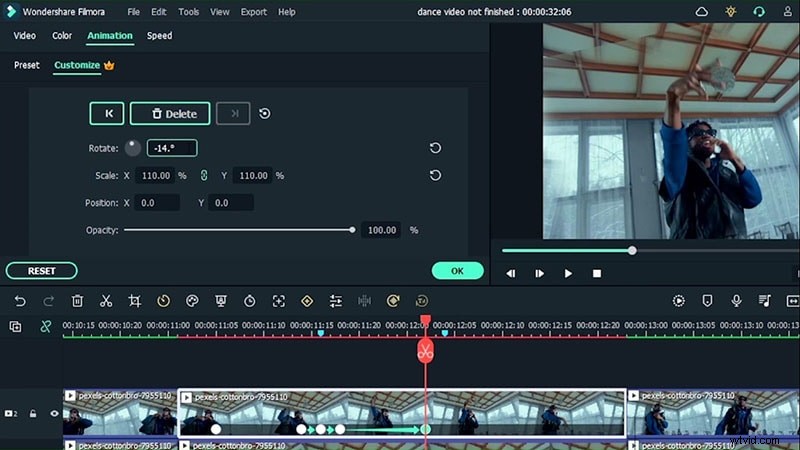
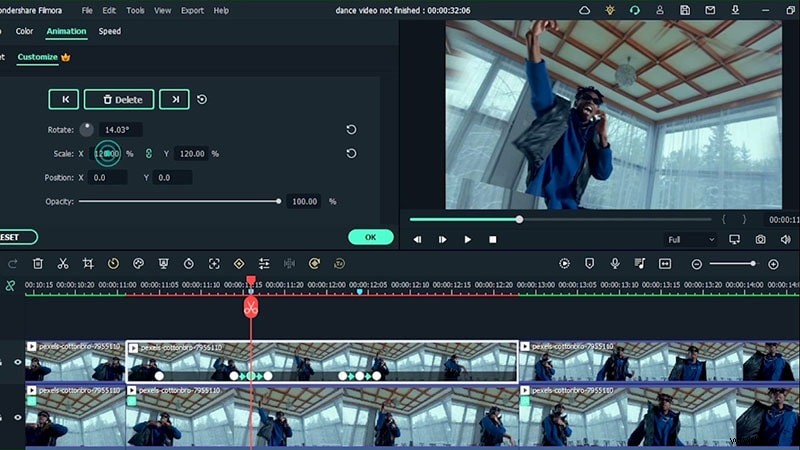
Step 6: Refine Animation and Scale
Open the Animation settings for each clip. Add keyframes where the dancer’s arm rises, then adjust the rotation angle and scale to maintain consistent motion. Use frame‑by‑frame navigation (left/right arrows) to capture precise timing.
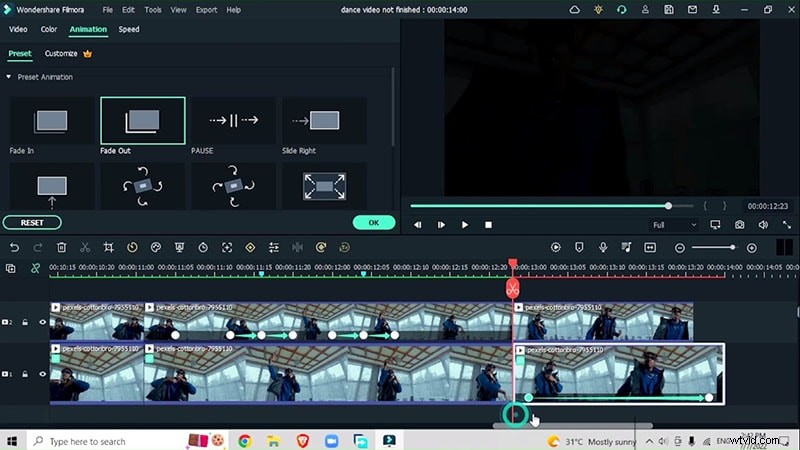
Step 7: Add Fade‑Out Presets
To soften transitions, go to Animation > Presets > Fade Out. Mark the point where you want the fade to start, then apply the preset to create a smooth exit.
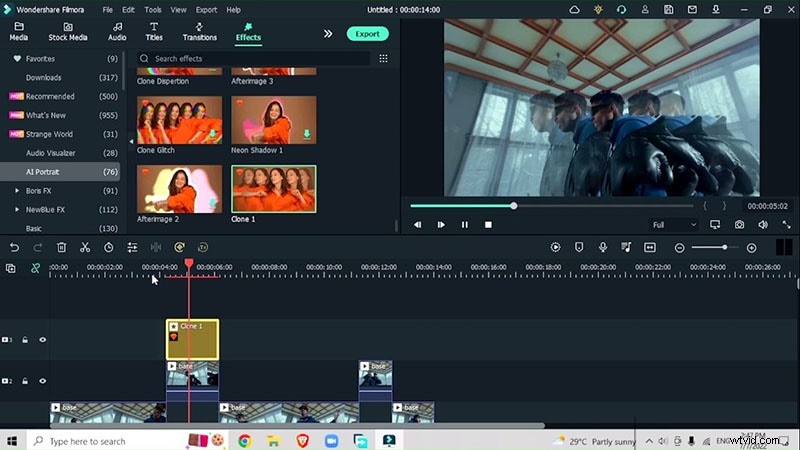
Step 8: Export and Layer Advanced Effects
Export the edited clip, then start a new project. Import the base video and duplicate the previously edited segments onto higher tracks. Apply AI Portrait effects such as Clone 1 for a multi‑dancer illusion.

Step 9: Add Cinematic Bars and Final Transitions
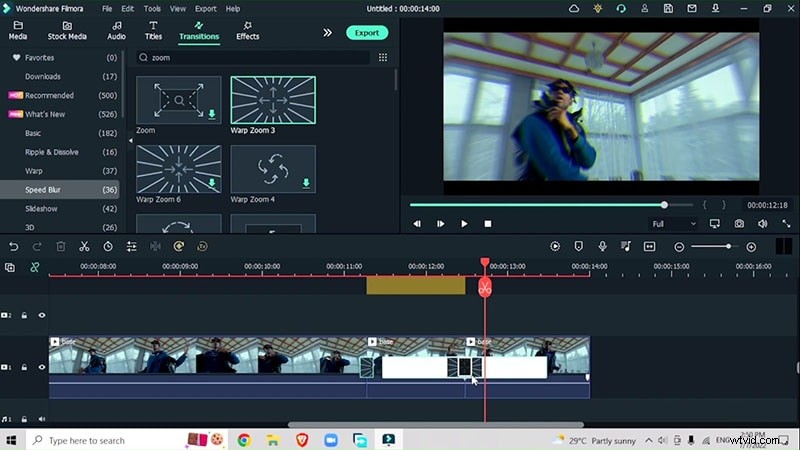
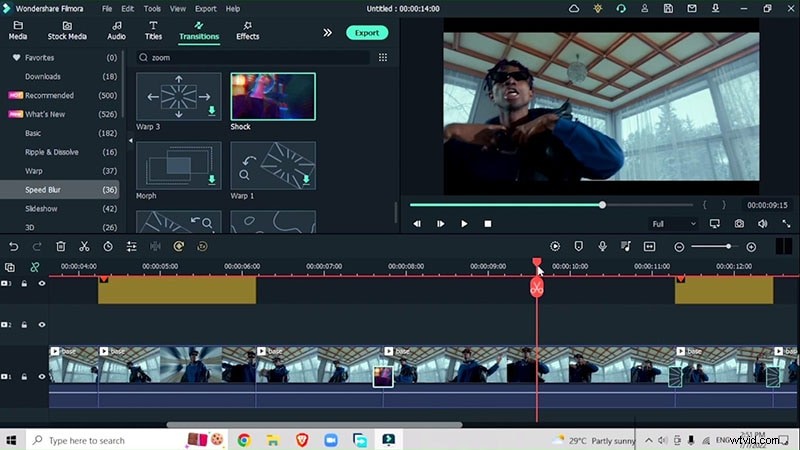
Search for “Cinema” in the effects library and overlay cinematic bar strips. Match their duration to the underlying clips and fine‑tune intensity. Between segments, insert a Warp Zoom transition from Speed Blur > Warp Zoom to maintain visual continuity.
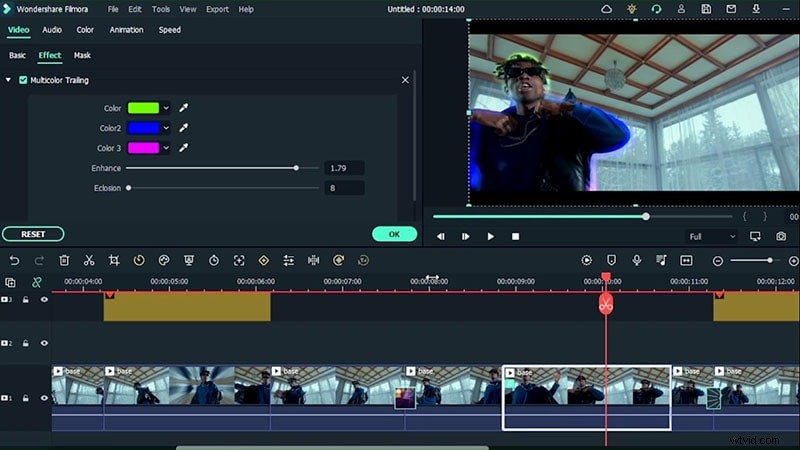
Step 10: Polish with Multicolor Trailing
Finally, apply the Multicolor Trailing effect from AI Portrait. Double‑click to adjust hue, saturation, and intensity, then integrate it across the entire timeline for a cohesive, vibrant finish.
Summary
By following these steps—leveraging Filmora 11’s AI portrait segmentation, warp transitions, and creative overlays—you’ll elevate your music video from basic to blockbuster. Start with a single dancer to master the workflow, then scale to multi‑subject productions with confidence.