Want to guarantee that your captions are always visible, no matter the device or platform? Learn the difference between soft and hard subtitles, discover why hard‑coded captions matter, and follow our step‑by‑step guide to embed them using Clideo’s intuitive online tools.
In this article you’ll master the art of hardcoded subtitles—also called burned‑in captions—while gaining insight into their advantages, potential drawbacks, and the best practices for making your video accessible to a global audience.
Table of contents
- Benefits of subtitles
- Hardcoded vs. soft subtitles
- Why choose hardcoded subtitles?
- How to burn subtitles into video
- Frequently asked questions
- Conclusion
Benefits of subtitles
Subtitles enhance the viewing experience in multiple ways:
- Accessibility in all settings: They enable audiences to follow the content in noisy venues or when sound must be muted.
- Improved comprehension: Subtitles help viewers understand rapid speech or strong accents.
- Language support: They provide translations for international audiences.
- Message reinforcement: Repetition in text supports retention and clarity.
- SEO advantage: Textual captions allow search engines to index keywords.
- Inclusivity: Subtitles meet the needs of people with hearing impairments.
Hardcoded vs. soft subtitles
Subtitles are generally split into two categories: soft (closed captions) and hardcoded (open captions).
Soft subtitles are separate files—SRT, VTT, or similar—that the player loads on demand. They offer flexibility but can suffer from playback inconsistencies or sync issues, depending on the player’s compatibility.
Hardcoded subtitles are permanently burned into the video image. Once embedded, they cannot be turned off or edited, but they guarantee perfect synchronization and universal visibility across any device or platform.
With a growing share of viewers watching muted or audio‑disabled content—whether for hearing impairment, public settings, or personal preference—both soft and hard subtitles are essential for a fully inclusive experience.
Why choose hardcoded subtitles?
Before embedding captions, consider the trade‑offs. Here’s a quick rundown of the main pros and cons.
Advantages
- Device‑agnostic compatibility: No external subtitle file is needed; playback works on any player.
- Guaranteed sync: Embedded captions stay perfectly aligned with the audio.
- Platform flexibility: Ideal for services that don’t support subtitle uploads, such as Instagram or TikTok.
- Reliable translations: International viewers see the correct language every time.
- Accessibility for hearing‑impaired audiences: Captions are always present.
Disadvantages
- Viewers cannot toggle or customize the captions.
- Embedded captions cannot be removed or edited without re‑encoding the entire video.
- There may be a slight loss of video quality during the encoding process.
How to burn subtitles into video
Ready to embed subtitles? Clideo’s Subtitle tool offers a straightforward, browser‑based workflow that supports manual entry, file import, or AI‑generated transcripts—all without installing software.
Below is a concise guide to using Clideo’s Subtitle tool.
-
Upload your video
Open the Subtitle Creator in any web browser and click “Choose file.” You can upload from your local drive or connect to cloud services like Google Drive or Dropbox for a seamless workflow.
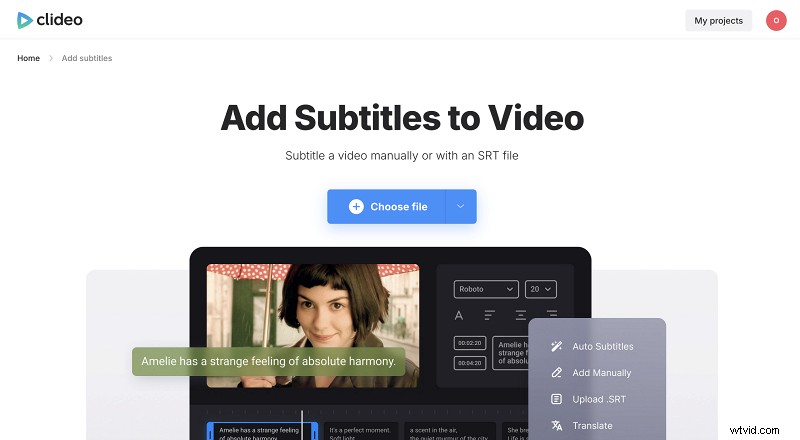
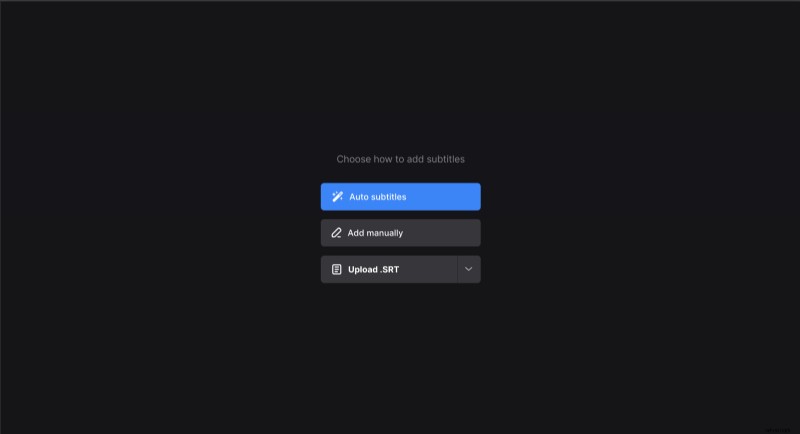
Once the video loads, you can create subtitles automatically, manually, or by importing an existing .SRT file.
-
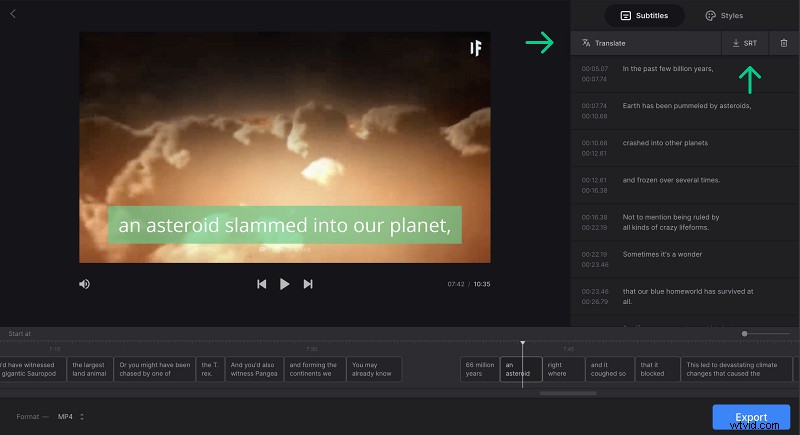
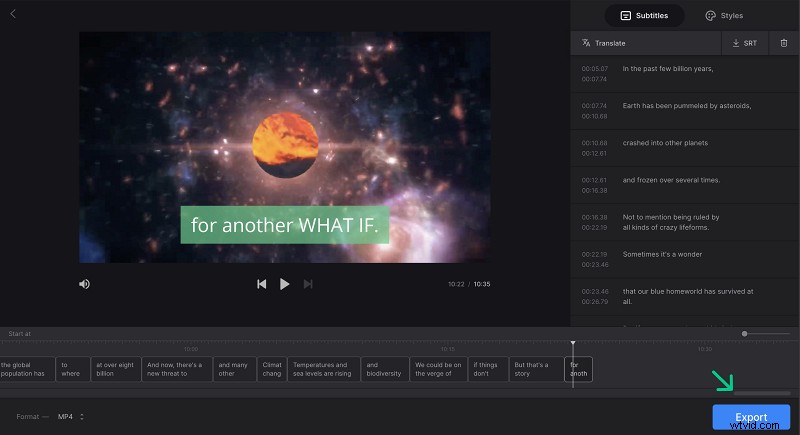
Edit subtitles
The editing pane lets you add, remove, reorder, and fine‑tune timing. You can also tweak the font, size, color, and background to match your brand’s style.
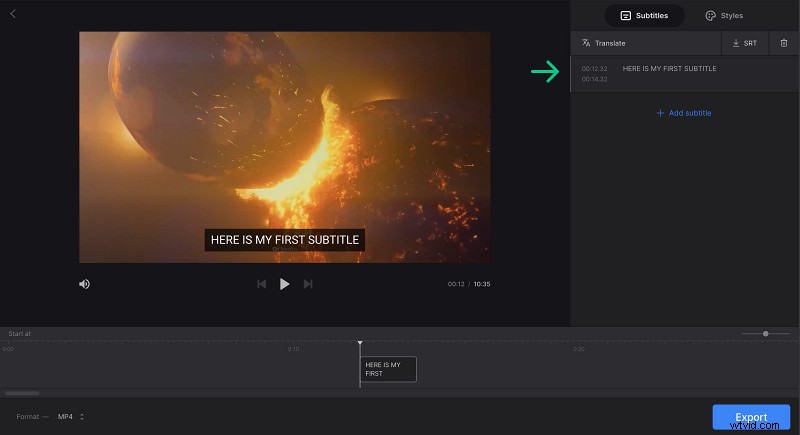
For projects that may need future edits, save the captions as an .SRT file before exporting.
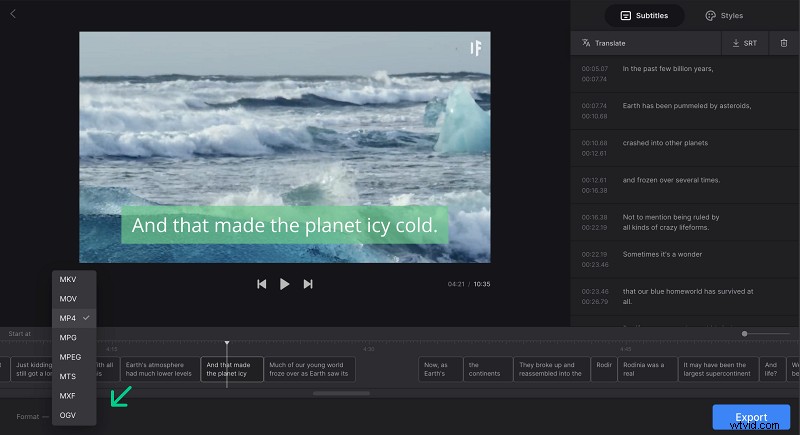
Choose MP4 or MOV as the output format for maximum compatibility with social platforms and web hosting.
When you’re satisfied, hit “Export” and let Clideo render the final file.
-
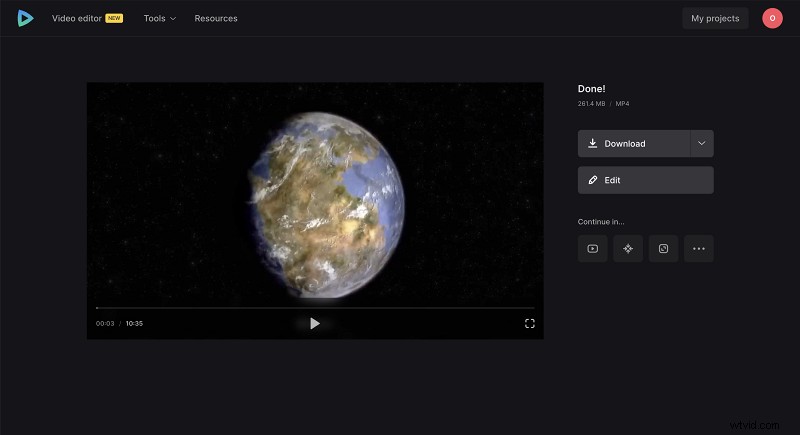
Finalize and download
After rendering, you can preview the hardcoded subtitles. If everything looks good, download the finished video. Any future edits would require re‑uploading and re‑exporting.
For the latest updates on Clideo’s tools, consult our Help Center.
Frequently asked questions
Can I upload any video format to the subtitle tool?
Yes. Clideo supports MP4, MOV, AVI, and many other formats, ensuring broad compatibility.
Is it possible to add subtitles automatically?
Absolutely. The auto‑subtitle generator extracts audio and creates captions, though longer videos may require a Pro plan.
Can I customize the subtitle style?
Yes. You can adjust font, size, color, and background to maintain brand consistency.
Can I translate subtitles with Clideo?
The platform includes an in‑app translation feature, allowing you to create multilingual captions without leaving the editor.
Can I edit the hardcoded subtitles after downloading?
No. Once subtitles are burned into the video, they become part of the image and cannot be altered.
Make videos with subtitles
Adding hardcoded subtitles is a quick, effective way to improve clarity and broaden reach.
Conclusion
Professional subtitles signal a commitment to accessibility, boost engagement, and enhance brand reputation. With Clideo’s user‑friendly Subtitle tool, you can embed high‑quality, hard‑coded captions in minutes—no software installation required. Whether you’re targeting global audiences, ensuring compliance for hearing‑impaired viewers, or maximizing visibility on social media, hardcoded subtitles provide a reliable, device‑agnostic solution. Try Clideo today and elevate your videos with crisp, burn‑in captions.