While it may seem intimidating, reshaping a scene’s mood—from bright and sunny to cool and dramatic—can be done with a few deliberate adjustments. Premiere Pro’s Lumetri Color effect lets you fine‑tune tone, color, and contrast without relying solely on a LUT.
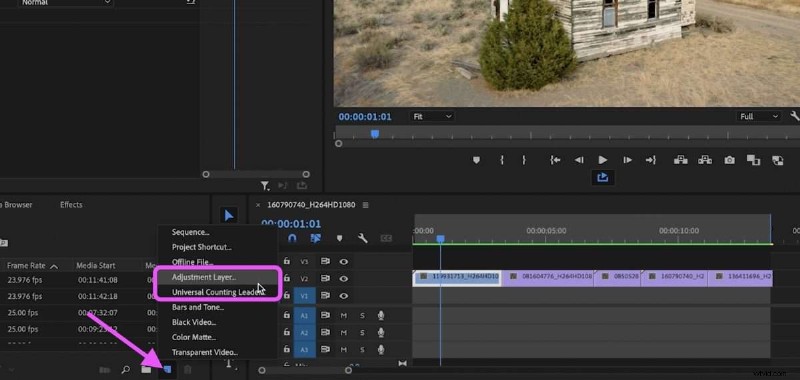
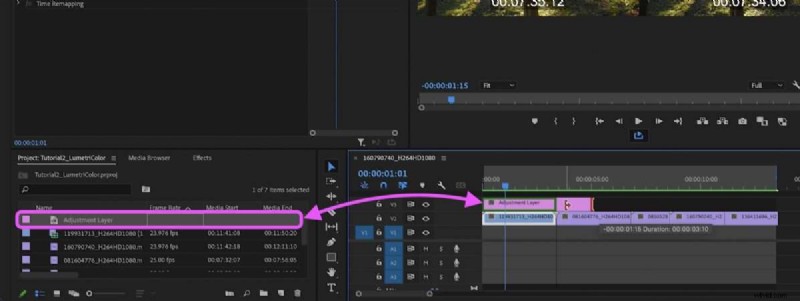
Our example footage is bright, cheerful, and full of daylight. Our goal is to turn it into a colder, darker, and more cinematic look. The first step is to create an adjustment layer, which applies effects to everything beneath it on the timeline.
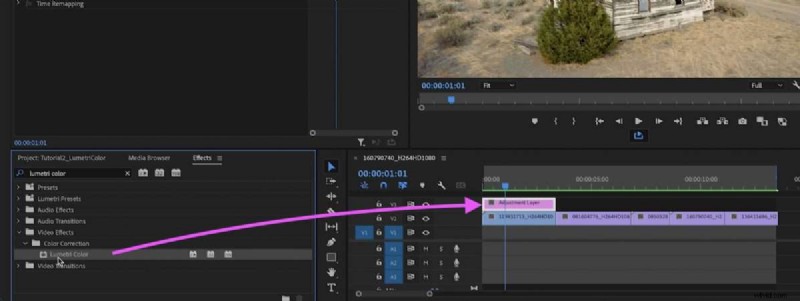
Next, locate the Lumetri Color effect in the Effects panel and drag it onto the adjustment layer.
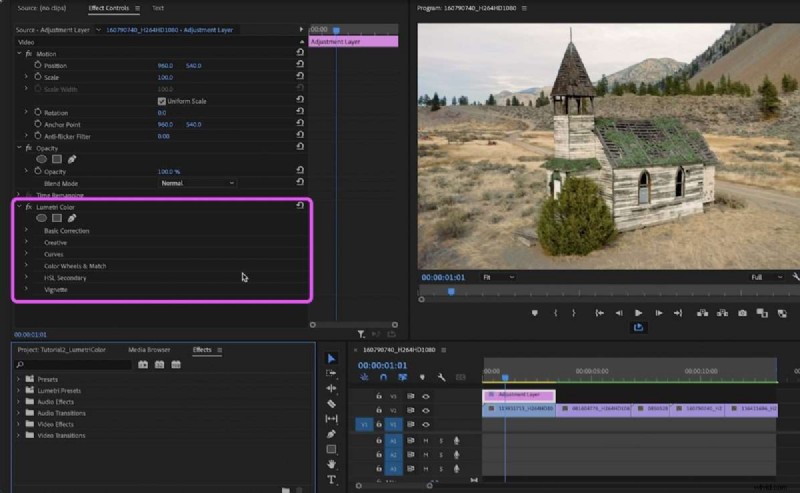
Select the adjustment layer and open the Effect Controls panel. Here you’ll see all of the adjustable parameters. Play around to find what works for your scene.
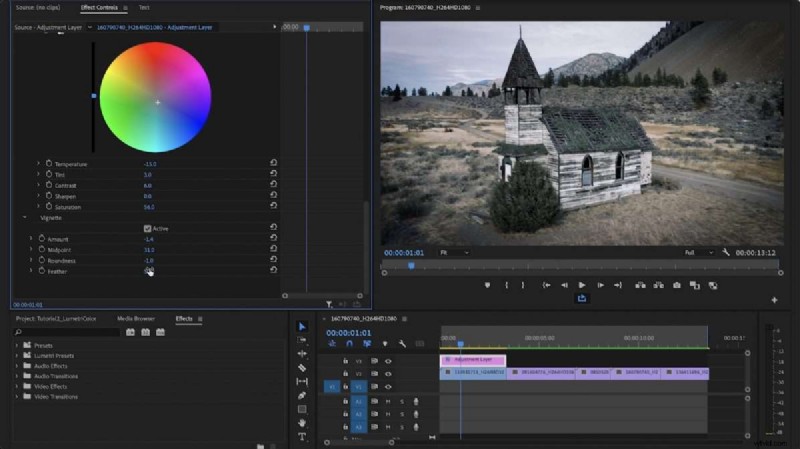
Because we’re aiming for a cool, cinematic look, start by reducing the Temperature slider to bring in more blue tones. Lower the Saturation slightly to tone down the colors, and adjust the White, Shadow, and Highlight sliders to refine the overall exposure.
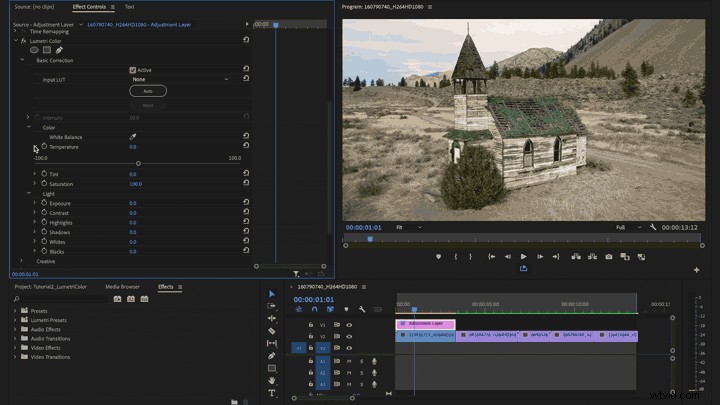
Move on to the Creative section. For this clip, we simply dialed Vibrance down a touch to create a more muted palette. Experiment with these settings, but remember that over‑correction can quickly make footage look artificial.
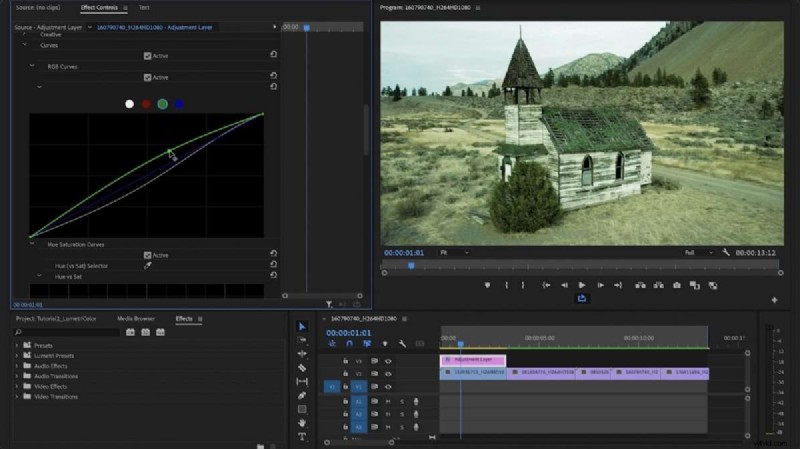
Curves give you pixel‑level control over brightness and color. The default diagonal line runs from shadows (bottom‑left) to highlights (top‑right). Click along the line to add keyframes, then drag to shape the curve and adjust the image’s contrast and color balance.
Start by selecting the white dot in the middle of the line. Move it up or down to boost or cut overall luminance. Adding more keyframes allows you to target specific tonal ranges.
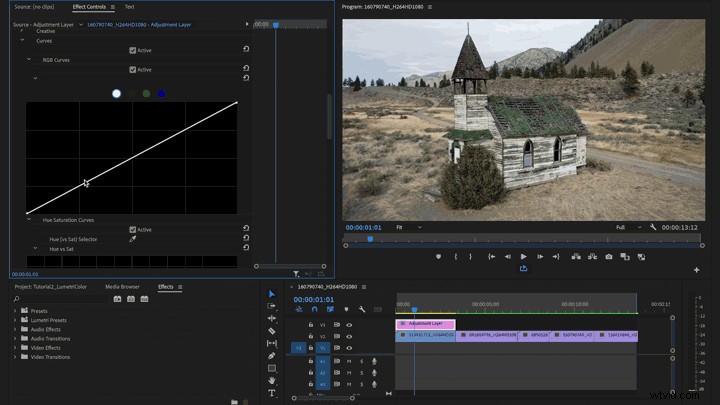
After adjusting the overall curve, you can fine‑tune individual color channels by clicking the colored dots. For example, if greens remain too prominent, click the green dot and tweak that channel independently.
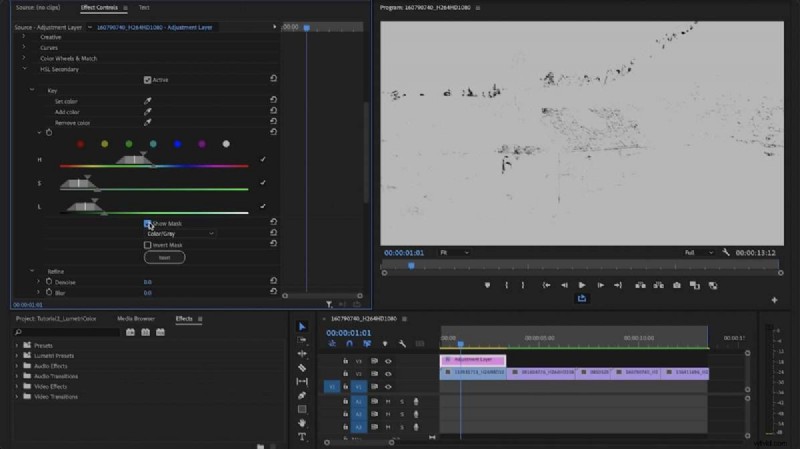
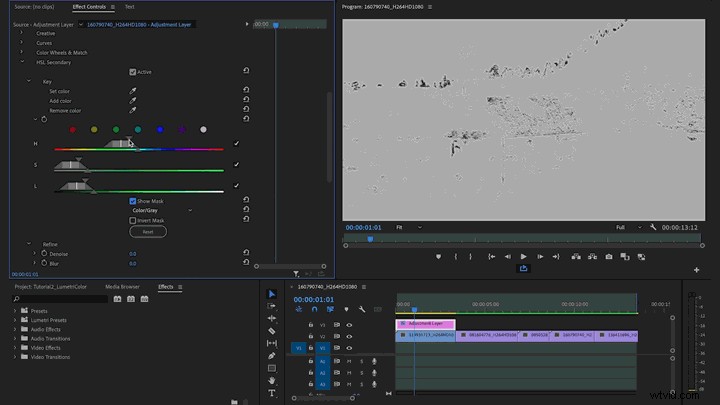
Once you’re satisfied with the primary corrections, open the HSL Secondary panel. This lets you isolate and adjust a specific hue, saturation, or luminance range—ideally after your primary edits.
Set the color picker to the green hue you want to tweak, then click “Show Mask” to view the selected area. Drag the Hue, Saturation, and Luminance sliders to widen or narrow the selection. You can also adjust the saturation and temperature of the selected colors.
The final tweak is a subtle vignette. Set the amount to –1 to darken the edges, and adjust Midpoint, Roundness, and Feather to shape the transition smoothly.
Toggle the adjustment layer’s visibility to double‑check the look before applying it to the rest of your timeline.
To extend these settings across your sequence, simply stretch the adjustment layer over the desired clips. If your footage varies widely, use the razor tool to cut the layer so it only affects relevant sections.
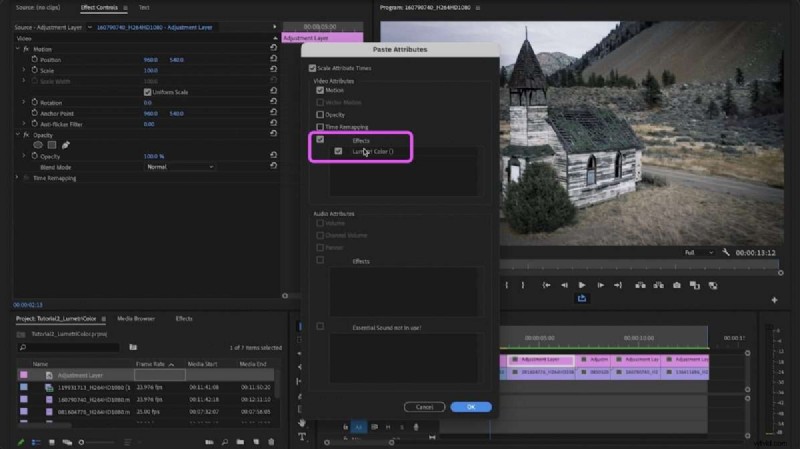
You can also copy the adjustment layer’s attributes and paste them onto other layers via the “Paste Attributes” function, selecting only the effects you need.
Compare the original footage with the adjusted version to see the dramatic transformation.
Need footage to practice? Pond5 offers licensed clips, and the Pond5 Free Collection has thousands of assets you can download and test.
There’s plenty more to explore—next tutorials will cover audio adjustments, preset creation, color matching, and additional Lumetri tricks.