Every day, Instagram users collectively spend 17.6 million hours watching Reels. These bite‑size videos capture attention and keep viewers hooked. To boost engagement and expand your reach, creating Reels is essential.
Ready to start? In this guide we’ll explain why Reels matter, walk you through a proven step‑by‑step workflow, and share best‑practice insights to help you grow your audience.
Why You Should Create Instagram Reels
Reels are not just another feature – they’re a powerful marketing tool. Below are the top reasons to incorporate them into your strategy.
1. Amplified Visibility
Reels appear on both the Explore page and in followers’ feeds, giving your content a chance to reach users who don’t follow you yet. According to Statista, accounts with up to 500 followers can achieve an average reach rate of 892% when posting Reels.
Expert tip: Leverage social‑media growth frameworks from industry leaders like Jade Beason to boost influence.
2. Higher Engagement
Short‑form content invites rapid interaction: likes, comments, shares, and even remixing. A study found that 35.4% of all Instagram likes come from Reels.
Because Reels are quick to watch, viewers spend less time deciding whether to engage.
3. Showcase Creativity & Branding
With music, effects, and trending formats, Reels let you express your brand personality in a visually striking way.
4. Product & Service Promotion
Businesses can demonstrate products in action, often leading to higher conversions. Research indicates that 77% of users purchase after viewing a Reel.
5. Low‑Barrier Production
Reels range from 15 to 90 seconds, making them quicker to create than long‑form videos while still delivering impact.
Step‑by‑Step: How to Create Successful Instagram Reels
Follow these eight stages to produce high‑quality Reels that resonate.
1. Plan Your Reel
Define the goal, key message, and format before filming. Draft a storyboard or outline to keep the narrative focused.
2. Craft a Hook
The first 3‑5 seconds must grab attention. Use a striking visual, a punchy line, or a trending audio snippet to pull viewers in.
3. Record Your Content
Within the Instagram app, tap the + icon, select Reel, and choose between on‑device recording or uploading a pre‑recorded clip. Instagram offers AR effects, text overlays, countdown timers, and filters to enhance your footage.
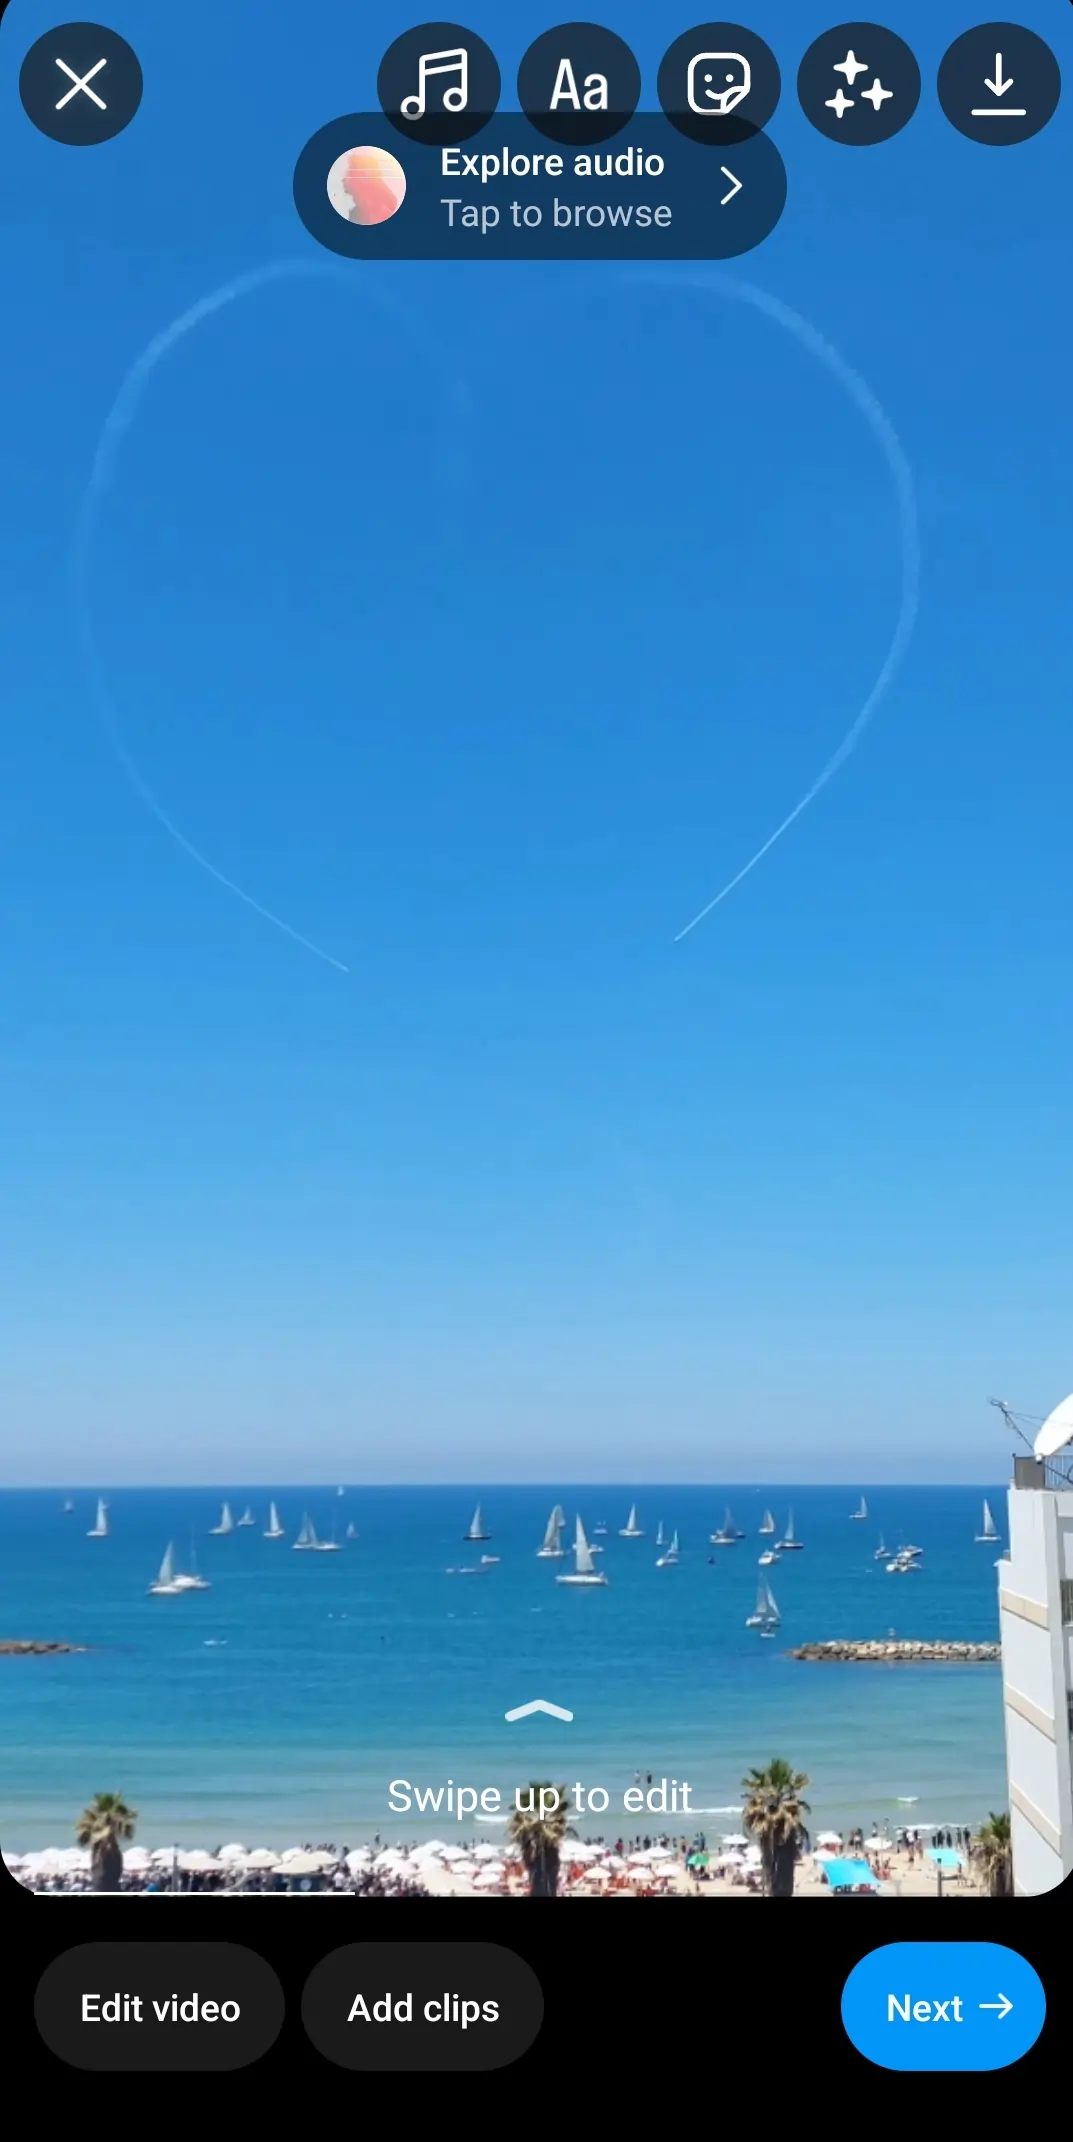
For higher‑quality production, tools like Riverside enable 4K recording and quick clipping via Magic Clips.
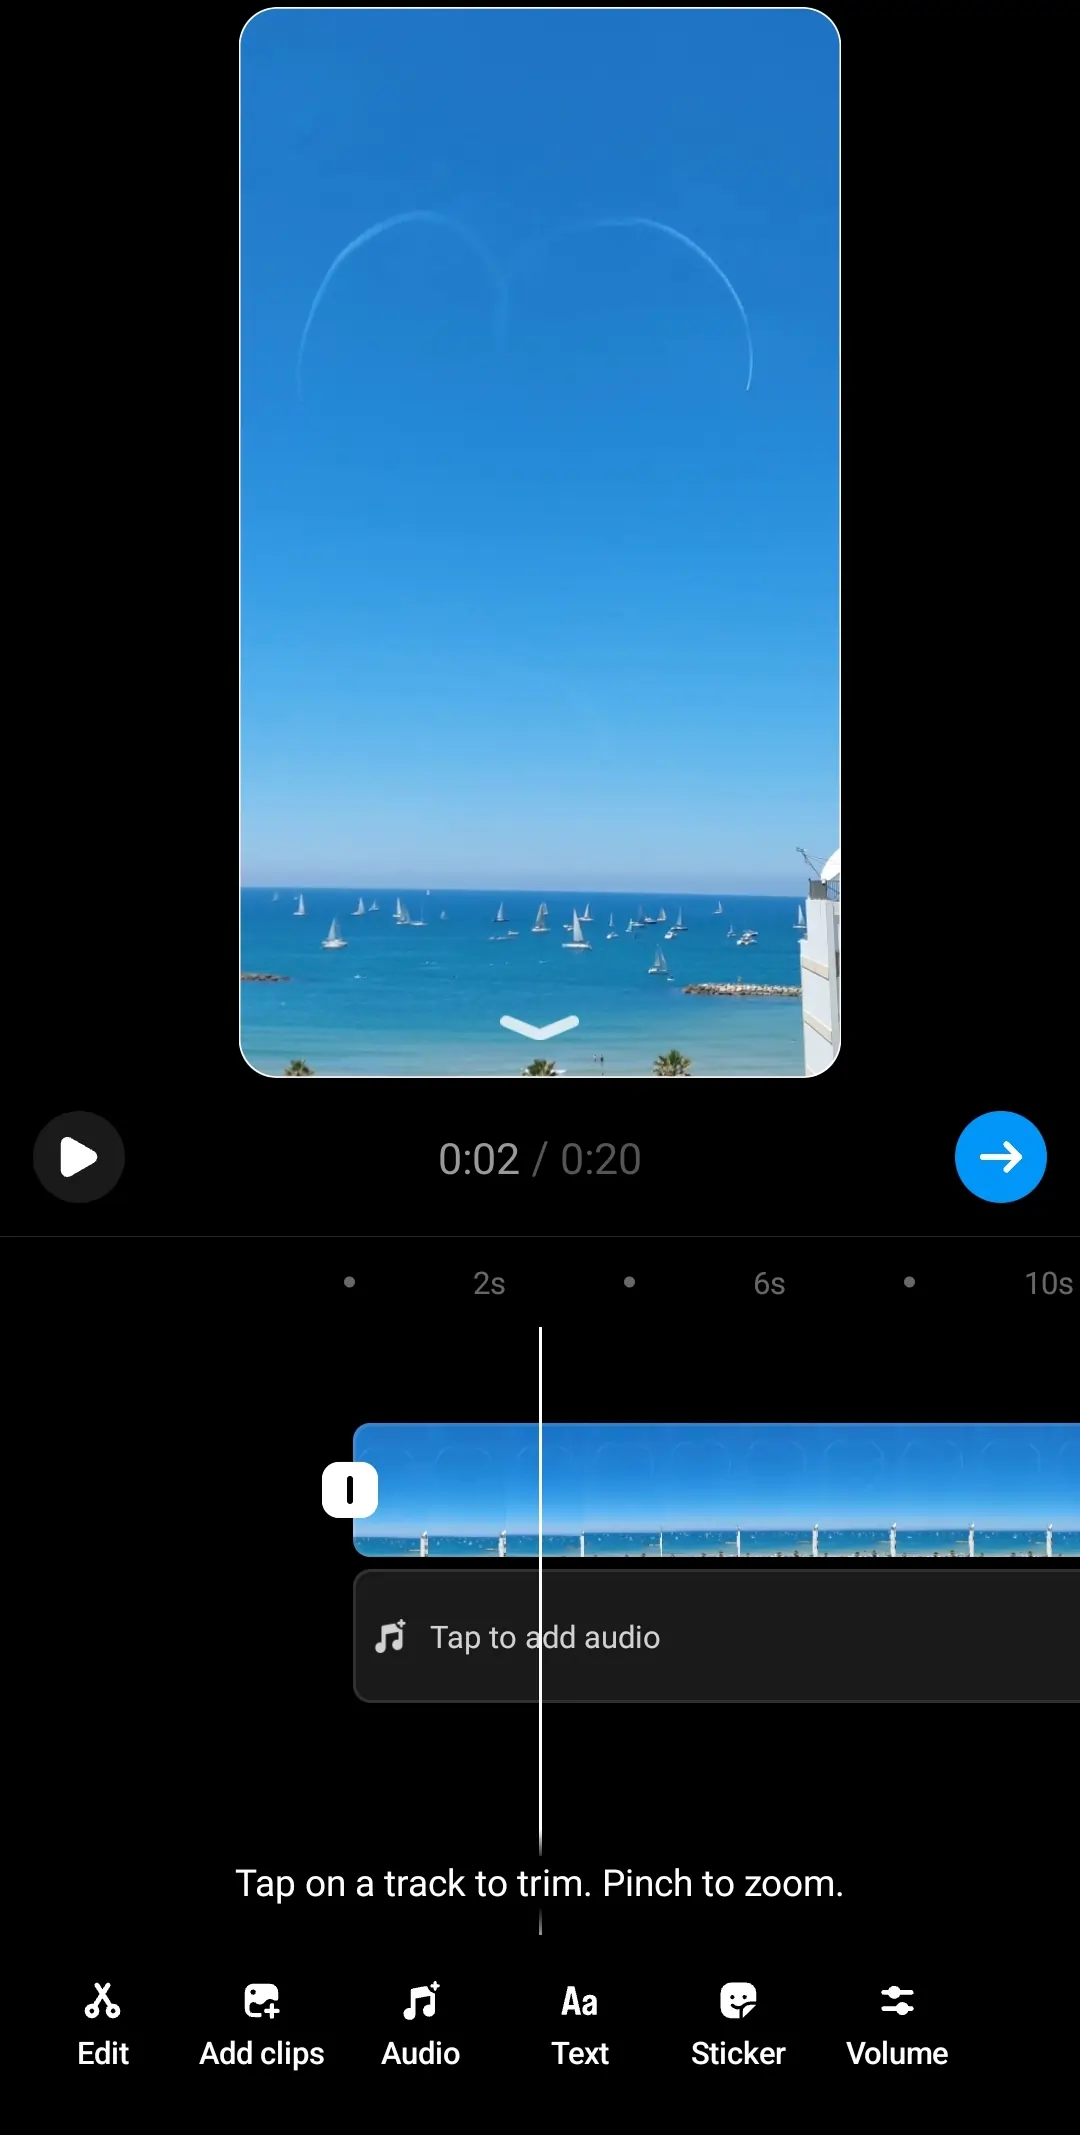
4. Edit Your Video
Use Instagram’s built‑in editor or an external tool for greater control. Key features include:
- Text and sticker insertion
- Audio management and music selection
- Volume adjustment
- Trim and cut
- Transitions and visual effects
External editors reduce the risk of accidental loss and offer advanced capabilities such as AI‑powered subtitles.
5. Prepare for Publishing
Upload the final clip, then add a concise, engaging caption. Storytelling, a clear call‑to‑action, or a thought‑provoking question can elevate engagement.
6. Share at the Right Time
Post during peak activity windows for your audience and tag relevant accounts or use strategic hashtags to maximize reach.
7. Measure Performance
Leverage Instagram Insights to track impressions, reach, average watch time, and engagement metrics. Use this data to refine future Reels.
8. Repurpose Your Content
Transform a single Reel into TikTok clips, YouTube Shorts, or Facebook Reels. Repurposing extends content life and broadens audience exposure.
Streamlining Reels Production with Riverside Magic Clips
Riverside’s Magic Clips turns a single 90‑second recording into multiple shareable Reels with a single click. Features include:
- AI‑identified highlights for instant clipping
- Text‑based editing with AI transcription
- Customizable layouts and backgrounds
- 4K recording and noise reduction
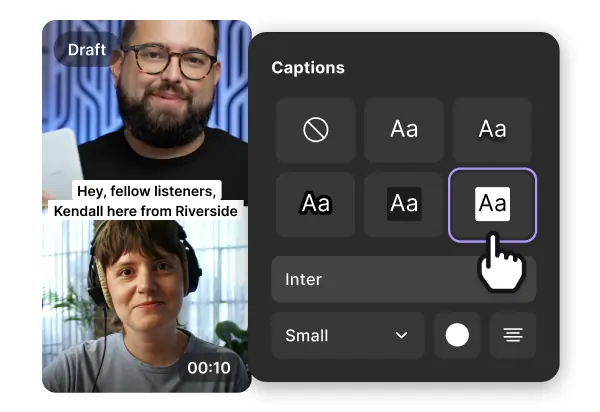
- Subtitle generation and style options
Follow these streamlined steps to create and publish Reels directly from Riverside:
- Sign up and select a plan that fits your budget.
- Create a new studio and configure audio‑video settings.
- Invite collaborators if needed.
- Record your session, marking key moments with the Mark Clip button.
- After uploading, generate clips from the Magic Clips panel.
- Edit clips via the text editor and add subtitles.
- Export your chosen clip and upload it to Instagram as a Reel.
Best Practices for Maximizing Reach
Follow Design Guidelines
Place text and captions within the visible area of the frame to avoid being obscured by on‑app buttons.
Leverage Trending Challenges & Hashtags
Participation in popular challenges and inclusion of relevant hashtags increases discoverability.
Craft Compelling Captions
Captions that entertain, inform, or ask questions encourage comments and shares.
Strategic Audio Use
Choose engaging music or custom audio that aligns with your brand voice.
Showcase Personality & Style
Authenticity builds trust; let your unique voice shine through each Reel.
Deliver Concise Stories
In under 90 seconds, convey a clear message or narrative that delivers value quickly.
Maintain a Consistent Posting Schedule
Regularly publishing Reels keeps your audience engaged and signals activity to the algorithm.
Collaborate & Cross‑Promote
Partner with other creators to tap into new follower pools.
Engage with Your Audience
Respond to comments, gather feedback, and adapt content based on insights.
Repurpose Strategically
Convert high‑performing Reels into content for TikTok, YouTube Shorts, or other platforms to maximize ROI.
FAQs
How do I create a Reel with photos and music?
Open the Reels tab, tap +, then Gallery to select images. Drag edges to set duration, tap Audio to add music, and then use text, stickers, or effects. When satisfied, tap Share.
Can I upload a video as a Reel?
Yes. In the Reels creation screen, tap Gallery, select your video, trim if needed, then publish.
Is posting a Reel better than a regular post?
Reels currently enjoy a 14% reach rate, the highest among Instagram formats, outperforming regular posts which average 9–10%.
What distinguishes a Reel from a post?
Reels are vertical, up to 90 s long, and feature music, stickers, and effects. Posts can be vertical or horizontal, up to 10 min, and lack the built‑in audio and sticker options that Reels provide. Reels also appear in the dedicated Reels tab, offering greater discoverability.