If you’re working with video, you’ve probably noticed clips with cool 3D text that look like they required Maya or Cinema 4D to create. With After Effects CS6’s new Ray-Traced 3D Compositions, though, you now have the ability to extrude and bevel text and objects just like full 3D programs — or at least close enough.
This tutorial will show you how to do it. You’ll need a basic knowledge of lighting and 3D Camera Tracking before you start, so if you need a refresher on those check out our previous tutorial on adding 3D elements to your videos.
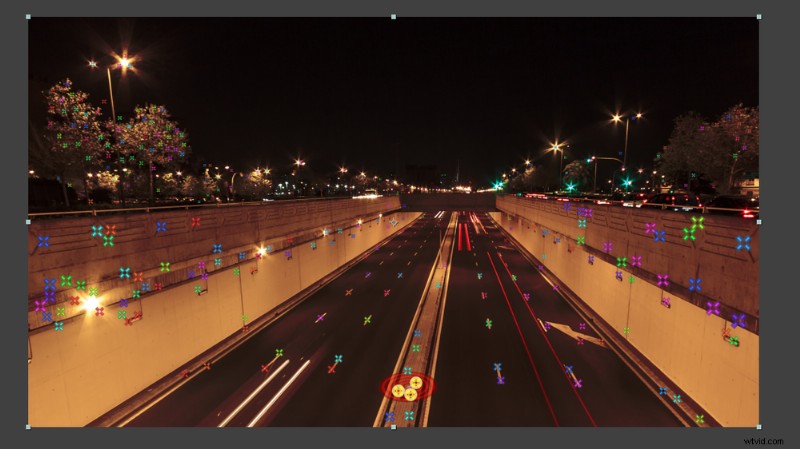
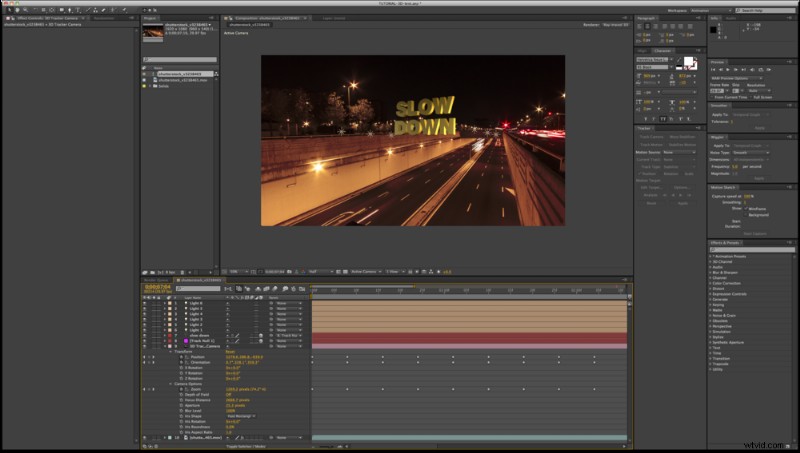
The clip we’ve selected to use here is Urban Traffic Hyperlapse – Timelapse by contributor Efecreata Photography.

Step 1
To start, import your footage file and create a new composition. Go to Composition > Composition Settings… and choose Advanced. Change your composition from Classic 3D to Ray-traced 3D.
Step 2
Next, we’ll get our camera tracking out of the way. Go to Animation > Track Camera, and wait while After Effects analyzes your video in the background.
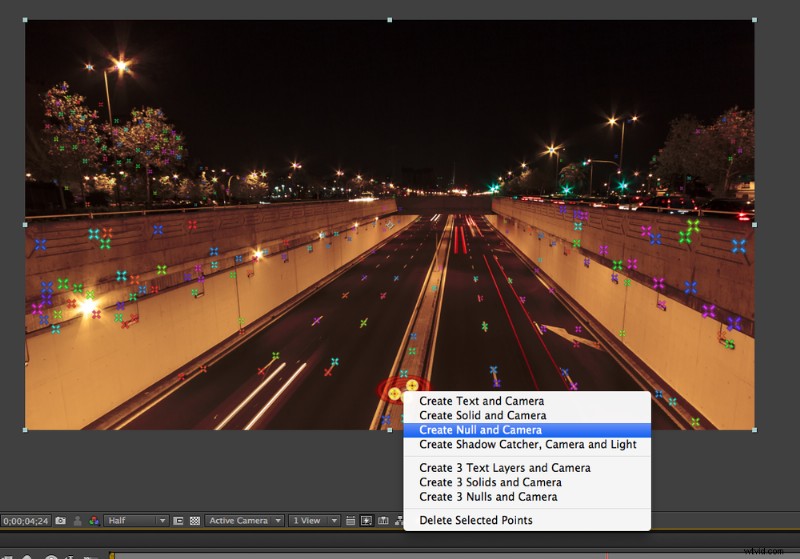
Step 3
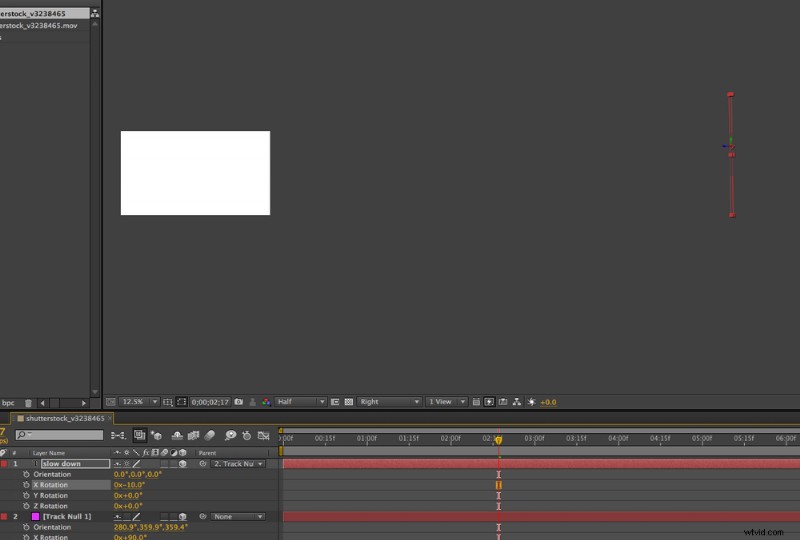
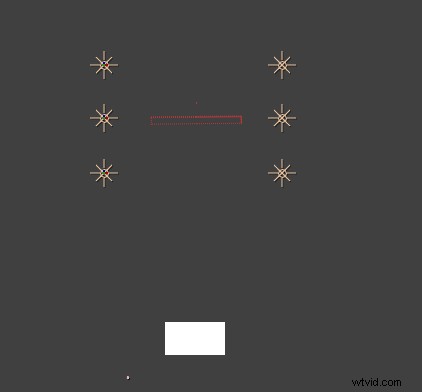
This step was also part of our previous tutorial. Select the points on the plane that you want your text or object to live on. Right-click and select Create Null and Camera.
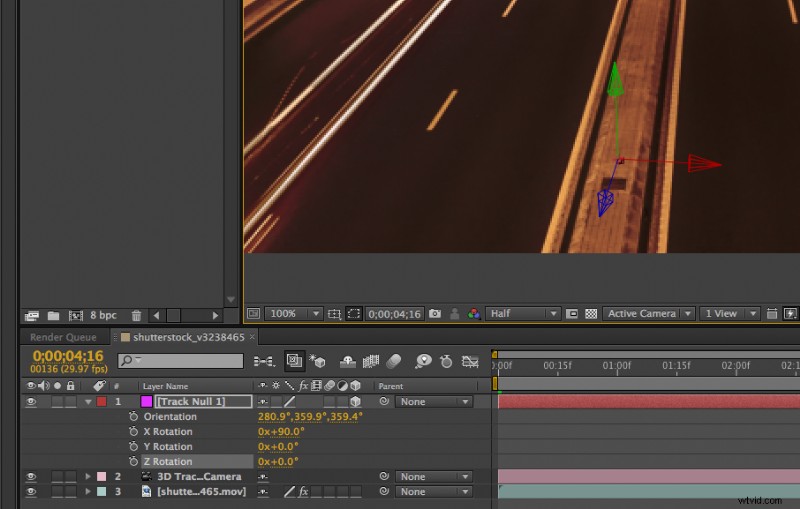
Step 4
Rotate your new Null object so that it’s standing straight up and down on your plane.
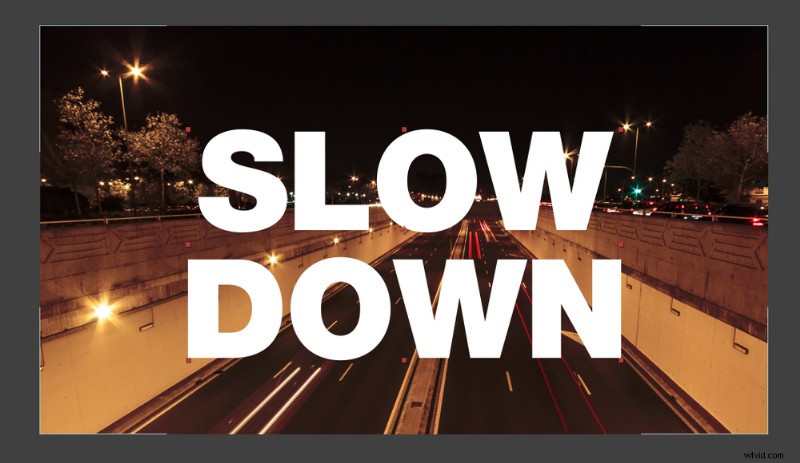
Step 5
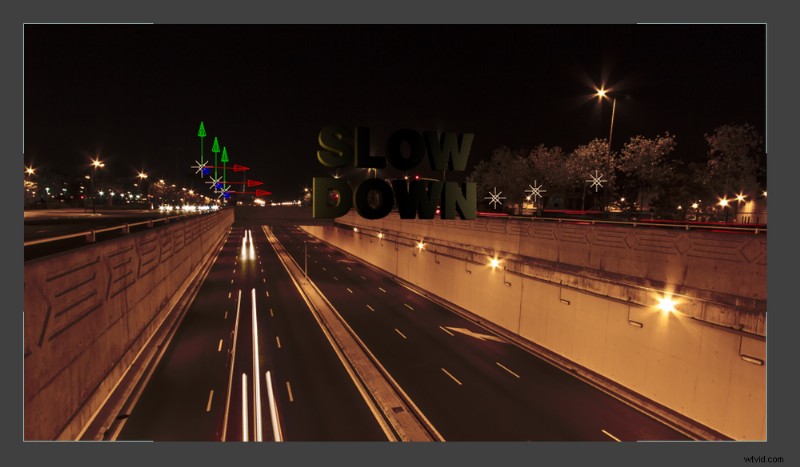
Create your desired text and make it a 3D layer. Use the piq whip on your text layer while holding the Shift key and drag it to your Tracking Null. It will then jump to where the Null object lives within the composition.
Adjust the size and location of your text — in this case, I moved it well above the road, along the Y plane, and increased the size.
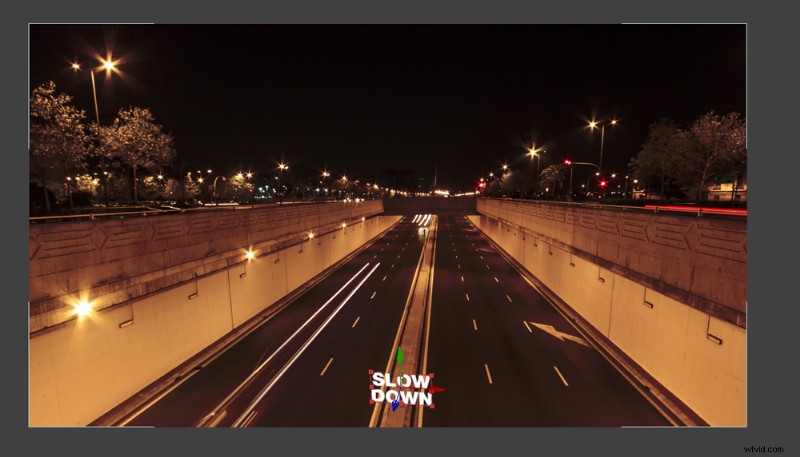
Step 6
You may also have to adjust your rotation, in case your Tracking Null isn’t 100% accurate. To do this, change your Camera Angle to “Right” and adjust as necessary.
Step 7
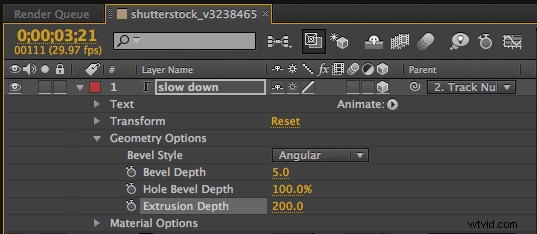
Now for the fun part. Go into your text layer’s options, and you’ll see a couple of new things: Geometric Options and Material Options. (If you don’t see these options, make sure that your composition is set to “Ray-Traced 3D,” your text layer is a 3D layer, and you’re using CS6 After Effects.)
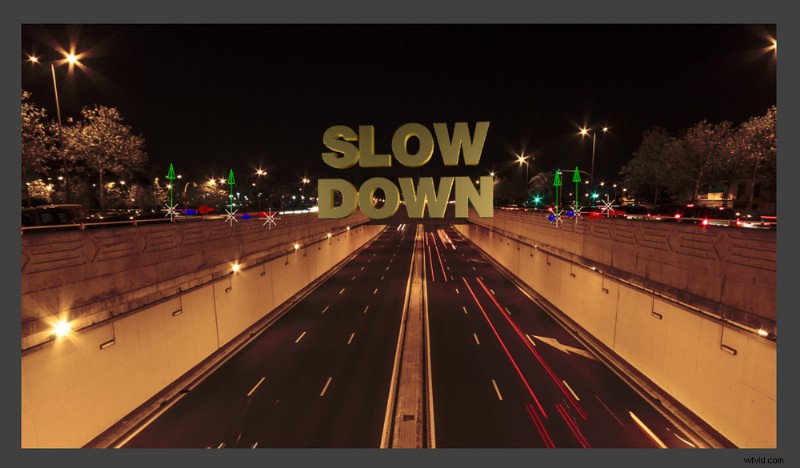
Adjust your Extrusion Depth and Bevel to your desired settings. Mine are shown above.
Step 8
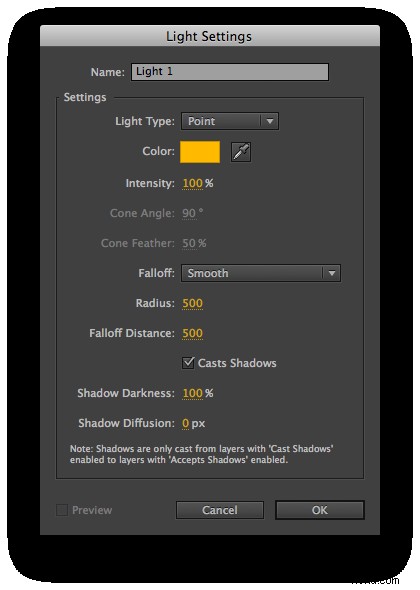
Create a Light so that you can better see your new 3D extrusion. I chose to use a “Point” light to better match the scene.
Step 9
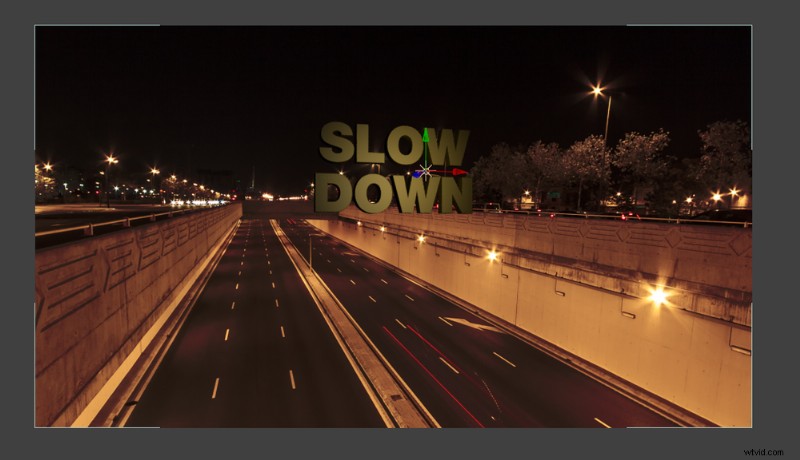
For this clip, I copied my light six times and lined them all up in a row along the sides of the text, to match the lights in the scene.
Step 10
Adjust your lights until they have achieved your desired effect.
Step 11
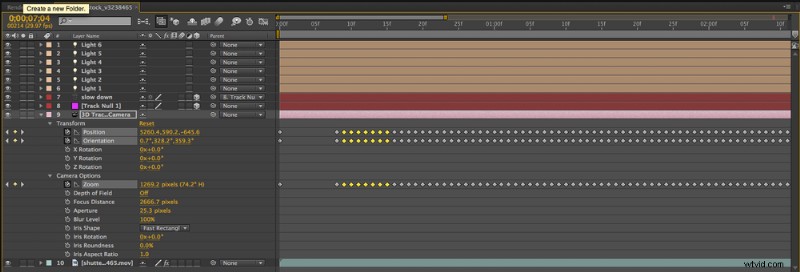
You might have noticed, especially if you’re using a time-lapse video, that your text hops around a little bit because of the inconsistency of the tracking data.
One easy way to smooth this out is by opening your Camera’s layer options and deleting some key frames. Due to the higher level of inconsistency in a time-lapse video, I deleted every seven key frames, whereas I usually only delete every three, or less. This helps smooth out your camera’s movement.
That should do it! If you get stuck, or have any questions or requests for future tutorials, let us know in the comments below.
Like this tutorial? Check out these other great After Effects lessons from Shutterstock: