In this article, we’ll look at a few tips and tricks for getting fantastic sounding audio in your upcoming video projects.
Audio might just be the most important aspect of your video work. Look, every camera is good now. I say that because every new camera released in 2022 can produce stunning results. Even your phone can produce mind-blowing cinematic video.
So, making sure you get good audio is the real challenge. The audio should match the quality of the video for your project can be taken to the next level. Every little detail matters—recording audio, editing, mixing, and delivery. Here are a few tips on how to achieve the best-sounding audio for your upcoming projects.
Microphones for Video
Before we dive into which microphone does what, let’s see what Charles from PremiumBeat found when comparing these different microphones. This way, you can know what quality to expect before diving into which microphone does what.
Choosing the right type of microphone all depends on your shooting scenario. But, by far, the most important information to know when picking out a microphone is the pickup pattern, which dictates how the microphone records sound spatially and the sensitivity at different angles. Knowing what pickup pattern to choose can avoid potential noise interference that may bleed into your sound source signal or any unnecessary audio editing which may interfere with the overall sound.
Here are four pickup patterns that every filmmaker should know:
1. Cardioid Microphones
Cardioid microphones have an extremely flexible pickup pattern from the front and sides, but not the rear. Fun little fact: the pattern itself looks like a heart, hence the name “cardioid,” and is among the most common pickup patterns found in popular all-purpose microphones.

This pickup pattern is perfect for documentaries, weddings, and anything that includes vocals, as you won’t get as much interference from behind the mic. However, a cardioid microphone will pick up plenty of background noise if you’re not in a controlled environment.
2. Omnidirectional Microphones
Omnidirectional microphones have a pickup pattern with the same sensitivity in all directions. They’re also suitable for getting a flat frequency response, meaning that all frequencies will be at equal levels. They’re perfect for interviews, but they do tend to pick up additional background noise.
If you want the viewers to get a perspective of a scene where many different sounds occur, using an omnidirectional microphone would be perfect. In video production, the most commonly used omnidirectional microphones are lavalier mics.
3. Hypercardioid Microphones
Hypercardioid microphones have a directional pickup pattern, more than your standard cardioid microphone. These mics are perfect for mounting on top of cameras for documentaries, news interviews, or even recording instruments.
If you’re looking to record nearby the sound source in noisy environments, hypercardioids are your go-to. Due to the highly narrow pickup patterns, this does result in sounds coming from the rear.
It is good to note that anything that could give off feedback noise should be kept away from not only the front, but from the back of the microphone. This allows the mic to produce a high gain before feedback (how much the microphone can be amplified before any feedback is produced).
Furthermore, hypercardioids have more directional pickup for higher frequencies. The lower the frequency, the less directional it gets.
Also called mini-shotgun mics, the hypercardioid pickup pattern picks up little sound behind the microphone. So, it won’t capture too much of the camera operator’s breathing or the sound of changing camera settings. The way that these pickup patterns have high directionality is due to shotgun microphones having an interference tube that further narrows the pickup pattern.
4. Supercardioid Microphones
Supercardioid microphones are very similar to hypercardioids in that they have a directional pickup pattern. The difference is that the pickup pattern isn’t as narrow as a hypercardioid mic and is less sensitive to sounds coming from the rear of the pickup pattern.
These shotgun mics are the type frequently used on boom poles. They offer the ability to isolate audio and can lessen the bleed between two sound sources that may be close together, focusing only on capturing the sound of your subject.
Much like every other aspect of production, there are right and wrong ways to approach it. Who knew! So, check out the tutorial below if you’re wondering what a few good techniques are to follow next time you’re on set.
Audio Recorders
Many indie filmmakers and corporate video producers need to have a separate audio recorder since many DSLR and mirrorless cameras don’t have XLR ports for capturing quality audio from a professional microphone.
If you have a camera with an XLR input, you should have a solid audio recorder built into your camera. You can attach a boom with the XLR cable, and you’re good to go if you’re not recording dialogue or a specific sound.
But, if your camera requires a microphone with a 3.5mm input jack, you should only use that audio as a backup or for syncing purposes. This is where an external audio recorder will come in handy.
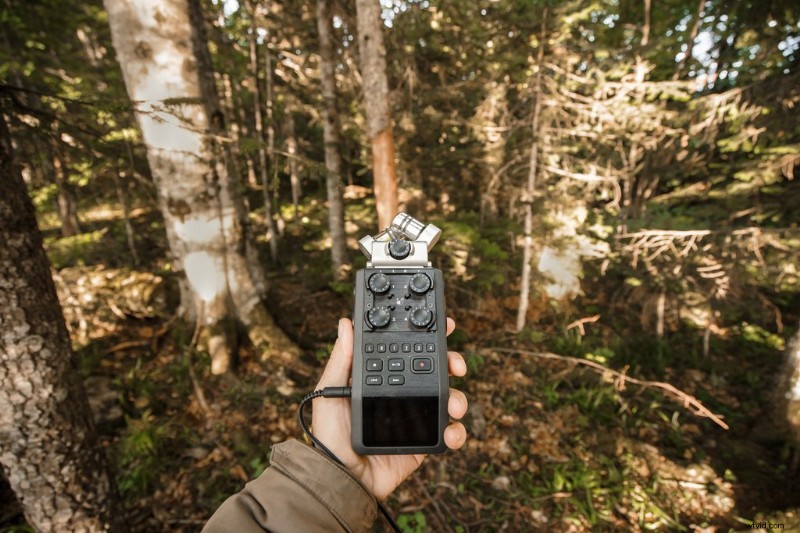
If you have the budget to invest in a serious recorder (like in the image above), you’ll want something like a portable field recorder or a handy high-end recorder. Those recorders can cost anywhere between $200-$1000.
They may be pricey, but having access to high-quality audio recordings will bring your projects to the next level. You want your audio also to match your visuals, right? It also avoids situations in post-production where you may need to recover bad sound.
For those looking for a simple-to-use recorder, you can purchase a handy audio recorder between $100-$300. If you have no budget, use your iPhone. Trust me; the voice recorder is way better than I imagined.
An essential accessory that shouldn’t go amiss is a windshield. While these are used on microphones, audio recorders also may need them too! For those wanting to record natural sounds with just the audio recorder, this will cut out the sound of the wind, which can cause clipping.
Sometimes, I’ll record an exciting sound and add it to my “SFX” bank on my drive to use later if I get the chance. That’s how good the mic is, in my opinion. Building up a sound library is always a must. Having those spontaneous recording sessions, whether that’s sound effects from inside or outdoors, will most likely have a function in the future.
Check out Lewis from Shutterstock Tutorials showing us how to use it to capture quality sound effects.
Editing Sound for Video
Editing audio is one of the most challenging things to do. Not only is audio hard to adjust, but broadcast standards can be so overwhelmingly confusing that people give up and go with whatever sounds best. But, bailing on it together is not the best idea. Recover, ranger!
Editing the audio can bring out its best qualities. Applying some reverb can provide a more realistic sense of space. Compressing your audio recordings can narrow the dynamic field providing more balanced audio. This ensures the louder sounds don’t overshadow the quieter sounds.
You may also want to add an equalizer to your audio to bring out specific frequencies. All of these effects can get the best sound out of your audio recordings.
No matter what you’re editing—a film, commercial, documentary, or YouTube video—one of the most important things you should be implementing is a clear organizational structure to your edit, specifically with audio. One of the tried-and-true tricks to organizing your audio is to figure out which category each sound goes in.
Organizing Your Audio Tracks
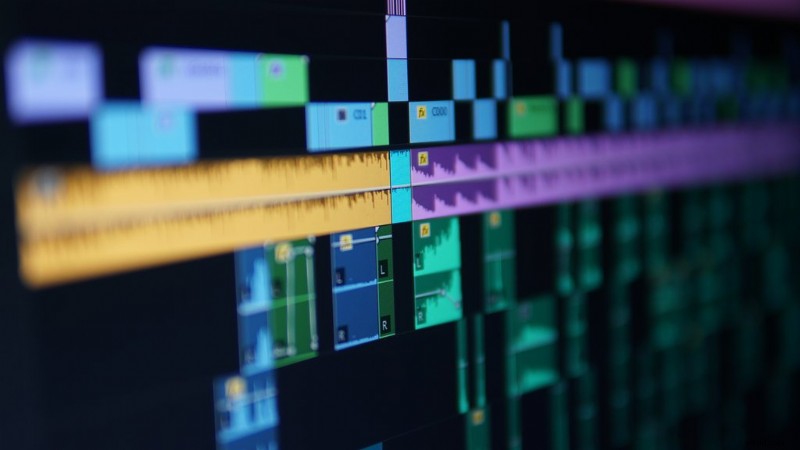
Here is a breakdown of a recommended way to organize your tracks.
- Audio Tracks 1 and 2 – Sync Sound (SOT)
- This is the audio of your main speaker, what was originally called Sound-on-Tape (SOT). Think “dialogue” or your interviewee’s voice.
- Audio Tracks 3 and 4 – Sync Sound (NAT/SOT)
- This is the audio from B-roll footage, called Natural Sound-on-Tape (NAT/SOT). Think foley or natural sounds you might hear from the location.
- Audio Track 5 – Narration (VO)
- Audio from any voiceover (VO). If you want to know how to record VO/ADR click here.
- Audio Tracks 6, 7, and 8 – Sound Effects (SFX)
- Any additional sound effects used. By using tracks 6, 7, and 8, you allow Mono and Stereo SFX.
- Audio Tracks 9 and 10 – Music Cue 1
- These tracks are reserved for the score, songs, soundtrack, or royalty-free music. Side note, if you need tracks, be sure to check out our stacked library of songs and cinematic soundscapes.)
- Audio Tracks 11 and 12 – Music Cue 2
- Having separate tracks for music allows you to easily fade between songs.
These organizational tips apply to any NLE you might be using, as they all have multiple audio tracks on the timeline for you to use.
Recommended Audio Levels
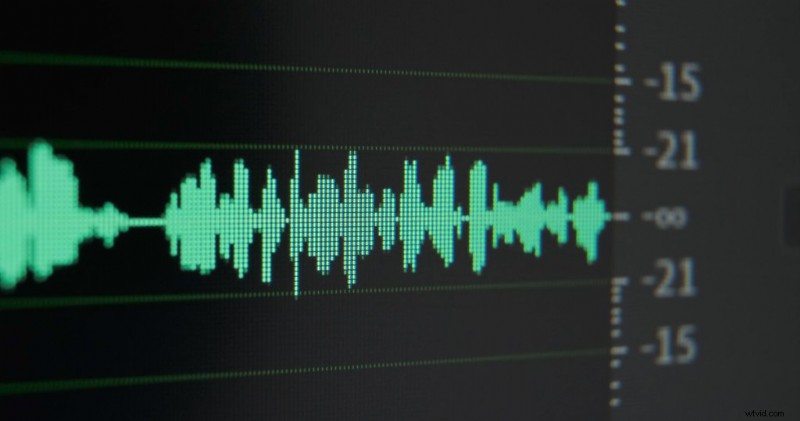
Every single audio mixer will tell you something different about where your levels should be. However, they all agree that audio levels should never go above 0dB.
In fact, 0dB is still considered quite loud, and this level would be considered the loudest setting. Going above this results in audio being heavily distorted, lessening the quality even more.
Most audio editing software with have a level meter with green, amber, and red indicators. If you’re looking at your levels on the right (or left) side of the timeline, the meter crosses into the red once the levels are peaking. Try to stay clear of this so you get unusable audio.
When using an audio recording device, you may need to set some levels in order to avoid clipping. It’s always best to test before you record, as the peak level you see for one sound isn’t necessarily a universal level. It can save you heaps of time in post-production.
Something to consider with audio levels is the headroom. This is the space between full digital scale (0dB) and the nominal level (average peak level of your audio). The headroom acts as a safe zone for any transient audio peaks that may go over the nominal level without distorting. Having peak levels fall between -6dB and -12dB is a good range to minimize any hiss noise while still avoiding those peaks.
Though the following guidelines have some leeway, these are a few of the average levels for different types of audio:
- Overall audio: -10dB to -20dB
- Speaker (SOT) audio levels: -6dB to -12dB
- SFX levels: -12dB to -18dB
- Underscore music level: -18dB to -20dB
Like any aspect of filmmaking, you can break these rules and adapted them to fit whatever your project calls for.
Getting your audio to sound realistic and impressive ensures the audience keeps engaged with the narrative of your video. Whether it’s dialogue or a sound effect, ensure the audience has a clear guide for the their ears.
For more audio-based tips, check out these articles:
- How to Improve the Audio Quality of a Built-in Camera Microphone
- Should You Use Camera Audio Recording or a Field Recorder?
- Video Tutorial: How to Run Audio on Set by Yourself
- Learn Music Video Playback From An Audio Professional
- The Best Lavalier Microphones for Video Production
Cover image via Lewis McGregor.