Whats that sound? Nothing, if you follow these steps to remove hums and other noises in Final Cut Pro X!
There’s nothing more frustrating than bringing all of your hard-earned, beautiful footage back to the edit bay, only to have your spirit crushed once the audio starts playing. There it is — the unwanted background noise and infuriating hum, buzzing just behind your Oscar™-worthy character dialogue.
Have no fear, video editor! Final Cut offers a few methods to help (even if just a little) get rid of unwanted audio blemishes.
Before Importing

You can start your edit off right by adjusting the unwanted sounds in your audio clip from the moment of import simply by checking the boxes seen above. This is a very basic level of correction; it’s less of a fix and more of a very minor adjustment, a surface-level correction. Still, the cleaner the better, and it never hurts to preemptively tweak a few problems. Here’s what the check-boxes do:
- Analyze and fix audio problems (flags unwanted hum and noise, marks minor problems with audio)
- Separate mono and group stereo audio (channels are analyzed and grouped as dual, mono, or stereo)
- Remove silent channels (Silent channels are removed and those clips are marked as Autoselected)
Hum and Noise Removal
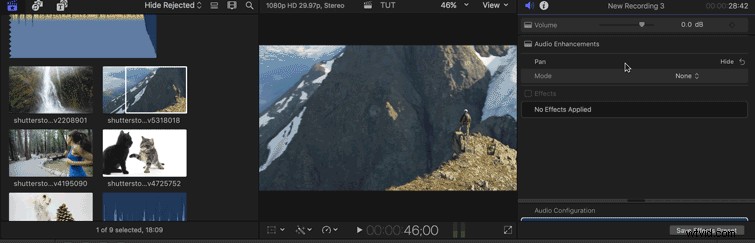
This more in-depth customizer is better for fine-tuning your audio. It lets you control the amount of noise removal that’s applied, and you can turn on each enhancement individually, instead of grouping them together. Be aware — toggling the noise removal dial helps with background noise, but it will also reduce the volume of your vocals.
Obviously even using this in-depth customizer won’t completely remove hum and unwanted noise from your project. Nonetheless, if you’re working with irreplaceable audio, you can only do so much, and this option has gotten me out of some hairy situations in the past.
Your first encounter with bad audio in post will quickly remind you just how important it is to record good audio during production. For more info on good audio equipment and smart recording habits, check out some of our previous articles on the matter.
- Hack Your H1 Audio Recorder for $15
- 9 Helpful Audio Tricks for Recording Documentary Interviews
- The Best Audio Recorders for Under $300
- Get Great Location Audio When Working as a One Man Band
- 10 Audio Accessories Under $100
What are your go-to tricks for salvaging bad audio? Share your techniques in the comments below!