While Audacity offers a robust suite of audio effects, it does not include a built‑in autotune feature. If you need to correct pitch or fine‑tune vocals, GSnap—a free, open‑source plugin from GVST—provides that functionality for Windows, macOS, and Linux.
This guide walks you through downloading, installing, and enabling GSnap in Audacity, so you can adjust pitch automatically and elevate your recordings.
How Autotune Works
Autotune corrects a recorded signal by snapping each pitch to the nearest correct tone within a specified scale. It smooths out out‑of‑key notes and can add a subtle or pronounced effect, depending on the settings you choose.
Artists, producers, and everyday creators use autotune to mask imperfections or create distinctive vocal textures. GSnap replicates this functionality within Audacity, giving you professional pitch correction without leaving the program.
How to Add Autotune to Audacity Using GSnap?
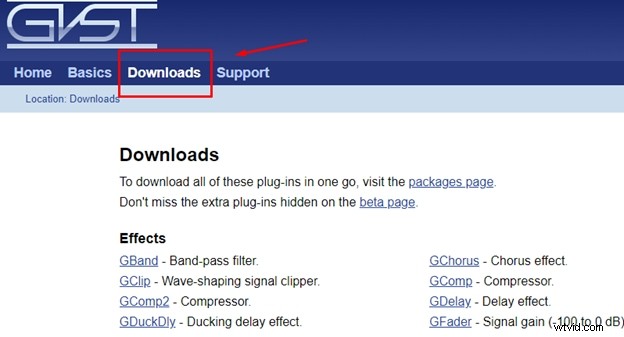
Step 1 – Locate the GSnap Download
Visit the GVST website and navigate to the GSnap page. This is the official source for the plugin.

Step 2 – Access the Downloads Section
Click the "Downloads" link at the top of the GSnap page to open the download archive.
Step 3 – Choose the Correct Package
Select the ZIP file that matches your operating system. Windows users download the .zip containing the DLL; macOS and Linux users download the appropriate installer or package.
Step 4 – Extract the Files
Open the downloaded ZIP file and extract all contents to a temporary folder.
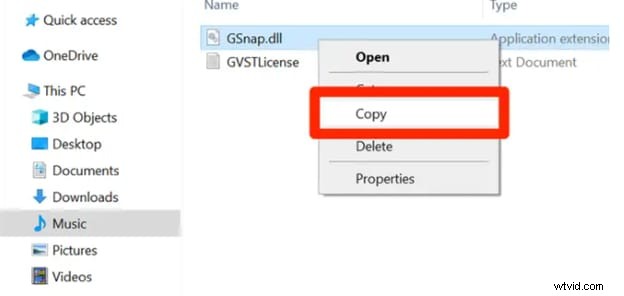
Step 5 – Copy the Plugin to Audacity
For Windows, copy the GSnap.dll file to Audacity’s plugins folder, typically found at C:\Program Files\Audacity\plugins. For macOS, open the Applications folder, right‑click the Audacity icon, select "Show Package Contents," then navigate to Contents/Extensions and paste the GSnap.bundle file. Linux users follow the distribution‑specific instructions on the GVST site.
Step 6 – Grant Administrator Permission
If prompted, click "Continue Anyway" to allow the file to be copied. Wait for the operation to finish.
Step 7 – Restart Audacity
Close and reopen Audacity so it can recognize the newly added plugin.
Step 8 – Open or Record Audio
Start Audacity and either record a new track or import an existing file you wish to correct.
Step 9 – Enable GSnap
From the menu bar, choose Effect > Add / Remove Plug‑Ins. Scroll through the list, find GSnap, and click Enable. Click OK to confirm.

Step 10 – Apply GSnap
With your track selected, go to Effect > GSnap. A window will open, offering a range of knobs and sliders—such as pitch correction amount, retune speed, and scale selection—to fine‑tune your audio. Experiment with the settings or consult the online manual for advanced usage.
Final Verdict
GSnap brings professional autotune capabilities to Audacity without cost. By following these steps, you can seamlessly integrate pitch correction into your workflow, whether you’re refining vocal tracks or experimenting with creative vocal effects.