Are you thinking of repurposing a YouTube video on Instagram? Well, YouTube videos can be repurposed directly to WhatsApp, Facebook, Twitter, Reddit, Pinterest, LinkedIn, and a few other major social media networks. However, YouTube doesn’t provide an option of repurposing the videos to Instagram directly.
In this article, you will learn how to repurpose YouTube videos on Instagram in three simple steps
- Step 1: Downloading the YouTube video
- Step 2: Customizing the video for Instagram
- Step 3: Uploading the video to your Instagram account
STEP 1: Downloading the YouTube video
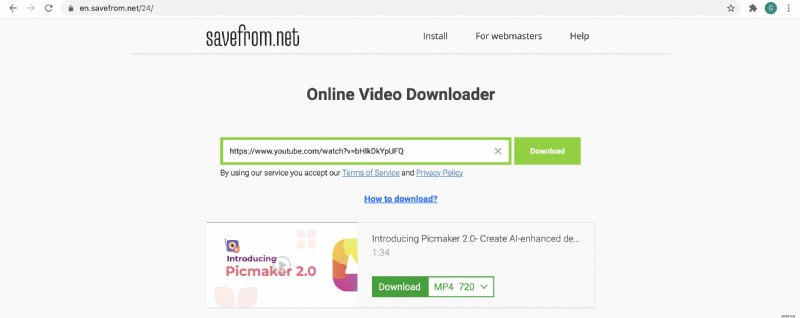
There are several ways to download YouTube videos. The simplest way is to use a third-party website like savefrom.net or ytmp3
Copy and paste the YouTube video link in either of the above websites and download
STEP 2: Customizing the video for Instagram
Instagram allows us to share videos as Reels, Story, IGTV, and Post. Each one of these content types has requirements that have to be met before you can successfully upload it to your Instagram account.
The requirements are as below
For IGTV:
- Video duration has to be at least 1 minute long
- The maximum length can be 15 mins (when uploading from a mobile device) or 60 mins (when uploading from the web)
- You can upload in 9:16 aspect ratio (1080 pixels x 1920 pixels) (Vertical video) or You can upload in 16:9 aspect ratio (1920 x 1080 pixels) (Horizontal video). We recommend uploading in the vertical format as most of the content on Instagram will be consumed from a mobile phone
- And in terms of output quality, the video has to be at least 720p
For Reels:
- Video duration can be from 15 – 60 seconds
- The aspect ratio should be 9:16 (1080 pixels x 1920 pixels)
For Story:
- Video duration can be up to 15 seconds
- The aspect ratio should be 9:16 (1080 pixels x 1920 pixels)
For Posts:
- Video duration can be up to 60 seconds
- Aspect ratio should be 1:1 (1080 pixels x 1080 pixels) or 4:5 (1080 pixels x 1350 pixels)
As you can see, a 9:16 vertical video is the best-suited video type to be posted for Reels, Story, IGTV and a 1:1 square video is the best-suited video type for Instagram posts.
So now, we’ll show how to customize your horizontal YouTube video for both aspect ratios.
- Customizing the video for Instagram Reels, Story, and IGTV
- Customizing the video for Instagram Posts
Customizing the video for Instagram Reels, Story, and IGTV
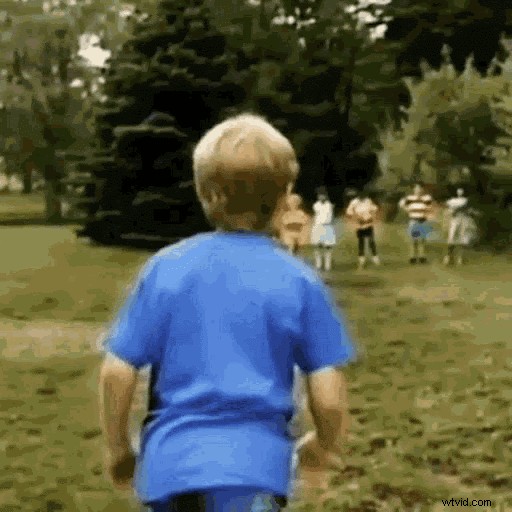
This is the sample YouTube video that we are going to repurpose on Instagram and I have downloaded the video to my PC using
In this instance, we aim to generate traffic back to the YouTube channel using an Instagram Story.
Let’s see how we can customize the video for Instagram Story
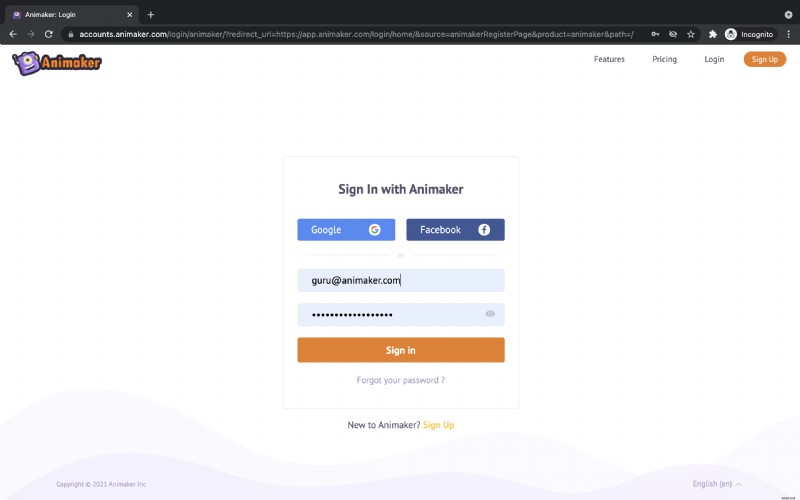
1. Head over to the Instagram Video Maker from Animaker and sign up for a free account.
2. After logging in, you will be redirected to the application’s Dashboard. Under the section Create Project, you can see the different types of projects that can be created using Animaker.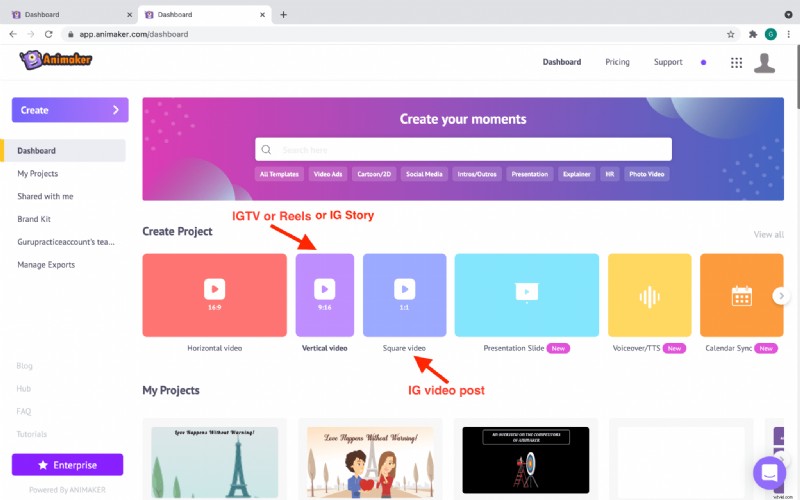
3. To create an Instagram Story, IGTV, or Reels, click on the Vertical video. You will be prompted to choose between a blank canvas and templates to create your video. Since we are planning to customize our YouTube video into an Instagram Story video, click on the Blank option.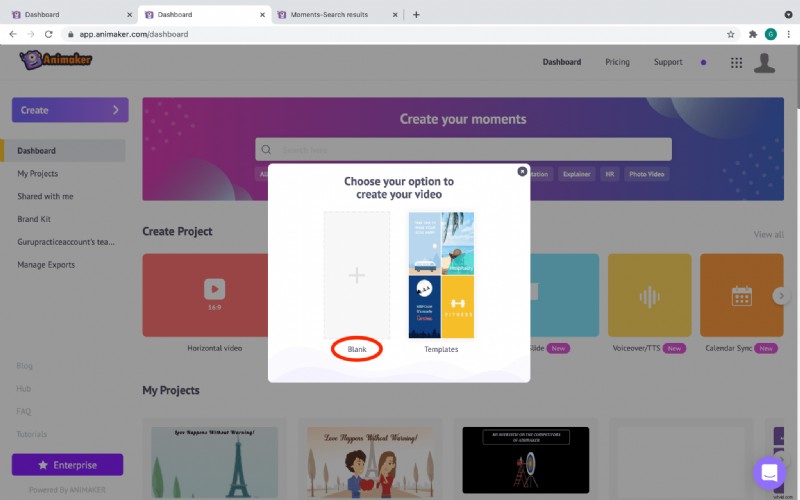
4. On choosing the Blank option, a new blank project will open in the application. This is the interface of the Animaker app where you can edit and repurpose your videos.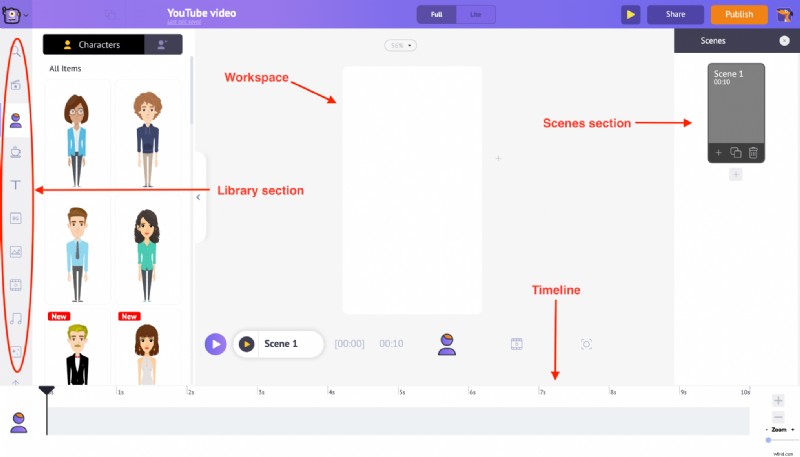
5. Towards the left-hand side, is the Library section. You will find the Upload option at the bottom of it. Once you click on it, you can select and upload the YouTube video you want from your PC.Note: YouTube videos are of horizontal video format with 16:9 ratio.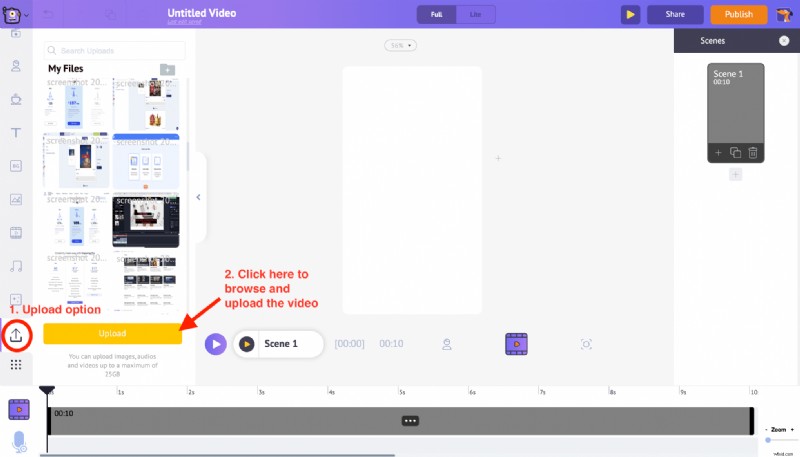
6. After uploading, clicking on the video will automatically convert it into a vertical video and fit inside the workspace. Once you click on the video in the workspace, you will notice a set of options. This is called the Item menu and it gives us the options to edit the video.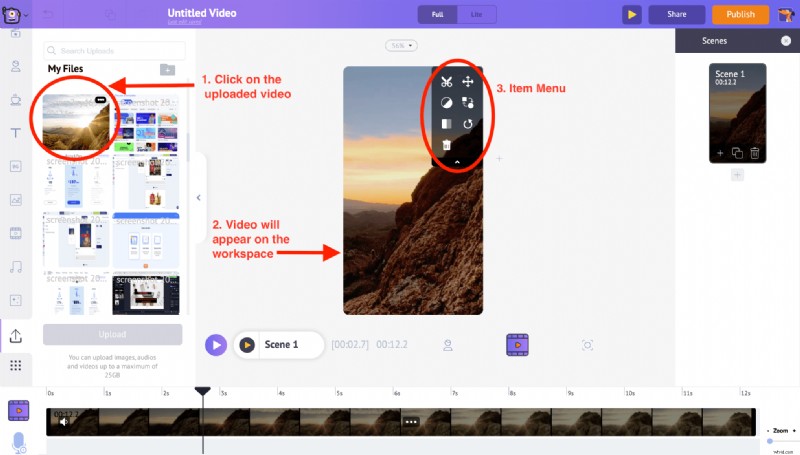
7. While the video changes from horizontal to vertical video format, certain parts of the video may get cropped because of the change in the aspect ratio. But do not worry. You can always use the Resize feature from the Item Menu and adjust the specific part of the video that has to be visible.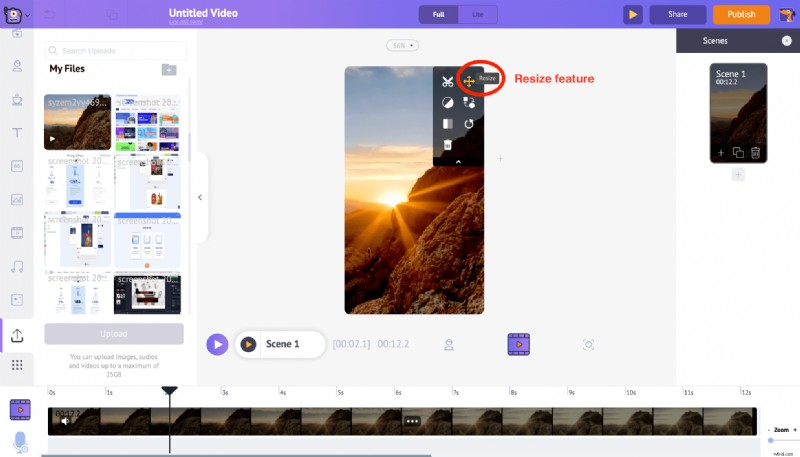 Click on the Resize option and you will be able to control the part of the video that will appear within the workspace.
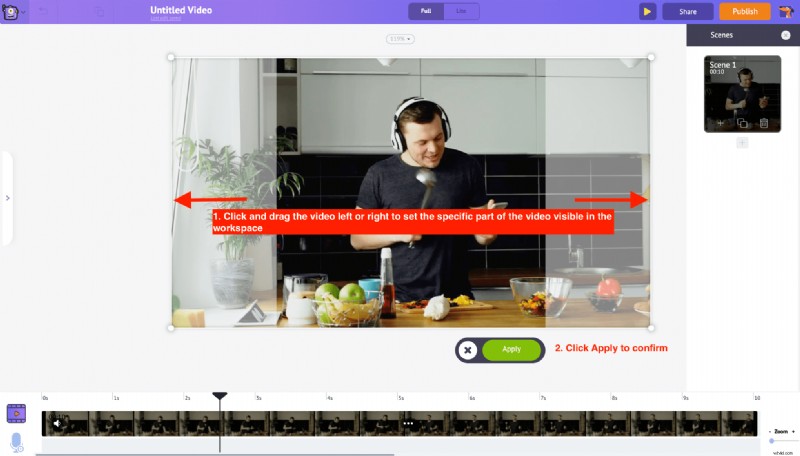
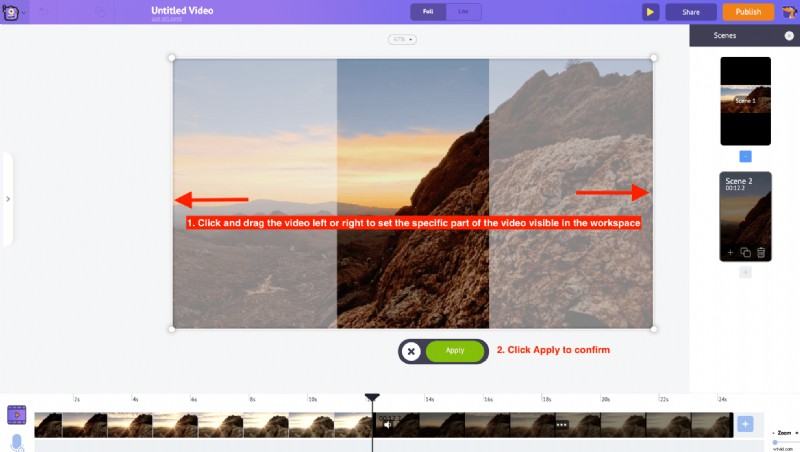 But if you want to totally avoid the video getting cropped, use the Resize option to reduce the size of the video and keep it at the center of the workspace and then click apply.
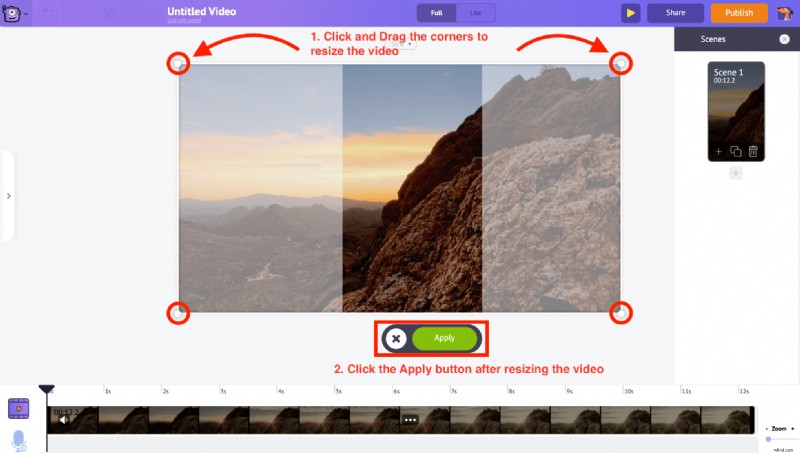
 Now you can use the space above and below the video to add a Title text or a call to action text. But before adding text, let’s change the background color to make the video look better. To change the color of the background, click anywhere on the white region of the workspace and you can see a new color palette option appearing at the bottom.
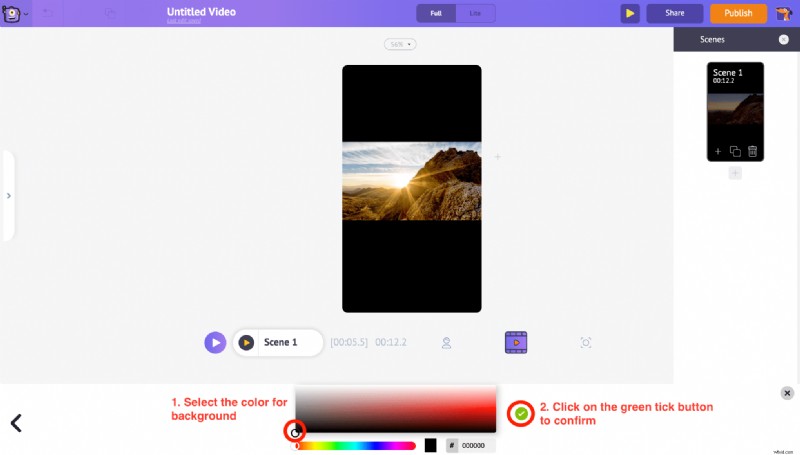
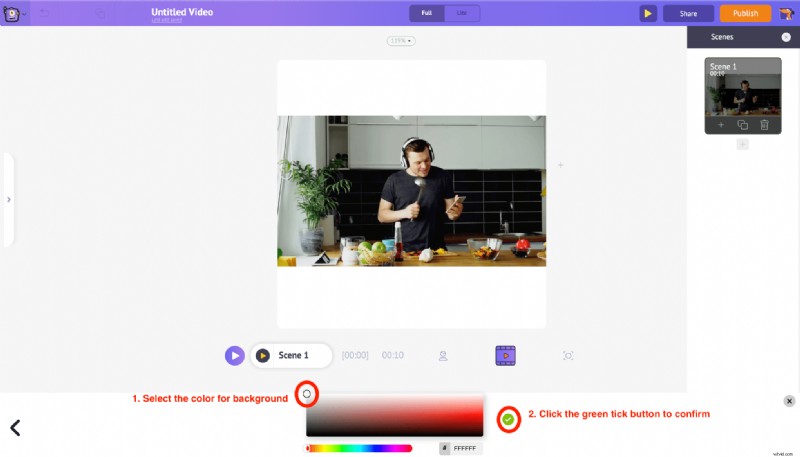
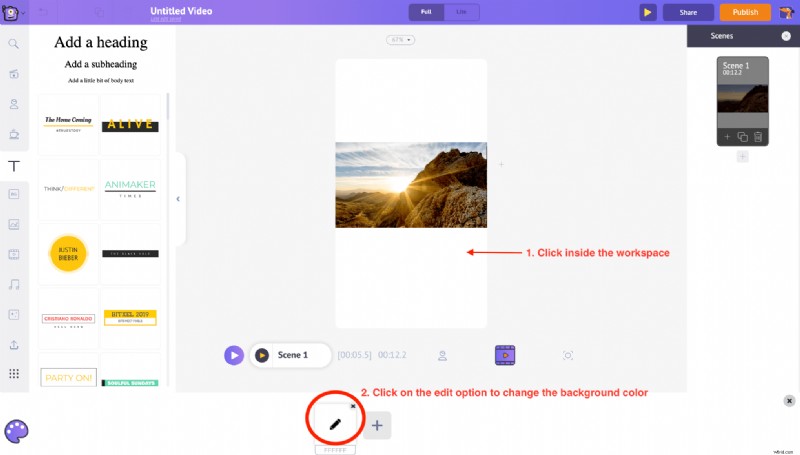 Click on the edit option over it, and choose the new color that you want to add to the background. Click the green tick icon to apply. In our case, we are choosing the Black color for the background.
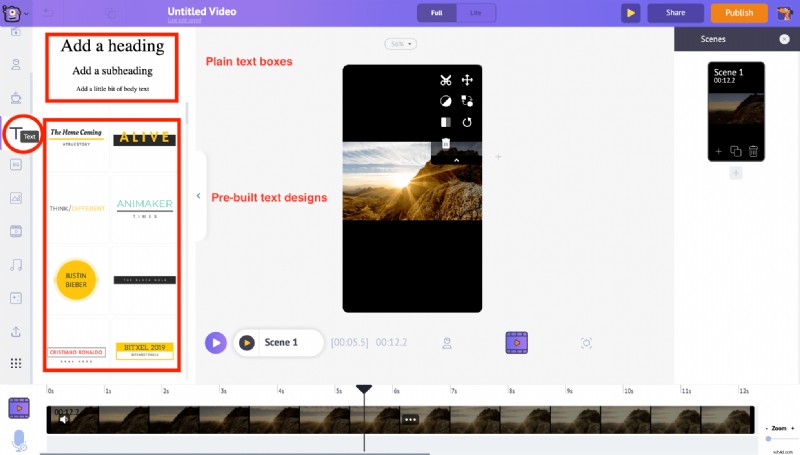
8. To add text, click the Text section on the library. From this section, you can choose a blank text box or pick from a list of pre-built text designs that come with pre-applied animation effects.
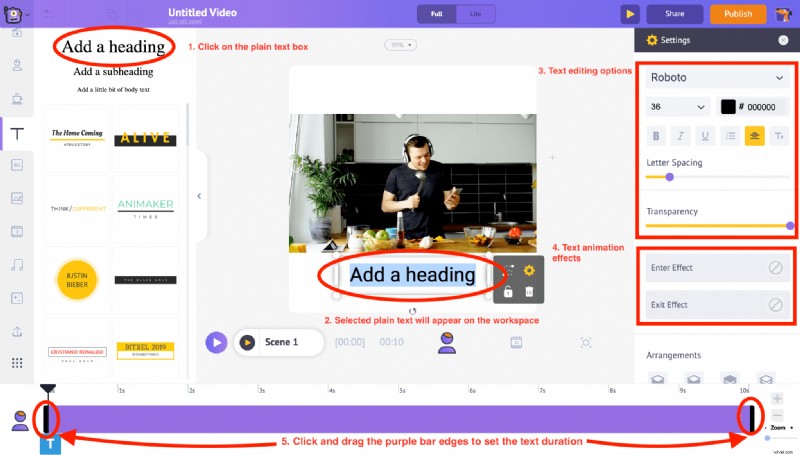
Let’s see how to use one of the text boxes to add text to the video. Just click on one of the plain text boxes you like, and it will appear in the center of the workspace. To edit the text, click over it again and type in the new text. Since we want to drive traffic to our YouTube video from our Instagram story, let’s use “SWIPE UP” as the call to action text to this video.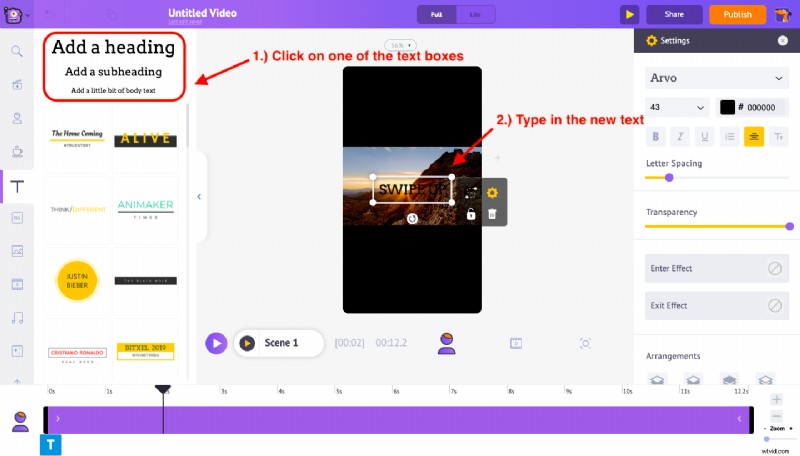 Once you have typed “Swipe Up” in the text box, click on the settings option that appears on the right side. Using the options available in the settings menu, you can change the font style, color, spacing, and even the transparency of the text. Let’s change the font style and font color for better visibility and keep it at the bottom of the workspace.
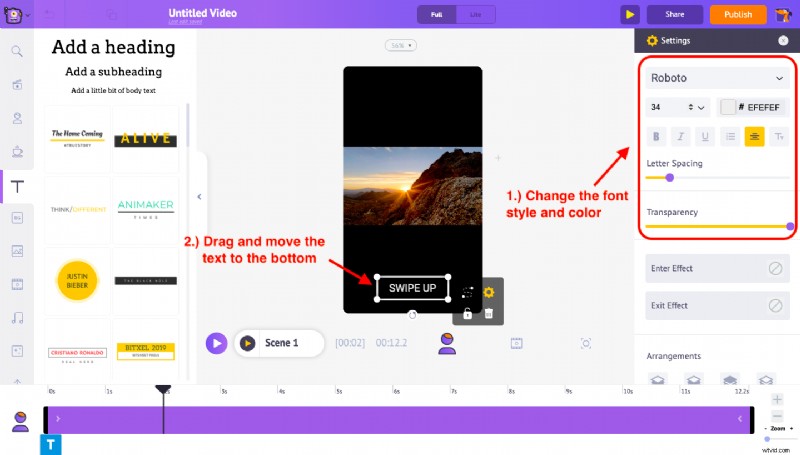 You will also notice a purple bar in the timeline. You can just drag and adjust its length to control the duration for which the text will appear on this story video. For example, If I want the text to appear after the first two seconds, I have to drag the left edge of the purple bar and move it to the 2s mark on the timeline.
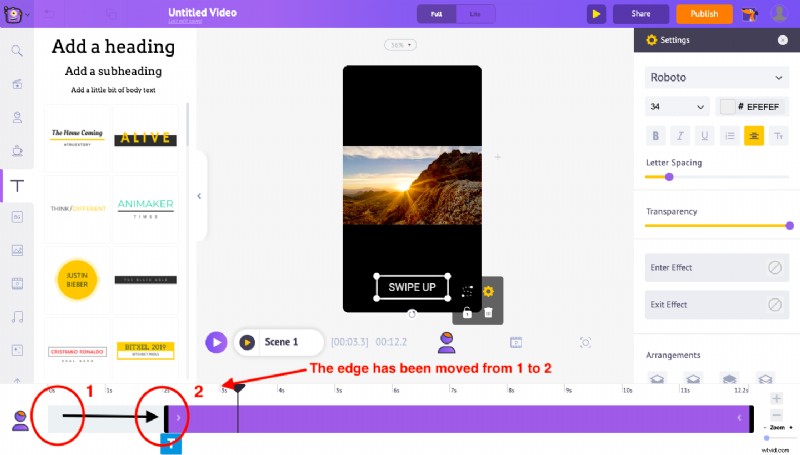 Likewise, you can control the entry time and exit time of any text using the edges that are available at both ends of the purple bar.
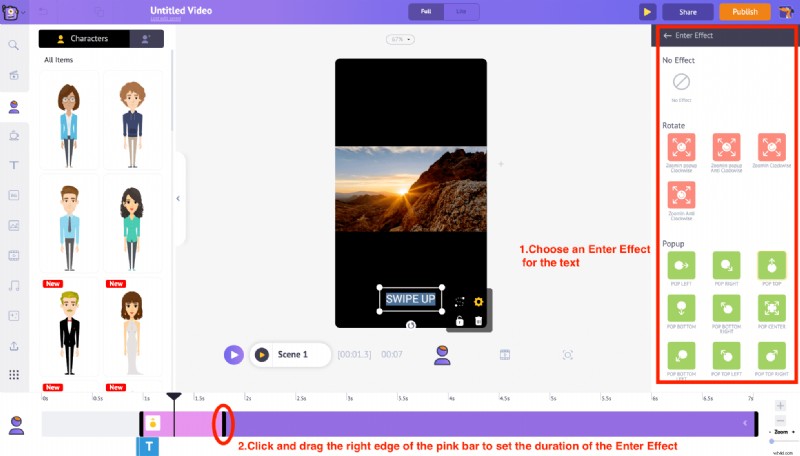
The next step after this is to add entry and exit effects for the “Swipe Up” text we just added to our project. To do this, head over to the bottom section of the settings menu. The two options ‘Enter effect’ and ‘Exit effect’ let you add enter and exit animation effects to your text. Click on the enter effect option and you can find more than 50+ different text animation effects that can be applied to this text. Here we are selecting “Pop left” as the Enter effect for the text.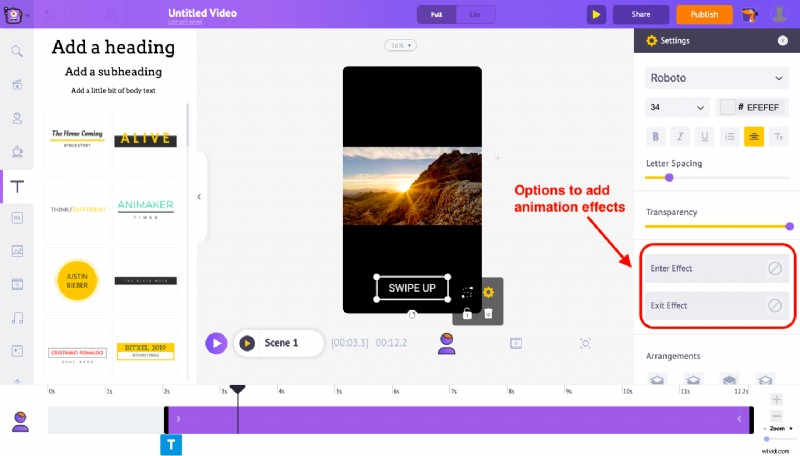
After applying the enter effect, you will notice a new pink-colored part within the purple bar in the timeline. This will let you control the duration of the text’s Enter effect. In the same way, we can apply an Exit animation effect for the text. But for this text, we don’t want any exit animation effect so we are not choosing any effect.
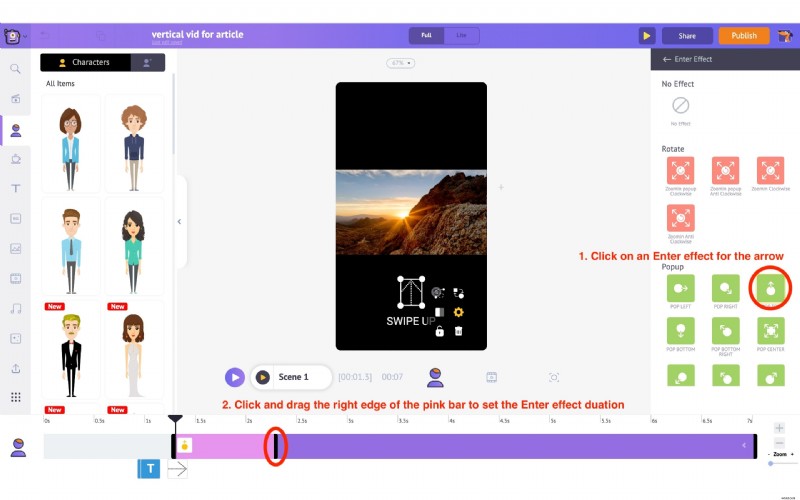
Now let’s add an icon to compliment the “Swipe Up” CTA text. We can use the properties option from the library section to add an arrow icon. Also, let’s apply a suitable Enter effect like “Pop Top”, to the arrow, to make it more engaging for the audience.
Similar to how we adjusted the time of entry for the swipe-up text, you can use the purple bar in the timeline to adjust the duration at which the arrow will appear in the video. And similar to the Swipe up text, use the right edge of the pink bar to adjust the Enter effect duration of the arrow.

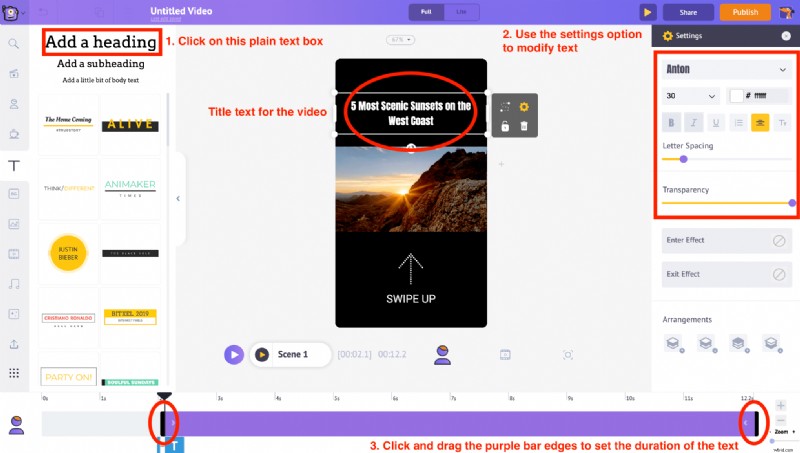
Now let’s also add a Title for this Instagram story. Let’s type the YouTube video’s title “ 5 Most Scenic Sunsets on the West Coast “ and place the text box at the top of the video. Use the settings menu that appears on the right side to modify the text color, font style, etc. Adjust the purple bar in the timeline to set the duration at which the text will be seen on the video.
9. Use the Trim feature in the Item Menu to customize the overall duration of the video.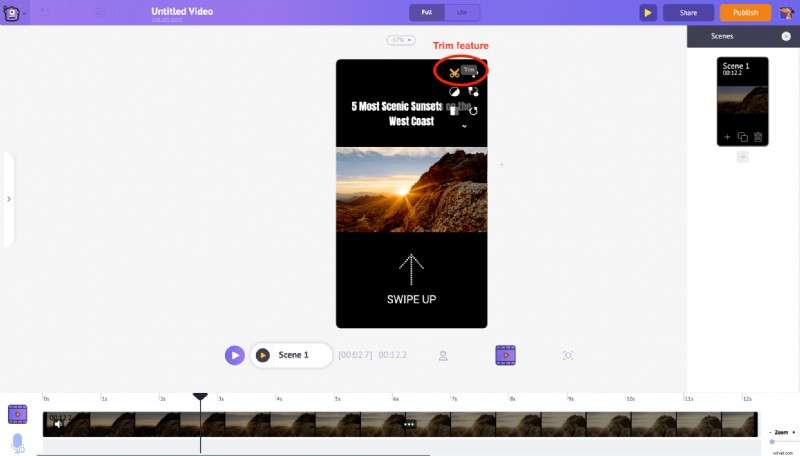 Once you click on the trim feature, you can see a pop-up of the video with options to trim it.
 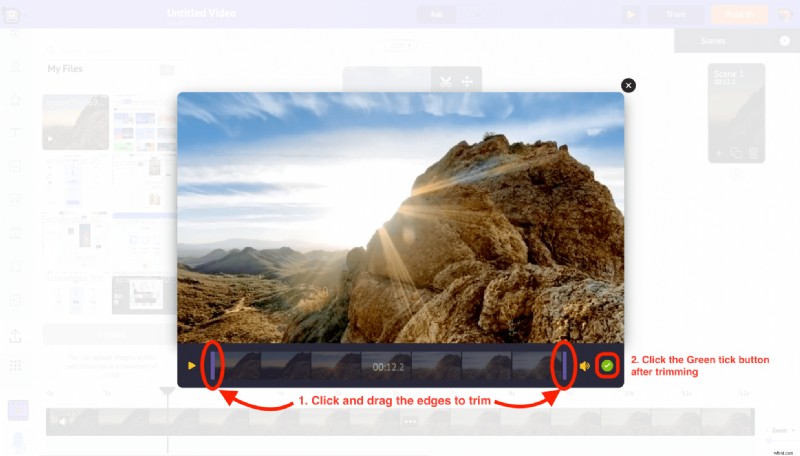 Drag the purple edges in the timeline to trim the video. Since we are creating an Instagram Story video, set the duration to less than 15 seconds (the max duration for Instagram Story is 15 seconds). Then click on the Green tick icon to apply the changes.
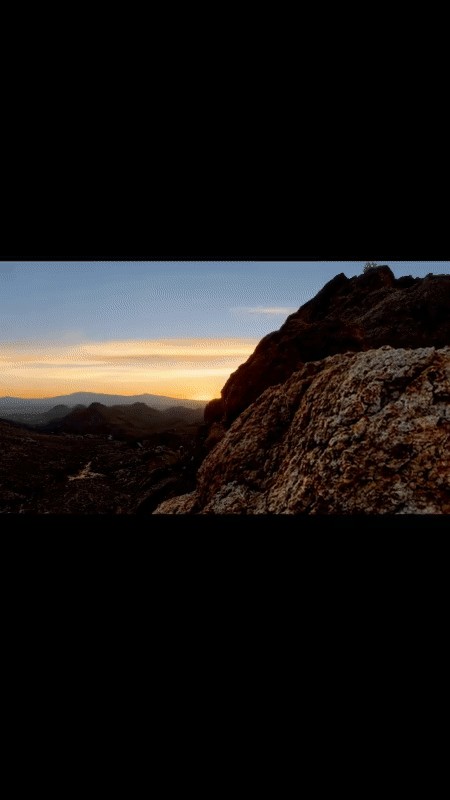
10. Now let’s preview what we have made. Using the Preview button in the menu bar, we can see how the scene looks.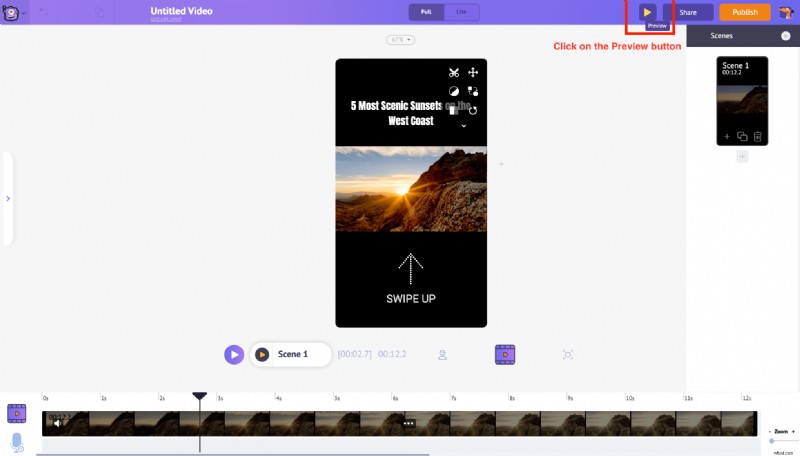
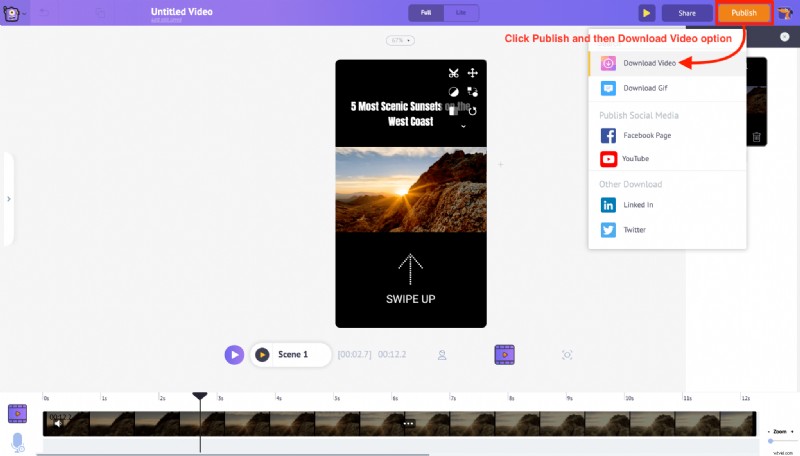
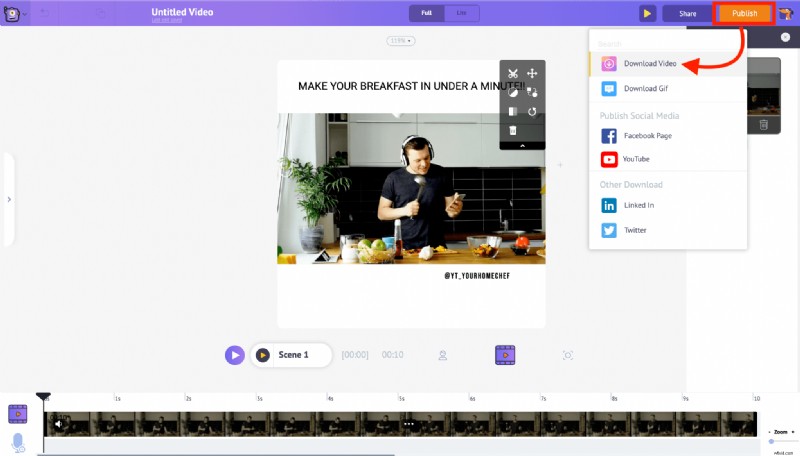
11. Once everything is done, click on the Publish button in the top right corner. From the options shown, select the Download Video option to download the video.
12. Clicking on Download Video, the project will be redirected to the export page. Click on the Download button to save the video directly to your PC.
Now that you know everything you need to customize the video to suit an Instagram story, let’s look at how to customize a video to fit an Instagram post.
Customizing the video for Instagram Posts
In this instance, we are going to repurpose a YouTube video on Instagram. We aim to generate traffic back to the YouTube channel using an Instagram Post. Let’s see how to customize the YouTube video (of 16:9 aspect ratio) into an Instagram square video of 1:1 ratio,
1. Head over to the Instagram Video Maker from Animaker and sign up for a free account
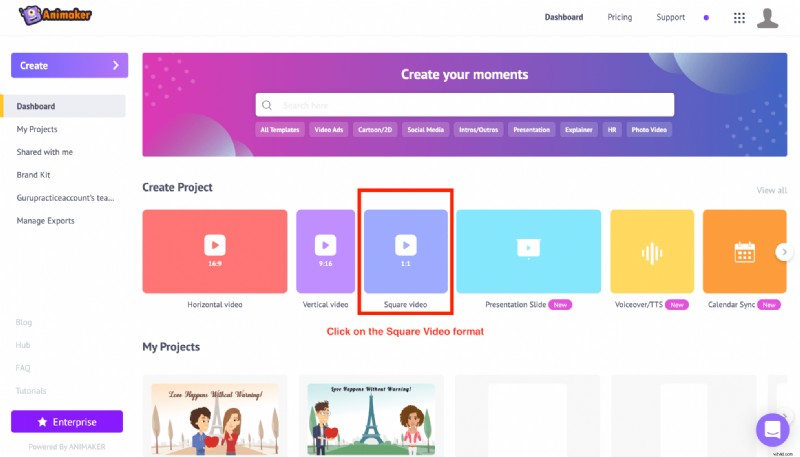
2. In the Animaker application’s Dashboard, under the section Create Project, select the Square video format.
3. You will be prompted to choose between a blank canvas and templates to create your video. Since we are planning to customize our YouTube video into an Instagram video, click on the Blank option.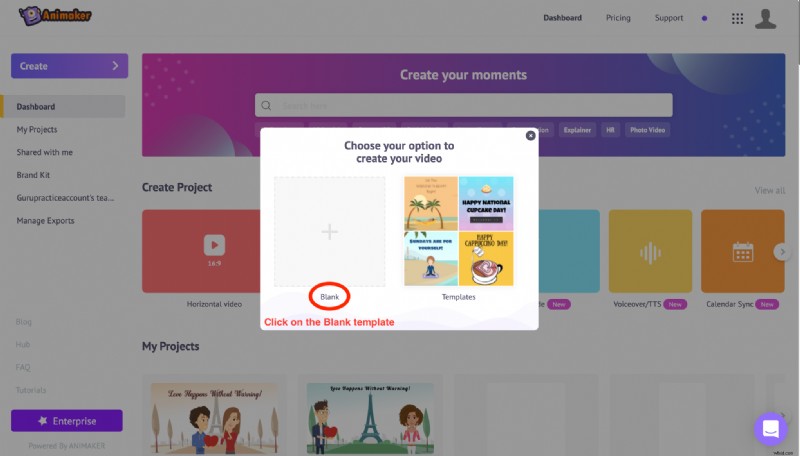
4. On choosing the Blank option, a new project window will appear. This is the interface of the Animaker app where you can edit your videos.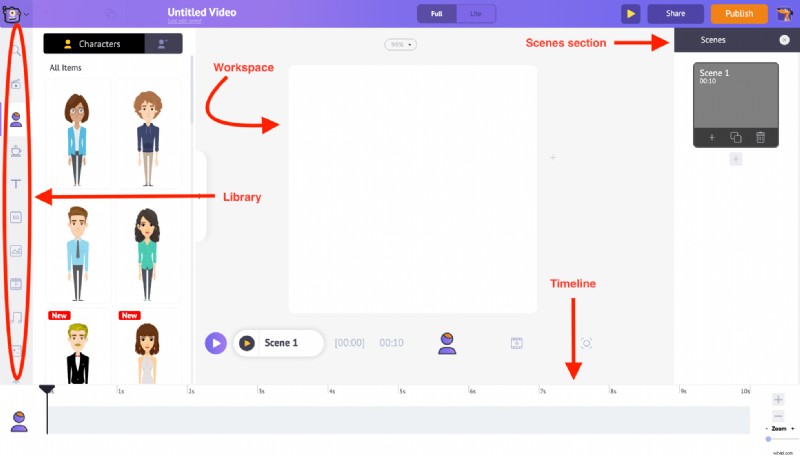
5. Towards the left-hand side, is the Library section. You will find the Upload option at the bottom of it. Once you click on it, you can select and upload the YouTube video you want from your PC.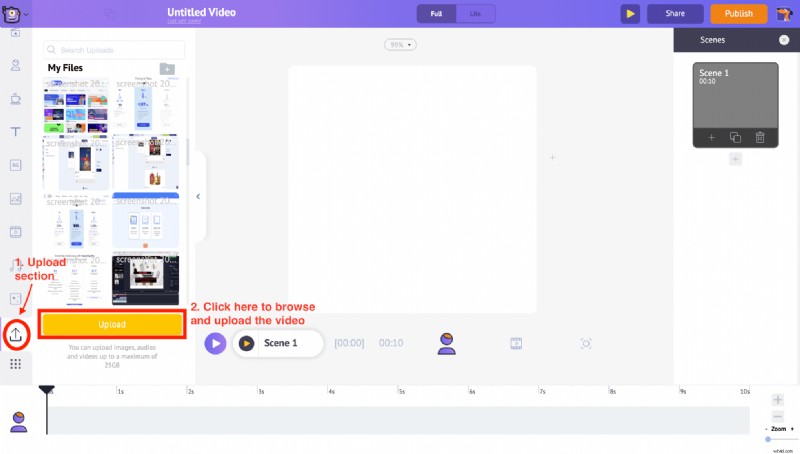
6. After uploading, clicking on the video will automatically convert it into a square video and fit inside the workspace. Also, an Item Menu will now be visible in the workspace which lets us edit the uploaded video.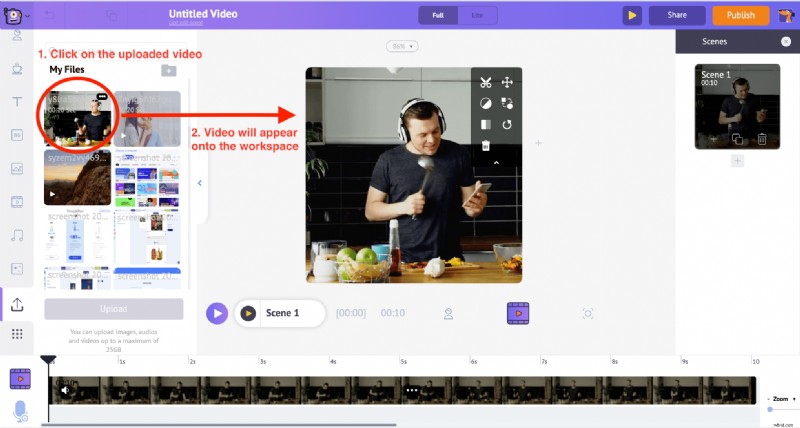
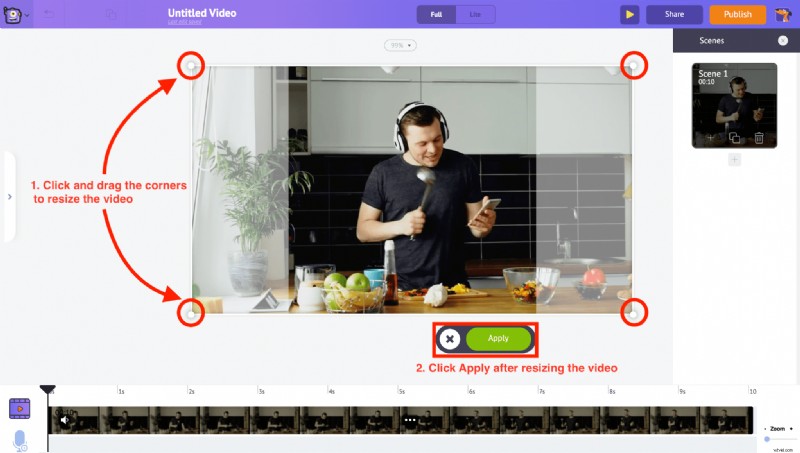
7. While the video changes from horizontal to Square video format, certain parts of the video may get cropped because of the change in the aspect ratio. But do not worry. You can always use the Resize feature from the Item Menu and adjust the specific part of the video that has to be visible.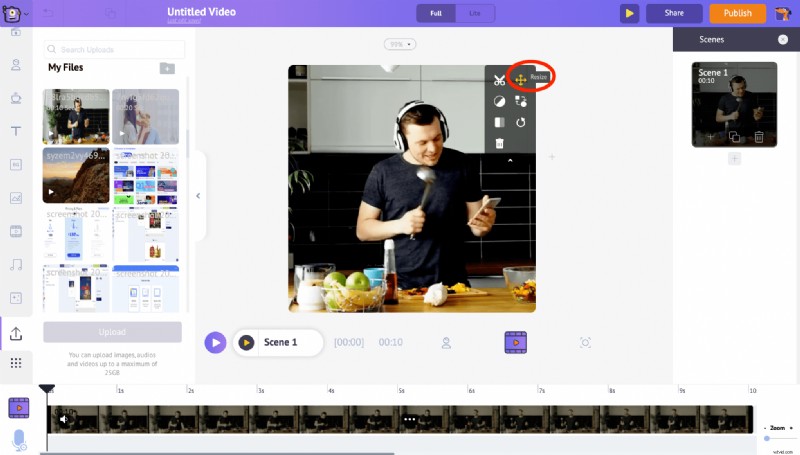
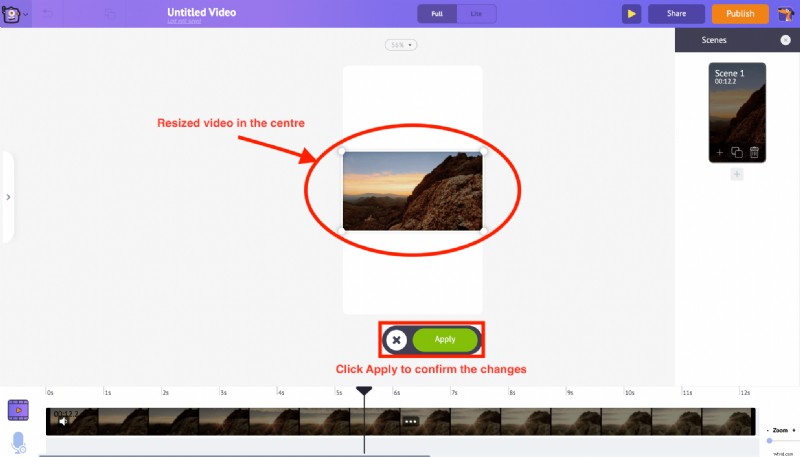
 But if you want to avoid the video getting cropped at all, use the Resize option to reduce the size of the video and keep it at the center of the workspace and then click apply.
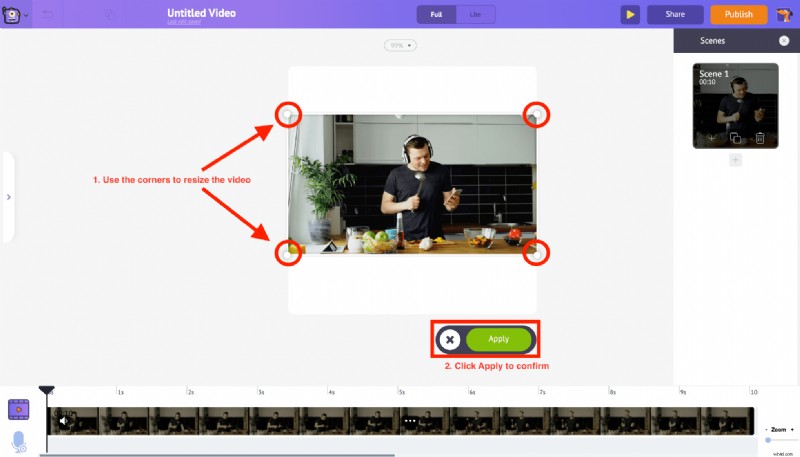
In our case, we have Resized the video to the center of the workspace and then clicked Apply.
8. Click in the empty white region of the workspace and an option for editing the background color will be available at the bottom of the screen. Select the suitable color and click the green tick button to confirm. In our case, let’s stick with the default white background color.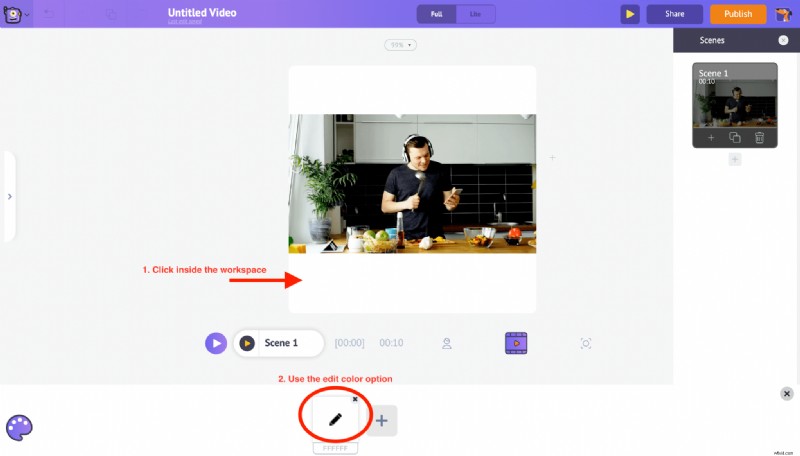
9. You can also add text over the video by using the Text section from the library. Once you click on the text section you will have two more options to add text. On the bottom, you can find the pre-built text designs that come with pre-applied animation effects. And plain text at the top that can be customized according to our needs.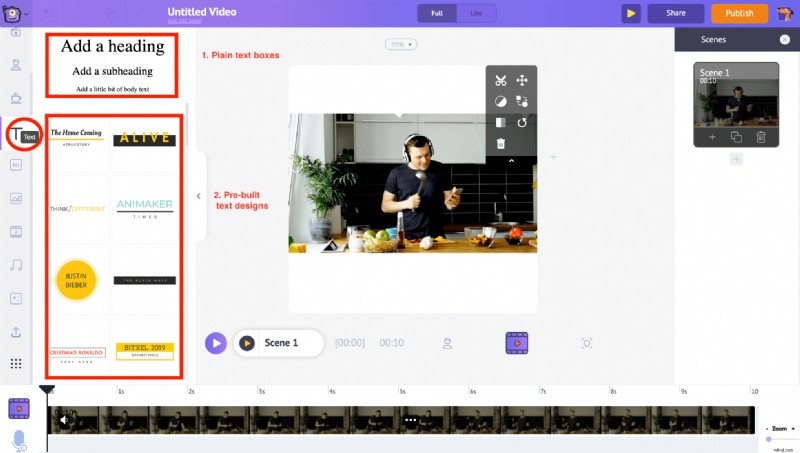 By clicking on the plain text, a new text box will be added to the workspace. Click on it further and you would be able to type the text that you want to add. We can also drag and move it anywhere within the workspace.
The settings tab appears on the right side. Using these options you can change the font style, color, spacing, and even the transparency of the text.
And at the bottom of the settings, the two options ‘Enter effect’ and ‘Exit effect’ let you add enter and exit animation effects to the text. You will also notice a purple bar in the timeline. You can just drag and adjust its length to control the duration of the text.
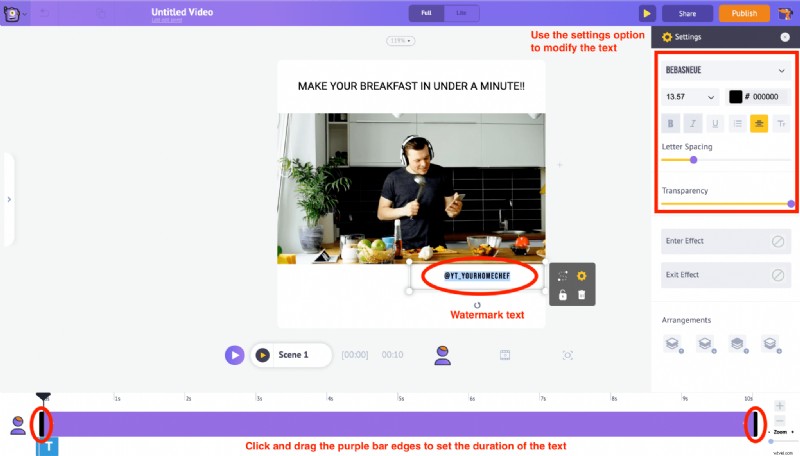
In this instance, for our Instagram Square video post, let’s type the title “ Make your breakfast in under a minute ” at the top of the video and add the YouTube channel name ” @YT_YourHomeChef” as the watermark and place it in the bottom space of the video.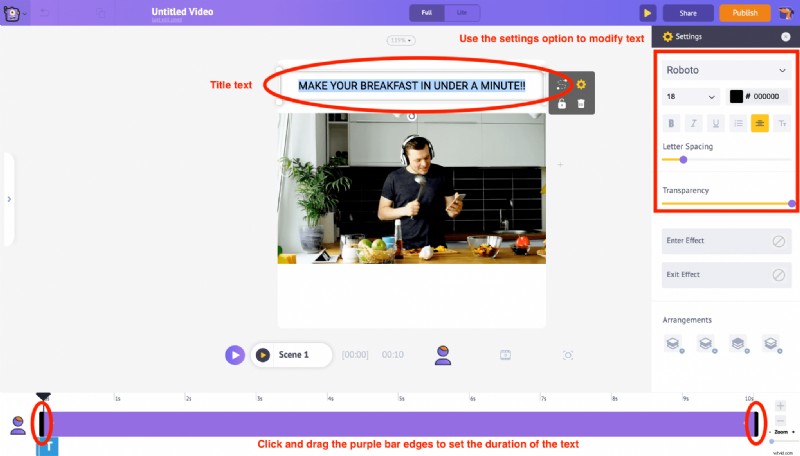
10. Use the Trim feature in the Item Menu to customize the duration of the video. According to the Instagram duration requirements (Instagram Square Video Posts can be 60 secs long), drag the edges to trim the duration and click on the Green tick button.
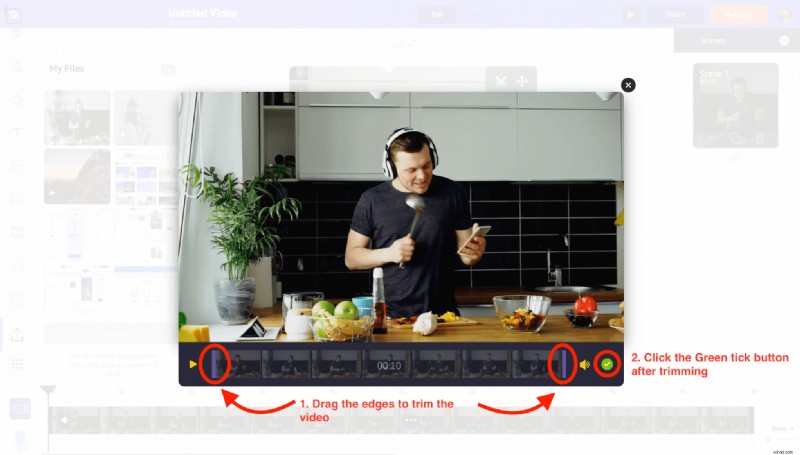
Using the Preview button in the top menu, we can view the changes made to the scene.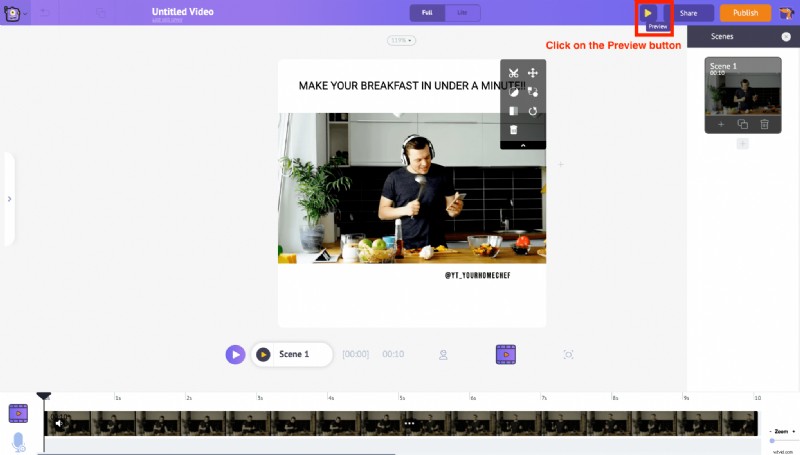
11. Once everything is done, click on the Publish button in the top right corner. From the options shown, select the Download Video option to download the video.
STEP 3: Uploading the video to your Instagram account
There are two different ways to upload videos onto Instagram. Let’s see how to publish your videos using both methods.
- Using a PC or Mac
- Using a Smartphone
1. Using PC or Mac
Only IGTV videos can be uploaded from PC. Follow the instructions below,
-
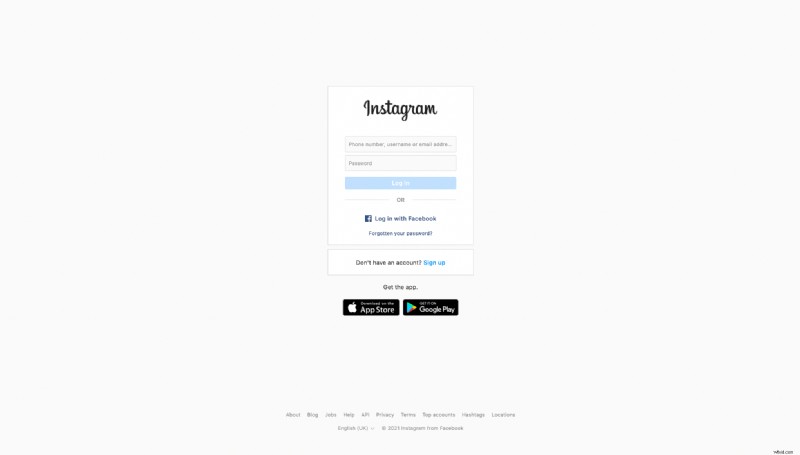
- Visit www.instagram.com on your PC or Mac browser and log in to your Instagram account
-
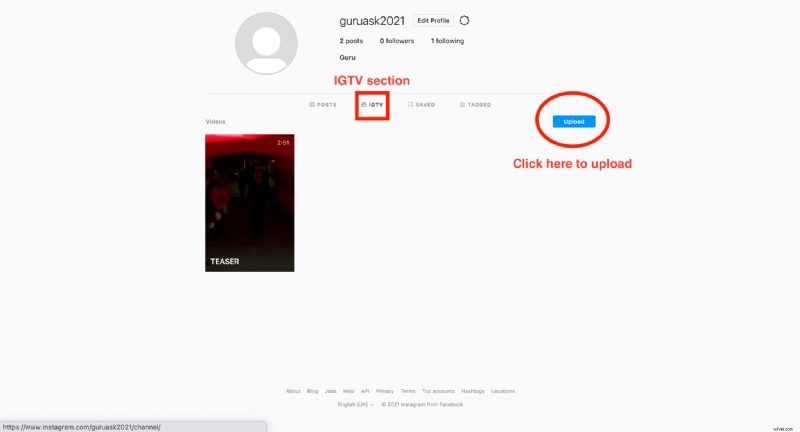
- In the profile page, under the IGTV section, click on the Upload button
-
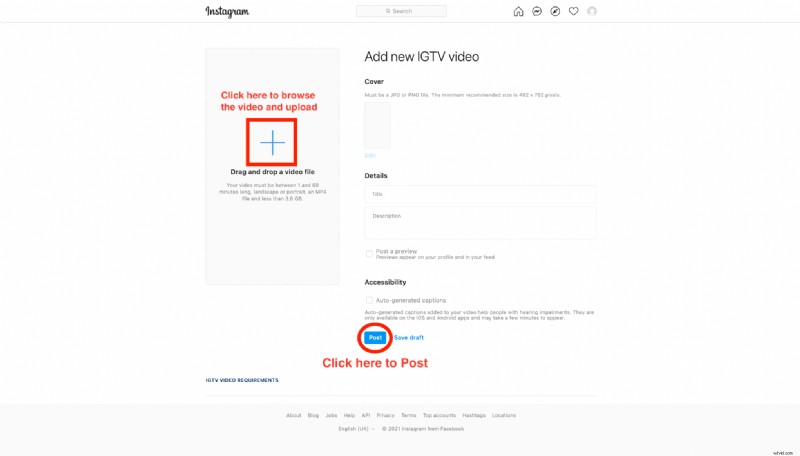
- You will be redirected to the Add new IGTV video section
-
- Upload the video either by drag and drop or click on the add button and browse for the video on your PC.
- Choose a Cover photo and Enter other details – Title and description once everything is completed, click on the Post button.
2. Using a smartphone
Instagram mobile application (Android & iOS) allows uploading the videos to your Instagram account as Reels, Story, IGTV, and Posts. Follow the instructions below
-
- Transfer the edited video onto your smartphone from your PC.
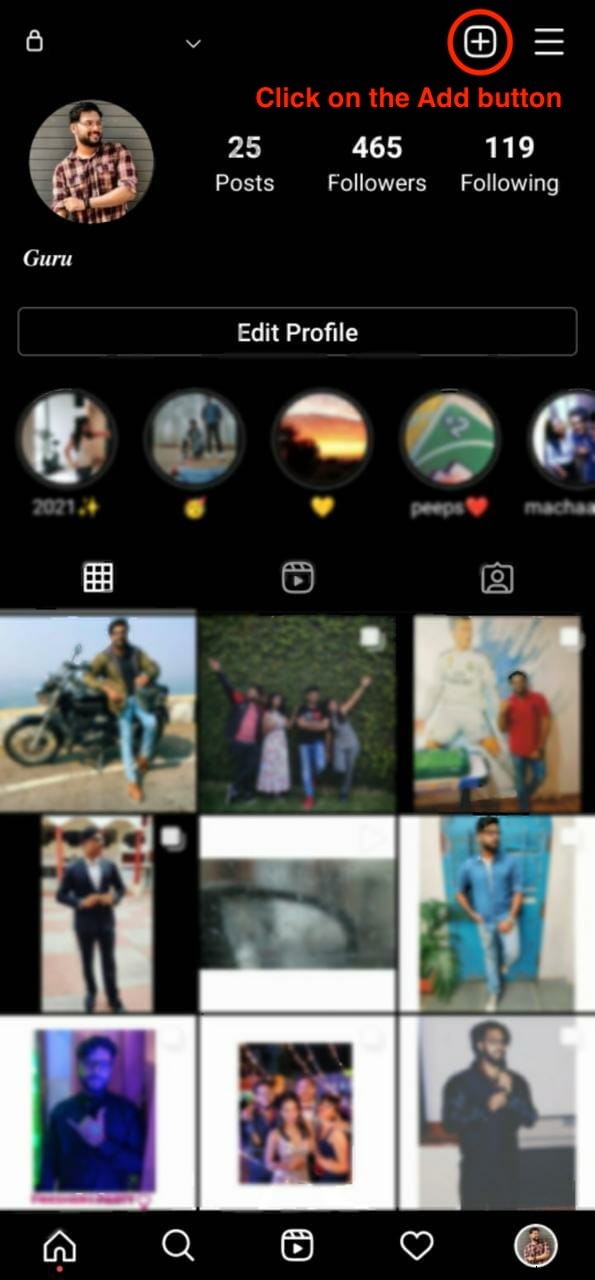
- Login in to your Instagram account, click on the add button at the top right corner in the profile page as shown below
- Transfer the edited video onto your smartphone from your PC.
-
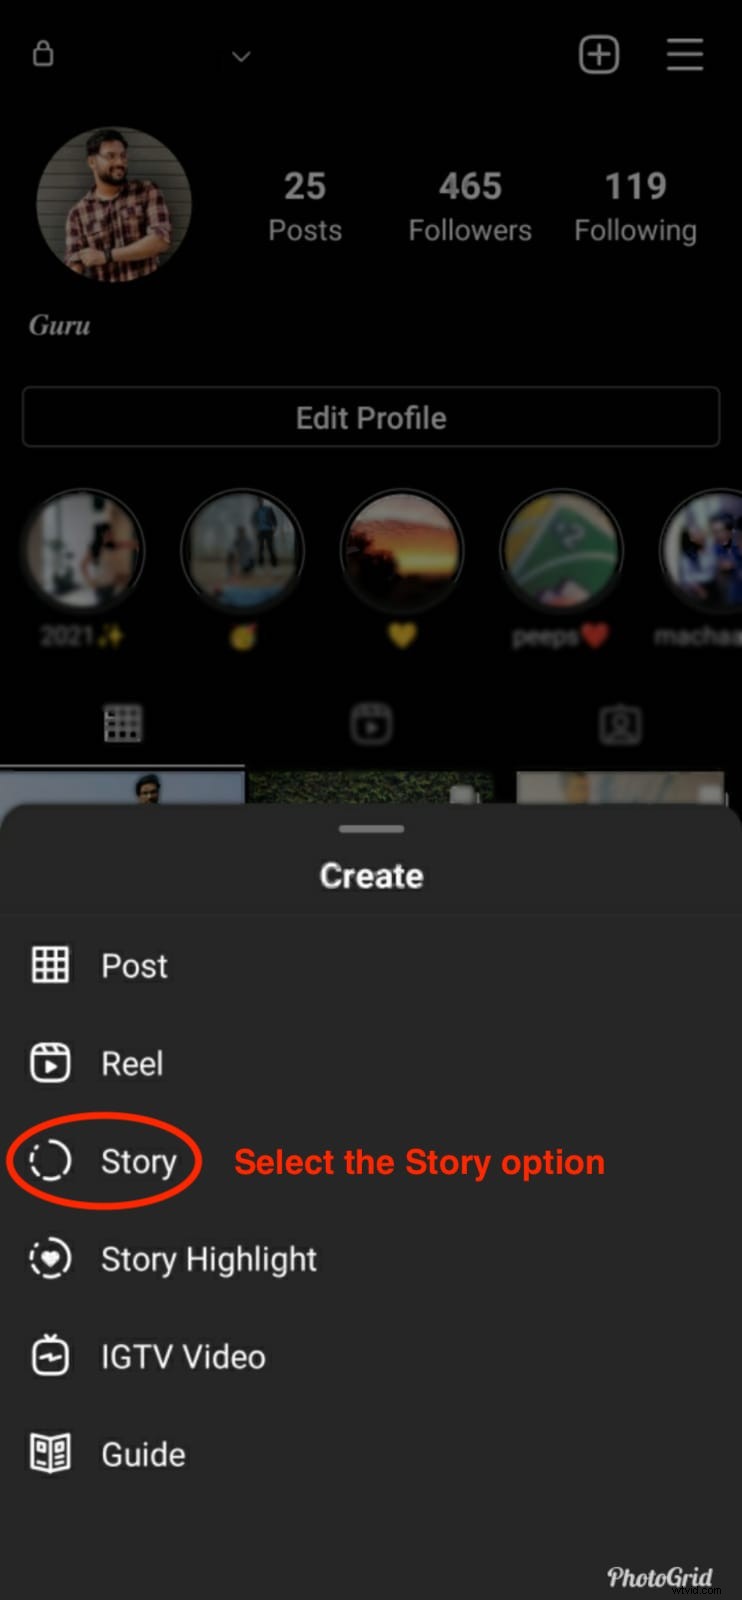
- This will pop up the different create options from the bottom of the screen. Choose the one according to your requirement. Here, for instance, we have chosen “Story” under the Create option.
- This will pop up the different create options from the bottom of the screen. Choose the one according to your requirement. Here, for instance, we have chosen “Story” under the Create option.
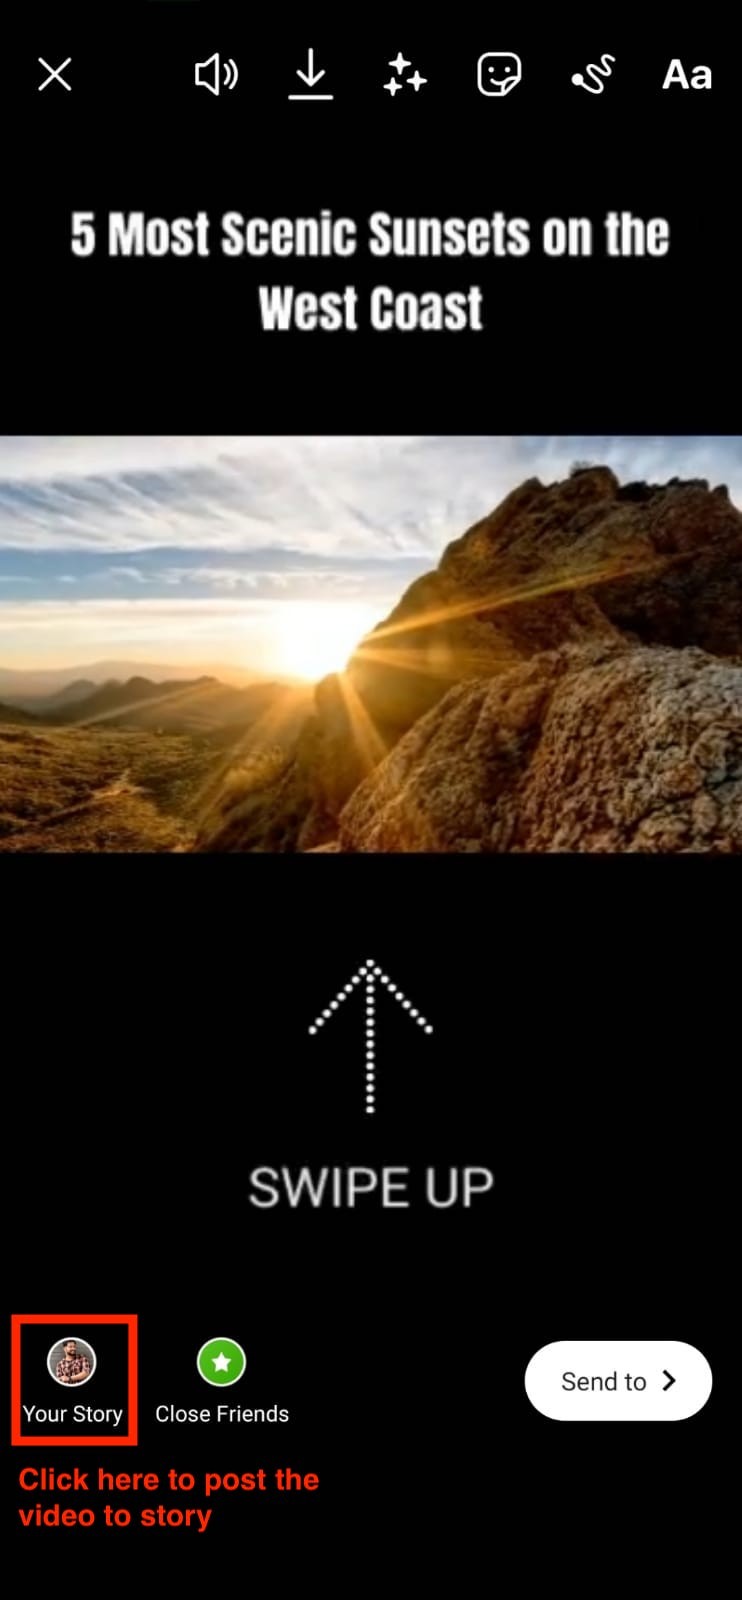

- Now choose the required video from the Gallery section. And click on the “Your Story” option to publish the video as Instagram Story.
The video will be uploaded successfully and will be visible in your profile now.

Kudos! You have learned to post your YouTube videos on Instagram. So why wait? Up your IG game with Animaker.