Speed ramping is a powerful technique that lets editors modulate motion to amplify drama, tension, or clarity. Whether you’re creating a viral clip or a polished film, mastering this skill elevates your visual storytelling.
Industry leaders use Adobe Premiere Pro, Movavi, and Wondershare Filmora to craft seamless speed changes. This guide explains the fundamentals of speed ramping and walks you through precise steps to speed up and slow down footage in Filmora.
In this article
Part 1: What Is Speed Ramping?
A speed ramp is a gradual acceleration or deceleration applied to a clip, creating a smooth transition between two distinct speeds. It’s the backbone of many cinematic moments—think of the sudden shift from a high‑octane chase to a deliberate, lingering reveal.
When executed correctly, speed ramps can add suspense, emphasize action, or highlight emotional beats. Professional editors often refer to the technique as time remapping, using it to blend super‑fast footage with super‑slow motion without compromising quality.

High‑frame‑rate footage (60fps or higher) is essential for dramatic slow‑motion; it ensures you have enough frames to stretch without jaggedness. Even with a standard frame rate, a well‑planned ramp can produce a polished, engaging effect.
Part 2: How to Speed Up a Video in Filmora
Step 1: Import the Clip
Launch Filmora, then drag your footage onto the timeline or use File > Import to add the file.

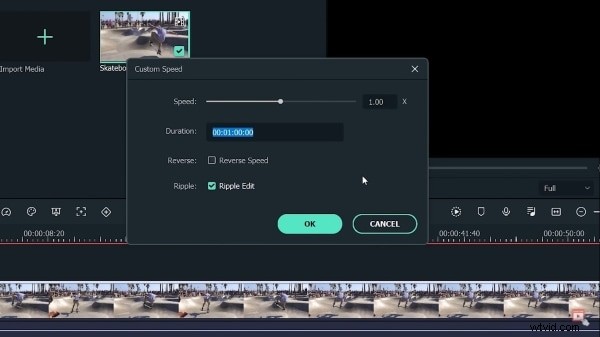
Step 2: Adjust the Speed
Right‑click the clip, choose Speed and Duration, and set a value greater than 1x (e.g., 2x for double speed). You can also enter a custom multiplier.

Step 3: Fine‑Tune the Duration
After setting the multiplier, the clip’s length will automatically shorten. Confirm the change by clicking OK and preview the motion.
Step 4: Save and Export
Save your project via File > Save Project. When ready, hit Export, choose your format, rename the file, and select the destination (device, cloud, or YouTube). Click Export to finalize.
Part 3: How to Slow Down a Video in Filmora
Step 1: Import the Clip
Open Filmora and add your footage to the timeline by dragging or selecting File > Import.
Step 2: Adjust the Speed
Right‑click the clip, select Speed and Duration, and set a value below 1x (e.g., 0.5x for half speed). For custom speeds, use the percentage slider.
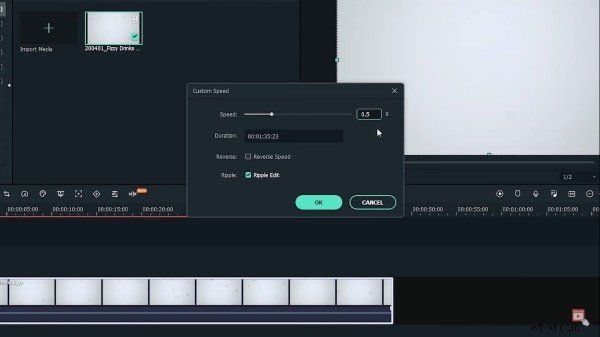
Step 3: Update the Duration
Increasing the duration will stretch the clip, creating a smoother slow‑motion effect. Confirm by clicking OK and review the playback.

Step 4: Save and Export
Save the project, then export to your preferred platform. Filmora’s export wizard lets you choose resolution, bitrate, and destination.

Part 4: Tips for Creative Speed Ramping
Record at a High Frame Rate
For future slow‑motion, shoot at 60fps or higher. This gives you flexibility to drop to 24fps for cinematic playback without loss of smoothness.
Manage Frame Resolution
When slowing footage, you can change the clip’s frame rate in settings (e.g., 120fps to 24fps). This stretches frames evenly, preventing choppiness.
Use Purposeful Remapping
Rather than applying a uniform speed, divide the clip by narrative beats—action, dialogue, reaction—and adjust each segment individually. This targeted approach keeps viewers engaged and avoids a monotonous rhythm.
Closing Remarks
Strategic speed ramps can transform a routine video into a memorable visual experience. Whether you’re a seasoned editor or a hobbyist, Filmora’s intuitive tools make the process straightforward, while Premiere Pro offers advanced refinement for the pros.
Wondershare Filmora
Get started easily with Filmora’s powerful performance, intuitive interface, and countless effects!