Create High‑Quality Video – Wondershare Filmora
Wondershare Filmora offers a powerful yet intuitive video editing experience, packed with a wide array of effects and detailed tutorials from its official channel.
Have you ever finished a video with great audio but a poor visual look? Whether it’s a recorded presentation with inadequate lighting or a casual home clip, low brightness can ruin the overall impact. Brightening a video corrects these mistakes and can add artistic flair, especially in the era of high‑resolution content. While some programs include this feature natively, Windows 10 users may find the process unclear without guidance.
Adjusting brightness on Windows 10 is straightforward once you know the right tools. This guide walks you through two reliable methods—using Filmora and the native Windows Video Editor—to make your videos shine.
In this article
Does Windows 10 Offer Built‑In Video Editing?
Yes. Windows 10 includes a user‑friendly video editor within the Photos app. It’s ideal for basic home projects such as trimming, creating slideshows, or auto‑generating montages. While it lacks advanced features needed for professional filmmaking, its simplicity makes it a solid choice for everyday editing tasks.
Many users find the built‑in editor sufficient for routine tasks like adjusting brightness or adding basic transitions, eliminating the need for expensive software.
How to Brighten a Video in Windows 10 – Two Easy Methods
1. Using Filmora to Brighten Your Video
Filmora stands out as a versatile editor for Windows and Mac, offering smooth performance and a polished interface. It’s especially effective for improving dark footage.
Step 1 – Install Filmora
Download the latest version from the official Wondershare website and install it on your PC.
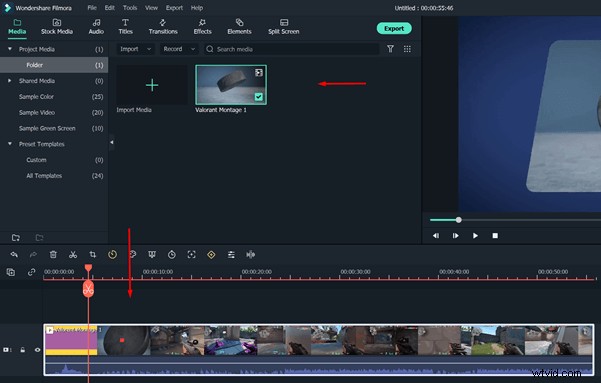
Step 2 – Import Your Video
Open Filmora, click Import, select your file, and drag it onto the timeline.
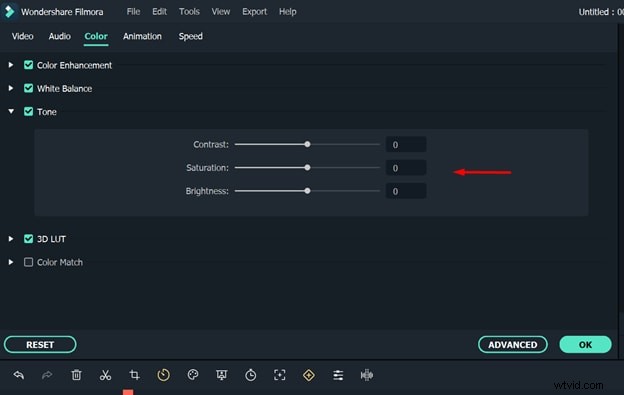
Step 3 – Access the Color Controls
Double‑click the clip on the timeline to open the editor. Navigate to the Color tab to find the White Balance, Tone, and 3D LUT options.

Step 4 – Adjust Brightness
Move the Brightness slider to the right. Press the spacebar to preview the changes in real time. Continue adjusting until the video looks clear and vibrant.
Step 5 – Export Your Video
Click Export and choose your desired format—MP4, MOV, AVI, etc. You can also select device presets for iPhone, iPad, or Android. Direct uploads to YouTube and Vimeo are available, and DVDs can be burned if needed.
2. Using Windows Video Editor to Brighten a Video
For those preferring a free, built‑in solution, Windows Video Editor is an excellent choice. Follow these steps to brighten your footage without installing additional software.
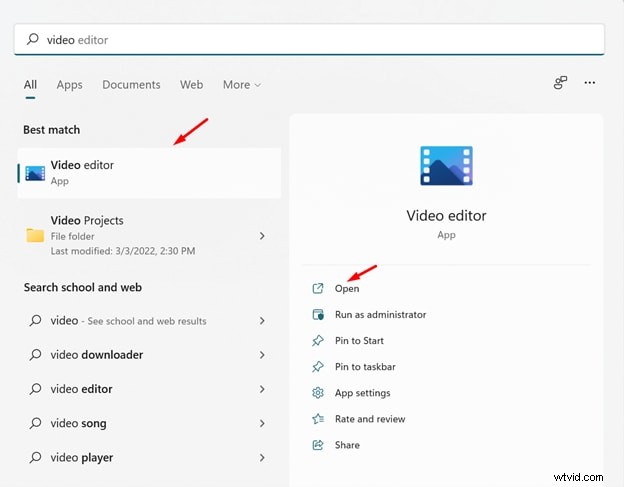
Step 1 – Open Video Editor
Search for “Video Editor” in the Windows Start menu and launch the app.
Step 2 – Create a New Project
Click New project, then Add to import your video file.
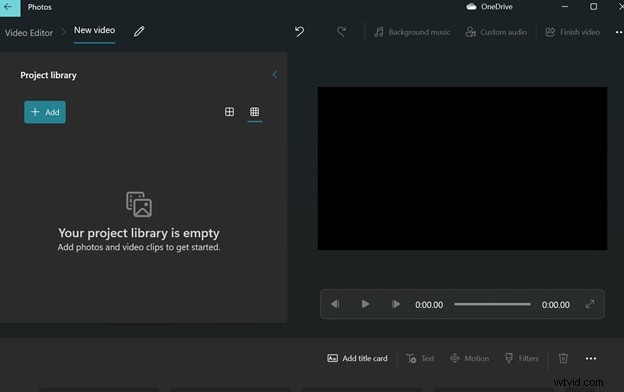
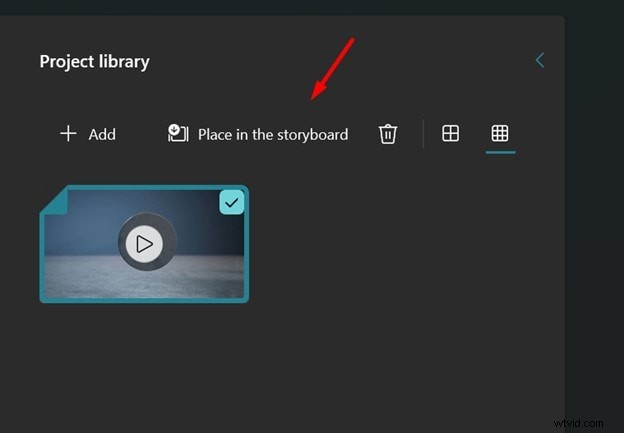
Step 3 – Add to Storyboard
Drag the clip onto the storyboard to unlock editing options.
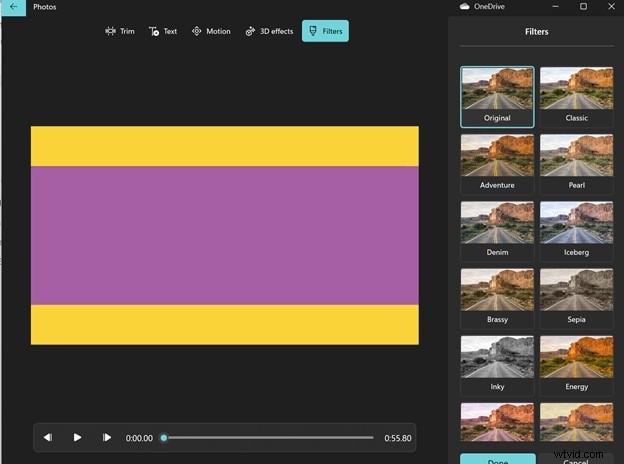
Step 4 – Apply a Brightening Filter
From the bottom toolbar, select Filters. Browse the options and choose a filter that enhances brightness. Preview the result before finalizing.
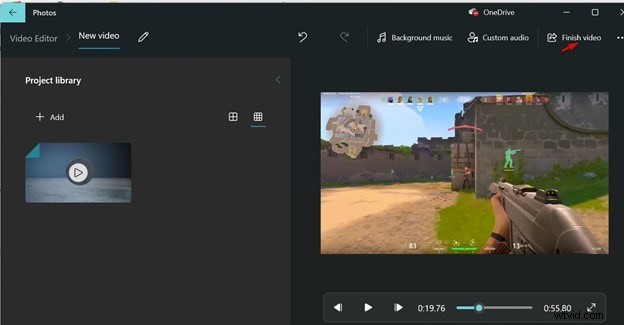
Step 5 – Finish and Export
Click Done, then Finish video. Select your preferred resolution and export the edited file.
Conclusion
Brightening a video on Windows 10 is simpler than you might think. Whether you opt for Filmora’s advanced controls or the native Video Editor’s straightforward filters, both methods deliver crisp, clear results without the need for costly software.
Give these steps a try and transform your dark footage into vibrant, professional‑looking videos.