Frame rate is a cornerstone of visual storytelling. A mis‑matched FPS can make motion feel jarring or result in a choppy viewing experience. Whether you need to swap an entire sequence’s frame rate or fine‑tune individual clips, this guide gives you step‑by‑step instructions for Adobe Premiere Pro. We’ll cover common conversions—such as turning 60fps footage into cinematic 24fps, creating smooth 120fps edits, and ensuring your final output meets platform or creative standards.
Table of Contents
- Check a Video’s Current Frame Rate in Premiere Pro
- Why Frame‑Rate Adjustments Matter
- How to Change FPS in Premiere Pro
- Creating 120fps Videos
- Upgrading 30fps to 60fps
- Converting 60fps to 24fps for a Cinematic Look
- Best‑Practice Conversion Cheat Sheet
- [Bonus] Wondershare Filmora – A Premiere Pro Alternative
How to Check a Video’s Current Frame Rate in Premiere Pro
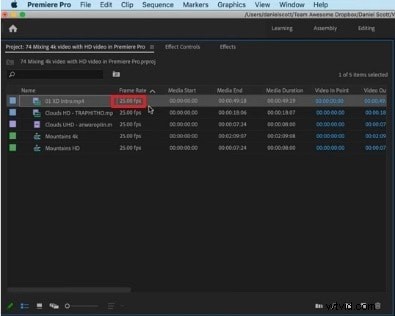
Before you start editing, confirm the footage’s native FPS. In the Media panel, the frame rate appears next to the file name in the format “x.00 fps.” Knowing the original value will guide your next steps.
Why Frame‑Rate Adjustments Matter
Action‑heavy scenes shot at 30fps can feel noticeably choppy. Increasing the frame rate smooths motion and enhances slow‑motion effects. However, pushing to high FPS (e.g., 60fps) can trigger a “soap‑opera effect,” making footage look overly sharp and less cinematic. The ideal FPS depends on your target audience, platform, and desired visual style.
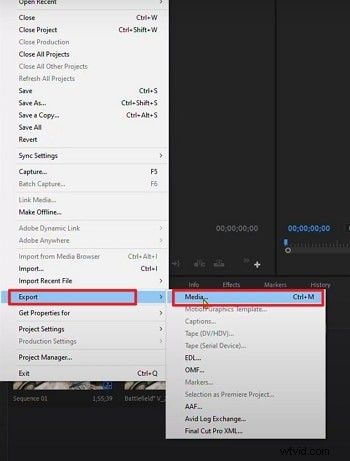
How to Change Video FPS in Premiere Pro: Step‑by‑Step
Premiere Pro offers two distinct methods: altering the sequence’s frame rate or adjusting a clip’s FPS directly. Below you’ll find clear instructions for both.
Method 1: Change the Frame Rate of a Sequence
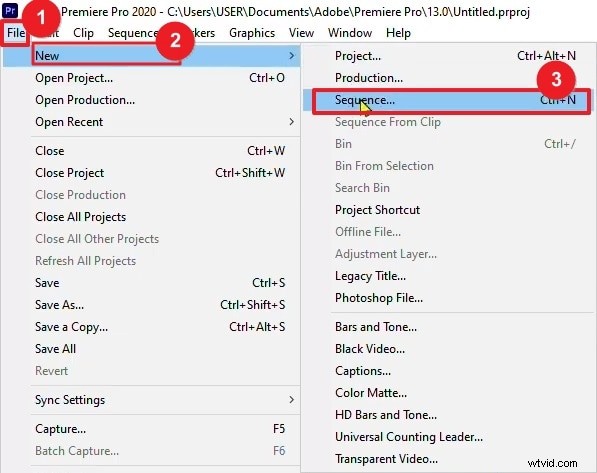
- Open your project in Premiere Pro.
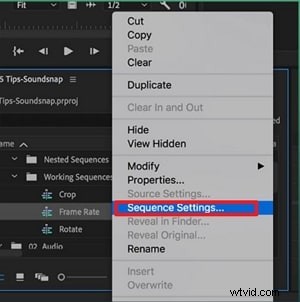
- Right‑click the sequence you want to modify in the Project panel and choose Sequence Settings.
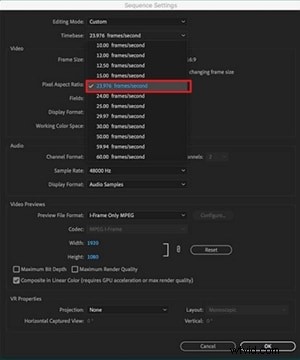
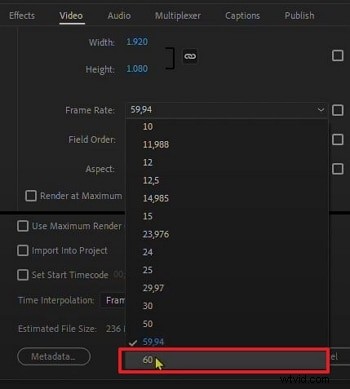
- In the Timebase drop‑down, select the desired FPS.
- Click OK to apply the change.
Method 2: Change the Frame Rate of a Video Clip
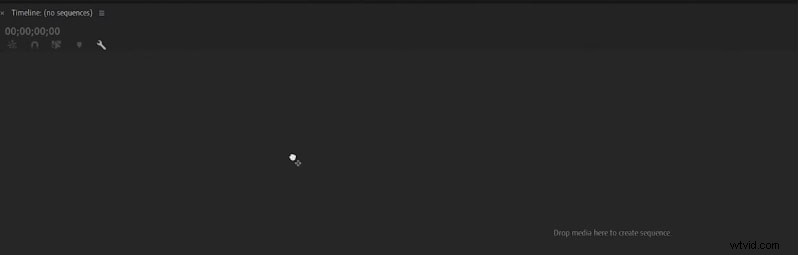
- Drag the clip onto the timeline.
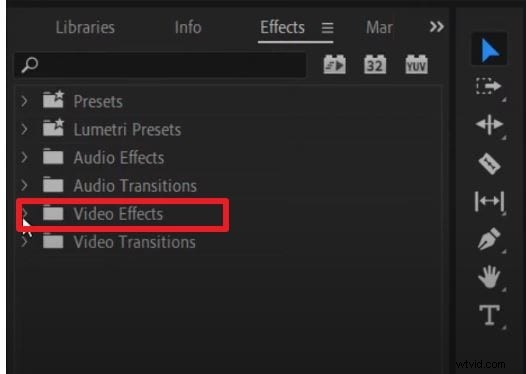
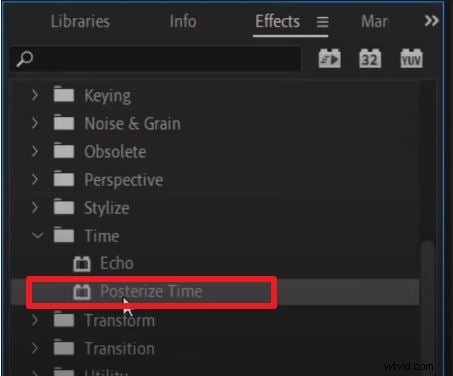
- Navigate to the Effects panel and locate Video Effects > Time > Posterize Time.
- Apply the effect to the clip.
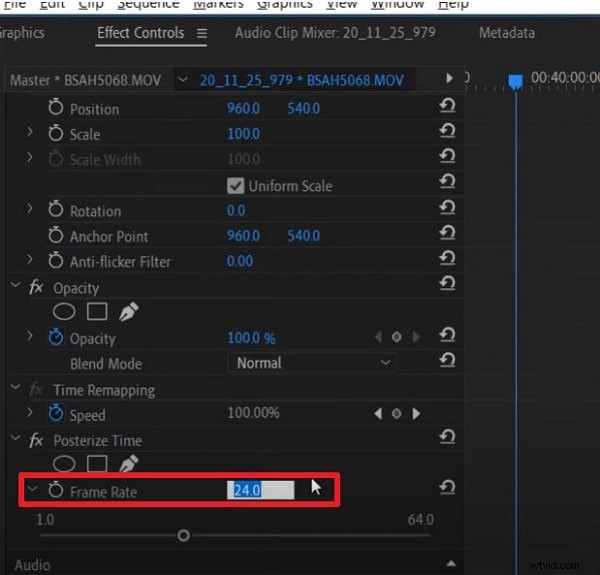
- Open Effect Controls and click the arrow next to Frame Rate.
- Enter the new FPS value (e.g., 60).
- Render the selection via Sequence > Render Selection.
How to Make 120fps Videos with Premiere Pro
Gaming and high‑speed footage often comes in 120fps. Premiere Pro can handle this frame rate, but you need to confirm the sequence settings.
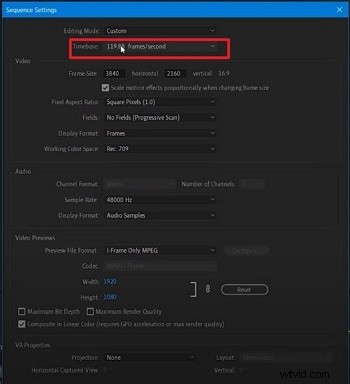
- Import the 120fps clip.
- Drag it onto the timeline; the timeline will prompt you to create a new sequence.
- In Sequence Settings, the Timebase should read “119.88 frames/second” (rounded to 120fps).
- Edit and render; the exported file will preserve the 120fps rate.
How to Upgrade 30fps to 60fps in Premiere Pro
To double the frame rate for smoother motion, follow these steps:
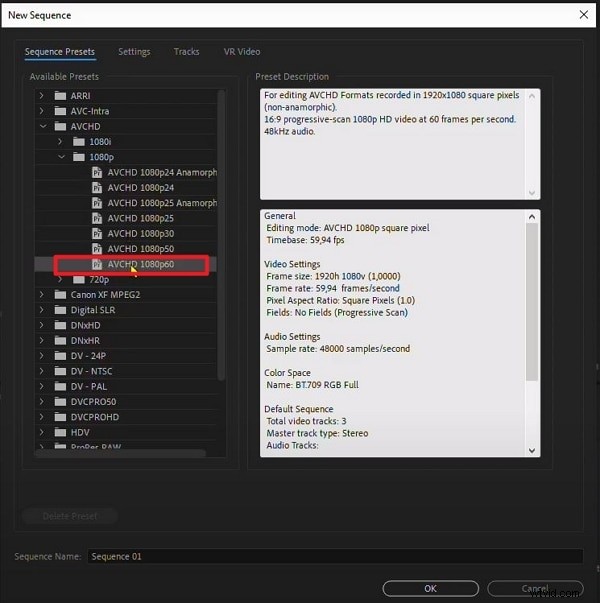
- Create a new sequence set to AVCHD 1080p60.
- Import the 30fps clip and place it on the timeline.
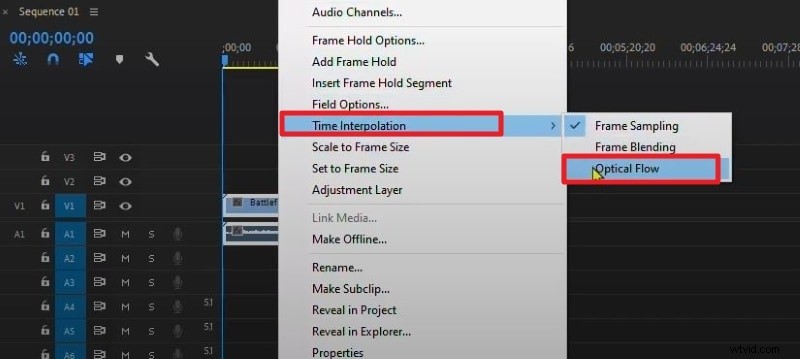
- Right‑click the clip and choose Time Interpolation > Optical Flow to generate intermediate frames.
- Render the clip; export with the desired 60fps preset.

Converting 60fps to 24fps for a Cinematic Look
To achieve a classic film aesthetic from high‑speed footage, use the Interpret Footage command:
- Right‑click the 60fps clip and select Modify > Interpret Footage….
- Choose Assume this frame rate and enter 24 (or 23.976 for precise timing).
- Confirm with OK—Premiere will treat the clip as 24fps, extending its duration and creating smooth slow motion.
- If you only want to conform to a 24fps timeline without speed change, simply drop the clip into a 24fps sequence; Premiere will drop frames automatically.
Key Considerations:
- Speed reduction to 40% of the original may lower audio pitch; detach or replace the audio if needed.
- Motion blur may feel more staccato than native 24fps footage, but the effect is often subtle.
- Use this technique for creative retiming and cinematic slow‑motion.
Frame‑Rate Conversion: Best‑Practice Cheat Sheet
| Conversion Scenario | Recommended Method | Benefit | Potential Pitfall |
|---|---|---|---|
| 60fps → 24fps | Interpret Footage | Smooth 40% slow motion | Audio pitch shift; may need correction |
| 30fps → 60fps | Optical Flow | Ultra‑smooth new frames | Render‑intensive; possible artifacts |
| 120fps → 24fps | Interpret Footage | 20% slow motion for action shots | Requires high shutter speed during capture |
| Mixed FPS in a Sequence | Set sequence to primary delivery FPS | Premiere conforms clips; use Frame Blend for softness | Motion feel may vary if not managed |
Alternative: Wondershare Filmora – A Premiere Pro Alternative
If Premiere Pro’s workflow feels too complex for quick adjustments, Wondershare Filmora offers a streamlined, beginner‑friendly interface. It lets you change FPS from 30 to 60 or beyond with just a few clicks.

How to Change Frame Rate in Wondershare Filmora (Desktop)
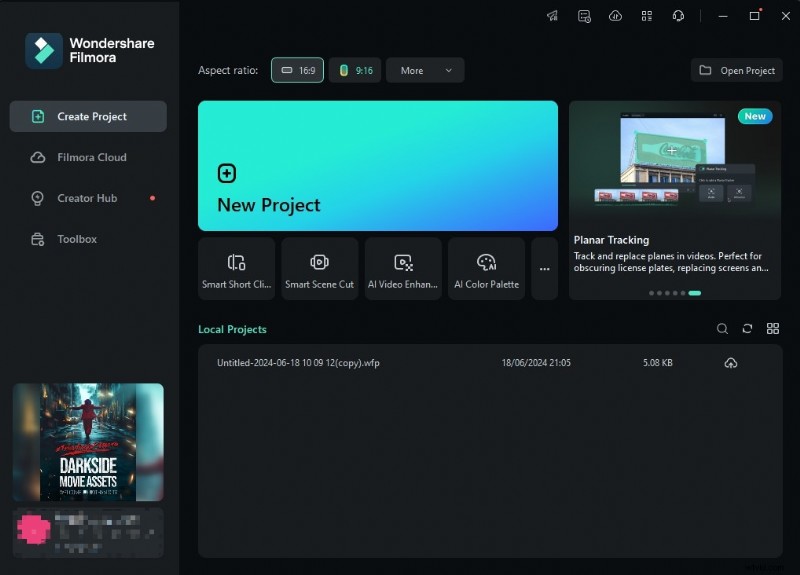
- Open Filmora and create a new project.
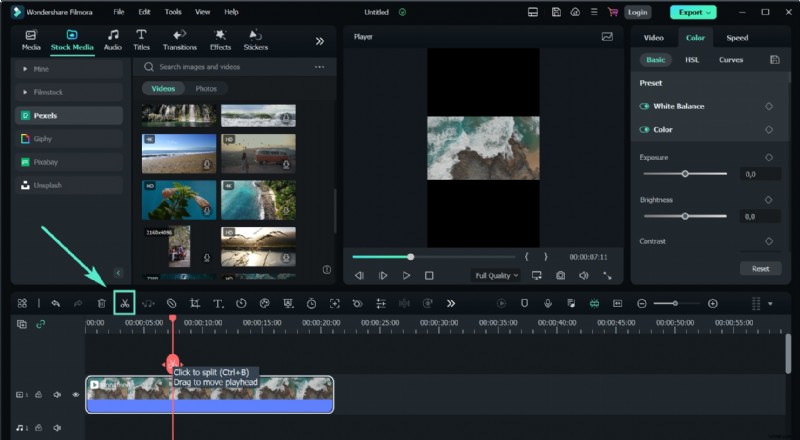
- Import the video you wish to modify and drag it onto the timeline.
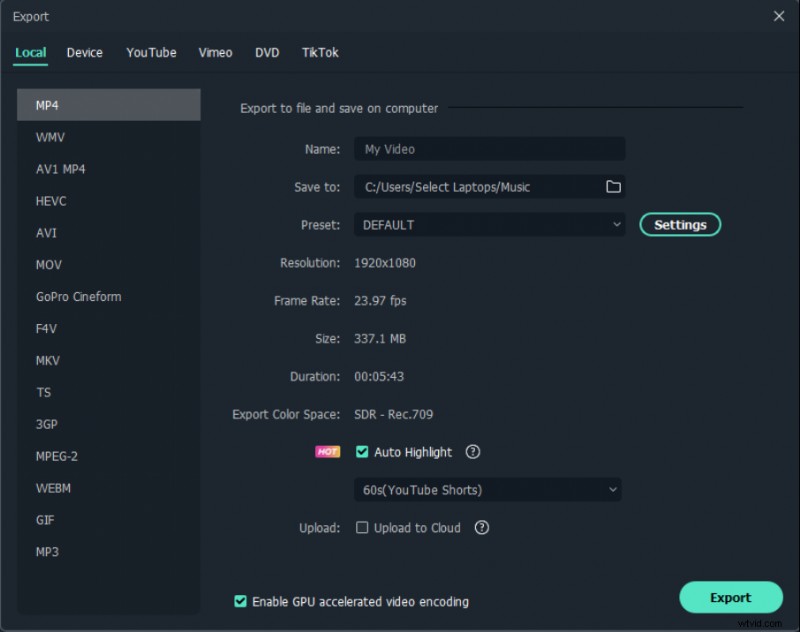
- Click Export, choose your format, and set the desired frame rate in the options panel.
- Export the final file.
Filmora Mobile – Change FPS on the Go
Filmora’s mobile app offers the same functionality:
- Install from the App Store or Play Store and start a new project.
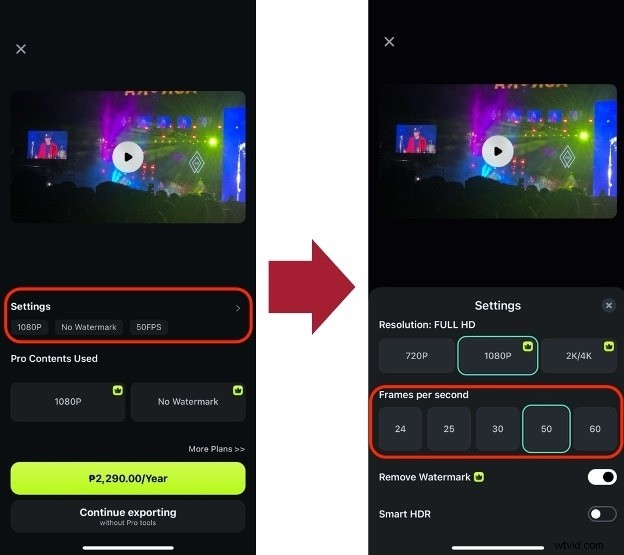
- Import the clip and tap Export.
- Adjust the Frames per Second setting in Settings before exporting.

Conclusion
Choosing the right frame rate is vital for delivering a polished visual experience. With Premiere Pro’s robust tools—or Filmora’s intuitive interface—you can correct mistakes and fine‑tune your footage to match any platform or artistic vision.
FAQ: Frame‑Rate Tweaks in Premiere Pro
What’s the best FPS for YouTube videos?
YouTube supports 24fps (cinematic), 30fps (standard), and 60fps (gaming/sports). Pick based on content style and keep the sequence consistent.
Does changing FPS affect video quality?
Lowering FPS drops frames, potentially causing choppiness. Raising FPS forces Premiere to interpolate frames, which can introduce artifacts. Optical Flow mitigates this.
How to fix choppy playback after a frame‑rate change?
Ensure sequence settings match your target FPS, use Frame Blend or Optical Flow, and avoid extreme rate shifts.
Can I batch‑change FPS for multiple clips?
Yes—select multiple clips, right‑click, and choose Modify > Interpret Footage… to apply the same setting to all.