The time‑lapse feature on iPhone is designed to compress long events into a short, 20‑to‑40‑second clip. When a video is too fast, you may want to reduce its playback speed to reveal details that would otherwise be lost.
Below is a comprehensive, professional walkthrough that covers everything from creating a time‑lapse to fine‑tuning its speed with iMovie, Filmora, and other trusted tools.
In this article
- What is a time‑lapse video?
- How to capture a time‑lapse on iPhone
- Ways to slow down a time‑lapse on iPhone
- Tips for preserving quality after slowing down
- Conclusion and next steps
Part 1. What is a Time‑Lapse Video?
A time‑lapse video is a series of frames captured at set intervals, allowing slow changes—like a sunset or a flower blooming—to play back at normal speed, creating the illusion of rapid motion. It’s an effective way to document long‑duration events in a compact format.

Below is a step‑by‑step guide to capturing a time‑lapse with the native iPhone Camera app:
Step 1: Open the Camera app and swipe through the camera modes to select Time‑Lapse.

Step 2: Frame your shot and keep the phone steady to avoid unwanted motion.
Step 3: Tap the red record button to start. When you have enough footage, tap it again to stop. The clip will be saved to the Photos app for review, editing, or sharing.
Part 2. How to Slow Down a Time‑Lapse Video on iPhone
Slowing down a time‑lapse expands the playback window, letting viewers appreciate finer details. The process is simple with the right software.
We recommend Wondershare Filmora for precise speed control. It offers a speed curve feature that preserves frame quality while reducing playback speed up to 0.1×.
Follow these steps to slow down your clip using Filmora:
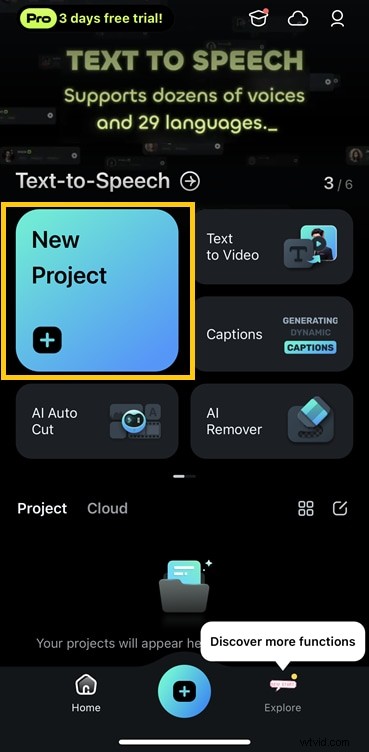
Step 1: Install Filmora from the App Store and launch it.
Step 2: Tap New Project and import your time‑lapse video.
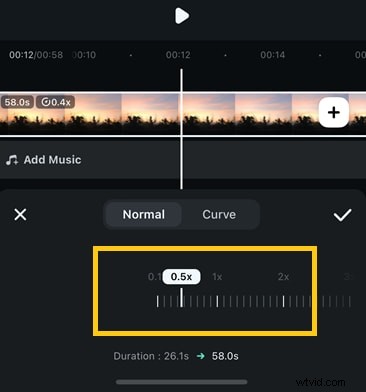
Step 3: Select the clip on the timeline, then tap the Speed icon.
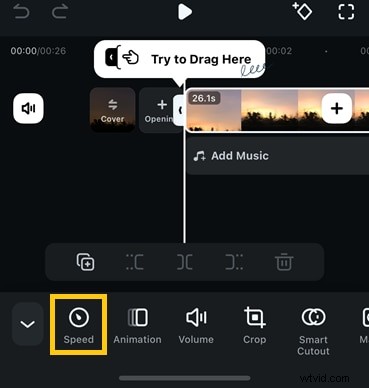
Step 4: Adjust the slider leftward to slow the clip. Confirm the desired speed by tapping the checkmark.
Step 5: Tap Export in the top‑right corner. Choose your resolution and frame‑rate settings before rendering.

Part 3. How to Slow Down Time‑Lapse Video Using iMovie
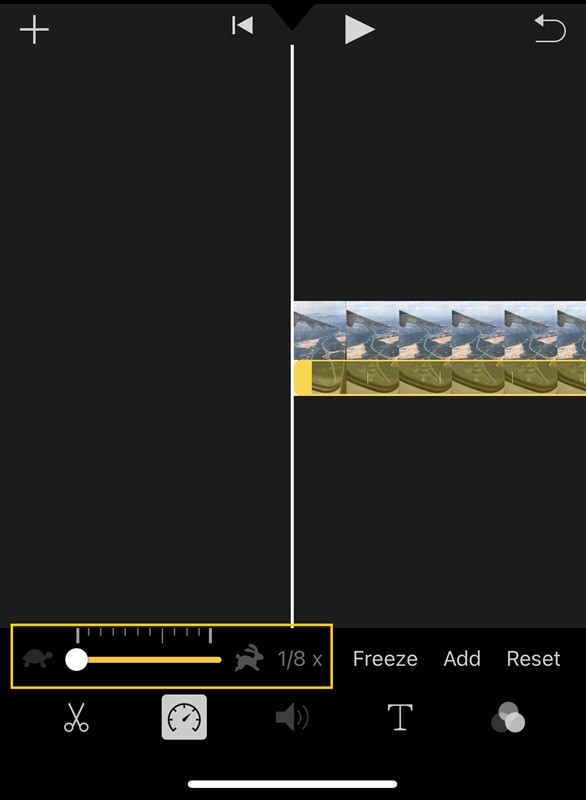
If you prefer an app that comes pre‑installed on iPhone, iMovie is a solid choice. It supports a minimum speed of 1/8×, which is suitable for casual edits.
Here’s how to do it in iMovie:
Step 1: Open iMovie and choose Movie to create a new project.

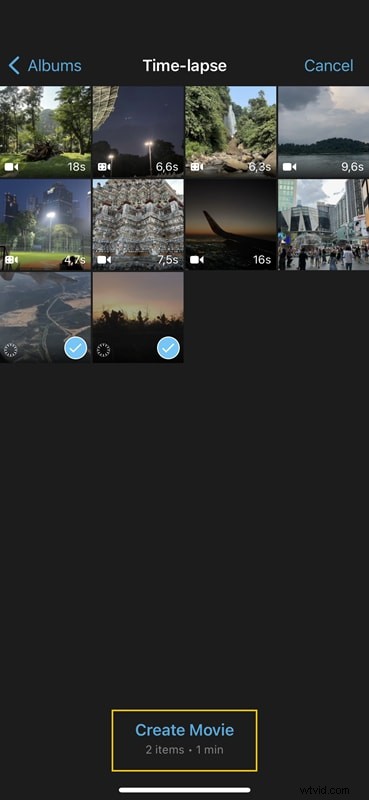
Step 2: Select your time‑lapse from the library and tap Create Movie.
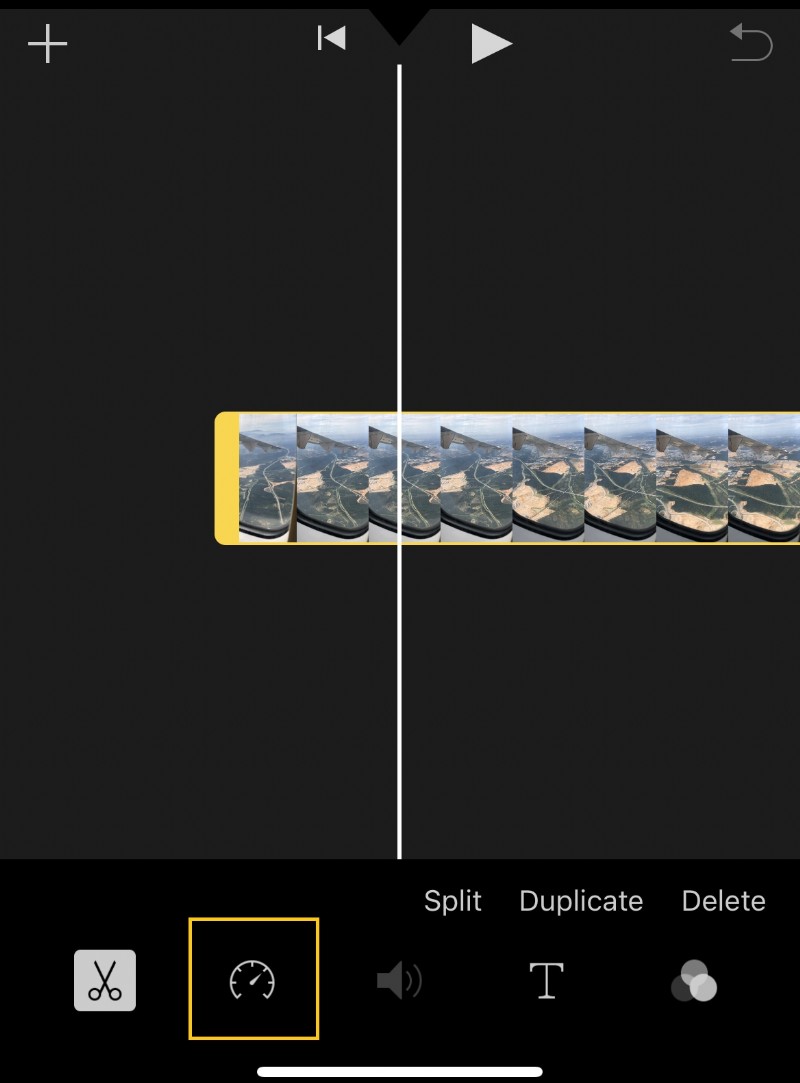
Step 3: Tap the clip in the timeline, then tap the speedometer icon at the bottom.
Step 4: Slide to reduce the speed to as low as 1/8×, preview in real time, and fine‑tune as needed.
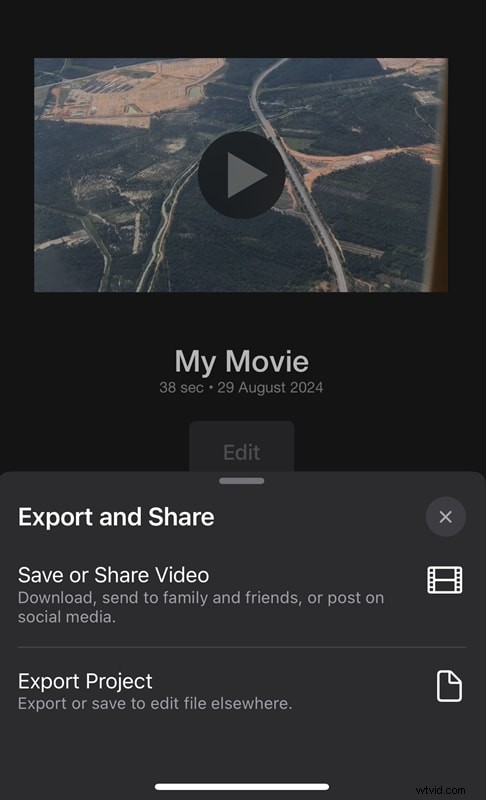
Step 5: Tap Done, then Save or Share to export the slowed‑down clip.
Part 4. Tips to Maintain Video Quality After Slowing Down Time‑Lapse Videos
Slowing down footage can introduce artifacts if not handled carefully. Follow these best practices to keep your video crisp:
- Start with high‑resolution footage to provide enough detail for deceleration.
- Record at a higher frame‑rate (e.g., 60 fps) so that slowed‑down playback remains fluid.
- Use editing software that supports frame‑rate conversion, such as Filmora, to avoid pixelation.
- Fine‑tune the output frame‑rate; a smooth 30 fps or 24 fps is usually sufficient.
- Keep footage stable: Shaky frames become more noticeable when slowed down.
- Maintain consistent lighting: Avoid drastic exposure shifts throughout the capture.
- Export in the highest quality preset available; avoid aggressive compression.
By applying these guidelines, you’ll produce professional‑looking slow‑motion time‑lapse videos on your iPhone.
Conclusion
Slowing down a time‑lapse unlocks details that fast playback obscures. For quick edits, iMovie’s 1/8× speed is sufficient. For finer control and higher output quality, Wondershare Filmora is the preferred tool.
With the techniques above, you can confidently transform your iPhone time‑lapse footage into captivating slow‑motion masterpieces.