About InShot Video Editor
InShot is a widely used mobile video editor that blends ease of use with a robust set of features. Its intuitive interface allows both beginners and seasoned creators to trim, layer, and polish footage quickly, making it ideal for the fast‑paced world of YouTube, Instagram, TikTok, and other social platforms.
- Trim, Cut & Split: Remove unwanted segments and reorganise scenes in a single tap.
- Music, Filters & Text: Add soundtracks, vibrant filters, and custom text overlays to convey your message.
- Transitions & Visual Effects: Enhance flow with smooth transitions and eye‑catching effects.
- Stickers & Emojis: Personalise videos with a wide selection of stickers and emojis.
Available on Android and iOS, InShot offers a free tier with core tools and optional in‑app purchases for premium effects and watermark removal. It’s a cost‑effective, versatile solution for on‑the‑go editing.
Creating Picture‑in‑Picture with InShot
The Picture‑in‑Picture (PiP) feature lets you overlay a secondary video or image onto your main footage—perfect for reaction clips, tutorials, and gameplay highlights. Below is a detailed walk‑through.
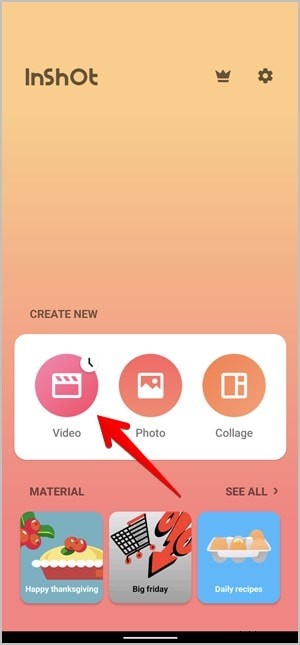
Step 1: Install & Launch
Download InShot from the Google Play Store (Android) or the Apple App Store (iOS). Open the app and tap Video to start a new project.
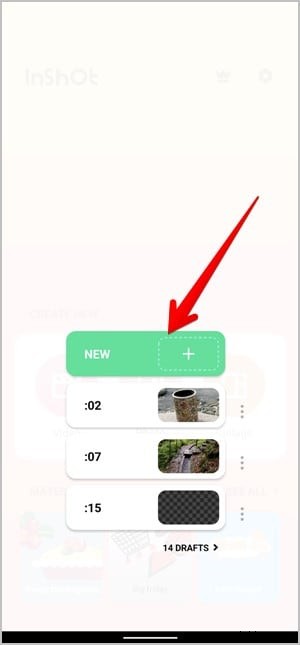
Step 2: Import Your Main Footage
Select the primary video from your gallery. You can begin editing immediately—no account required.
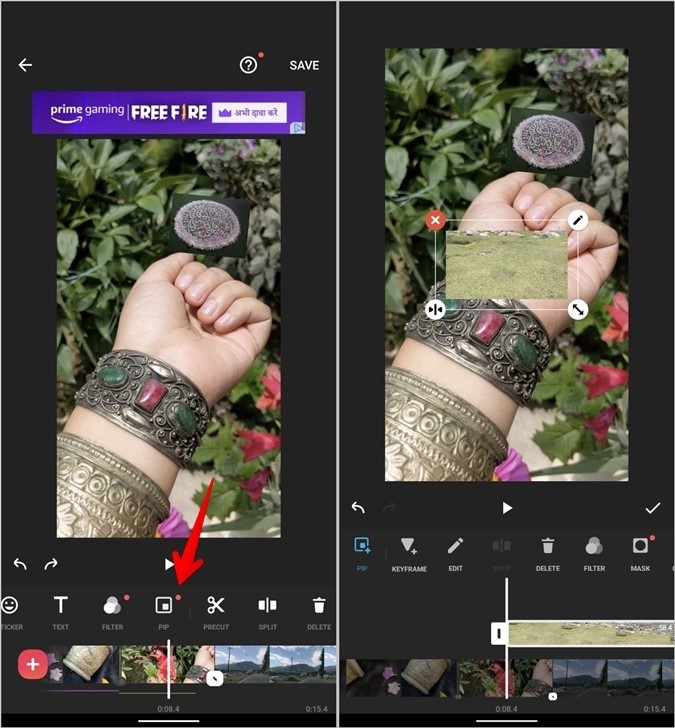
Step 3: Add the PiP Layer
Tap the Sticker icon and locate the PiP option. Choose a secondary video or image; it will appear as a smaller window over your main clip.
Step 4: Position & Resize
Pinch to scale the PiP window and drag it to your preferred location. Add borders, shadows, or adjust transparency to blend the overlay seamlessly.
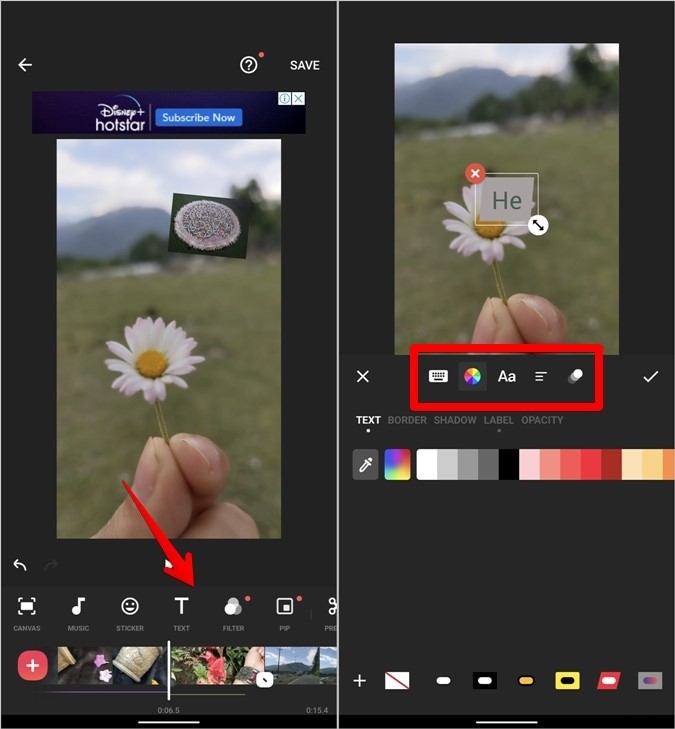
Step 5: Add Text Overlays
Tap the Text icon to insert captions, titles, or subtitles. Choose fonts, colors, borders, and optional animations. Set display durations to sync with key moments.
Step 6: Fine‑Tune Speed & Motion
Use the Speed tool to create time‑lapse or slow‑motion effects. The Curve option allows variable speed adjustments within a clip.
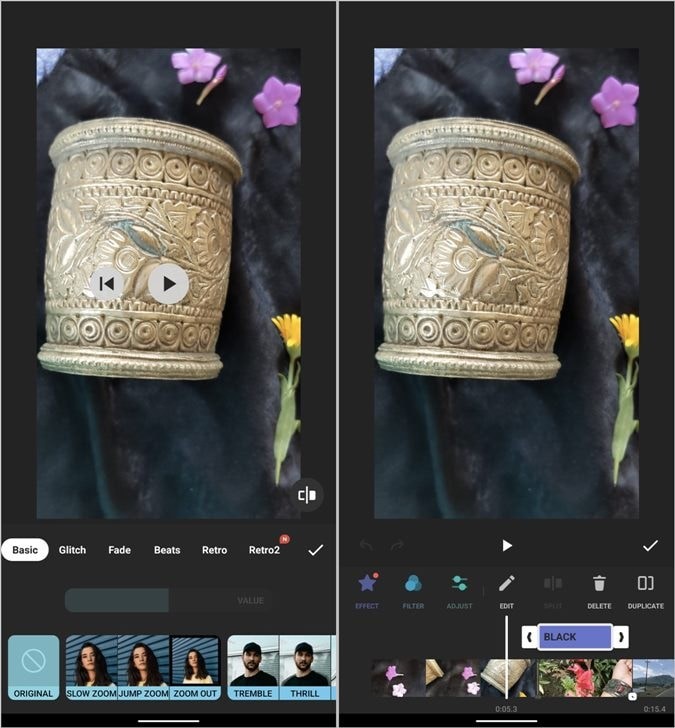
Step 7: Enhance with Filters & Effects
Open the Filter panel for color grading or brightness tweaks. The Effects tab offers animated overlays, while the Adjust section lets you control contrast, saturation, and warmth.
Step 8: Export Your Video
Tap Save and choose your preferred resolution (1080p, 720p, etc.) and frame rate (30fps or 60fps). You can remove the watermark by watching a short ad or upgrading to InShot Pro.
Alternative PiP Editor: Filmora for Mobile
For users who need more advanced PiP controls—such as motion tracking, multi‑layer editing, or high‑resolution exports—Wondershare Filmora for mobile offers a powerful suite of tools.
- Unlimited Layers: Seamlessly stack multiple videos or images without performance loss.
- Advanced Layer Controls: Each PiP layer can be individually trimmed, animated, or filtered.
- Masking & Blending: Shape overlays with custom masks for creative transitions.
- 4K Export: Export projects in up to 4K resolution without compromising quality.
Getting Started with Filmora
- Install the App: Download from the Google Play Store or Apple App Store.
- Create New Project: Tap Create New Video and choose your main clip.
- Add Overlay: Select Overlay or PIP from the editing menu and pick a secondary media file.
- Adjust Size & Position: Pinch to resize, drag to place, and set duration.
- Customize Appearance: Add borders, animations, opacity, or filters.
- Preview & Refine: Use the preview button to fine‑tune placement and effects.
- Export: Tap Export, choose resolution and frame rate, then save or share directly to social platforms.
Conclusion
The PiP effect is a powerful way to enrich your videos and captivate viewers. InShot delivers quick, reliable PiP edits suitable for spontaneous mobile projects, while Filmora provides advanced customization for creators demanding greater control. Choose the tool that best aligns with your project scope and start producing polished, engaging videos today.