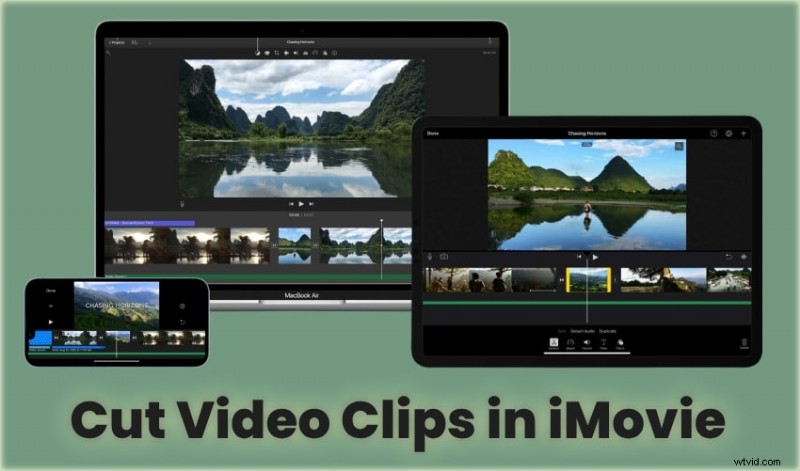
Are you wondering how to cut a video clip in iMovie? Do you wish to split your video to add transitions or effects to a specific section? How about trimming the beginning and end to polish your footage? This guide will walk you through all the methods.
We'll show you how to split, cut, and trim videos in iMovie and introduce an excellent alternative with many more features. Let's jump straight into the steps.
In this article
-
- How to Use Smart Short Clips in Filmora
- How to Use Scene Detection in Filmora
How to Split Clips in iMovie on an iPhone or iPad
The following guide shows an iPad workflow for iMovie. However, iMovie's interface is identical on iOS and iPadOS, so grab your preferred device and follow along. Here's how to split clips in iMovie:
Step 1: Launch iMovie and import video.

Choose a video and tap Create Movie.

Step 2: Select and trim video
Select the video on the timeline. Tap and hold the yellow handle, then drag it to trim the beginning. You can do the same for the end.
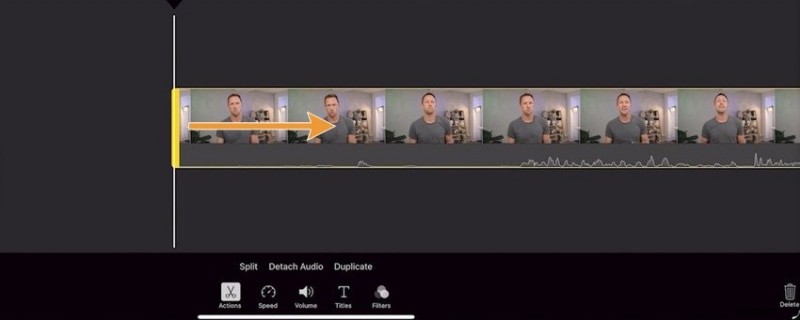
Step 3: Split the video clip
To split your video, drag it to position the playhead on the desired frame and tap Actions - Split.

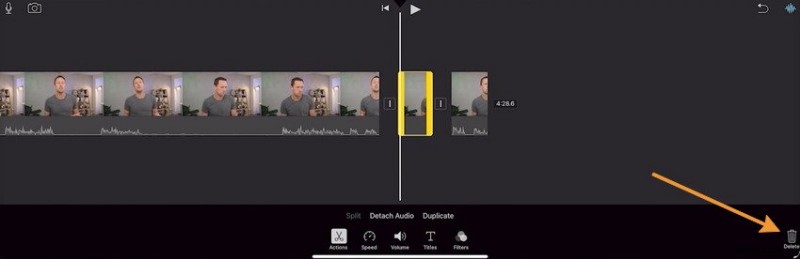
Step 4: Select the clip and hit Delete to remove it.
Step 5: Edit your clip after split
You can change the speed, adjust the volume, insert text, apply filters, and detach audio. You can also add a transition between the clips.
Add a transition between the clips or leave the video as is if you want a jump cut.

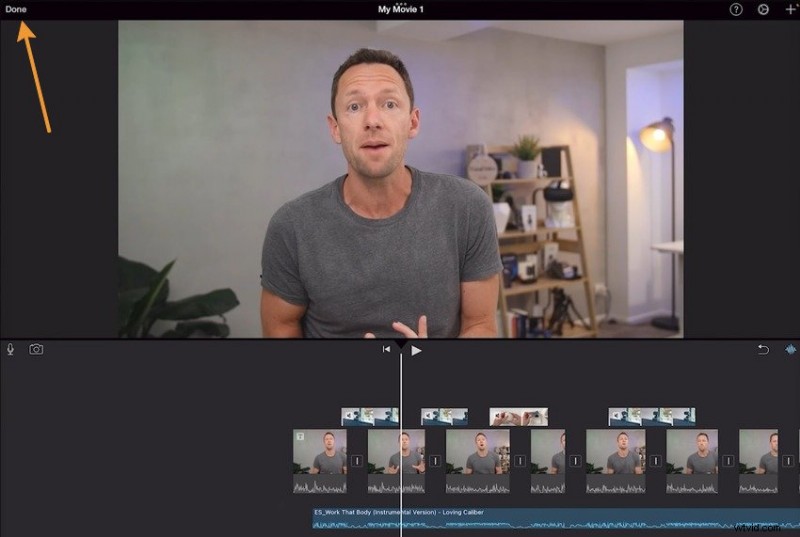
Step 6: Tap Done to save the changes.
How to Cut Videos in iMovie on a Mac
iMovie for macOS offers more editing features, including additional options for trimming and cutting videos. Here's how to cut a video clip in iMovie on a Mac:
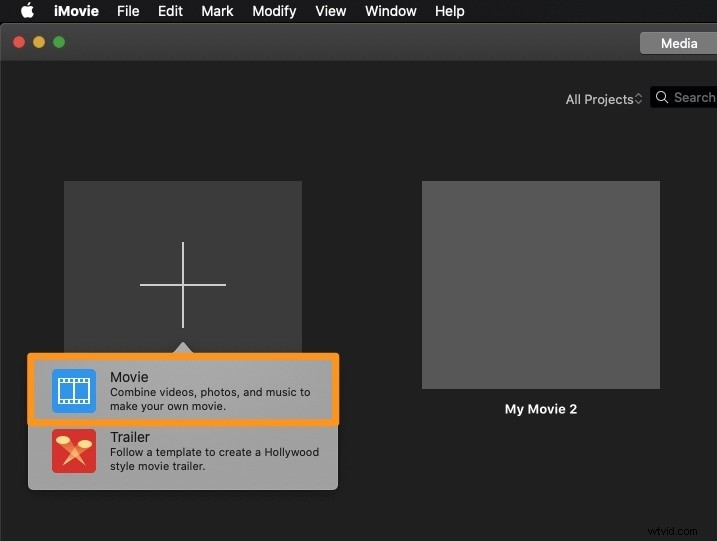
Step 1: Launch iMovie and click Create New under Projects.
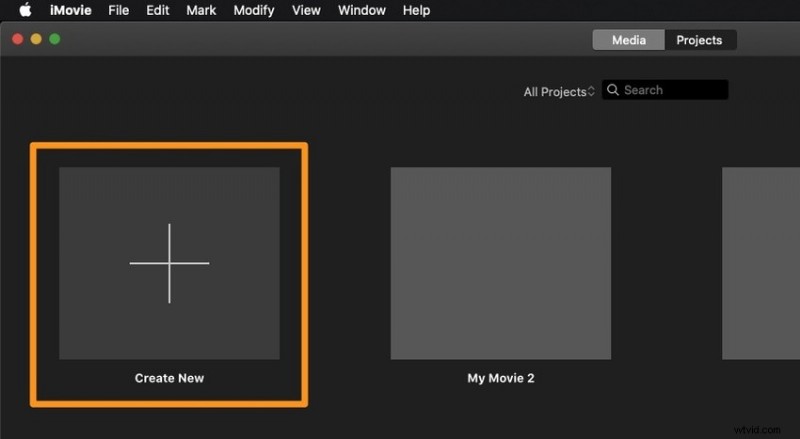
Select the Movie option.
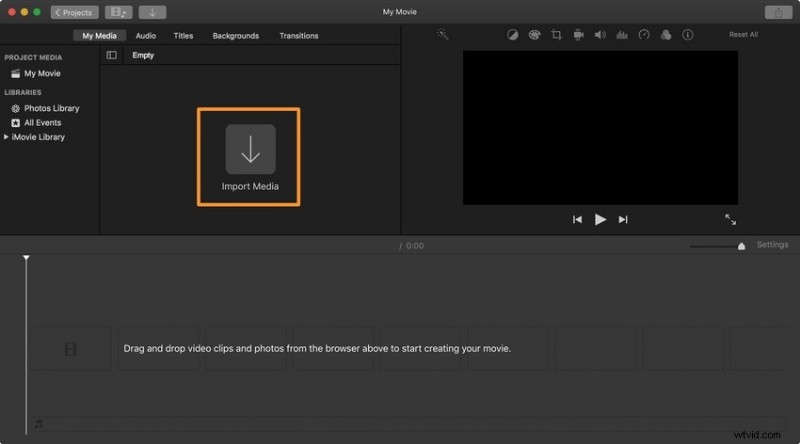
Click Import Media to choose a video and drag and drop it onto the timeline.
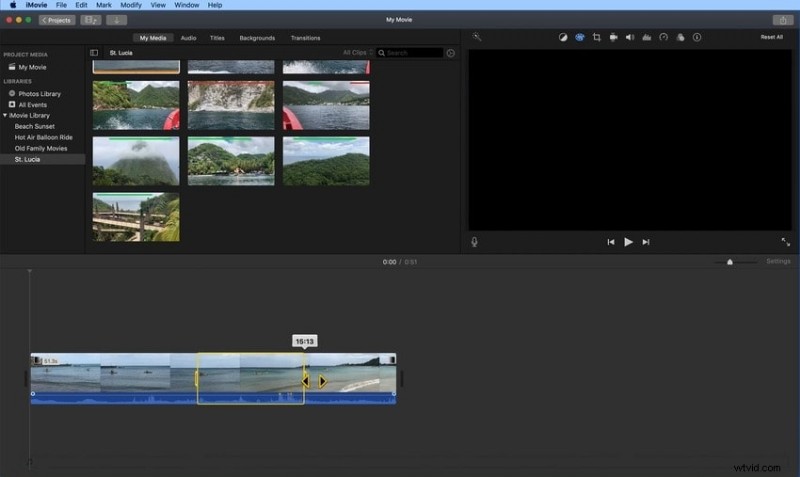
Step 2: Start trim the video clip
Select a frame range to trim videos in iMovie. Put the playhead on a frame where the video will start, then hold the R key on your keyboard.
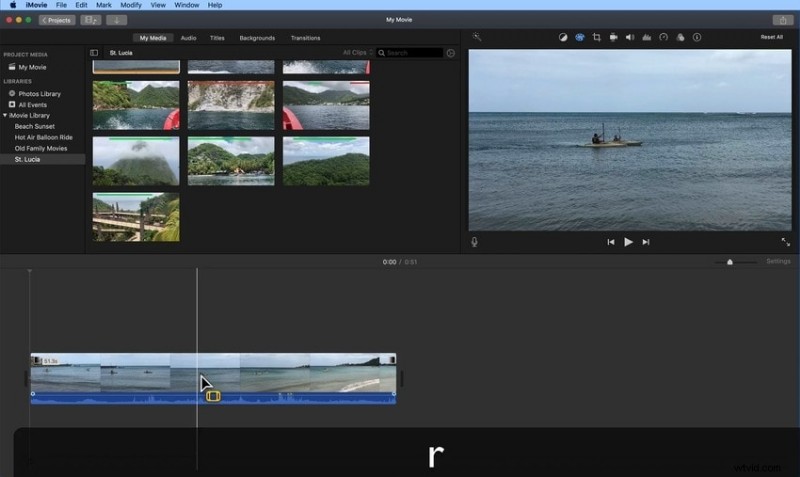
Drag the handle to the point where the video will end while holding the R key. Hit Option + / to trim the video.
Step 3: Hit Option + / to trim the video.

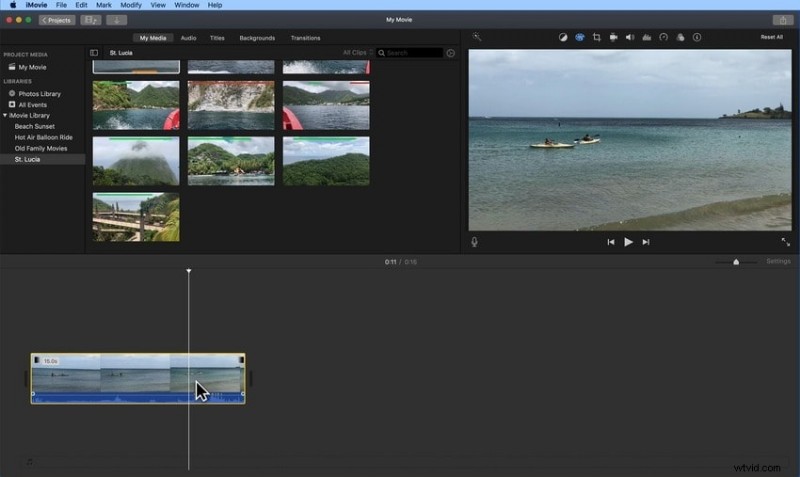
Step 4: You don't have to drag the edge to trim the last part of your video. Instead, use the playhead for higher precision. Place it on a frame where the video should end.
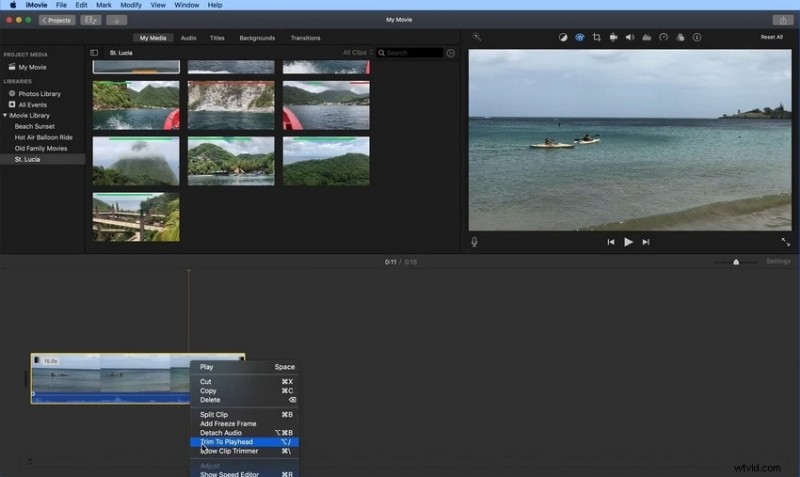
Step 5: Right-click the video and select Trim to Playhead (or hit Option + /).
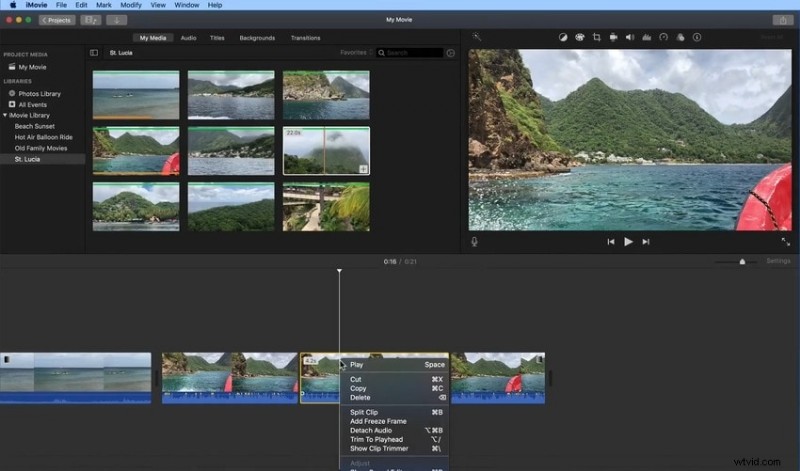
Step 6: Right-click the new clip and select Cut or Delete. You can also use the Command + X shortcut or the Delete key on your keyboard.
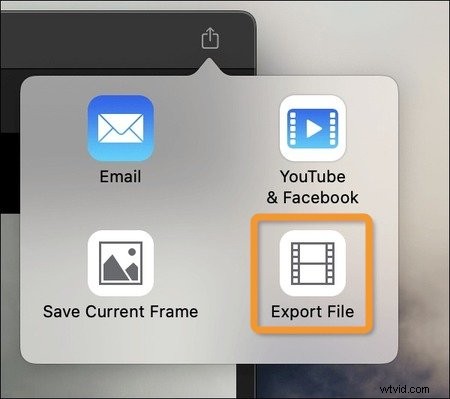
Step 7: Click the Export button and select Export File.
Effortlessly Trim Video Clips With an iMovie Alternative: Filmora
iMovie is excellent for standard video editing. However, it leaves much to be desired when creating professional-looking videos because it has few advanced features. Wondershare Filmora is a leading-edge video editor with an easy-to-use, beginner-friendly interface.
Besides run-of-the-mill tools (e.g., cutting, trimming, and splitting), Filmora offers the latest innovations in video editing, including dozens of AI-powered features. The most notable are AI Text Based Editing, Motion Tracking, Multi-Camera Editing, AI Video Enhancer, AI Video Denoiser, and AI Frame Interpolation. Download Filmora to your Mac to explore its ever-growing world of features and creative assets (2.9M+ and counting). You can also install it on your iPhone or iPad for on-the-go editing.
Trim Videos with Wondershare Filmora
- Superb video stabilization with low distortion.
- Vast video/audio effects and creative assets.
- Powerful AI for effortless content creation.
- Intuitive, professional yet beginner-friendly.
- Works on Mac, Windows, iOS, and Android.


How to Cut a Video Clip in Filmora
You can cut video clips in Filmora using several methods. Here are the steps:
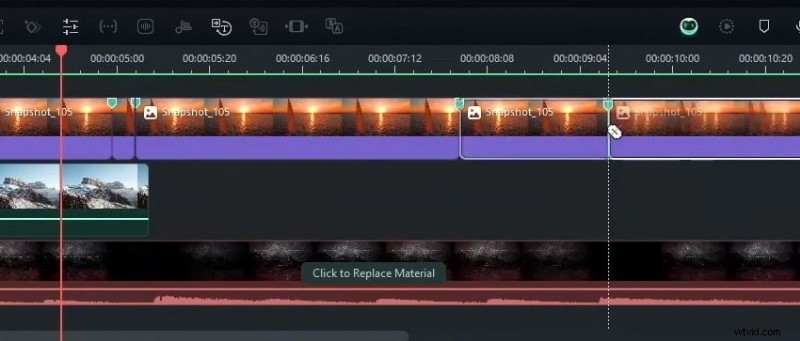
Step 1: Move the playhead to the desired frame for a jump cut, transition, or another video. Click the Split button in the timeline toolbar or on the playhead (the scissors). You can also use the Command + B shortcut.

To cut a specific mid-section, split the footage twice (on two frames) using the playhead and the Split tool.

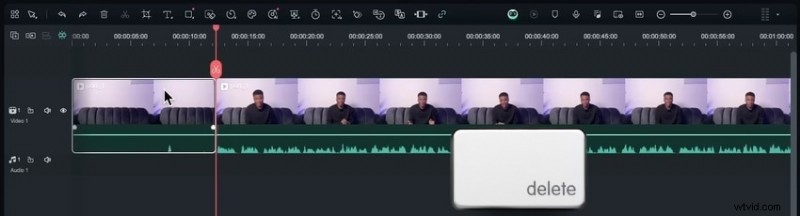
Step 2: Edit or cut the clip using the Delete key on your keyboard.
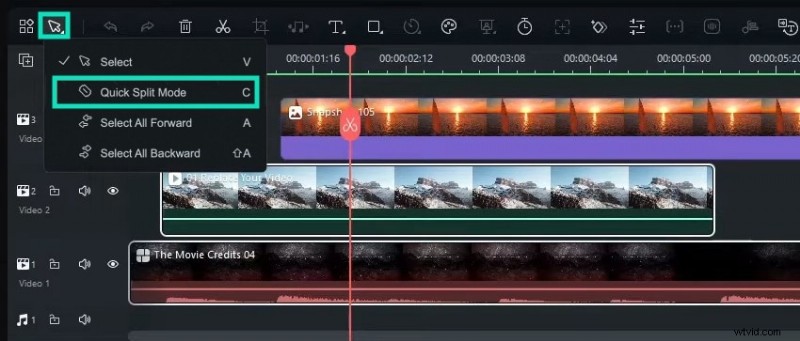
Pro tips: The fastest way to make multiple cuts is to use the Quick Split Mode.
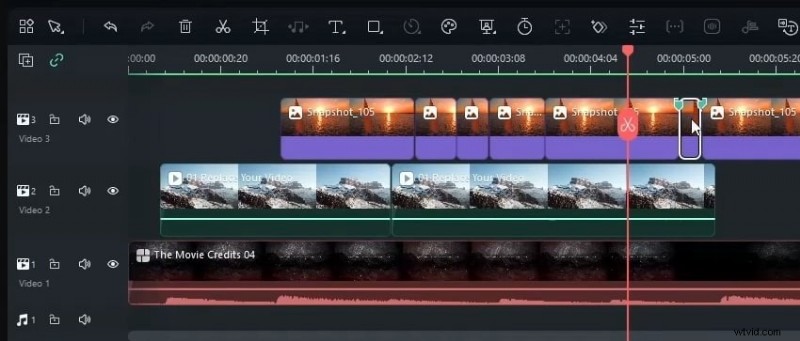
Step 1: Click the Select button in the timeline toolbar and choose the mode. You can also use the C key.
Step 2: Your mouse pointer will morph into a razor, and you'll see a skimmer (a dotted vertical line) to help you cut on specific frames. Click wherever you wish to split your video. You can do that for all the tracks in the timeline.
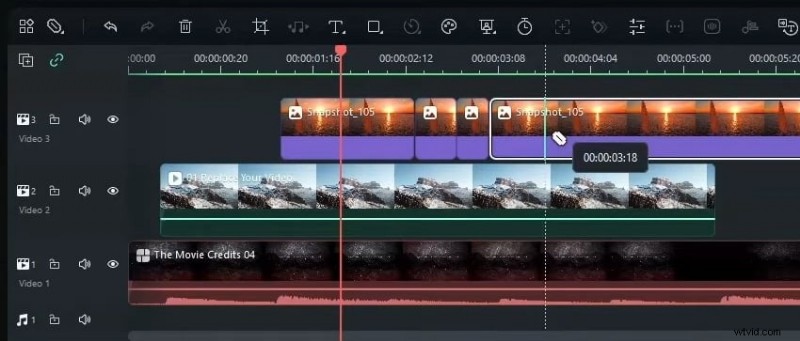
Step 3: Hit the C key to enable the Quick Split Mode and move your mouse pointer to the first marker. The skipper will snap to the marker, so click to split the video. Repeat the process for other marked frames.
Step 4: Select any clip you wish to cut and press Delete to remove it.
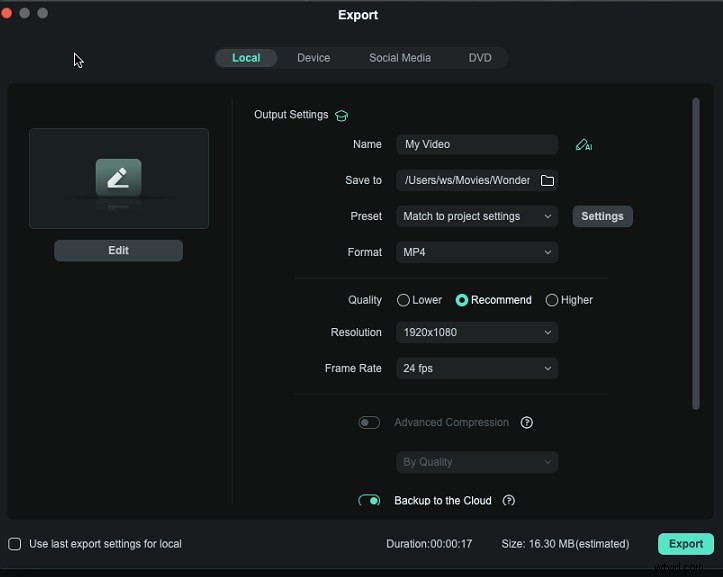
Step 5: Click Export to save your video locally, send it to another device, or share it on YouTube, Vimeo, or TikTok. Choose the output settings and hit Export.
Bonus: The Fastest Way to Split Clips Using AI Features
Filmora doesn't have a shortage of AI features for maximizing editing efficiency. They can help you quickly make eye-catching videos to boost audience engagement.
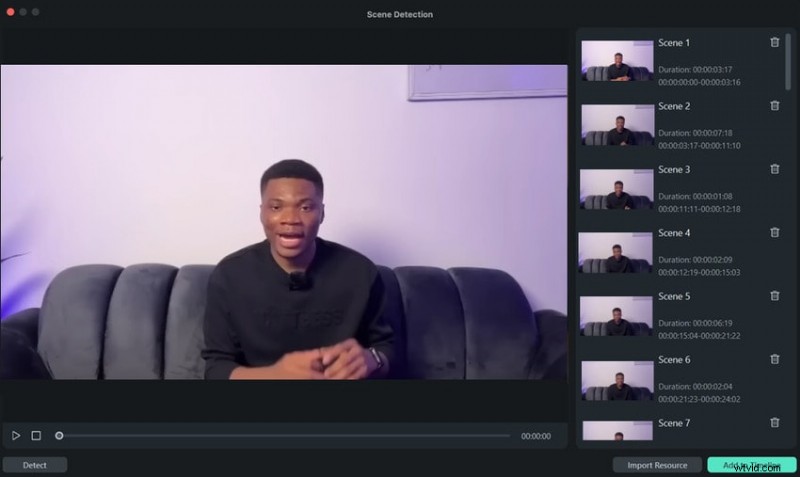
One notable AI feature for splitting clips is Scene Detection. It identifies transitions between shots, separating your video into multiple clips for seamless editing. Another is the Smart Short Clips feature for repurposing long videos. It analyzes video content to identify the most engaging moments, extracting the highlights to make snappy clips. It automatically generates animated captions, transitions, emojis, and stickers. It can also enhance speech, add suitable background music, and reframe your videos for YouTube Shorts, Instagram Reels, or TikTok.
The best part? You get several variations and can choose one according to its potential virality score. You can then edit every element of your clip, including the transcript, color scheme, thumbnail, layout, font style, etc.
How to Use Smart Short Clips in Filmora
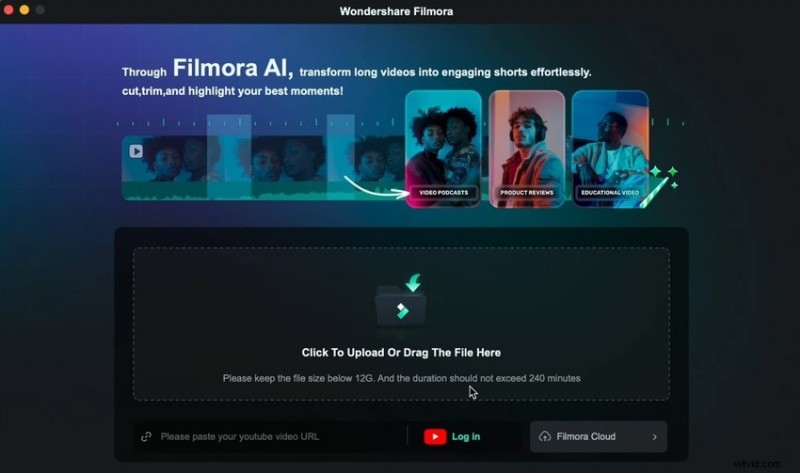
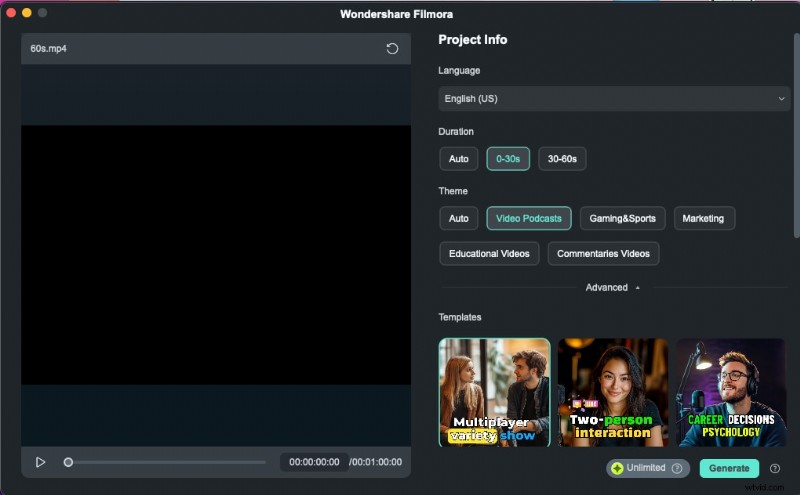
Step 1: Select the Smart Short Clips feature on the startup panel or Toolbox.

Step 2: Drag your local video to the designated box or provide a YouTube video's URL. The latter requires connecting your YouTube channel because the video must be yours.
Step 3: Specify the original language and choose a duration and theme.
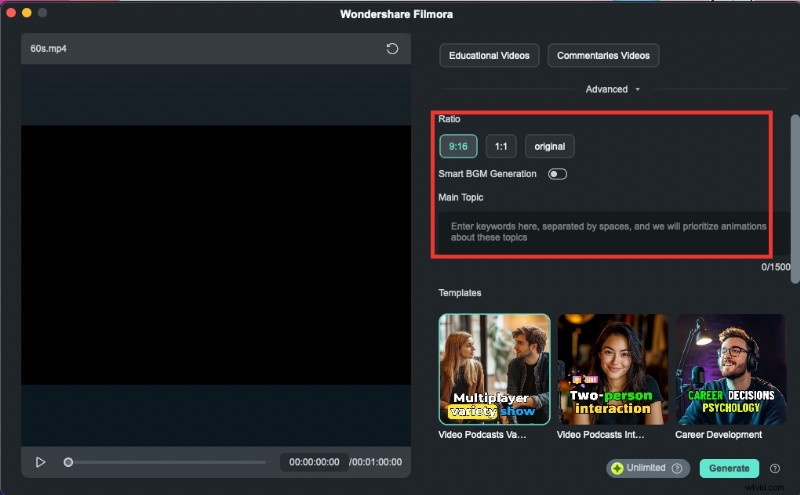
Step 4: Click Advanced to select an aspect ratio and toggle the Smart BGM Generation switch to implement background music. You can also add topic-related keywords so Filmora can customize animations accordingly.
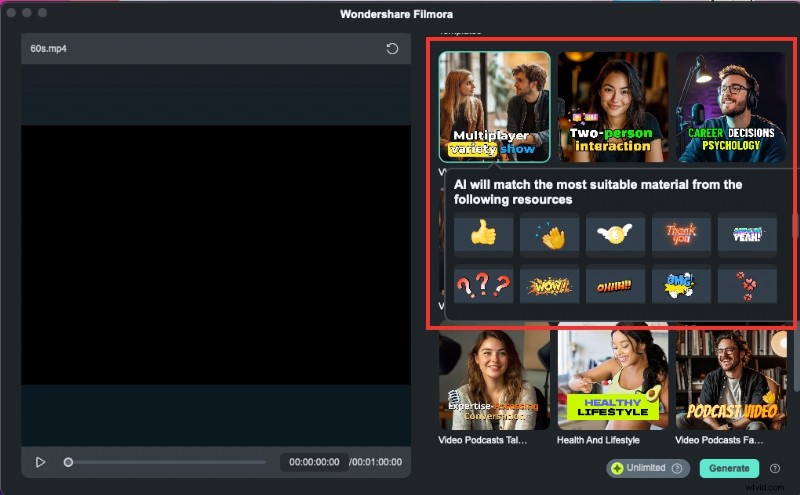
Step 5: Pick a preferred template and click Generate.
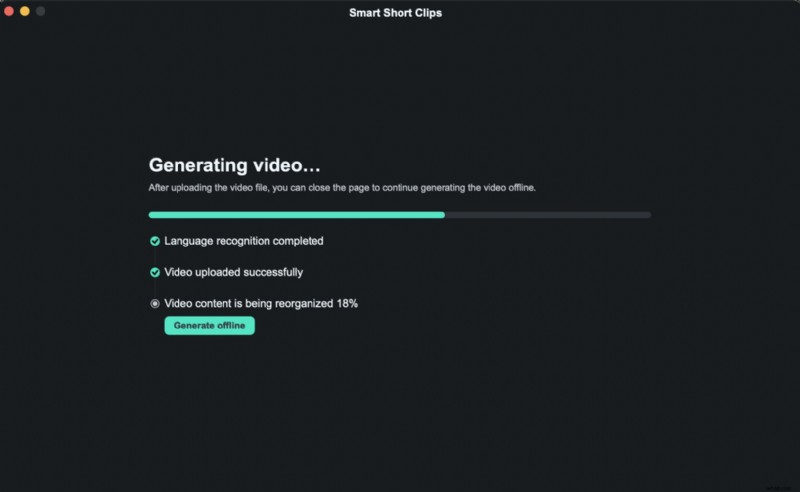
Step 6: Click Return to edit another video while Filmora creates your short clips. You'll get an email when your video is ready.
Step 7: Play the videos to pick your favorite and click Edit to refine it. You can also enable AI Speech Enhancement to reduce background noise and improve voice clarity, click Export for direct sharing, or hit Reset to generate different results.

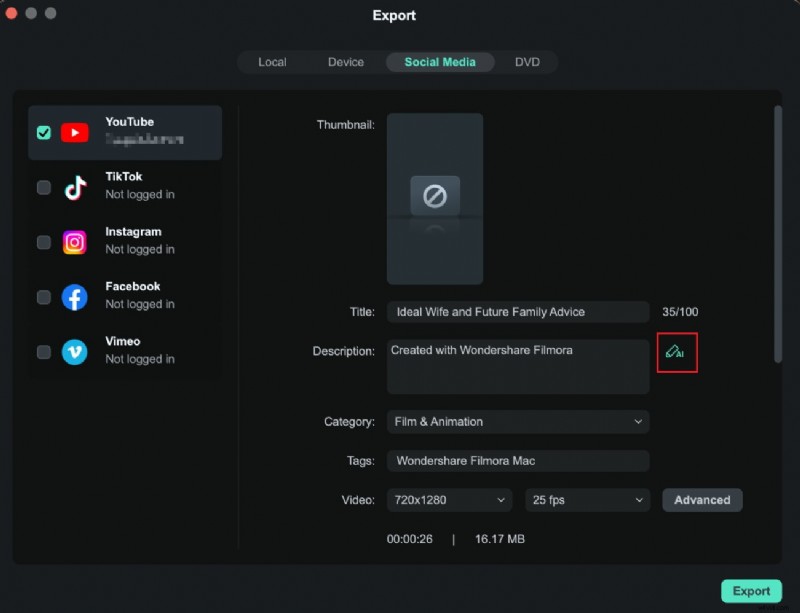
Step 8: Click Export. Pick a local directory, another device, or a social media channel for direct sharing. After logging into your YouTube, Vimeo, or TikTok account, change the video's title, description, and other settings and click Export or scroll down to schedule your post.
How to Use Scene Detection in Filmora
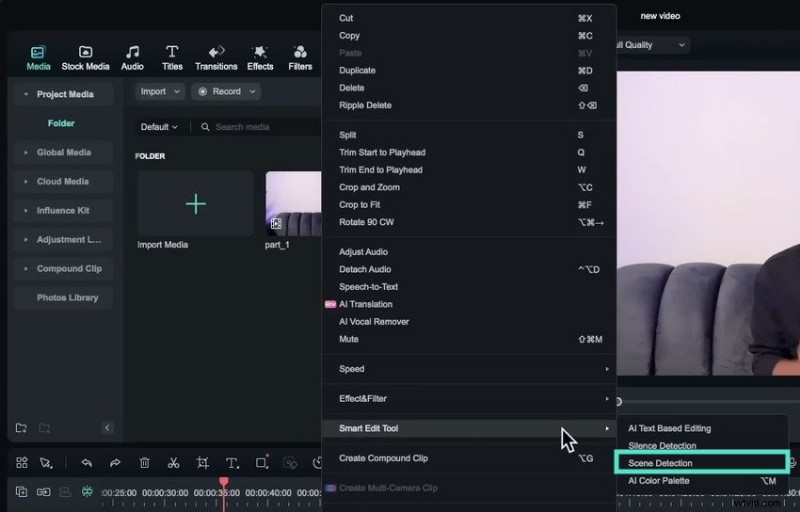
Step 1: Import a video, right-click it, and go to Smart Edit Tool - Scene Detection.
Step 2: Preview the scenes and click Add to Timeline. You can also delete unwanted scenes.
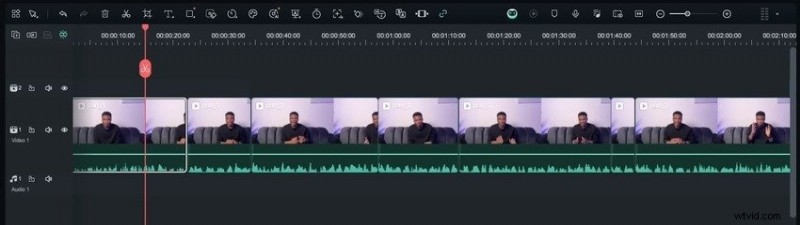
Step 3: Edit the clips separately, rearrange or delete them, and enrich your video with transitions, filters, effects, music, etc. Click Export to share or save it to your device.
Conclusion
Now that you know how to trim, split, and cut a video in iMovie and Filmora, it's time to put your newfound knowledge into practice and polish videos like a pro.
As you can see, Filmora boasts many more features than iMovie and is perfect for social media videos that draw viewers like magnets. Download it to your Mac or mobile device to see how it can revolutionize your video editing.

Filmora
⭐⭐⭐⭐⭐
The Best AI-powered Video Editing Software and App