Subtitles elevate engagement, extend watch time, and broaden your reach. They make videos accessible to the Deaf and Hard of Hearing community, attract silent‑watchers in noisy environments, and help viewers follow content without audio. For creators, marketers, vloggers, and any video‑producer, subtitles are a must‑have tool.
Filmora – the industry‑leading video editor available on iOS, Android, Windows, and macOS – offers an AI‑powered captioning feature that turns your footage into fully edited subtitles in seconds. Download Filmora for iOS, create an account, and you’ll receive 100 free AI credits to try AI Captions without cost.
In this article
A Step‑by‑Step Guide to Adding Subtitles to Videos on iPhone Devices
Filmora Mobile’s free version mirrors the desktop experience, but AI features require credits. Here’s how to generate subtitles on an iPhone using the AI Captions tool:
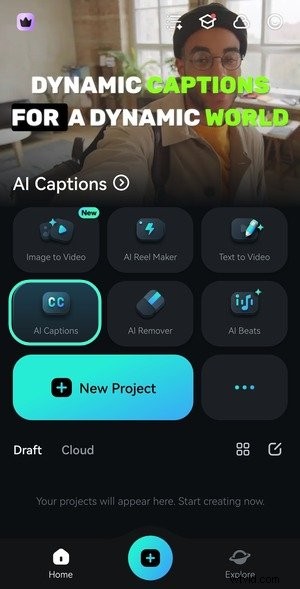
Step 1: Open Filmora and tap AI Captions.
Step 2: Select a video from your library and tap Import.

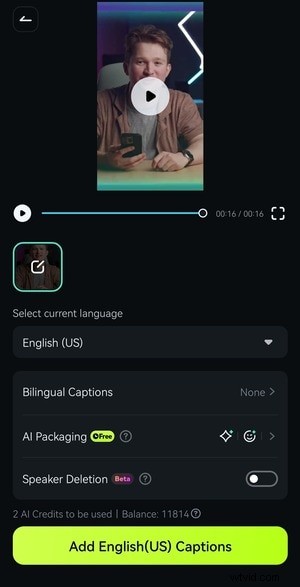
Step 3: Choose the spoken language, then tap Add Captions. If you need bilingual subtitles, enable Bilingual Captions and pick a second language. You can also activate speaker detection for multi‑speaker clips.
Step 4: Pick a template for dynamic captions or select None for standard subtitles. Tap Export or Project Edit to proceed.

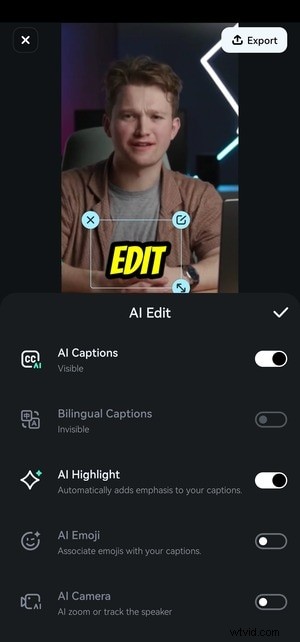
Step 5: Resize and reposition the text in the player panel, then tap AI Edit.

Step 6: Toggle AI features on or off. For instance, turn off AI Emoji to reduce clutter, or enable AI Camera to auto‑zoom around the speaker.
Step 7: Use Batch Edit to refine captions: edit text, merge or split segments, and adjust timing.

Step 8: Fine‑tune individual captions by tapping them and applying edits or merging.

Step 9: Access Highlight Options to customize highlighted words – change color, font, size, add sound effects, or toggle active words.

Step 10: Edit highlighted words: choose new color, font, or add a sound cue. Tap Apply to confirm.

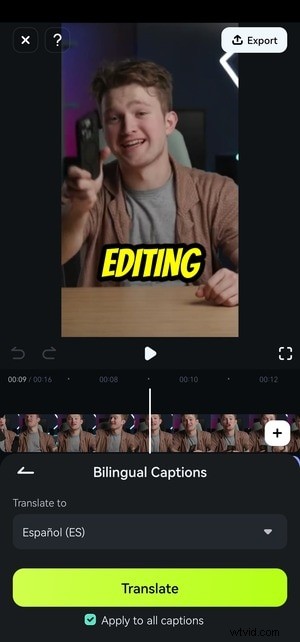
Step 11: Enable Bilingual Captions to add subtitles in a second language.

Step 12: Pick the target language, check Apply to All Captions, then tap Translate.
Step 13: If subtitle alignment differs, select the subtitle track, tap Style, then Align to adjust positioning and line breaks.

Step 14: In Align, set Line Break to Single Word and Line Number to One for precise placement.

Once satisfied, export the video. The AI Captions feature is identical on Android, so the same steps apply.
Use Filmora’s Text Editing Features to Polish Your Subtitles
Beyond basic captions, Filmora lets you tweak style, animation, and more. Here’s how to enhance your subtitles:
Step 1: Select a subtitle block on the timeline, then tap Template, Style, Emoji, Animation, Font, or Art – the toolbar opens the same editing panel.

Step 2: Browse dynamic caption templates and preview. Confirm your choice with the checkmark.

Step 3: In Style, adjust color, size, opacity, border, background, shadow, alignment, and position. Tick the checkbox to apply changes to all captions.

Step 4: Pick a font that balances readability and flair.

Step 5: Choose an Art design that complements your video’s aesthetic.

Step 6: If you used Emoji, adjust timing and placement.

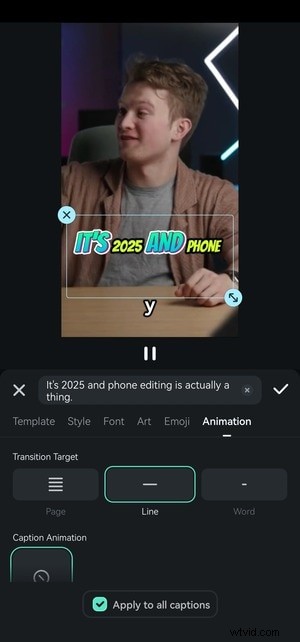
Step 7: In Animation, set the Transition Target to display text line‑by‑line or word‑by‑word. Enable Page to reveal multi‑line captions instantly.
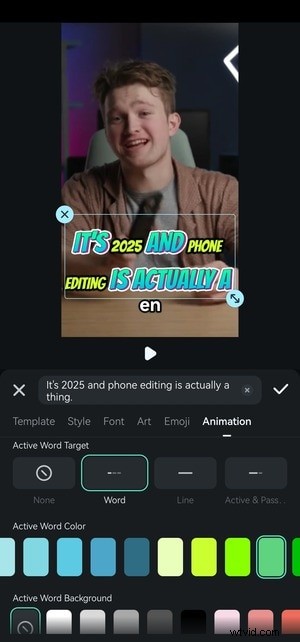
Step 8: Enhance the Active Word Target with custom color and background.
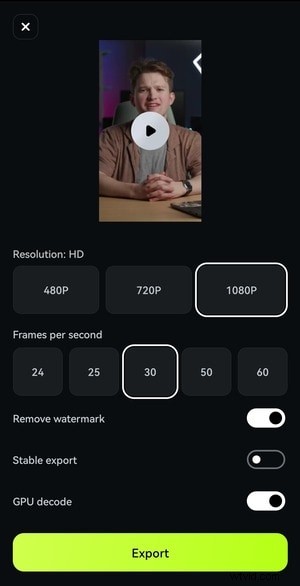
Step 9: When all edits are complete, tap Export to render the video.

Step 10: Choose resolution and frame rate, then hit Export.
Bonus: Add Subtitles on Windows and Mac with Filmora Desktop
Filmora’s desktop version offers advanced AI Captions and dynamic subtitle tools. Follow these steps on Windows or macOS:
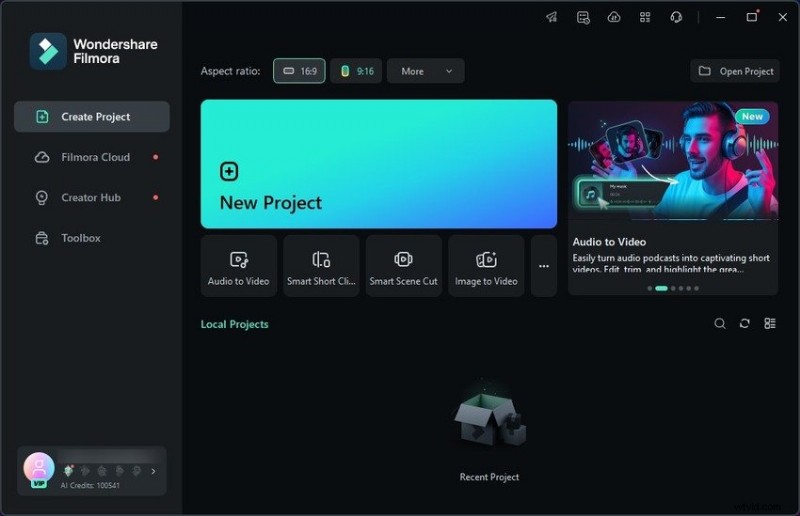
Step 1: Click New Project on launch.
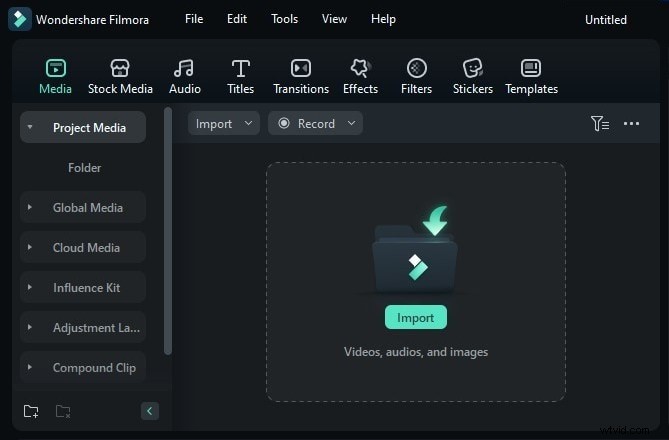
Step 2: Import a video file.
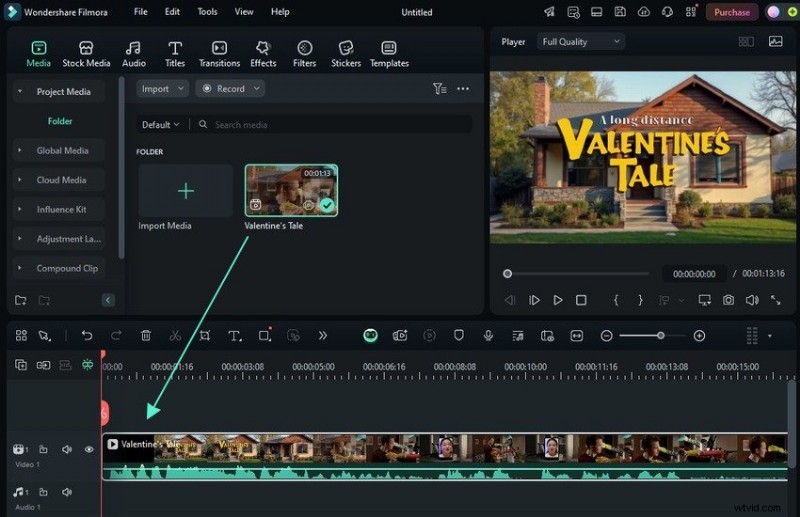
Step 3: Drag the clip onto the timeline.
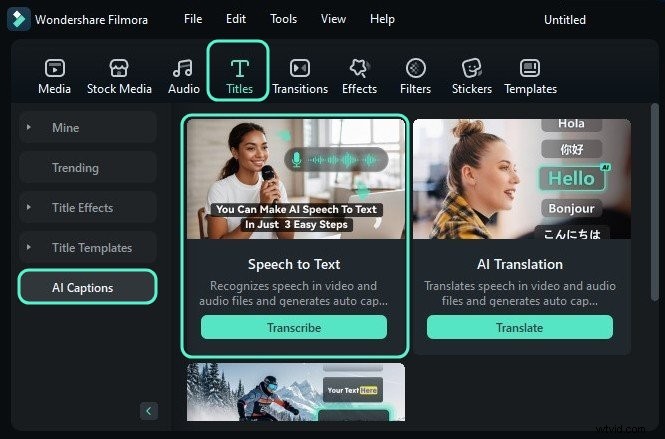
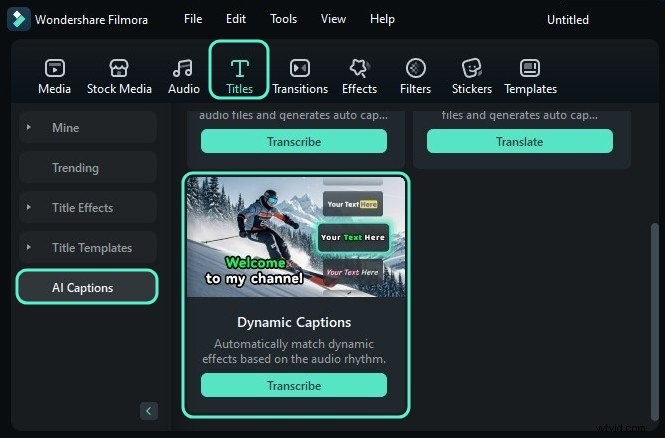
Step 4: Navigate to Titles > AI Captions > Speech‑to‑Text and click Transcribe.
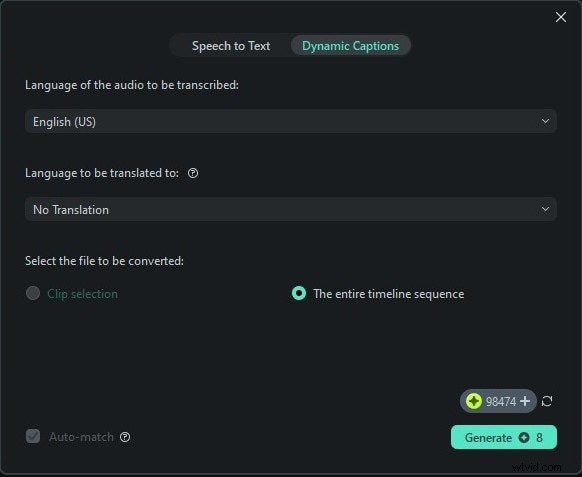
Step 5: Select the audio language, choose the entire timeline, and pick output format (SRT or hard‑coded titles). For bilingual captions, choose a second language and click Generate.

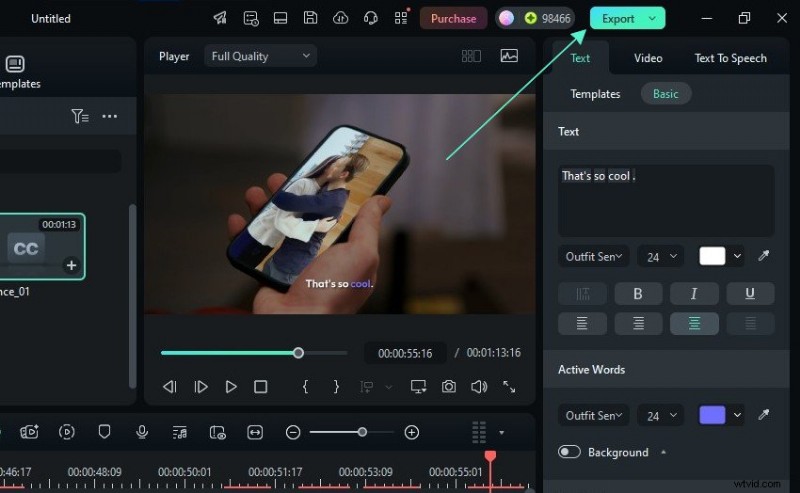
Step 6: Edit any subtitle track – correct text, modify color, font, size, add animation, or apply presets.
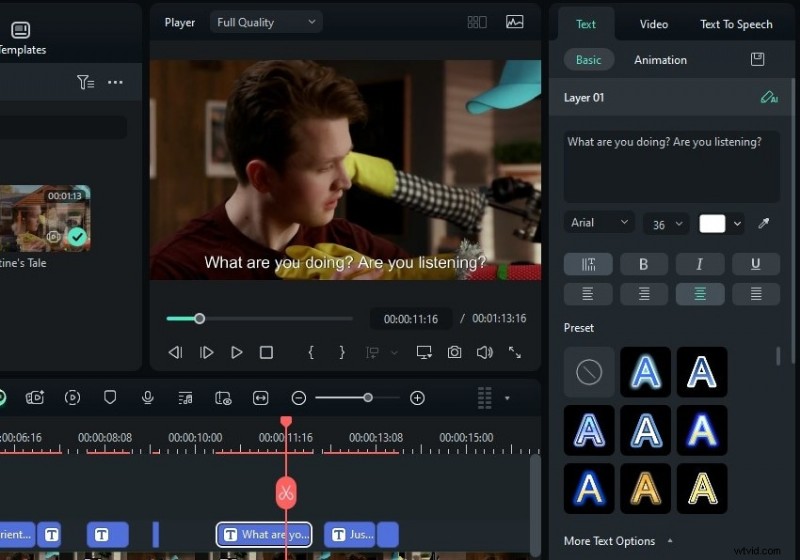
Step 7: Click More Text Options to add background color, bezier path, outline, or keyframe transformations.

Step 8: For dynamic captions, go to Titles > AI Captions > Dynamic Captions and click Transcribe.
Step 9: Choose audio language, entire timeline, and optional translation, then click Generate.
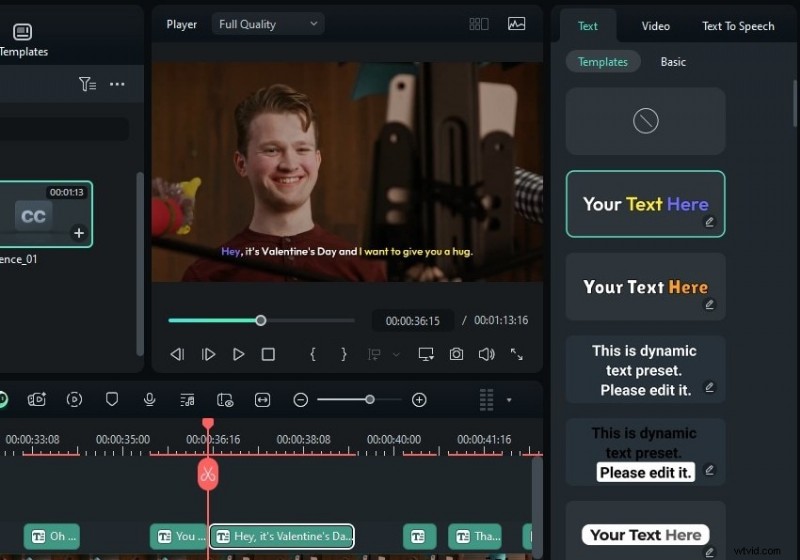
Step 10: Refine captions – edit keywords, active words, and style as needed.

Step 11: Switch to the Templates tab to change the text style.
Step 12: When satisfied, click Export.
Step 13: Adjust export settings and click Export. You can save locally, share directly to social platforms, or schedule posts.

Explore Filmora’s Advanced AI Features to Elevate Your Videos

Filmora’s AI suite extends beyond captions:
- AI Music – Generate royalty‑free tracks that sync with your video’s mood and tempo.
- AI Denoise – Remove background hiss, wind, and hum for studio‑grade audio.
- AI Remover – Seamlessly erase logos, watermarks, or unwanted objects from any scene.
These tools save hours of post‑production work and give your videos a professional polish.
Conclusion
Subtitles are a proven strategy to boost engagement, accessibility, and viewership. With Filmora, you can add, edit, and customize captions on iPhone, Android, Windows, and macOS with a few taps. The free trial unlocks all premium features for three days, so start editing today and transform your videos into audience‑magnet content.
For more advanced editing, consider the full version of Filmora – it offers 4K export, watermark removal, and additional AI tools that streamline your workflow.