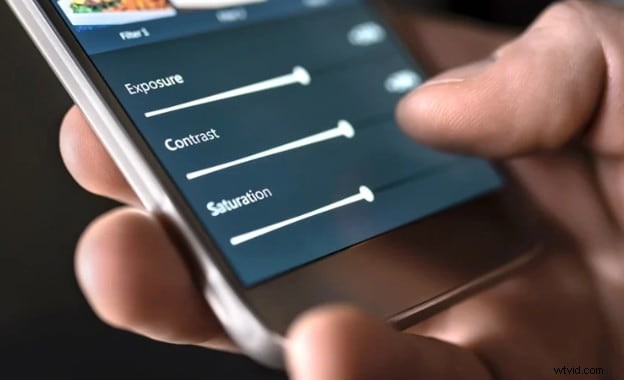
The Photos app on iPhone offers a built‑in filter feature that lets you instantly transform the mood and visual tone of your videos—perfect for sharing moments or posting to social media.
Filters elevate a video’s polish and visual impact. In this guide, you’ll discover how to apply video filters on iPhone and how tools like Filmora can streamline your editing workflow for a more professional finish.
Built‑In Ways to Add Filters to iPhone Videos
The iPhone’s simplicity is its strength, but it still offers several ways to enhance footage without installing third‑party apps. These native options are ideal for quick, casual edits before sharing on social platforms.
Filters in the Photos App
Many users overlook the fact that you can apply filters directly after shooting a video. Within the Photos app, simply open the clip, tap Edit, then the Filters icon. The palette includes Vivid, Dramatic, and Noir, each altering color tone and lighting to suit a particular mood.
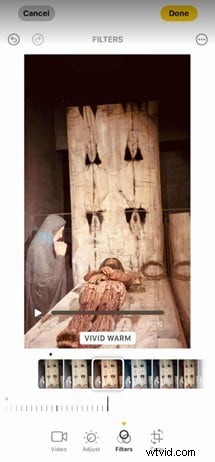
Real‑time preview is a major advantage—apply a Noir filter and see its effect throughout the clip immediately. This makes it ideal for quick touch‑ups before posting.
Filters via iMovie for iPhone
If you prefer not to install new software, iMovie is a reliable choice. Pre‑installed on most iPhones, it offers 14 clean, subtle filters that give your footage a polished or cinematic look.
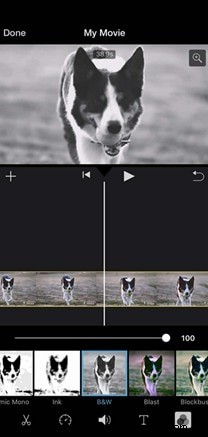
Adding a filter is a drag‑and‑drop operation: place the desired effect on the clip, preview instantly, then export. This built‑in tool is excellent for quick edits aimed at an Instagram‑ready aesthetic.
Filmora for iOS: From Basic to Advanced Filters and Editing
While native tools suffice for basic tweaks, a dedicated editor can unlock more sophisticated capabilities—especially if you edit regularly or require advanced styling. Filmora for iOS delivers a rich suite of filters, effects, and editing tools, all accessible directly on your device.
Filmora’s mobile interface is streamlined, ensuring smooth performance even on smaller screens. It’s perfect for creators who need powerful yet user‑friendly editing on the go.
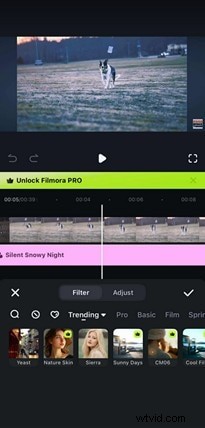
Filters
Filmora provides a broader palette than the default iPhone options, ranging from soft vintage tones to bold cinematic color grading. Every filter is fully adjustable, making it ideal for vlogs, travel videos, product showcases, or any content that benefits from a distinct visual style.

Effects
Beyond filters, Filmora offers overlays, transitions, and motion elements that can be applied with a few taps. Combining effects with filters lets you craft a unique editing style tailored to your brand or personal flair.

Built‑In Aspect Ratio Formats
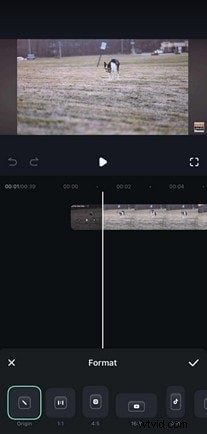
Filmora supports pre‑defined aspect ratios for major platforms—Instagram (1:1), TikTok (9:16), YouTube (16:9), and more. Selecting a format automatically crops or adjusts your footage, saving time and ensuring optimal presentation on each channel.
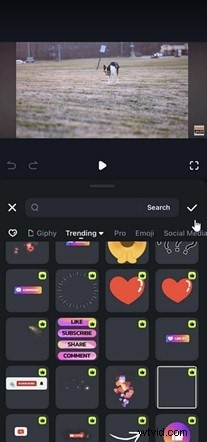
Text and Stickers
With animated text templates, custom titles, subtitles, and captions are effortless to add. Stickers—ranging from emojis to stylish icons—boost engagement or highlight key moments, making them useful for tutorials, announcements, or casual social clips.
A Full Filter Workflow for iPhone Creators
A structured editing process ensures your videos stand out, especially when shooting with an iPhone. Below is a workflow that blends native tools with Filmora to deliver polished, eye‑catching content for Instagram, TikTok, or YouTube Shorts.
Step 1: Capture Phase
High‑quality footage is the foundation of any great edit. Keep these tips in mind while recording:
- Good lighting: Shoot with the iPhone’s native camera app in well‑lit environments. Even natural light works best for filter performance.
- Consistent exposure: Avoid sudden lighting changes that can cause uneven filter application across clips.
Step 2: Edit in Filmora iOS App
After capturing, import your clips into Filmora. Begin by browsing the Filters library—select one that matches your desired tone and adjust intensity. You can layer multiple filters and blend overlays for a layered look.
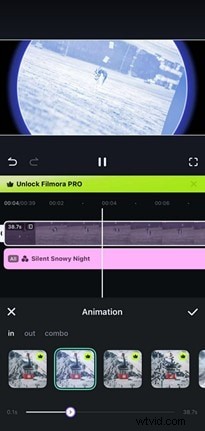
Filmora also offers animation options to smooth transitions and add emphasis to actions. These subtle touches make edits feel more polished and dynamic.
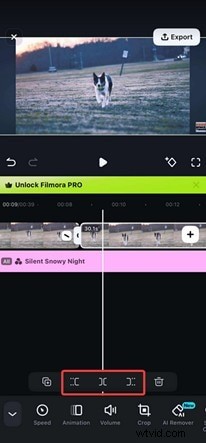
Additional tools such as crop, split, and trim help shape your video before finalizing effects.
Step 3: Export and Share
Export your finished video in 1080p or 4K to preserve filter clarity. Filmora’s preset aspect ratios—9:16 for TikTok, 1:1 for Instagram, 16:9 for YouTube—ensure your footage displays correctly across platforms.
Additional features like auto‑captioning and audio tools let you quickly add text, sync subtitles, or trim unwanted parts without affecting your filters.
Other Filmora Features to Elevate Your Content
Beyond filters, Filmora offers several tools that enhance overall video quality:
- Music Library: Add royalty‑free tracks directly.
- AI Audio Generation: Create voiceovers or narrations instantly.
- Animations: Apply motion graphics or animated text for intros/outros.
- Masking: Apply effects to specific areas with mask shapes.
- AI Captions: Generate subtitles from your audio track.
- Noise Reduction: Clean background noise for clearer audio.
These features integrate seamlessly with filters, enabling you to produce high‑quality content entirely from your iPhone.
Conclusion
While the Photos app and iMovie offer quick filter solutions, they have limitations when you need greater control. Filmora for iOS expands your creative possibilities with a wide range of filters, effects, and editing tools—turning ordinary footage into Instagram‑ready, social‑media‑worthy videos.
By integrating Filmora into your workflow, you can elevate your iPhone videos to a professional standard with minimal effort.