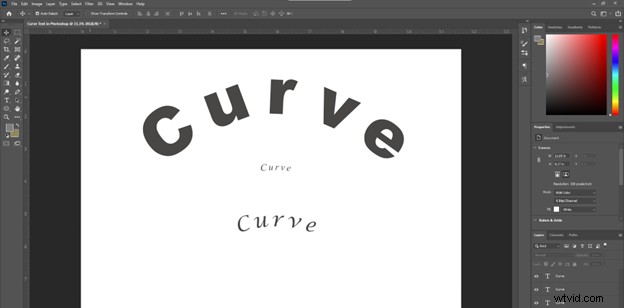
Do you want to make your Photoshop designs more appealing with the dynamic effect of curved text? Choosing to curve text in Photoshop will significantly enhance the flow and engagement of your unique designs. In this guide, we will learn its three straightforward methods: using the warp text tool, the ellipse tool, or the pen tool.
We will also weigh the pros and cons of these solutions and discuss the limitations of curve text in Photoshop. Moreover, we will guide you through choosing the best font for this task and introduce a surprising alternative tool.
Let's dive in!
In this article
-
- Use the Warp Text Tool - Quick Curve of Standalone Text Without Complex Shapes
- Use the Ellipse Tool - Curve Text Along a Custom Path or Shape
- Use the Pen Tool - Distort and Warp Text for Special Effects
-
- Key Features of Filmora Text Effects
- Steps to Curve Text in Filmora
Part 1: How to Curve Text in Photoshop?
Depending on your requirements, there are many ways to make your text curve in Photoshop. Even if you are an amateur at Photoshop, there's no need to worry! Our detailed steps will guide you through 3 simple techniques without a hassle.
Let's begin!
1. Use the Warp Text Tool - Quick Curve of Standalone Text Without Complex Shapes
The warp text tool is perfect for beginners as it is the easiest way to create curved text in Photoshop. Though it does not allow much customization, it quickly gets the job done! Let's explore how!
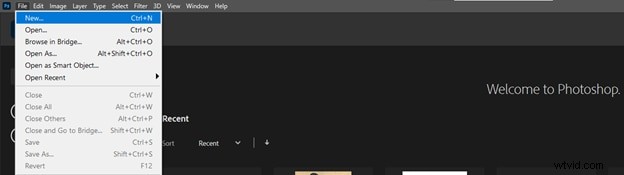
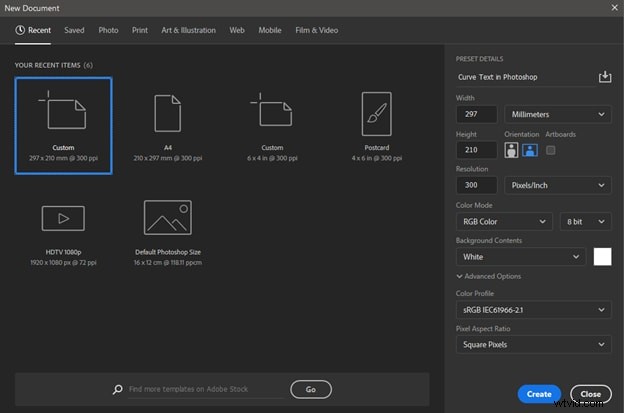
Step 1: Open Adobe Photoshop on your computer. In the top toolbar, navigate to "File" and click "New".
Step 2: Enter the name and choose your design's dimensions and other features. Click on “Create” to create a new Photoshop document.

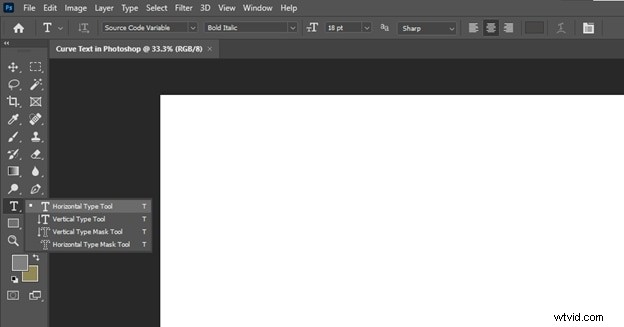
Step 3: Locate the “T” (Type tool) icon in the left toolbar. Right-click on it, then choose the “Horizontal Type Tool.”
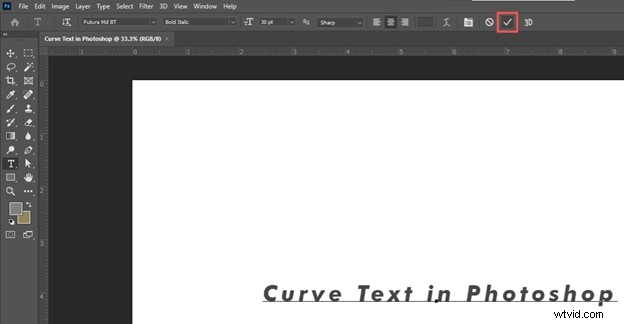
Step 4: Click anywhere on your canvas/white area and type in your desired text. In the top toolbar, you can change its font style, size, color, text orientation, alignment, etc. When done, click on the “✓” icon.
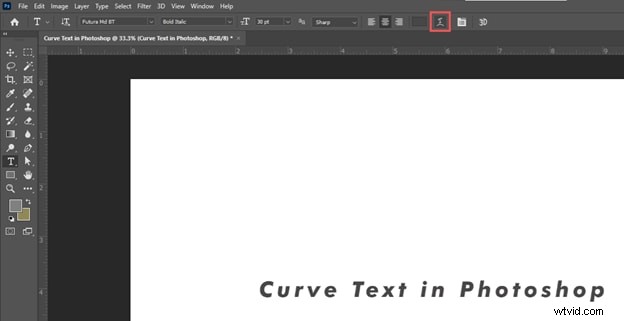
Step 5: Locate and click the “Create Warped Text” button (an italic “T” with a curve under it) in the top toolbar.
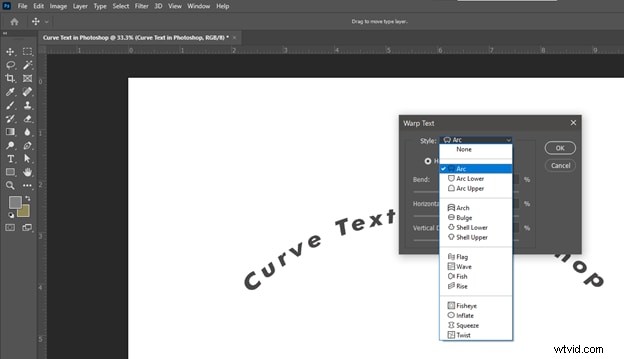
Step 6: Choose a curve style from the dropdown in the new popup. You can preview the results on your canvas by hovering over a curve style.
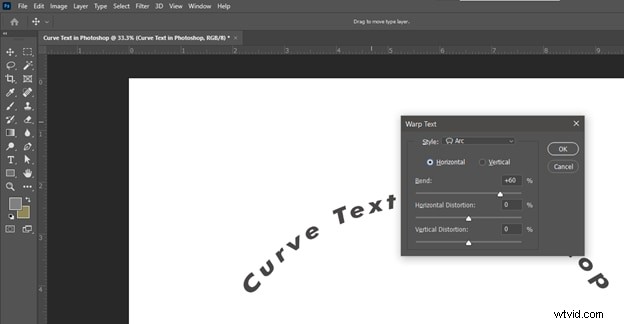
Step 7: Choose the direction of the curve. You can also adjust the curve bend using the slider or by entering a numeric value. You can also set the horizontal and vertical distortions. Then, click “OK.”
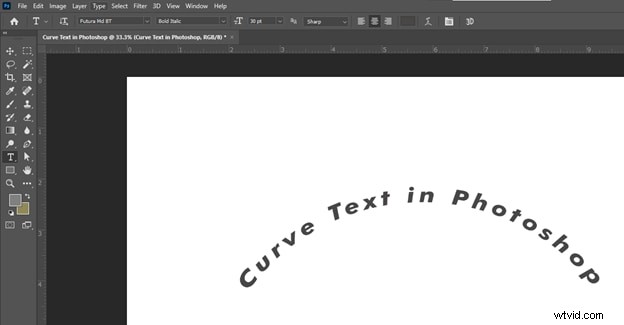
There you go! You just learned how to use warping to make your text curve in Photoshop to elevate your design!
 Pros
Pros
- It is the easiest and quickest method, hence ideal for all users
- You can adjust the direction and the strength or bend of the curve
- The text appears skewed and distorted
- Warping does not work well for lengthy texts
- There is less room for customization due to a few preset styles, as shown in the image below
After learning how to curve text using the warp text tool, let’s discuss techniques for further customization.
2. Use the Ellipse Tool - Curve Text Along a Custom Path or Shape
With our second solution using the ellipse tool, you can create and snap their text to the curves of ovals. This method allows for control as custom paths and shapes can be used. Let’s dive in to learn how!
Step 1: Open Photoshop. In the top toolbar, navigate to “File” and click “New.”

Step 2: Name your document and select its dimensions and other features. Then, click on “Create” to proceed.

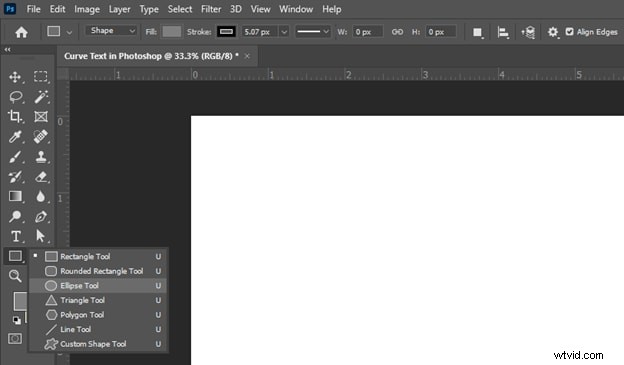
Step 3: Navigate to the “Rectangle Tool” and right-click. Then, click the “Ellipse Tool.”
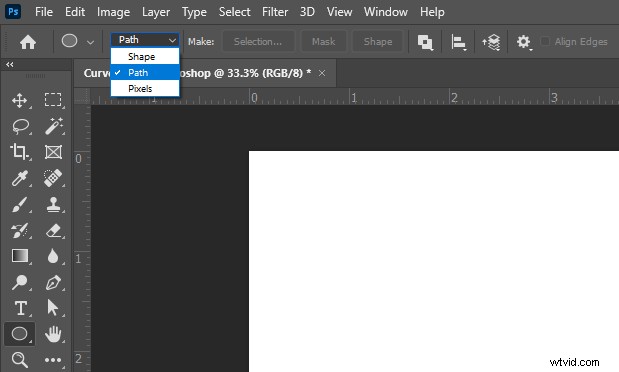
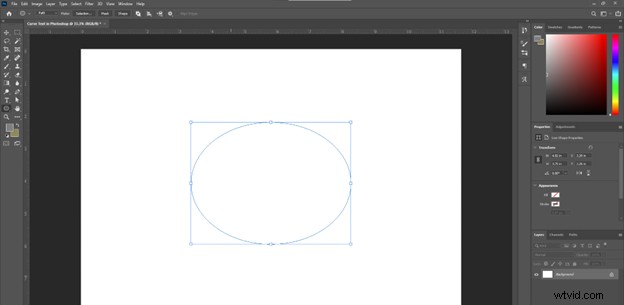
Step 4: Select “Path” from the dropdown in the top toolbar. Then, draw an elliptical path on the canvas. To create a perfect circle, hold the “Shift button” on your keyboard while drawing.
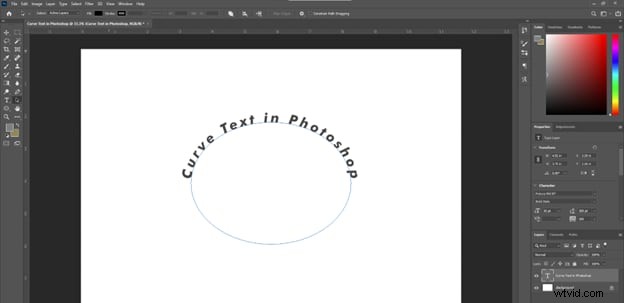
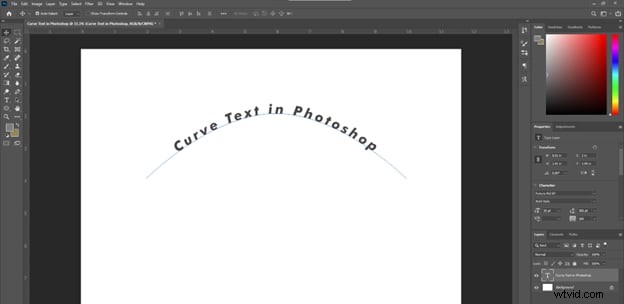
Step 5: Press “T” or click the “T” icon in the left toolbar to select the Type tool. Then, click anywhere on the path to start typing. Enter your desired text.
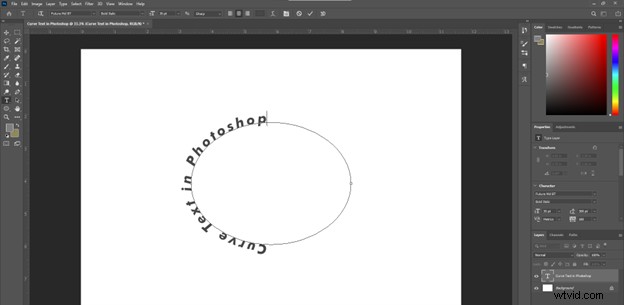
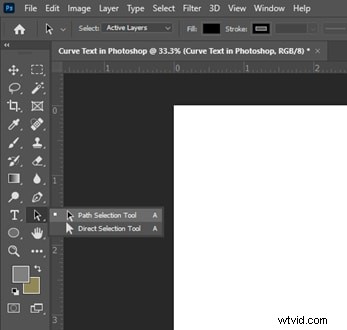
Step 6: To change the starting and ending points of your curved text, choose the “Path Selection Tool.” Then, click and drag the text to the desired position.
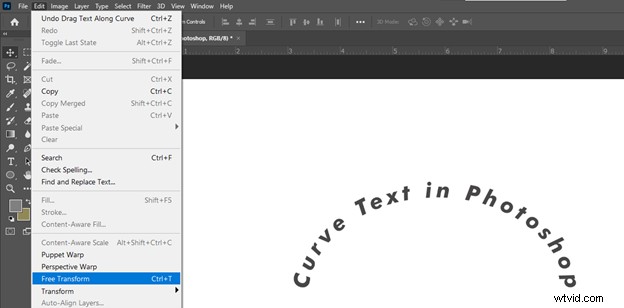
Step 7: To shrink the size of the path or center it, select the text layer and press “Ctrl + T” for Windows or “Command + T” for Mac. Or, navigate to “Edit” in the top toolbar, tick “Free Transform,” and edit as you like.

That’s it! That’s how easy it is to write curved text in Photoshop! Let’s highlight the advantages and disadvantages of this method.
Pros- The text maintains its shape and does not distort
- You can curve text along any customized shape and path
- You can add longer texts
- You need to create a separate path layer
- More complex distortions can not be done, hence less flexible
Let’s learn how to use the pen tool to bend text in Photoshop with maximum control/customization.
3. Use the Pen Tool - Distort and Warp Text for Special Effects
With the pen tool, you can precisely create shapes and paths of different sizes. This method gives the user flexibility, as they can customize paths however they want to. Let’s see how!
Step 1: Open Photoshop. Navigate to “File” > “New.”
Step 2: Name your document and select its properties. Click on “Create” to proceed.
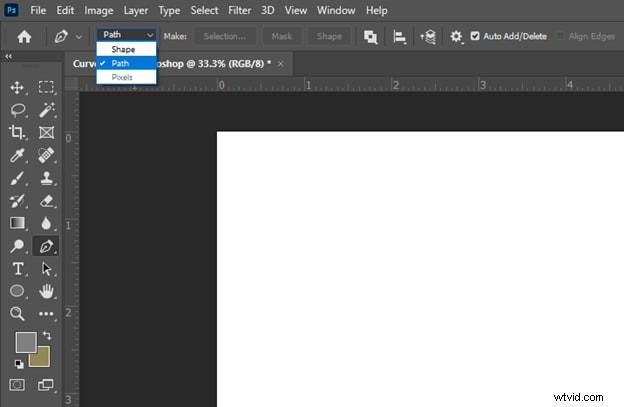
Step 3: To select the pen tool, press the “P” key or click the “Pen Tool” in the left toolbar.
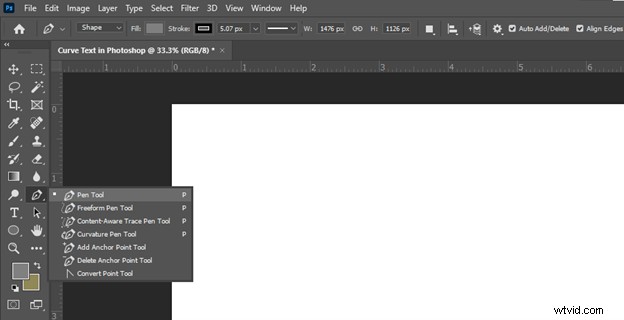
Step 4: Select “Path” mode from the dropdown in the top toolbar.
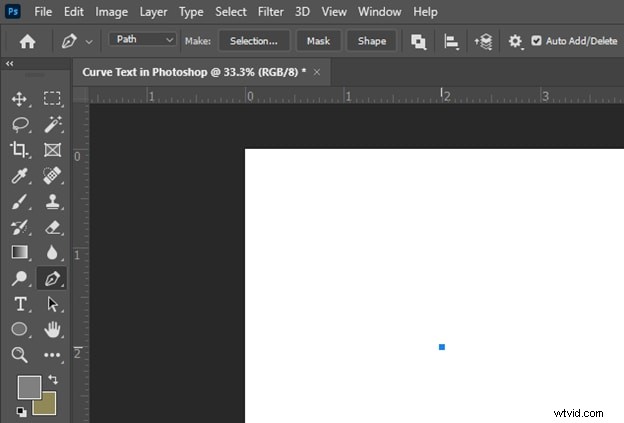
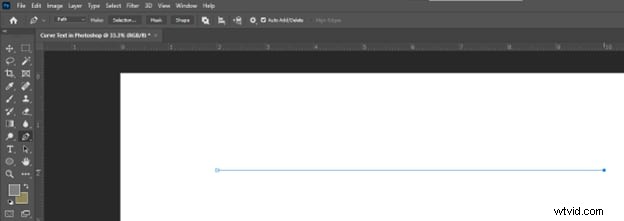
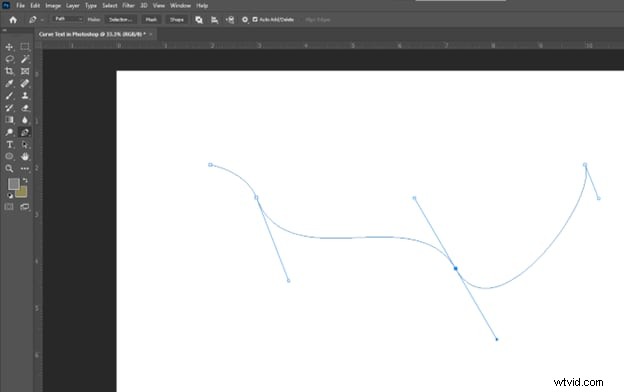
Step 5: Click anywhere on the current layer to set your curve’s starting point. Click at a different location on the canvas to set the ending point. The two points will connect via a straight line.
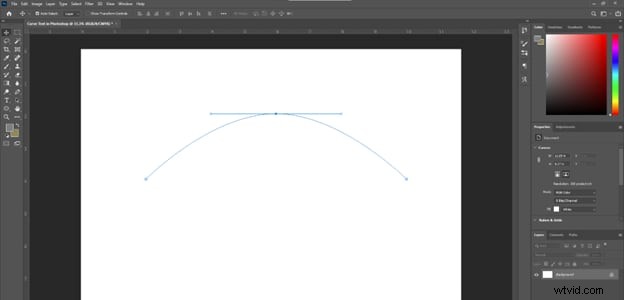
Step 6: Click anywhere on the line to create an anchor point. You can create multiple anchor points. Drag the anchor points to create a simple or more warped curve.
Step 7: Press “T” or click the “T” icon to select the Type tool. Click anywhere on the path and enter your desired text.
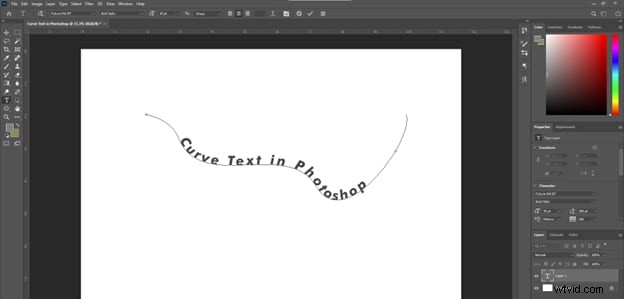
Step 8: Click the “✓” button in the toolbar. You have successfully curved text using the pen tool.

Now, you can easily bend text in Photoshop in any shape you want. Next, we will highlight the pros and cons of this method.
Pros- You can create curves with extreme warping and distortion
- The design can convey an important message via its textual arrangement
- You have complete control to make unique and complex paths
- If overdone, this can result in unnatural distortion
- It can be difficult for beginners to use the pen tool
There is no single best method for making your text curve in Photoshop. The choice of method depends on your specific design needs.
If you need quick results, use the warp text tool. The ellipse tool is useful when you want text on natural curves along paths with longer text. Lastly, the pen tool is your go-to option for extreme warping and customized shapes.
Part 2: How to Choose the Best Font Style for Curved Text in Photoshop?
The choice depends on your message and how you want to convey that message. You can experiment with different options to find the font style that is suitable for you. Here are a few pointers to help you decide:
Font Type
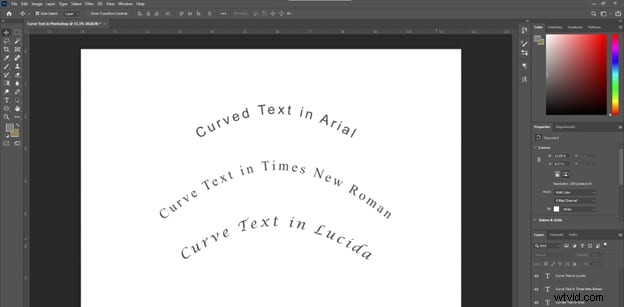
- Sans-Serif Fonts: Sans-serif fonts like Arial, Helvetica, and Roboto provide a modern, cleaner look. They also improve the readability of curved text, even if the size is small.
- Serif Fonts: With small strokes at the end of letters, Serif fonts include Times New Roman, Garamond, Georgia, and more. They are elegant but might be less readable when curved strongly.
- Script Fonts: Script fonts add the artistic effect of handwriting but might be difficult to read when severely curved. Examples include Lucida and Pacifico.
Weight, Style, and Size
- Weight: Bolder fonts can convey a strong/dramatic message, whereas lighter/thinner fonts can look more delicate.
- Style: Italic fonts can enhance the sense of flow, and condensed fonts can present a more compact appearance.
- Size: Larger fonts can emphasize a specific point, whereas smaller fonts can add accompanying details.
You can try out different variations of font styles before finalizing your best option. Though curving text in Photoshop has numerous advantages, it still has a few limitations. Let’s discuss them!
Part 3: Limitations of Adding Curved Text in Photoshop
- Font Limitations: Some fonts may not work well when curved severely.
- Distortion: Severely curved text can look distorted or unnatural.
- Lack of Readability: Heavy curving can be difficult to read when fonts are complex or small.
- Difficulty in Creating Paths: Making custom curved paths in Photoshop can be difficult for beginners.
Curving text with greater customization in Photoshop is not easy. But what if we enlightened you to a reliable and easy-to-use alternative? Let’s dive in to find out what it is!
Part 4: Enhance your Videos with Curved Text using Filmora
We have a premium dynamic tool, Wondershare Filmora, that allows you to curve text and enhance your videos’ visual appeal. Wondershare Filmora is a state-of-the-art video editing software with a range of customization options. Its unique text effects, such as curved text, ensure your project fully engages the audience.


Let’s learn about what makes Filmora stand out!
Features Related to Curve Texts in Filmora
- Presets and Templates: Filmora includes various preset path shapes and templates to quickly create common text on path effects like lower thirds or lower third banners.
- Customizable Path: You can create a path by drawing a shape or line using the path drawing tools. This gives you full control over the path's shape and direction.
- Adjustable Text Alignment: Filmora lets you choose how the text aligns along the path, such as centering it, left-aligning, or right-aligning.
- Path Keyframing: The path can be keyframed to animate over time, allowing the text to move along a dynamic path.
- Masking Integration: The text on path can be used as a mask to reveal or conceal other layers, enabling creative compositing effects.
Video Tutorial for a Quick Curving Text Creation
Step-by-step Guide to Curve Text in Filmora
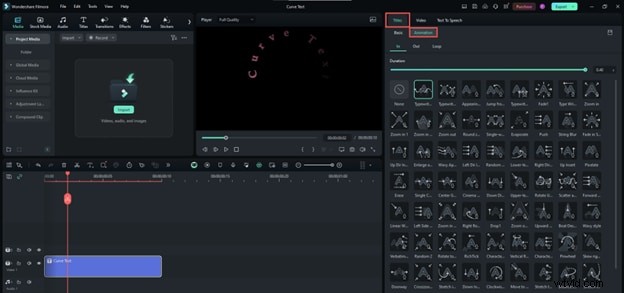
Step 1: Open or create a new Filmora project. Click the “Titles” tab from the top toolbar. Then, add a text preset onto the timeline.
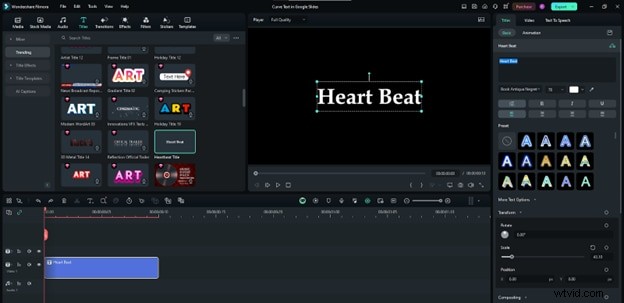
Step 2: Enter the text you want.
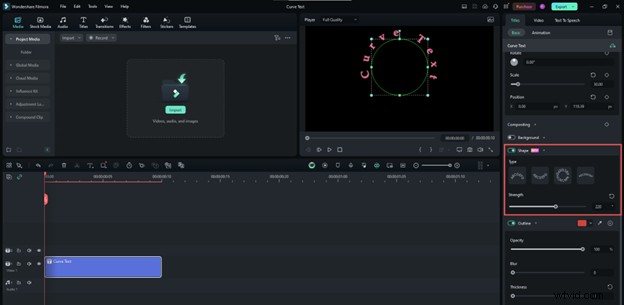
- Click “More Text Options” on the right to expand settings.
- Navigate to the “Basic” section, then click the “Shape” toggle.
- Choose any curved text design. Change its “Strength” to control the curvature.
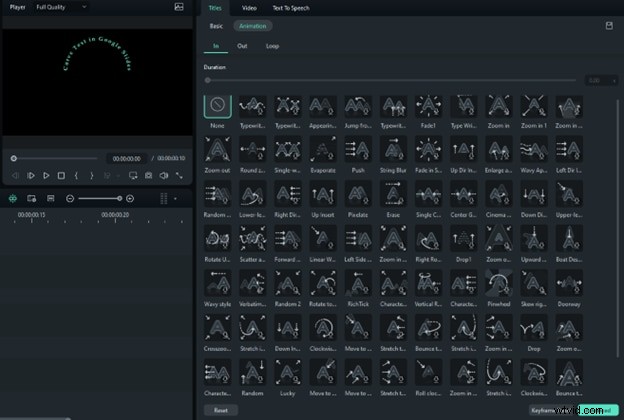
Step 3: Navigate to “Title” > “Animation” in the top right. Then, choose any animation preset you wish.
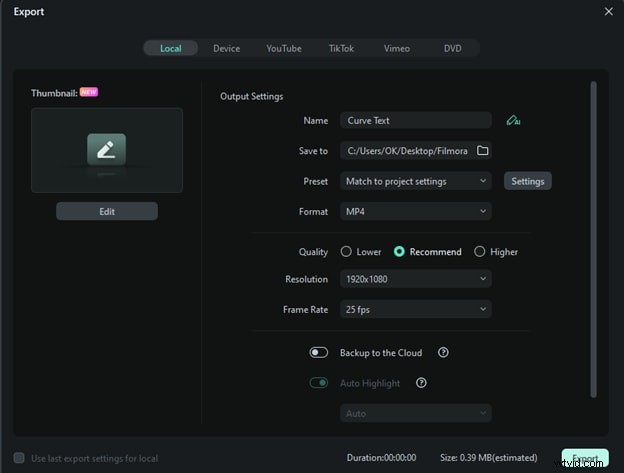
Step 4: Click on “Export” on the top right. Choose a destination and set the format to “MP4” or another video format. Edit other export settings if needed and then click “Export.”
Final Words
Congratulations! You have learned three easy ways to make your text curve in Photoshop. You can follow our detailed steps to curve text using the warp text, ellipse, and pen tools.
This guide also equips you with Filmora to bring your creative vision to life through captivating videos. So, get started and enhance your typography skills right away!
Get Started for FreeFor Win 7 or later (64-bit) Get Started for FreeFor macOS 10.14 or later