For creating an edgy promotional video or a comparative review video analysis, the split-screen effect is an effective tool. It helps in putting two products or topics side by side on a video screen while the narration covers the subject. The feature, however, requires support from precision editing software to come through on video. In this article, we will show you how to make a split-screen video, or how to put two videos side by side with iMovie and its alternative.
- Part 1: How to Create Split Screen Effect Video Using iMovie on Mac
- Part 2: How to Make Split Screen Video with iMovie on iPhone/iPad
- Part 3: How to Make Split Screen Video with iMovie Alternative [Presets Available]
Part 1: How to Create Split Screen Videos Using iMovie on Mac
Putting videos side by side on iMovie is easy if you know where the feature is. In the previous iMovie version, you can choose the Side by Side feature to make a split-screen effect.
Section1: Make Split-screen Videos in iMovie 9/11
Open your iMovie project on your Mac and then follow these steps to create a split-screen video.
Step 1. Drag and drop the video clips to the timeline.
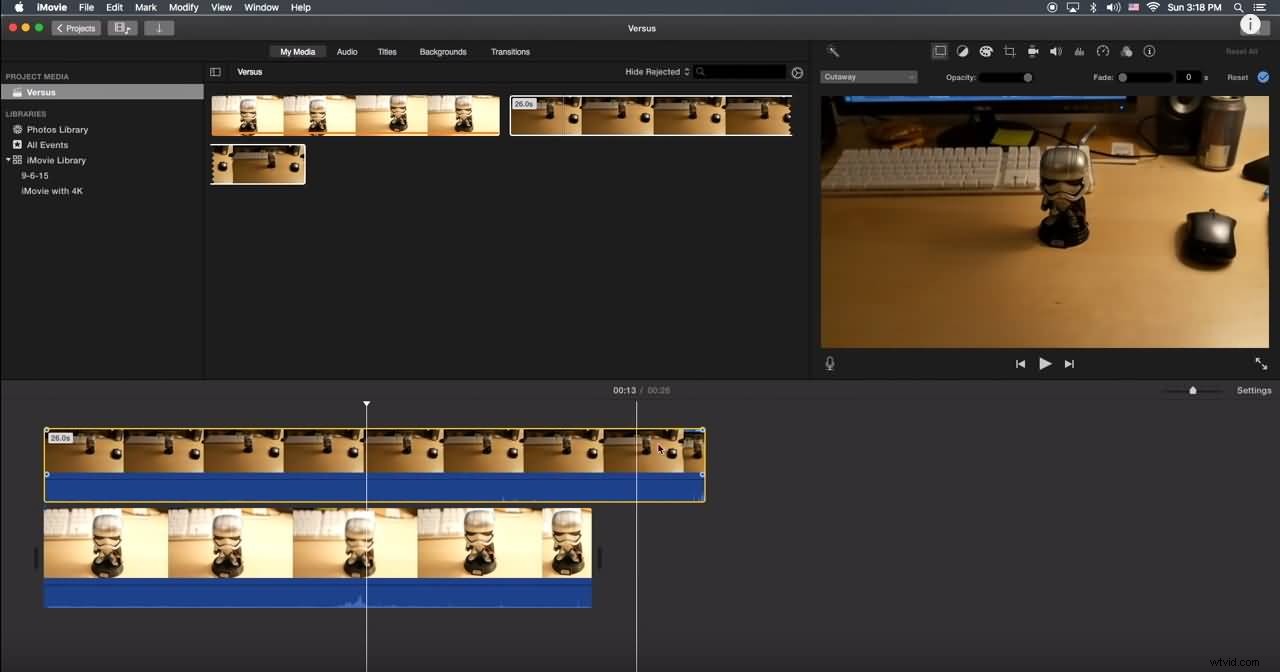
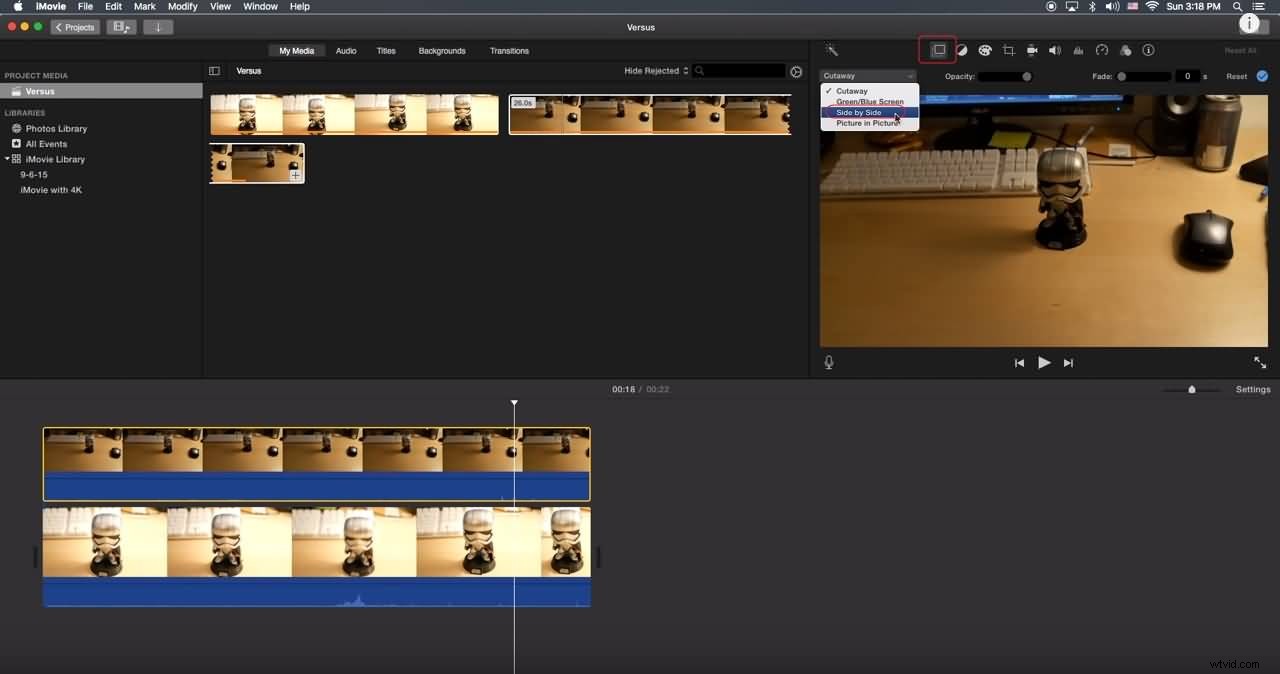
Step 2. Go to the overlay settings, and then select the Side by Side option.
Step 3. If you need to crop or zoom in to make the side by side effect look better, you can use the Crop tool.
Related: How to Zoom in/out Videos in iMovie
Section2: Make Split-screen Videos in iMovie 10
If you are using the iMovie 10 version, you will find the information above is not suitable. Below, I will show you how to make a split-screen effect video in iMovie 10, including how to add transitions and change the default settings for the split-screen effect.
Step 1. Drag and drop the clips that you want to show at the same time to the timeline and make sure one is above another in the timeline.
Step 2. Click the Video Overlay Settings icon above the Viewer window, and then select the Split Screen option from the drop-down box.
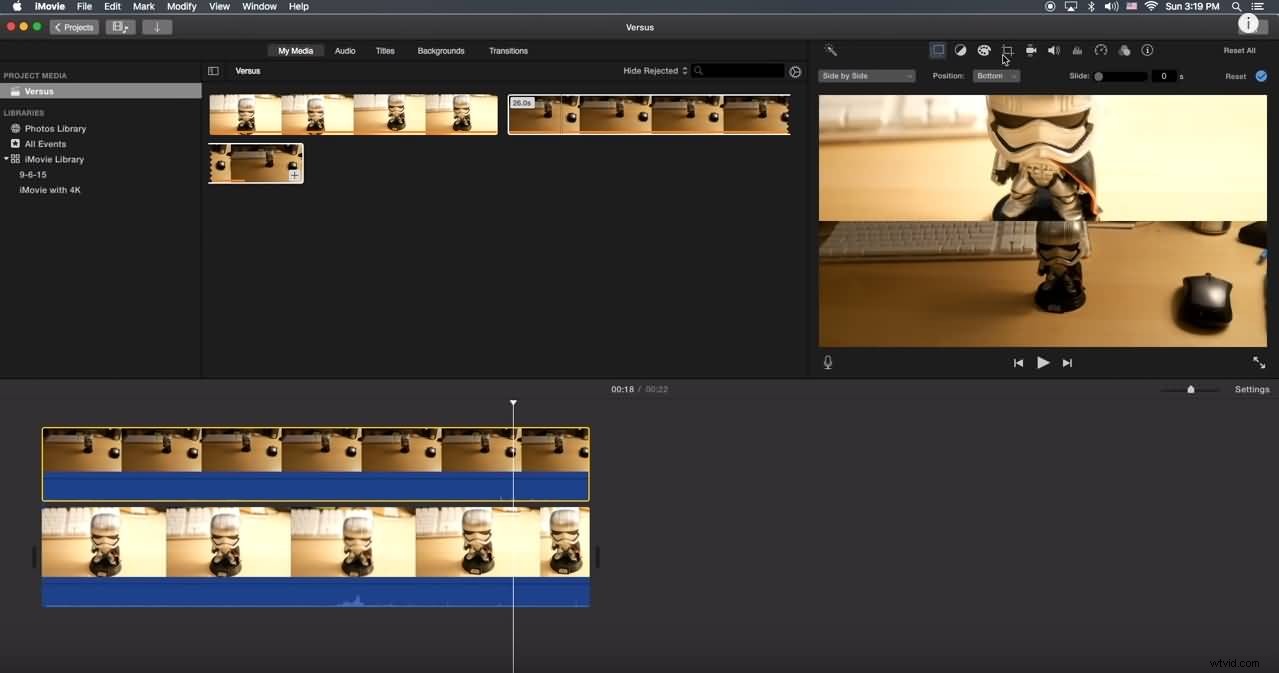
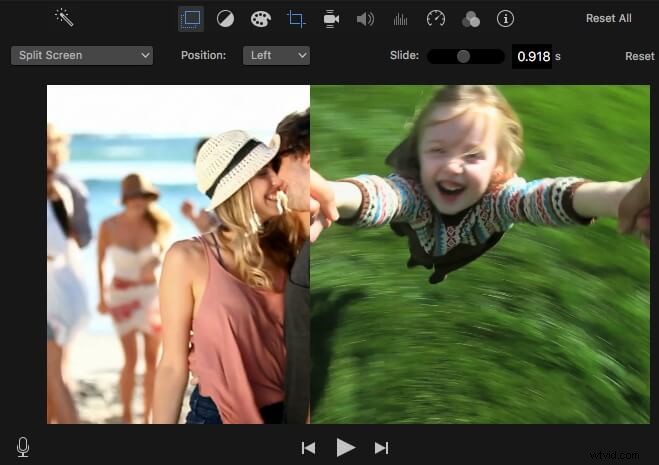
Step 3. You can now see the clips which have been cropped automatically in the Viewer window. Select where the split-screen clips appear by selecting the target positions. iMovie allows you to add slide-in transitions and adjust the duration.
Watch the tutorial below to get detailed information about how to make a side-by-side screen video with iMovie on Mac.
There are some downsides when using iMovie split-screen feature to make a split-screen video:
Limited Split-screen Layouts: There are only 2 split-screen modes (Left-Right, Top-Bottom) to display your video footage;
Limited Video Tracks: You can only add 2 video tracks, which means you can only display 2 videos side by side in iMovie at most.
For Mac users, Wondershare Filmora could be a better split-screen video maker that allows you to place two or more video clips in a single frame quickly. Click the Try It Free button below to get this easy and powerful video editor directly.
Part 2: How to Create Split-screen Videos Using iMovie for iPhone/iPad
For those who want to make a split-screen effect video on iPhone or iPad with the iMovie app, check the steps below. If you want to use the iMovie app on Android, check our picks of some best video editing apps similar to iMovie on Android.
Step 1. Launch your iMovie APP on your iPad/iPhone and start a new project.
Step 2. Add both sets of videos simultaneously.
Step 3. Click on the ellipsis and choose the split mode.
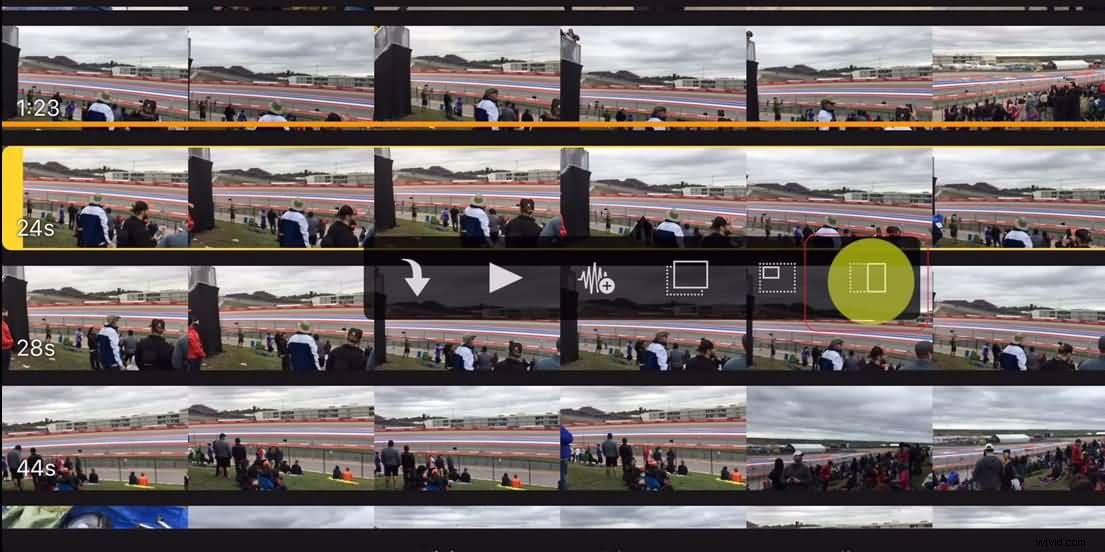
This will give you a side-by-side split. You can change the type of split-screen from the overlay controls at the bottom of the screen.
Related: Top 5 iMovie Alternatives for iPhone
Part 3: How to Make Split Screen Effect Using iMovie Alternative
For some users, using the split-screen controls on iMovie might be a little complicated and ultimately tedious if you want to display more than two clips. One of the best alternatives to iMovie on both Mac and Windows platforms is the Wondershare Filmora video editing software, which allows you to create a split-screen video with various layouts and animations, change screen saturation, the brightness, and adjust the pitch of the audio within the video.
Making a split-screen video with Filmora is easy. You can follow the steps below to put your videos side by side. Download Filmora now and let’s get started.
Step 1. Launch Filmora and create a new project. Then import the media files that you need.
Step 2. After importing your media files to the Media Library, select the Split Screen tab and preview to choose a screen mode. You can now place 2, 3, 4, 5, 6 videos on the same screen since there are various split-screen layouts available.
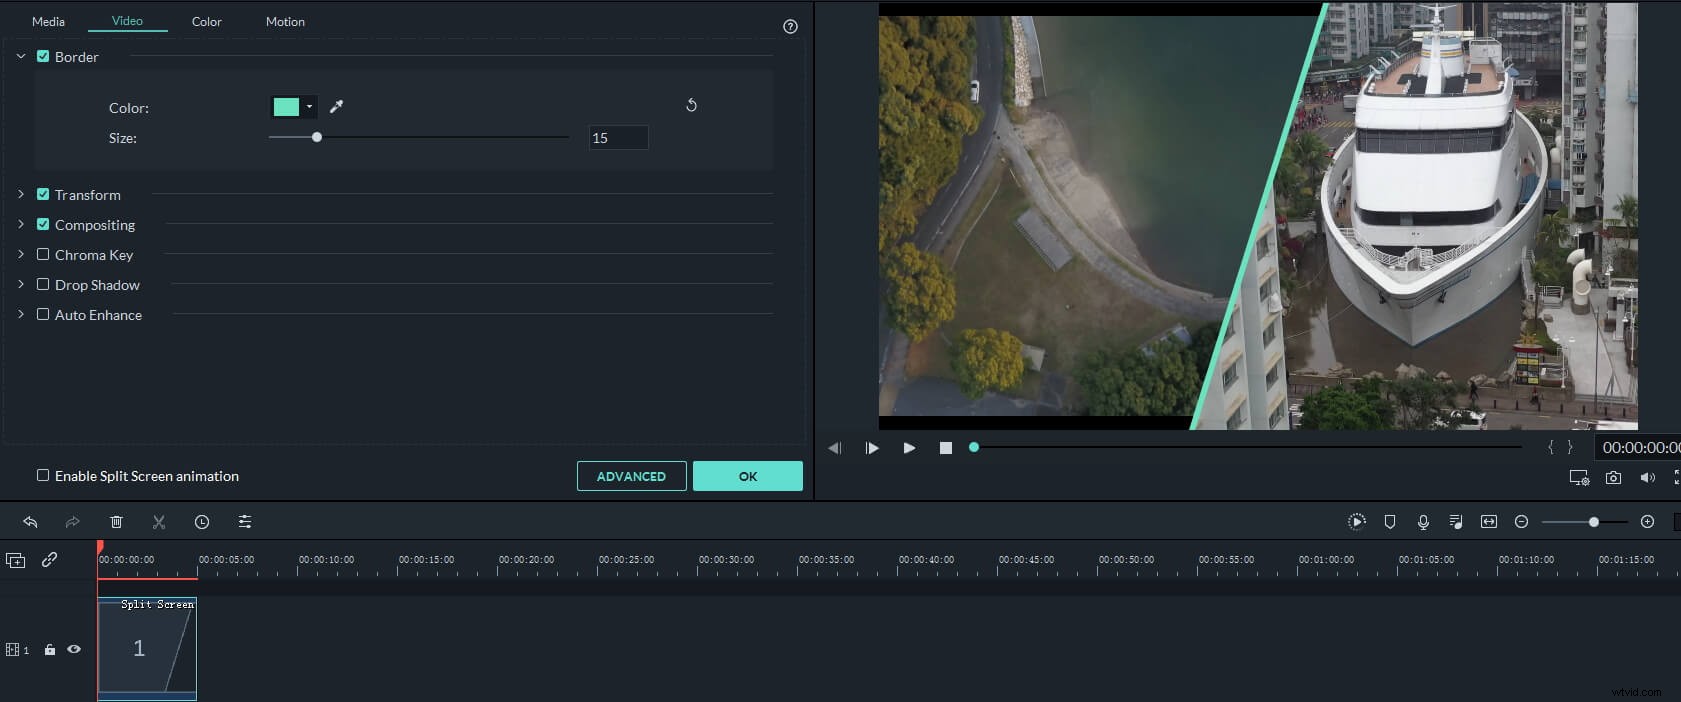
Step 3. Drag the Split Screen layout to the timeline, and then double click it to enter the editing panel. Add the video clips from Media to the screen in the Preview window accordingly. From here, you can also adjust the color and thickness of the borders in the split-screen video, apply motion effects to the whole split-screen video. Turn on or turn off the audio in the split-screen based on your needs.
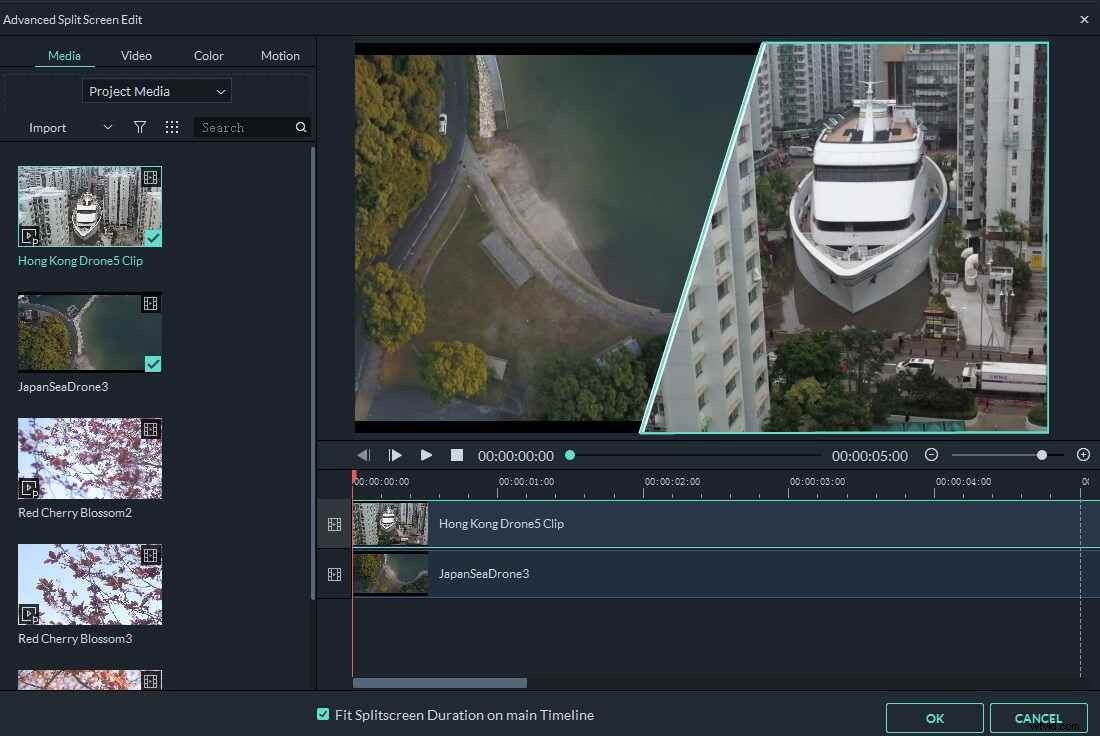
Step 4. If you want to adjust the starting points of each split-screen clip or adjust a single clip further, just click the Advanced button to enter the Advanced Split Screen Edit panel.
Step 5. When you finished the editing, click on Export to save the split-screen video to your Mac or share it to social media platforms directly.
Related: Make a Picture in Picture Effect Easily
That's it. Whether you are making a split-screen video with Filmora for Mac or with iMovie, you can add some transitions and adjust the duration of videos side by side. Check the video below to see how Filmora can help you create a split-screen music video.