
On this page
- How to use autocaptions
- How to edit and customize subtitles
- How to download the SRT file from your autocaptions
- How to hide autocaptions on a video
- How to turn off autocaptions on a video
- How to generate video captions in any language
- Watch the autocaptions YouTube tutorial
Make videos accessible and easy to follow with engaging captions. Captions extend reach, support muted viewing, and break language barriers.
Clipchamp’s autocaptions feature leverages Microsoft’s Azure Speech service to deliver accurate subtitles in a wide array of languages—all for free. The AI-driven voice‑to‑text conversion happens in a few clicks, ensuring privacy and speed.
Follow this guide to generate, edit, and export subtitles without ever typing a single word.
Step 1. Import and add your video to the timeline
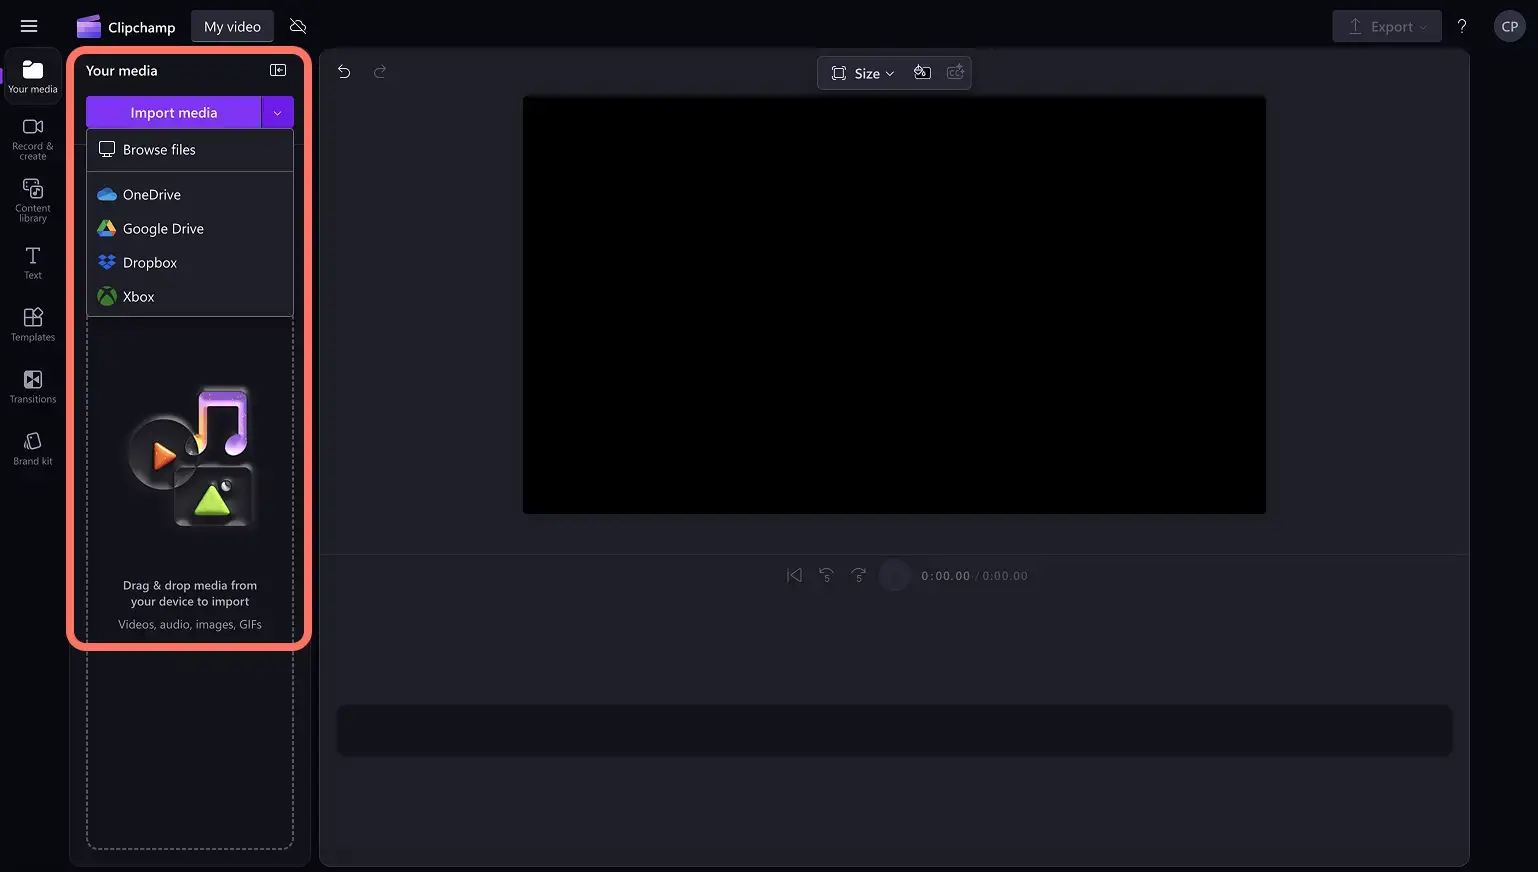
Import media by clicking the Import media button in the Media tab, or connect OneDrive. You can also record directly within the editor using the webcam recorder under the Record & create tab.
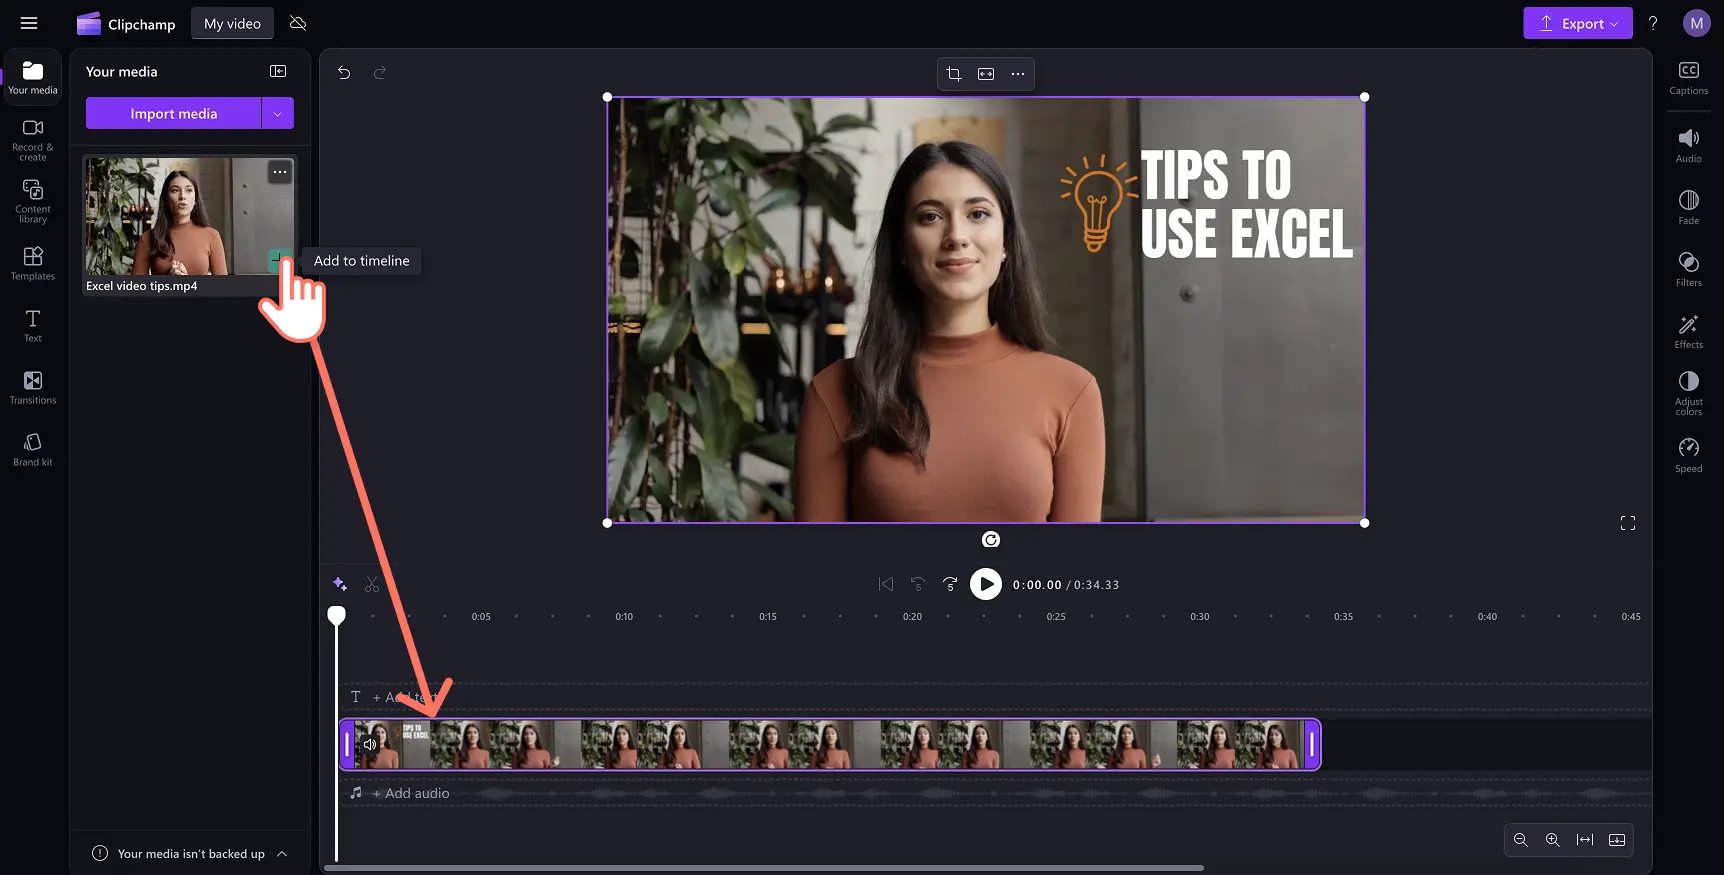
Drag and drop the video onto the timeline.
Step 2. Add captions to your video
Activate autocaptions by clicking the Captions icon on the preview, or toggle the option in the Captions tab of the property panel.
Note: Only audio containing human speech is eligible for subtitles.
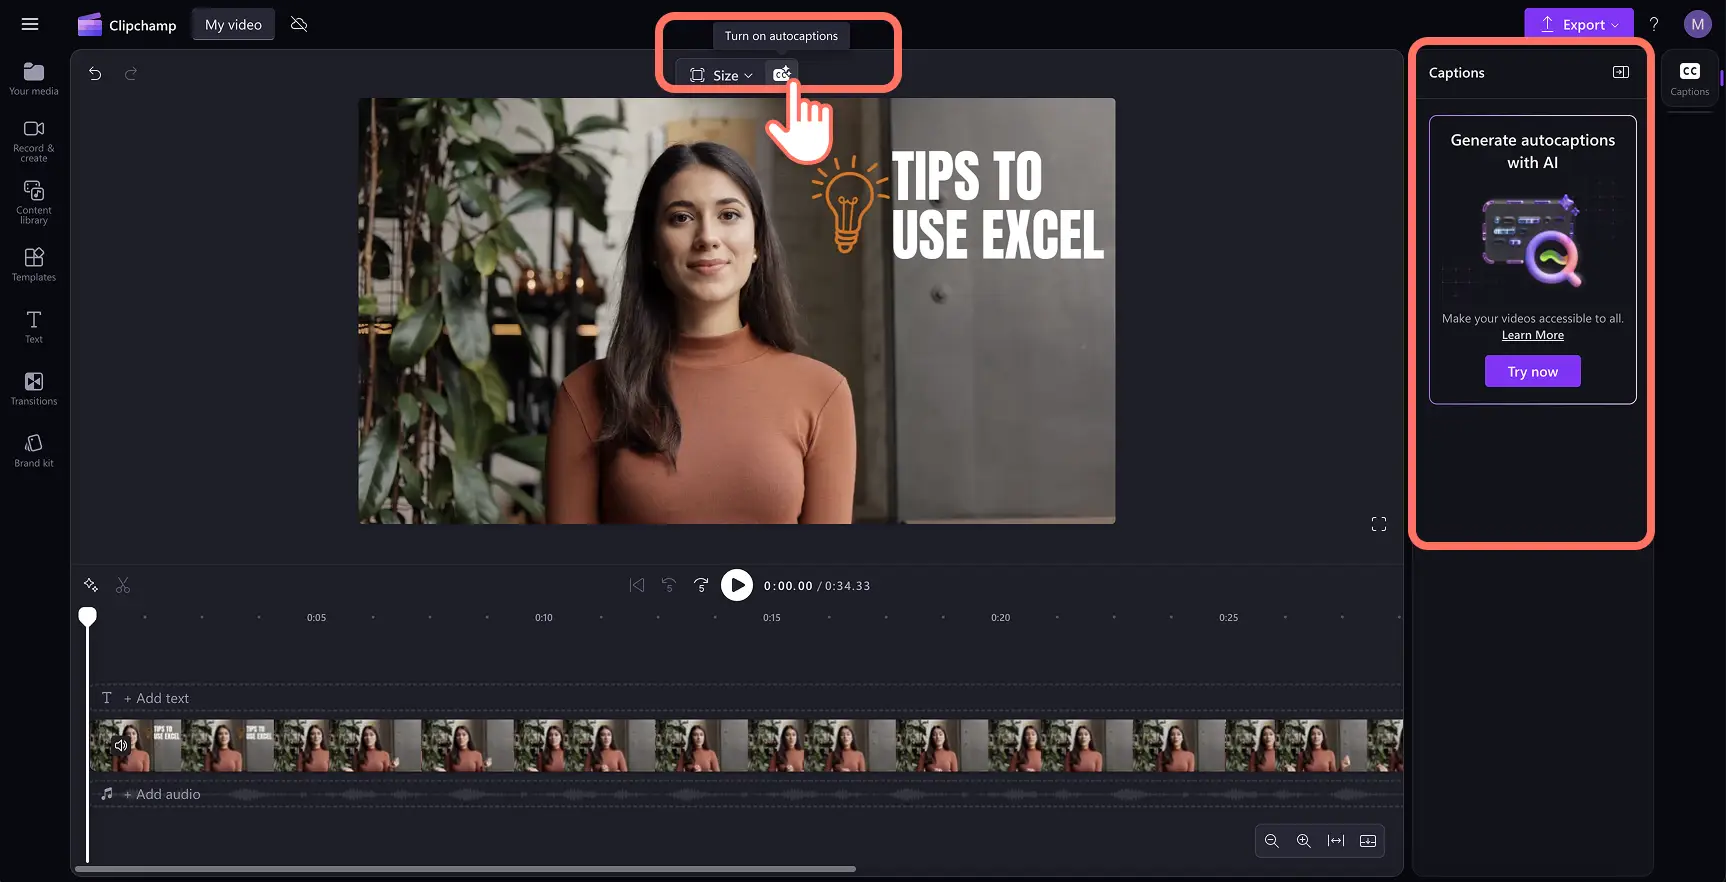
A pop‑up appears with transcription options. Choose the desired language, enable profanity filtering if needed, then click Transcribe media. Cancel to exit.
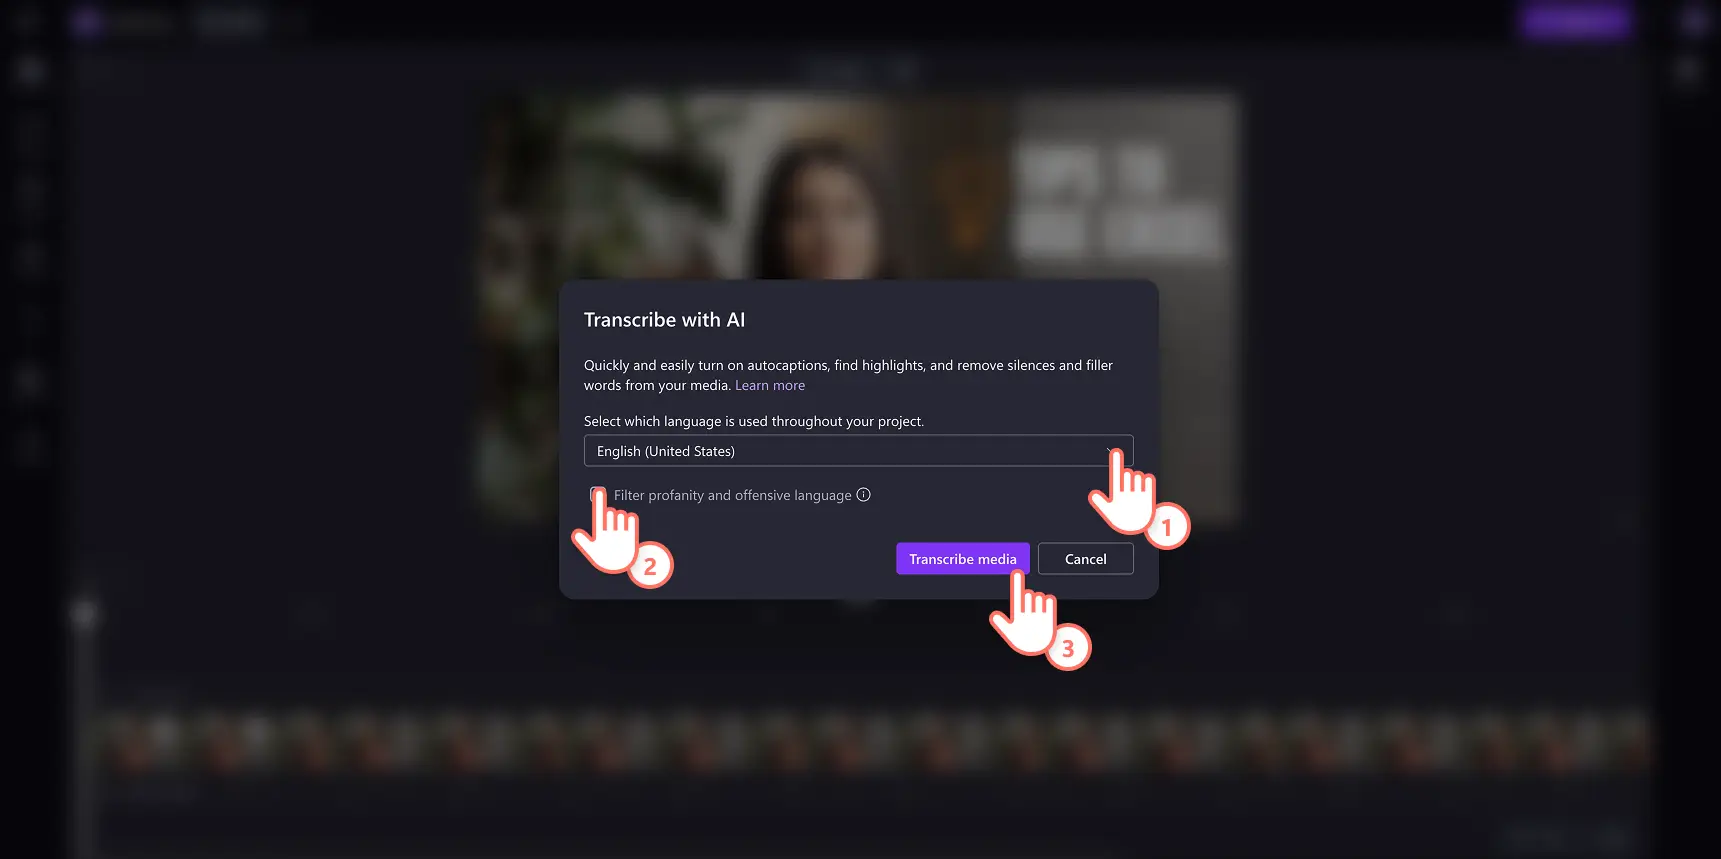
The generated text will populate the Captions tab and appear in the preview. Generation time depends on file length and internet speed.
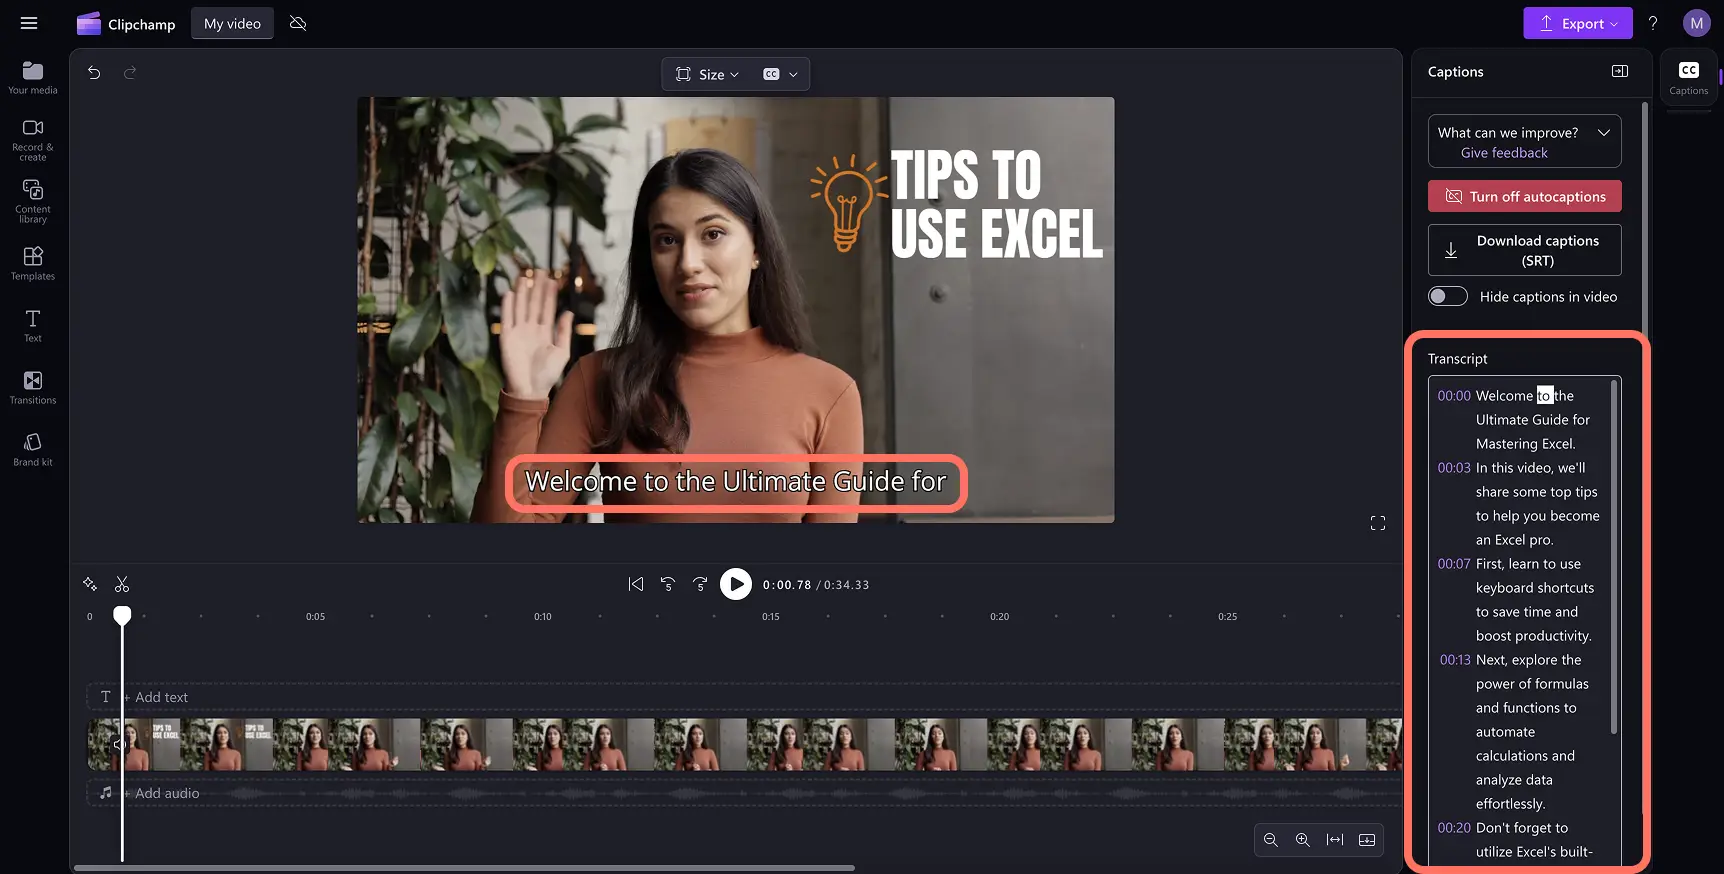
Step 3. Preview captions and export your video
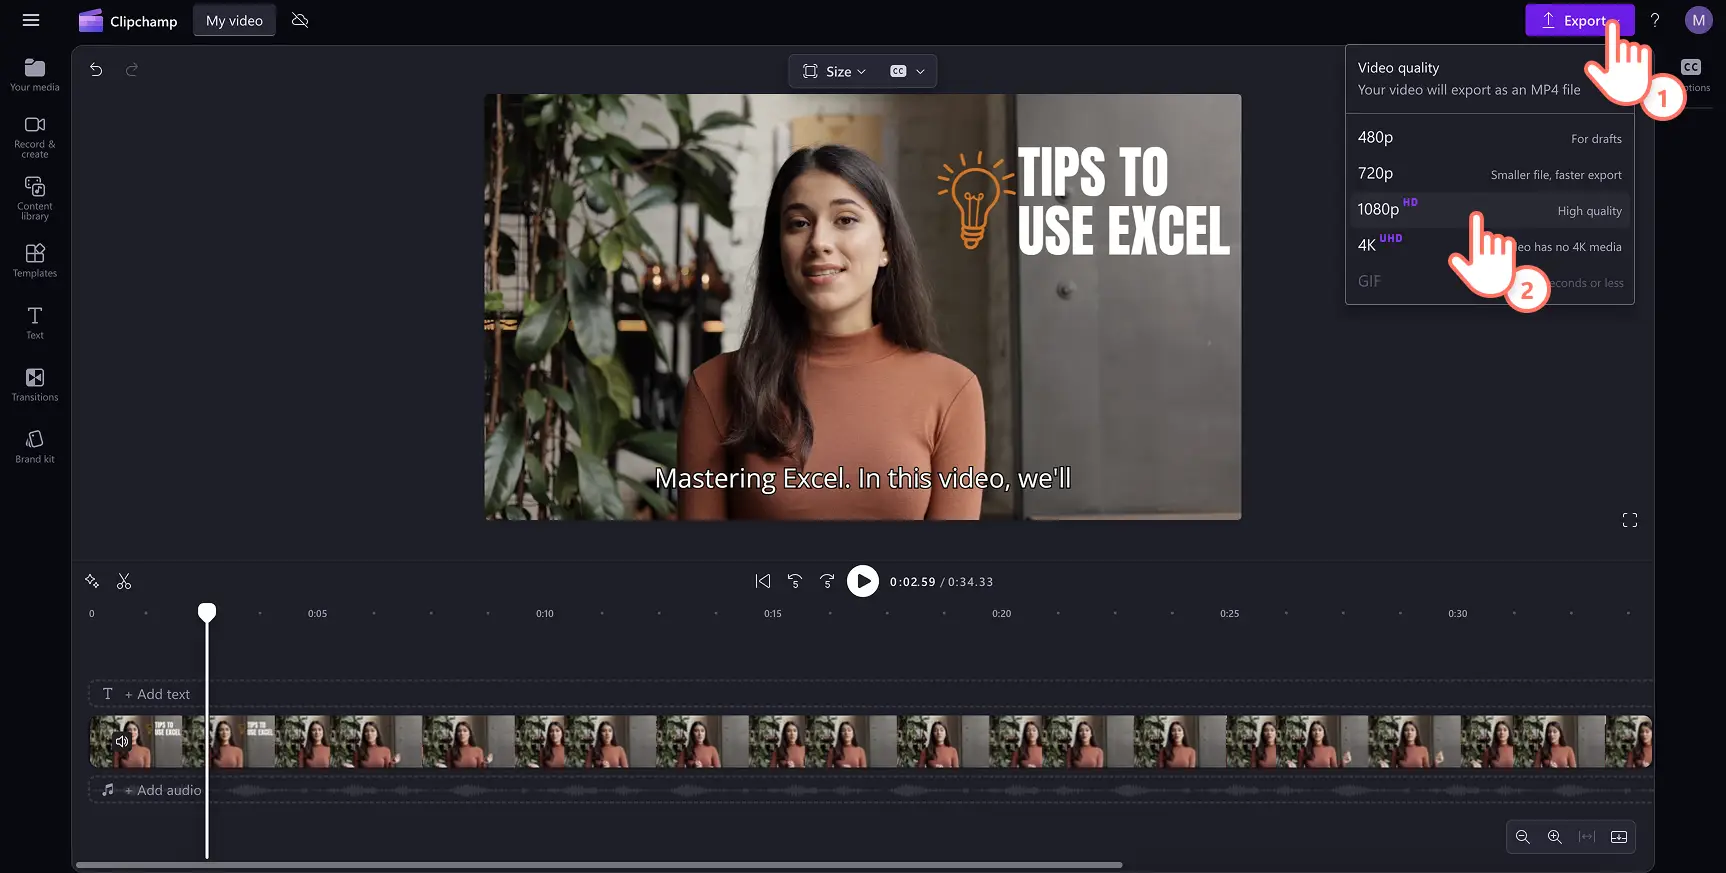
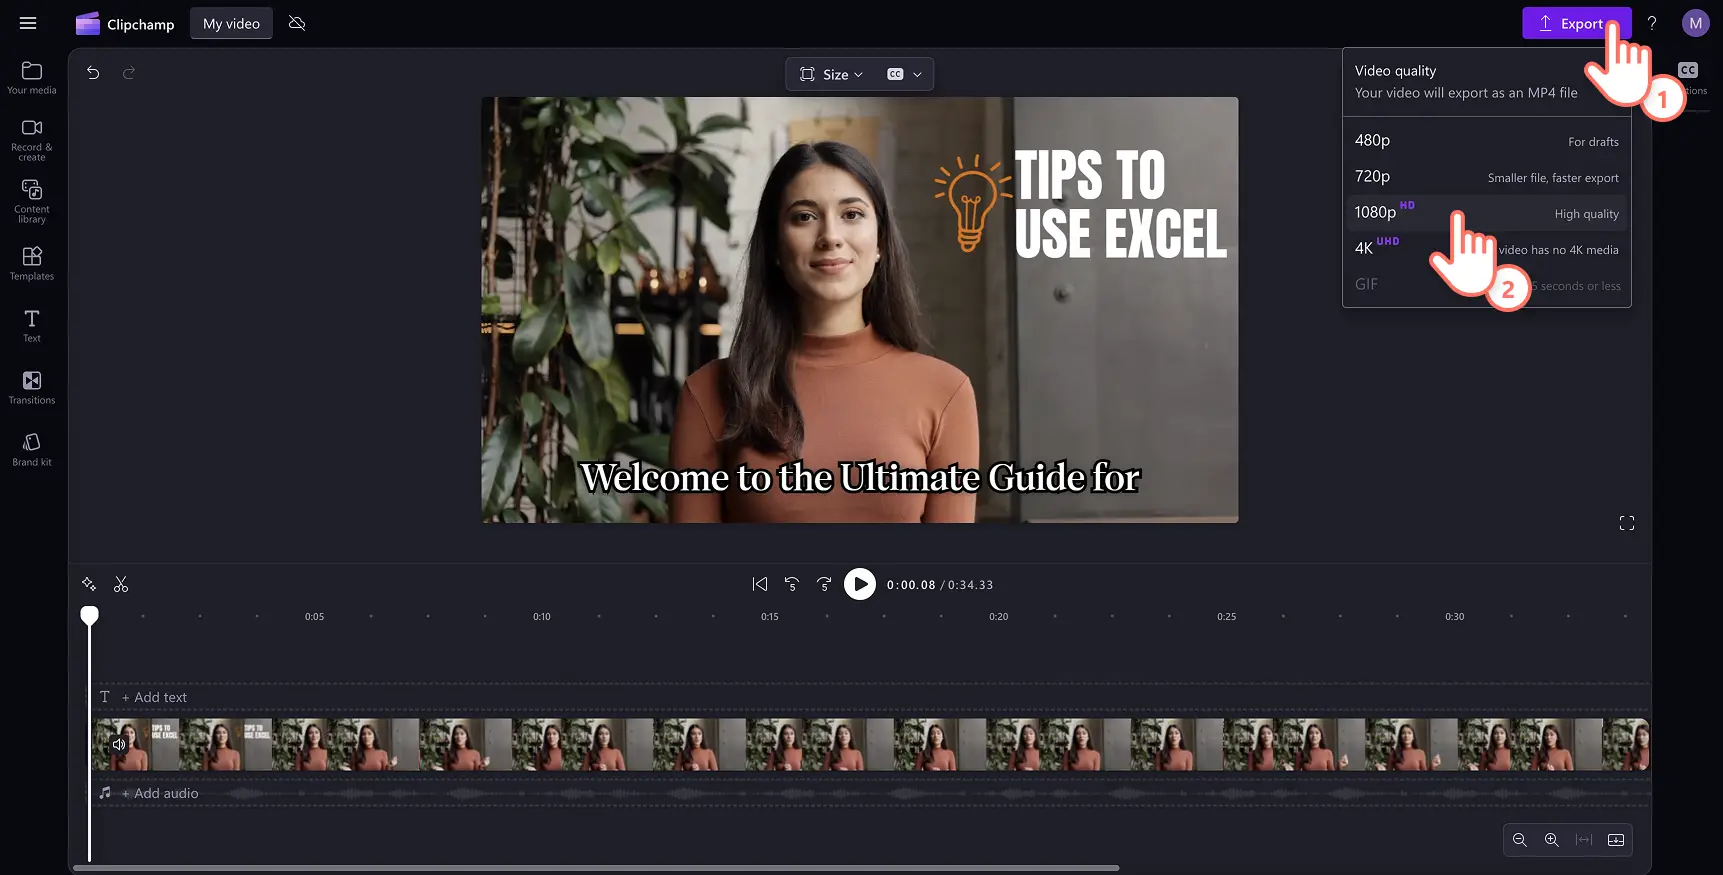
Press play to review the subtitles. When satisfied, click Export and choose your desired resolution.
How to edit and customize subtitles
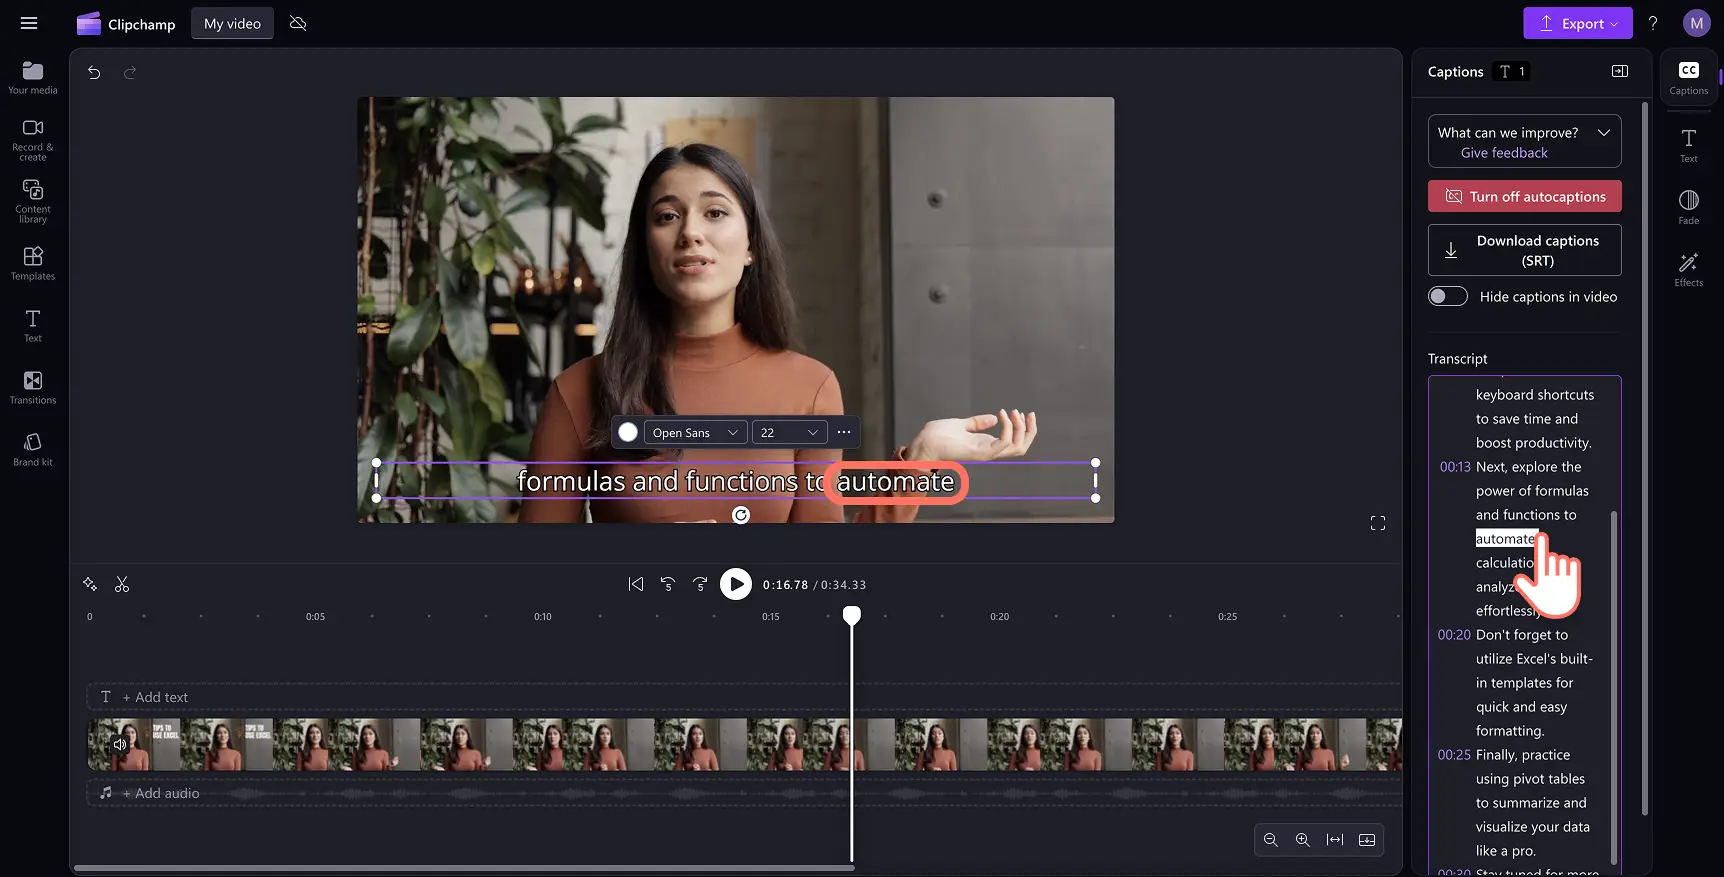
Edit the video transcript
- Open the transcript in the property panel.
- Double‑click a misspelled word to select it.
- Correct the spelling or delete the word.
Edit the captions format and style
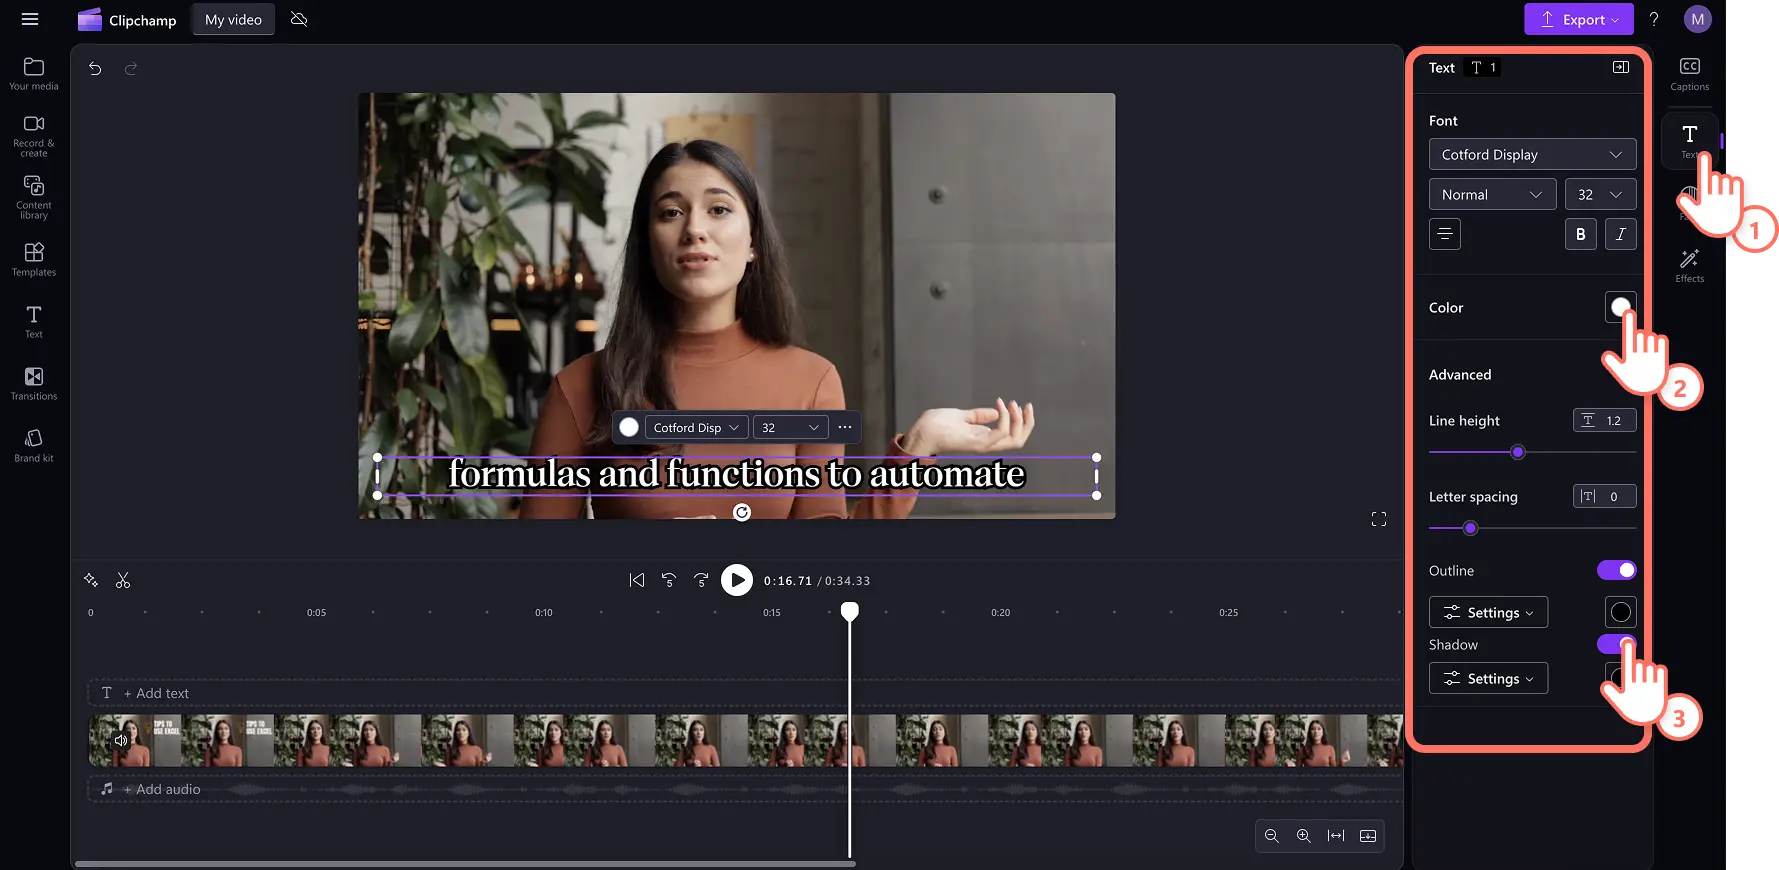
- Select the captions in the preview to reveal customization controls.
- Under the Text tab, choose a font or upload a custom brand font.
- Adjust size, alignment, and color palette.
- For advanced accessibility, tweak line height, letter spacing, outlines, and shadows. Add fades or effects for a polished look.
How to download the SRT file from your autocaptions
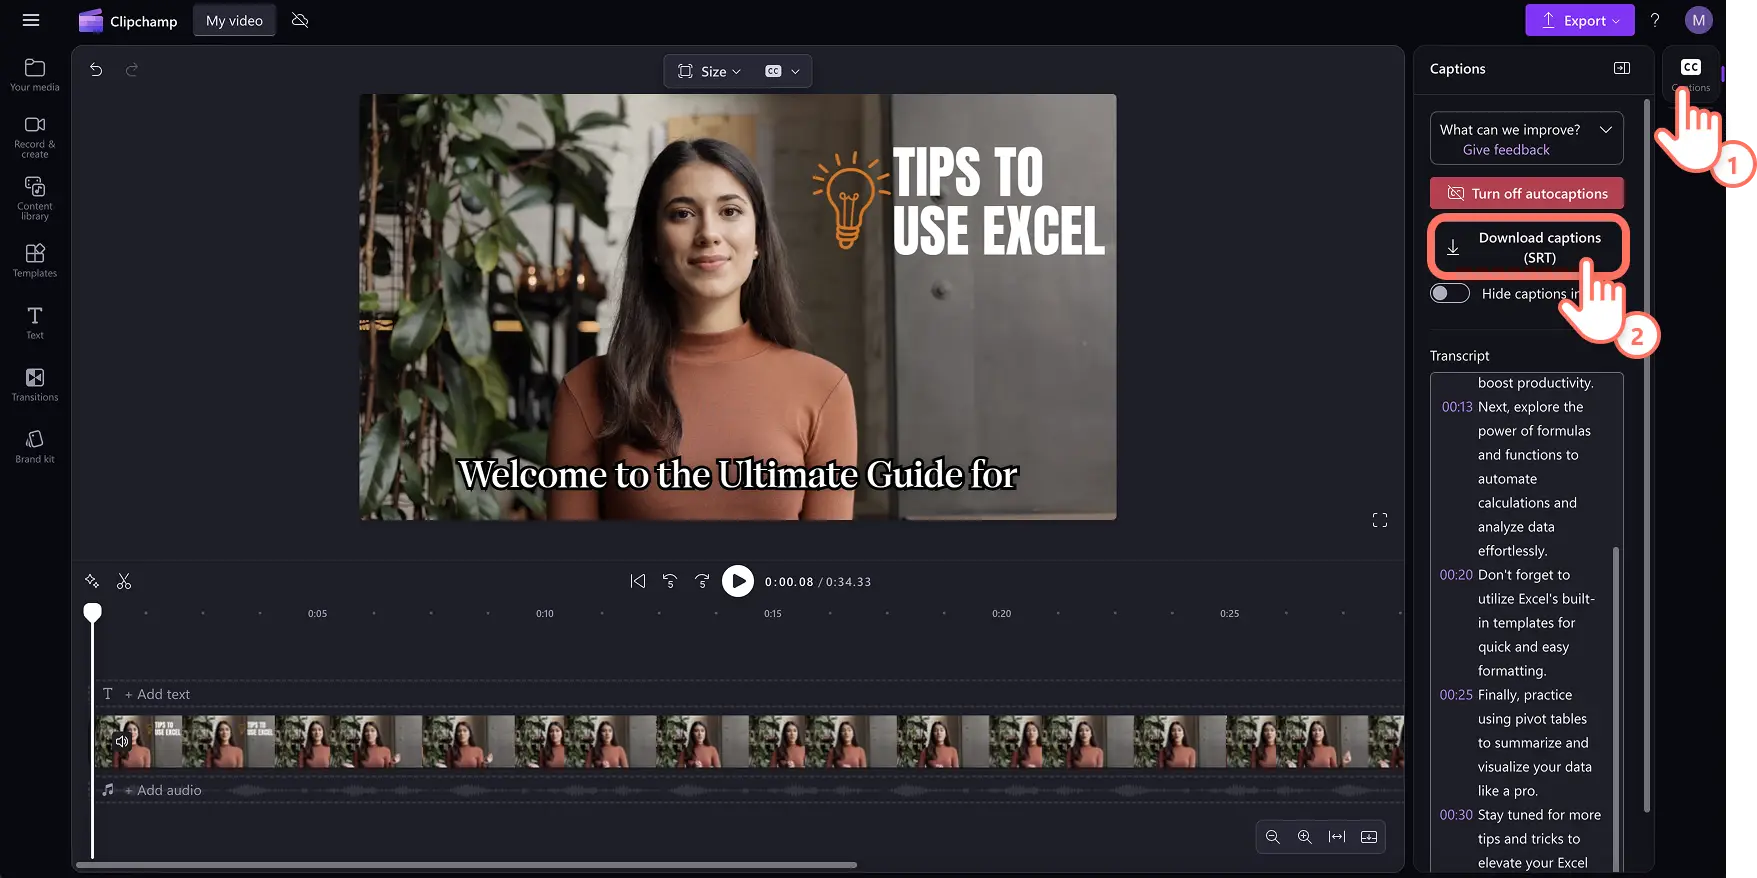
The SRT (SubRip) format is a standard for subtitles, enabling easy integration into other platforms. To download:
- Navigate to the Captions tab.
- Review the transcript for accuracy.
- Click Download captions to save the .srt file.
Adding an SRT file to PowerPoint, video slideshows, or streaming services enhances viewer comprehension.
How to hide autocaptions on a video
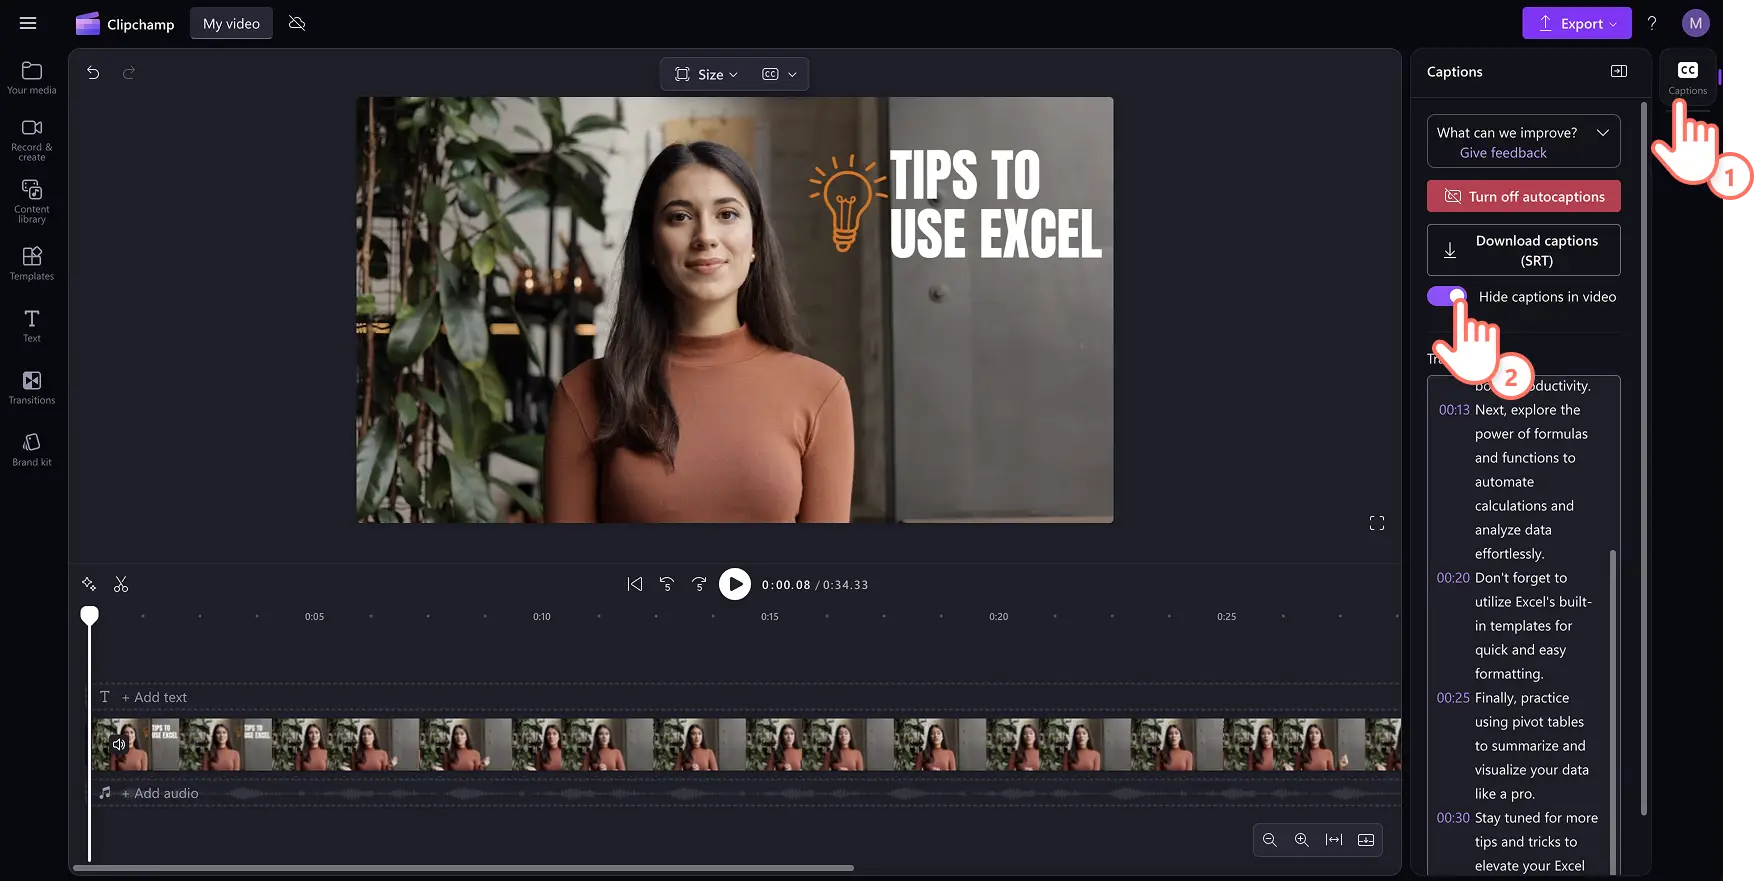
- Open the Captions tab.
- Toggle the Hide captions switch. Captions will remain in the transcript but not appear in the preview.
How to turn off autocaptions on a video
- Go to the Captions tab.
- Click Turn off autocaptions to remove subtitles entirely.
- Export the video without captions if desired.
How to generate video captions in any language
Clipchamp supports transcription in dozens of languages—including Spanish, French, Japanese, Arabic, Hindi, and more. Explore the full list of supported languages here. The platform also offers regional dialects, such as Spanish (Spain), Spanish (Mexico), and Spanish (United States), improving accuracy for local audiences.
The autocaptions feature pairs seamlessly with Clipchamp’s AI text‑to‑speech engine, allowing you to produce voiceovers that match the subtitles in a single editing session.
Watch the autocaptions YouTube tutorial
Master the art of clear, engaging subtitles for tutorials, Shorts, Reels, and other video formats.
Frequently asked questions
Are autocaptions free for all users?
Yes. Autocaptions are available to all Clipchamp users, whether on the free tier or a paid subscription.
What languages does autocaptions support?
Many languages are available. See the full list here. Each video can contain only one language at a time.
Who has access to this data?
Does Clipchamp store any caption data?
Subtitle data is stored only within your video file and is accessible exclusively by the account owner. Audio is processed entirely by Microsoft’s Automatic Speech Recognition with no human intervention, and caption data is not retained separately or used for other purposes.
If I don’t want Clipchamp to process this data, can I prevent it?
Disable autocaptions in the Captions tab to stop any audio processing. Note that turning off autocaptions removes the transcript from the video.
Discover additional accessibility features like ASL sticker overlays or transcribe audio to text using Microsoft tools. Start editing today with the Clipchamp video editor or download the Windows app.