Screenshots have revolutionized how we share information, teach concepts, and communicate visually across devices. Whether you’re a student, professional, or casual user, knowing how to capture and edit screenshots on an HP device can save time and improve clarity. Below is a concise guide to the most reliable methods available on HP laptops, desktops, and tablets.
In this article
- Part 1. Capture with Win + PrtSc (Windows 8 +)
- Part 2. Capture with Win + G (Windows 10 +)
- Part 3. Capture with PrtSc (All Windows versions)
- Part 4. Use the Snipping Tool (Vista +)
- Part 5. Use Snip & Sketch (Windows 10 +)
- Part 6. Screenshot on HP Tablets
Part 1. Capture with Win + PrtSc (Windows 8 +)
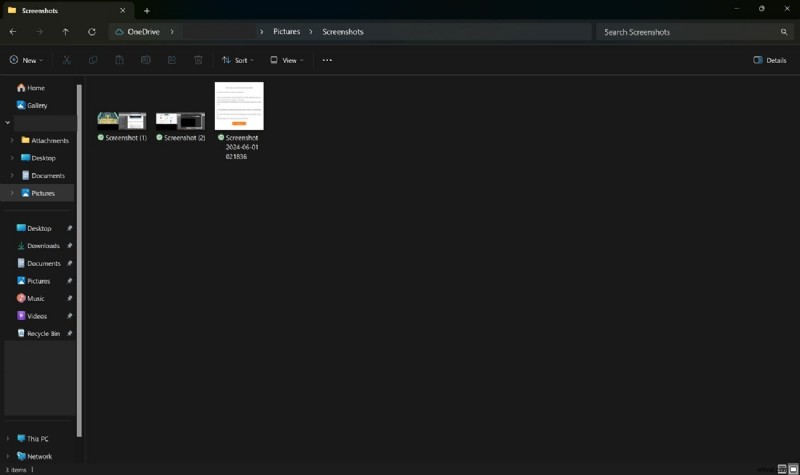
Keyboard shortcuts are the fastest way to grab a screenshot. When you press Win + PrtSc, the screen dims briefly, indicating a successful capture. The image is automatically saved to the Pictures\Screenshots folder and can be edited with the built‑in photo editor or shared directly.
Step 1: Open the window you want to capture and hit Win + PrtSc simultaneously. The screen will fade for a moment. Your screenshot appears in the Screenshots folder.
Part 2. Capture with Win + G (Windows 10 +)
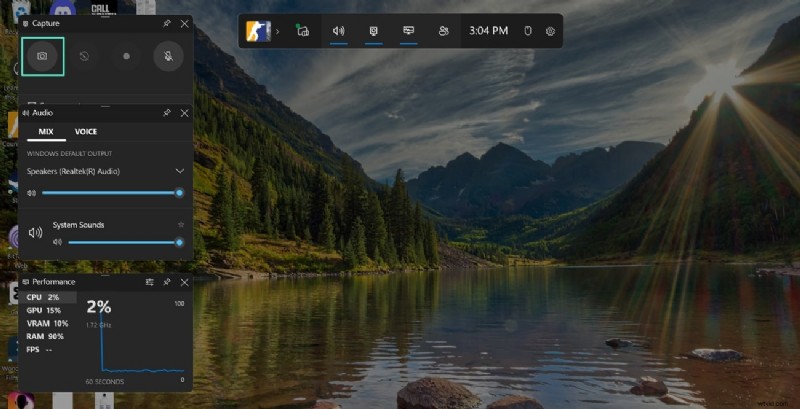
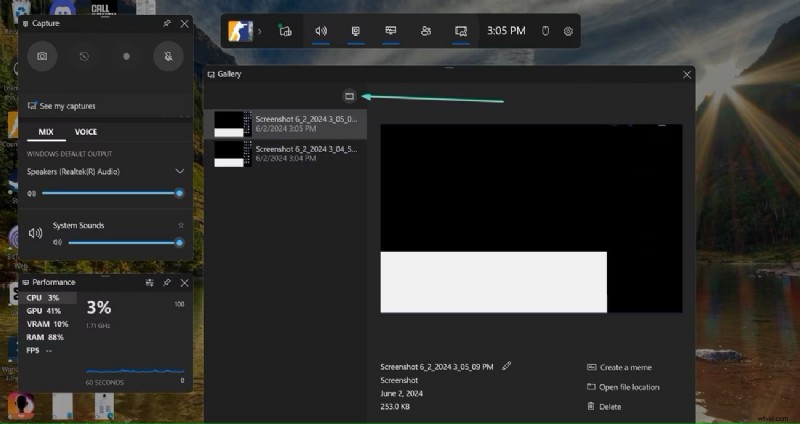
The Xbox Game Bar provides a quick, annotated capture tool. After pressing Win + G, a toolbar appears. Click the Camera icon to capture. The image is stored in Videos\Captures and can be annotated before saving.
Step 1: Press Win + G to open the Game Bar, then click the Camera icon.
Step 2: Your screenshot is saved in the Captures folder under Videos.
Part 3. Capture with PrtSc (All Windows versions)
For a quick capture without auto‑saving, use the PrtSc key. The screenshot is copied to the clipboard and can be pasted into any application, such as Paint or Word.
Step 1: Press PrtSc on the keyboard. Open Paint and press Ctrl + V to paste the image for immediate editing.
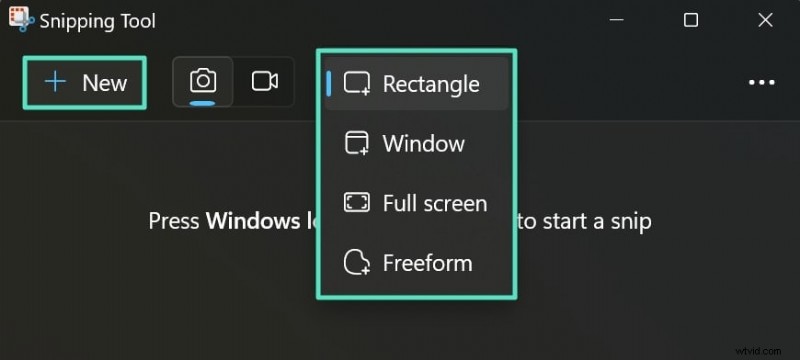
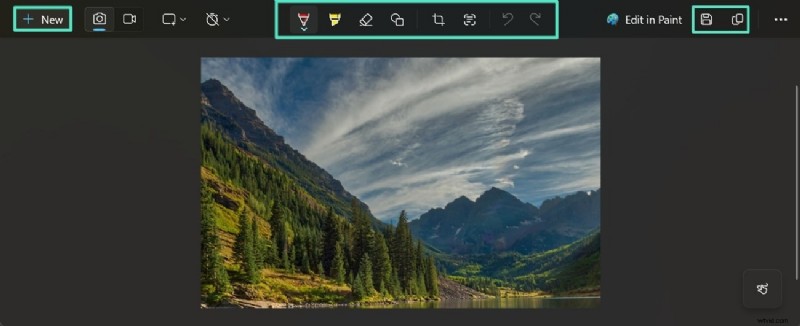
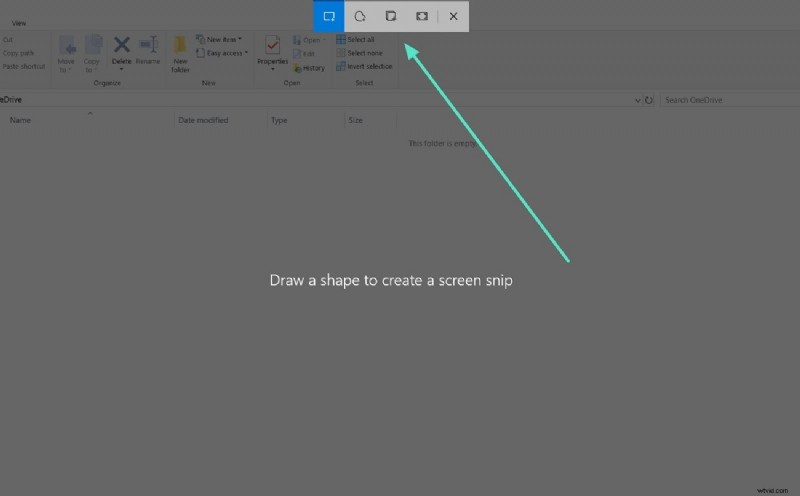
Part 4. Use the Snipping Tool (Vista +)
For more control over the capture area, the legacy Snipping Tool remains a solid choice. It allows you to choose from full‑screen, window, rectangular, or free‑form snips, then annotate directly.
Step 1: Search for and launch Snipping Tool. Select Mode (Full screen, Window, Rectangular, or Free‑form) and click New to draw the area.
Step 2: After capturing, use the Pen and Highlighter tools to mark the image. Click Copy or Save to store the result.
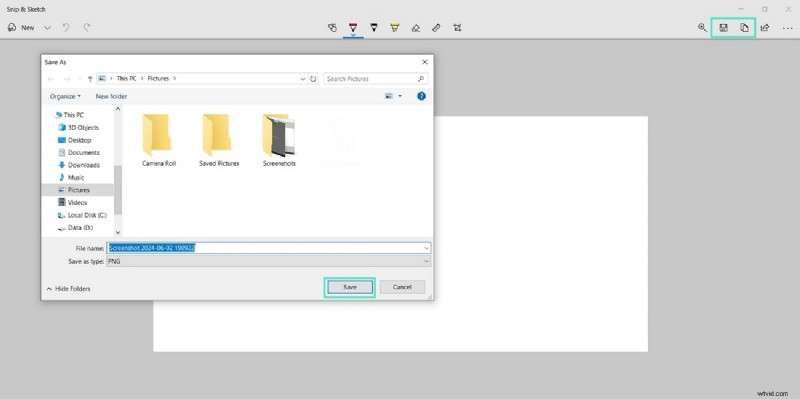
Part 5. Use Snip & Sketch (Windows 10 +)
Snip & Sketch offers a modern, touch‑friendly interface. It integrates with the clipboard and provides quick editing tools.
Step 1: Press Win + Shift + S. A translucent toolbar appears—select the shape, then capture the screen or a specific window.
Step 2: A notification will prompt you to open the image in Snip & Sketch. Click it to launch the editor.
Use the Touch Writing, Pen, Pencil, or Highlighter icons to annotate. The Eraser and Crop tools help refine the capture.
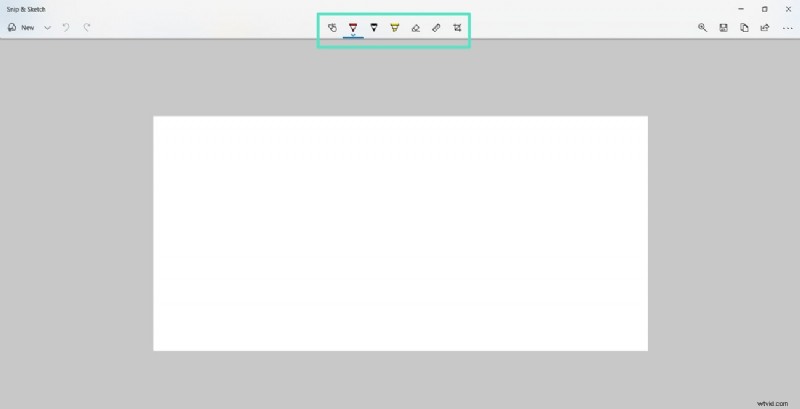
Step 3: Press Save to store locally, Copy to the clipboard, or Share directly from the editor.
Part 6. Screenshot on HP Tablets
Capturing screenshots on HP tablets follows the standard Android pattern: press and hold the Volume Down and Power buttons simultaneously. A flash indicates success, and the image appears in the Pictures\Screenshots gallery.
Step 1: Open the desired app or page, then press Volume Down + Power together.
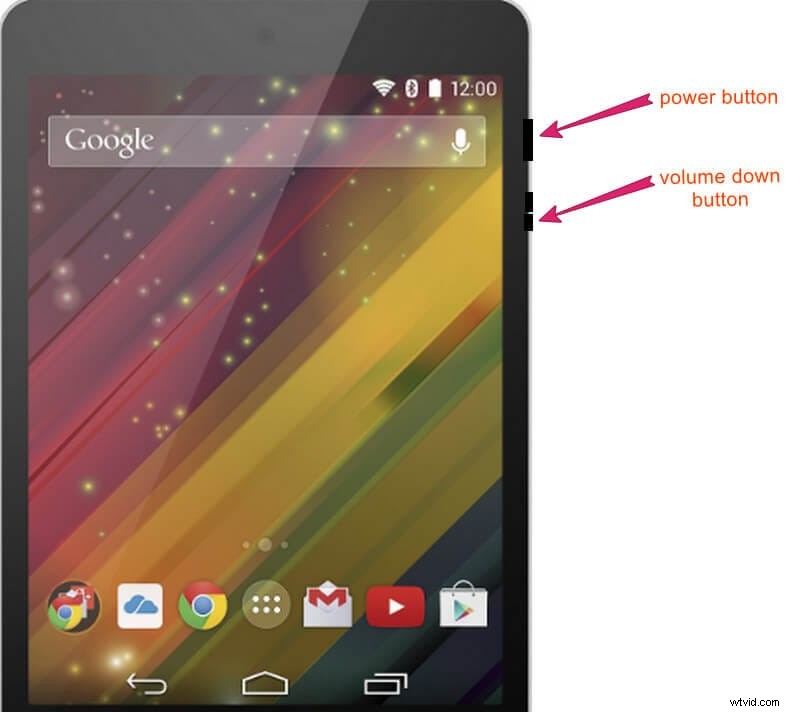
Step 2: Locate the screenshot in the gallery’s Screenshots folder for sharing or editing.
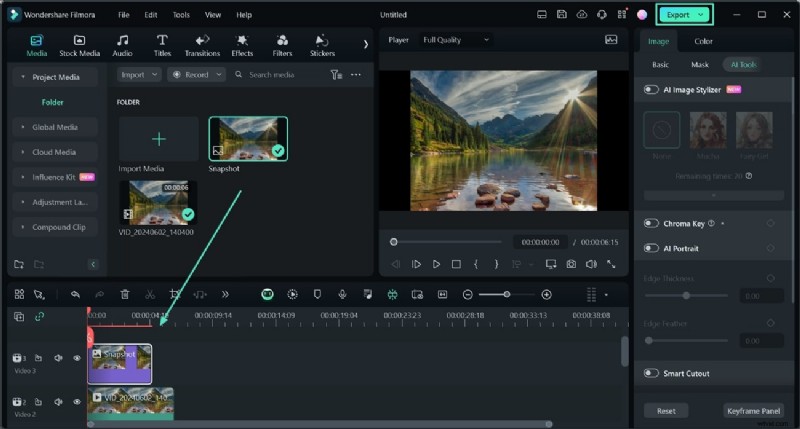
Bonus: Capture Snapshots in Wondershare Filmora
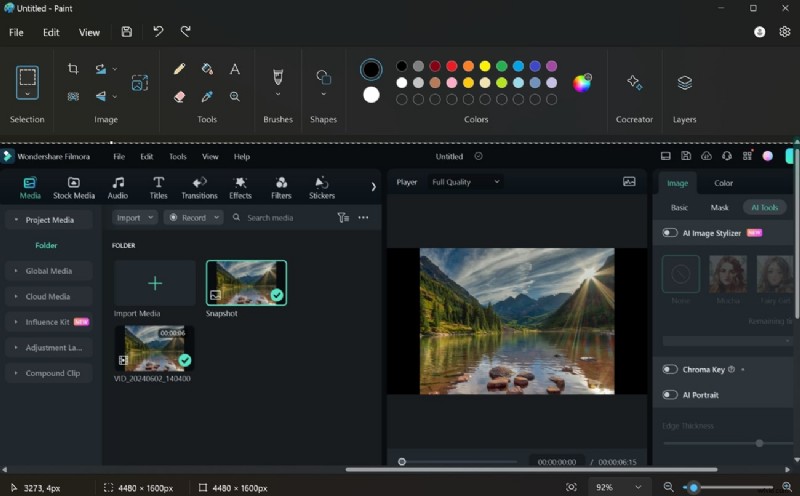
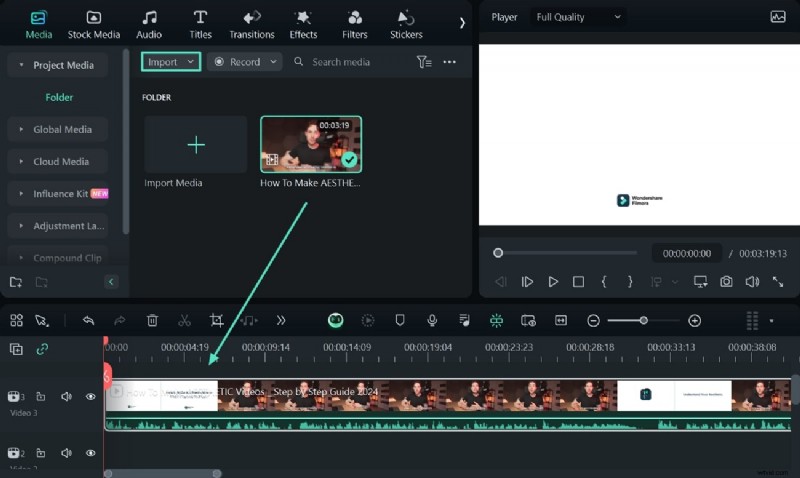
Wondershare Filmora’s built‑in snapshot tool lets you capture and edit frames directly from your video timeline, eliminating the need for external screenshot utilities.
Step 1: Launch Filmora, create a new project, and import your media. Drag the clip to the timeline.
Step 2: In the preview window, click the Snapshot icon. Define the output format and folder, then capture the frame.
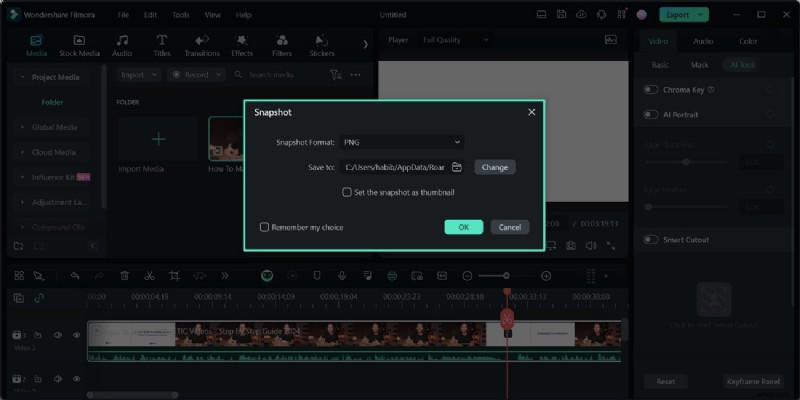
Step 3: Edit the snapshot using Filmora’s drawing and filter tools, then drag it onto the timeline or export it as an image file.
Conclusion
HP devices offer a range of reliable screenshot methods—from quick keyboard shortcuts to advanced editing tools like Snip & Sketch and Filmora. Choose the approach that best fits your workflow and enjoy crisp, shareable images anytime.