To deliver personalized online instruction, a robust screen recorder is essential. It should support annotation tools, cursor highlighting, and precise audio controls, enabling you to walk learners through each step with clarity and impact.
Moreover, the ideal recorder delivers crystal‑clear video and audio, making it vital to choose one that aligns with your specific needs. In this guide, we evaluate the five most reliable screen‑recording tools, helping you identify the perfect match for your tutorial production.
In this article
- What makes a top‑tier screen recorder?
- Key features for tutorial creation
- Top 5 screen recorders
- Feature comparison
- Choosing the right tool for you
Part 1. Defining a Top‑Tier Screen Recorder for Tutorials
A screen recorder is the backbone of any online tutorial. Selecting the right software from the outset prevents future headaches and eliminates the need to juggle multiple applications. Understanding the essential features of tutorial‑specific recorders ensures you make an informed, confident decision.
1. User‑Friendly Interface
An intuitive interface lets you start, pause, and manage recordings effortlessly. A clean layout, keyboard shortcuts, and contextual tooltips keep you focused on the content rather than the tool.
2. High‑Quality Footage and Audio
A premier recorder employs advanced encoding to preserve sharp video and pristine audio while keeping file sizes manageable. Expect adjustable frame rates, resolutions, and robust microphone support, including noise cancellation.
3. Qualitative Performance on All Devices
Whether on a high‑end workstation or a modest laptop, the recorder should deliver smooth, lag‑free capture with synchronized audio—crucial when you overlay a microphone.
4. Customization and Editing Features
The software should allow you to tailor settings to your workflow. Built‑in trimming, annotation, and effects tools should integrate seamlessly into your editing pipeline.
5. Advanced Features (e.g., Extended Recording Durations, Green Screen)
A superior recorder offers generous recording limits and a green‑screen tool for professional overlays, along with other advanced options that enhance production value.
6. Cross‑Platform Compatibility
Consistency across Windows, macOS, and Linux (or web) ensures you can switch devices without compromising performance or feature set.
7. Security and Data Protection
Because recordings may contain sensitive content, the recorder should safeguard data through encryption, secure storage, and strict privacy controls.
Now, let’s look at the top 5 screen recorders for tutorials that incorporate these features and more.
Part 2. The Five Best Screen Recorders for Tutorials
Selecting the optimal screen recorder profoundly influences your tutorial’s quality. Tools tailored for instructional videos provide the precision and polish needed for step‑by‑step demonstrations, thanks to built‑in annotations, high‑resolution capture, and streamlined editing.
1. Filmora [Most Recommended]
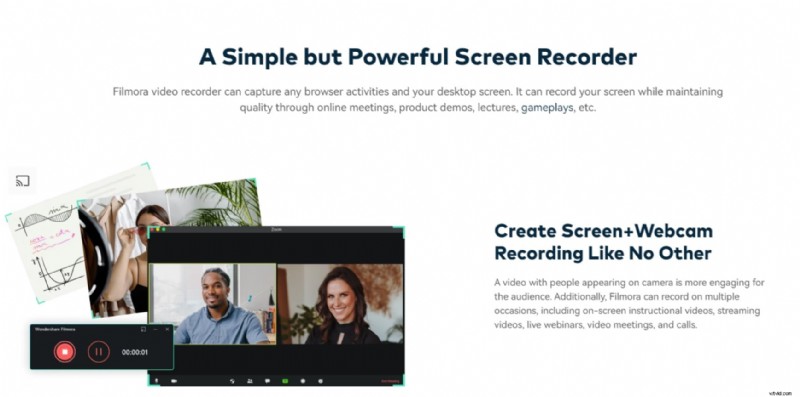
Wondershare Filmora is a versatile screen‑recording solution crafted for tutorials and online training videos. With robust editing features and high‑quality output, Filmora’s screen recorder excels in delivering polished content.
Features
- Cross‑platform compatibility (Windows & macOS)
- Four high‑definition microphone options
- Full‑screen, custom region, or window‑specific capture
- Multi‑track timeline for layered editing
- AI‑powered sound effect maker
- Green‑screen effects for dynamic overlays
- Text overlays, transitions, background music, trimming, splitting, animations, and more
- Direct sharing to YouTube, Vimeo, and Google Drive
Pros
- Intuitive for beginners and power users alike
- High‑resolution video output with minimal compression artifacts
- Advanced audio cleanup, including background noise removal
Cons
- Some premium features require a paid license
2. Camtasia
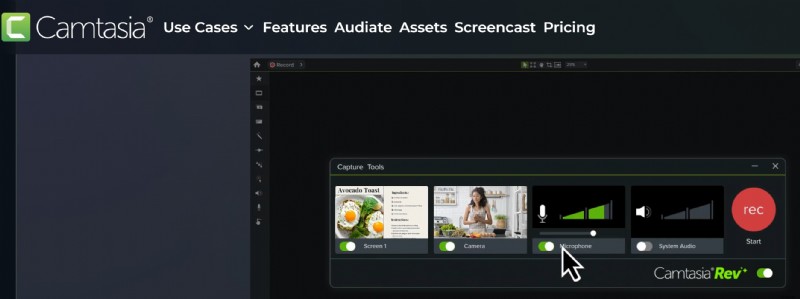
Camtasia is a commercial, feature‑rich editor favored by many professional tutorial creators. Its flexible interface lets you fine‑tune every aspect of your capture and editing workflow.
Features
- Webcam overlay and webcam‑only capture
- High‑definition screen recording
- AI‑driven background removal
- Multi‑track timeline for comprehensive editing
- Green‑screen support
- Over 150 transitions and animations
- Extensive asset library: callouts, shapes, arrows, and more
Pros
- Professional‑grade video output
- Intuitive drag‑and‑drop editing interface
- Suitable for both novices and advanced users
Cons
- Higher price point relative to free alternatives
- Advanced features can demand significant CPU and memory resources
3. OBS Studio
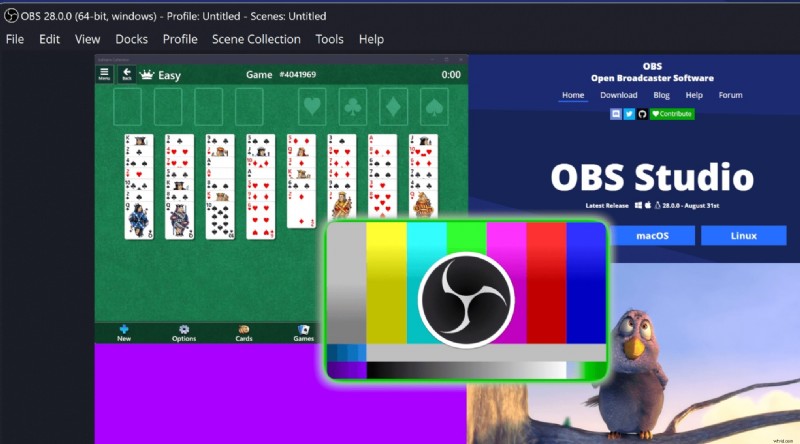
OBS Studio is a powerful, open‑source screen‑recording platform that also excels in live streaming. Its advanced settings grant full control over capture, making it a favorite for creators who need flexibility without cost.
Features
- Up to 1080p resolution with adjustable frame rates
- Built‑in audio mixer with source routing
- Video manipulation tools: rotate, merge, trim, split, crop, and flip
- Customizable advanced setups via scenes and sources
- Support for screen, webcam, and audio sources
Pros
- Highly flexible and feature‑rich
- Free with strong community support and plugin ecosystem
- No watermarks on exported files
Cons
- Steeper learning curve for beginners
- Limited built‑in editing; requires external software for complex cuts
4. ScreenFlow
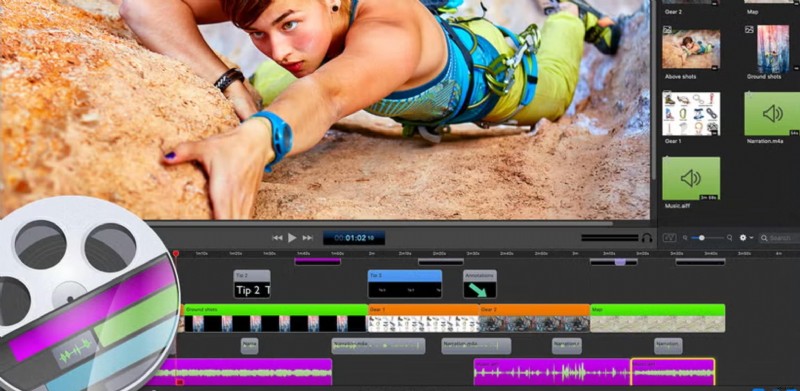
ScreenFlow is a leading screen‑recording solution for macOS, designed specifically for high‑quality tutorials. It pairs seamless recording with a powerful built‑in editor, enabling creators to produce polished videos quickly.
Features
- Professional video filters and effects
- Multi‑application capture for side‑by‑side comparisons
- Multi‑track editing with audio and video layers
- Integrated camera and microphone recording
- Motion graphics and animation tools
- Export to ProRes or MP4 with adjustable settings
Pros
- Straightforward editing workflow
- Ideal for software tutorials with built‑in stock media and templates
- High‑fidelity video output
Cons
- Mac‑only platform
- Higher price point for some users
5. Loom
Loom is celebrated for its speed and simplicity. It’s perfect for creators who want to record and share tutorials instantly, offering a streamlined workflow and basic editing tools.
Features
- Trim and basic editing suite
- Cloud storage and instant playback
- Screen and webcam capture with real‑time annotation
- One‑click sharing to Google Drive, Loom gallery, or external links
- Concurrent recording of screen and camera
Pros
- Minimal setup with a user‑friendly interface
- Free tier with essential features for quick sharing
- Real‑time highlights and annotations during capture
Cons
- Limited editing compared to full‑featured editors
- Not ideal for tutorials that require advanced production techniques
Each of these screen‑recording tools offers unique strengths. Consider your specific workflow, budget, and audience to select the recorder that best serves your tutorial creation journey.
Part 3. Comparison of the Best Screen Recorders for Tutorials
When choosing the best screen‑recording software for tutorials, it’s helpful to compare key features to determine which tool meets your specific needs. Below is a side‑by‑side comparison of the top five recorders based on ease of use, video and audio quality, editing tools, and compatibility.
| Screen Recorder | Ease of Use & Navigation | Video & Audio Quality | Editing & Annotation Capabilities | Advanced Features & Customization | Performance | Cross‑Platform Compatibility & Sharing |
| Filmora | Very intuitive | High‑resolution output | Built‑in editor, transitions, text overlays | Green‑screen, picture‑in‑picture, adjustable resolution | Excellent | Windows & macOS, easy sharing to YouTube, Vimeo, Google Drive |
| Camtasia | Easy | Professional‑grade | Advanced editing, interactive elements | Screen drawing, animations, custom frame rate | High | Windows & macOS, integration with Google Drive |
| OBS Studio | Moderate learning curve | High‑resolution output | Basic editing requires external software | Fully customizable settings, open‑source plugins | High, resource‑heavy | Windows, macOS, Linux |
| ScreenFlow | Easy for Mac users | High‑quality output | Built‑in editor, text overlays | Stock media library, customizable export options | High | macOS only, easy sharing to YouTube and Vimeo |
| Loom | Very easy to use | High‑quality output | Basic editing; annotations available | Instant sharing, screen + camera simultaneous recording | Good | Web‑based, compatible with all devices, one‑click sharing |
Part 4. Why Filmora Is the Premier Screen Recorder for Tutorials
When the goal is to create clear, engaging tutorials, a screen recorder that’s easy to navigate and lets you fine‑tune resolution is a must. Filmora delivers on all fronts, offering a seamless blend of capture and editing that elevates every lesson.
Key reasons Filmora stands out include:
- Independent tracks for webcam, screen, and audio mean edits in one layer don’t affect the others.
- Drag‑and‑drop editing keeps the workflow fast and intuitive.
- Dual audio capture (microphone + system sound) guarantees crystal‑clear narration.
- Extensive trimming, background music, and text annotation tools let you highlight key points.
- Green‑screen and picture‑in‑picture options support multi‑process demonstrations.
- Direct export to multiple formats and resolutions, plus one‑click upload to YouTube or Vimeo.
Part 5. How to Screen Record Using Filmora
Below is a step‑by‑step guide to capture and edit tutorials with Filmora.
Step 1: Install and Launch Filmora
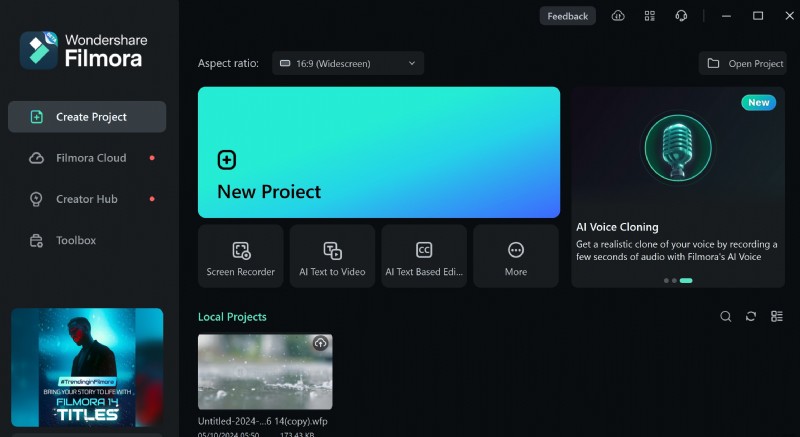
Download Filmora from the official site, install it, and launch the application. Select Screen Recorder from the home screen.
Step 2: Configure Settings and Start Recording
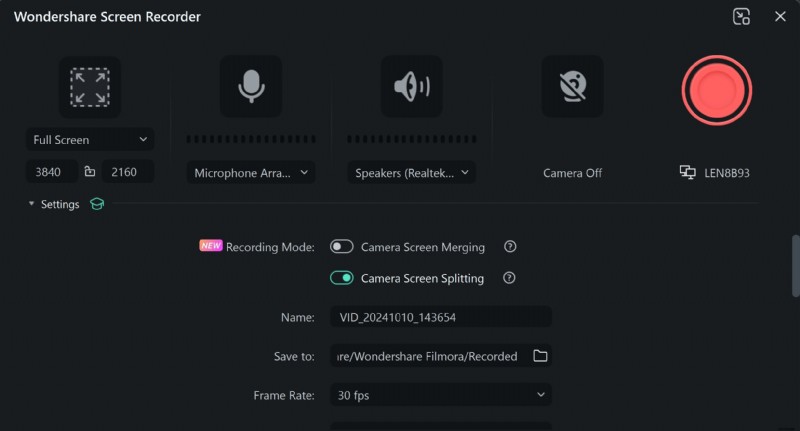
On the setup screen, choose your screen region, microphone, system audio, and webcam. Fine‑tune advanced options such as record timer, mouse gesture, and GPU acceleration. Press F9 to start, F10 to pause, and F9 again to stop.
Step 3: Review and Edit the Capture
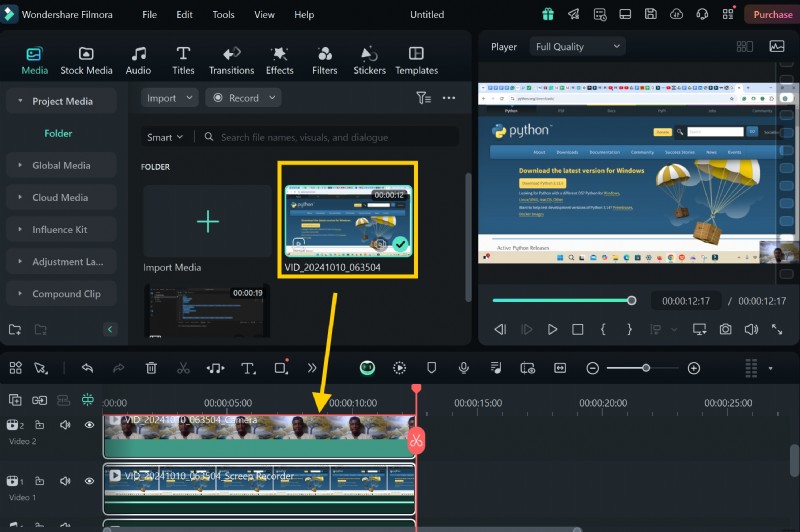
After stopping, the video is automatically saved. Import it into the timeline and review for any issues—mispronunciations, pauses, ambient noise, or visual glitches—before proceeding to edit.
Editing the Capture in Filmora
Filmora’s built‑in tools let you refine pacing, enhance visuals, and add professional touches.
1. Scale the Webcam Overlay
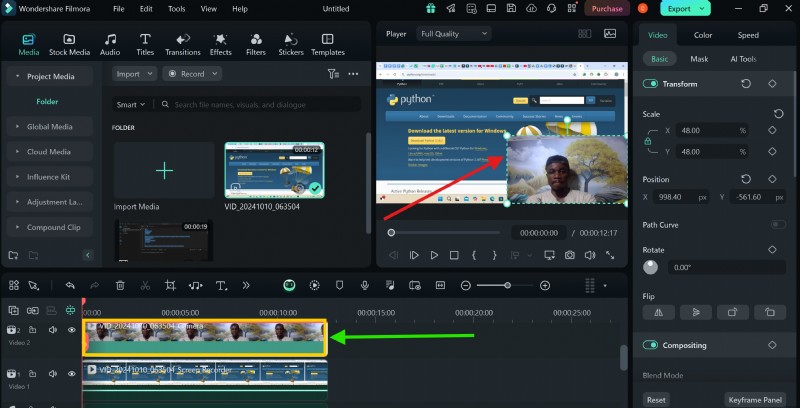
Click the webcam track, then adjust its size in the preview pane to emphasize your presence.
2. Trim Unwanted Sections
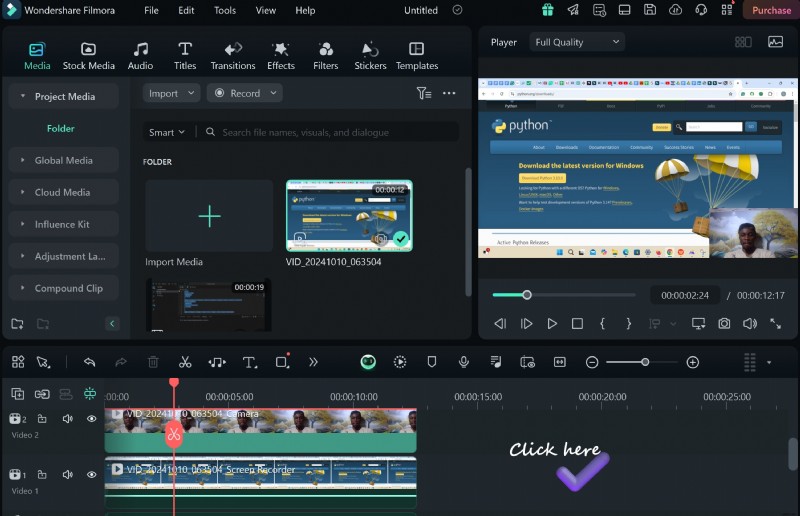
Select the cut point on the timeline, mark the section, and delete it to keep the flow tight.
3. Add a Lower‑Third Title
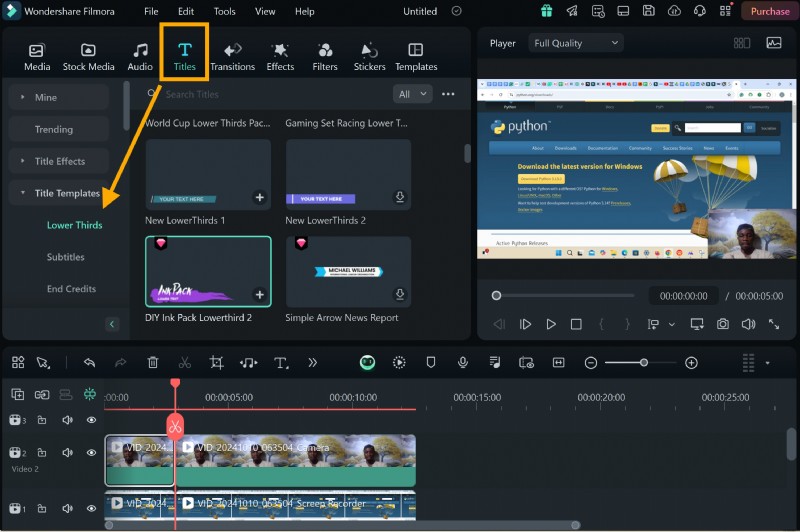
Choose a Title Template from the Titles tab, drag it onto the timeline above the webcam track, and edit the text in the Advanced Edit pane.
Tip: Use transitions between segments by selecting the Transitions tab and dragging the desired effect onto the timeline.
Conclusion
While several screen‑recording tools exist, Filmora emerges as the most comprehensive solution for tutorial creators. Its blend of high‑quality capture, intuitive editing, and advanced features makes it the best choice for producing engaging, professional instructional videos.