Xbox is one of the world’s most beloved consoles, and the surge of gameplay videos on YouTube, TikTok, and Twitch has turned many players into aspiring content creators. Recording those epic moments on Xbox doesn’t have to be a hassle—there are three straightforward methods that cover every skill level, from a quick built‑in capture to a full‑featured editing workflow.
In this guide we break down each technique in detail, complete with step‑by‑step instructions and practical tips to keep your footage crisp, engaging, and ready for upload.
Scroll down, choose the method that fits your workflow, and start saving your best plays—effortlessly.

In this article
Part 1. Capture Xbox Gameplay with Built‑in Tools (Quick & Easy)
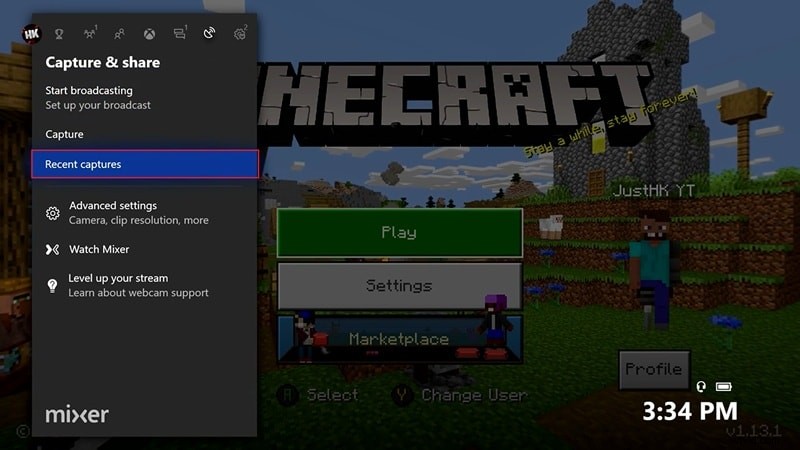
When you’re ready to record, the Xbox console’s native Capture & Share feature is the simplest route. No third‑party software, no extra cables—just a few button presses.
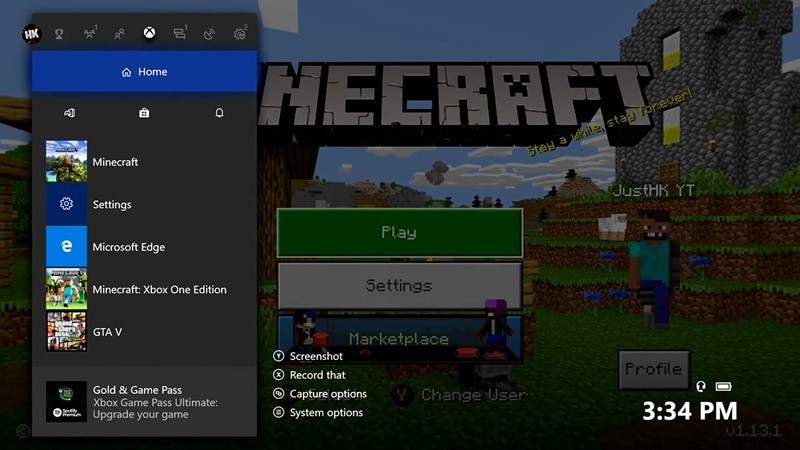
Step 1 – Open the Menu
Press the Xbox button on your controller while in game to bring up the system menu.
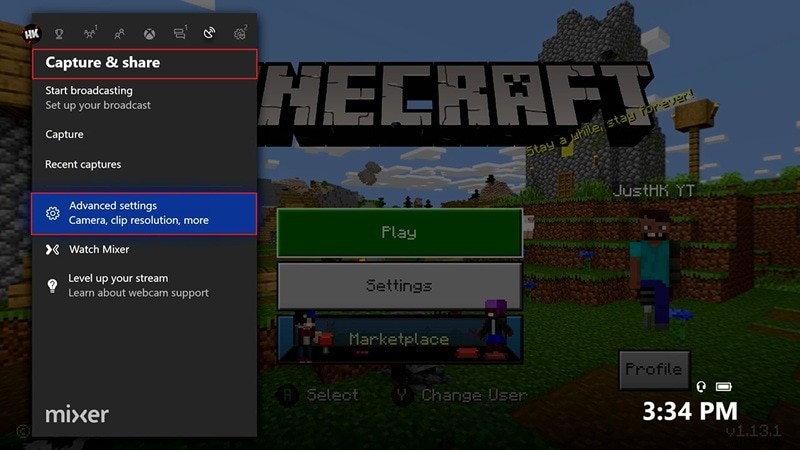
Step 2 – Adjust Settings
Navigate to Capture & Share, then tap Start Broadcasting to record the last 30 seconds. For longer clips, go to Advanced Settings where you can choose a duration of up to 2 minutes. You can also toggle your mic, balance audio levels, and decide whether to record the whole screen or just the active window.
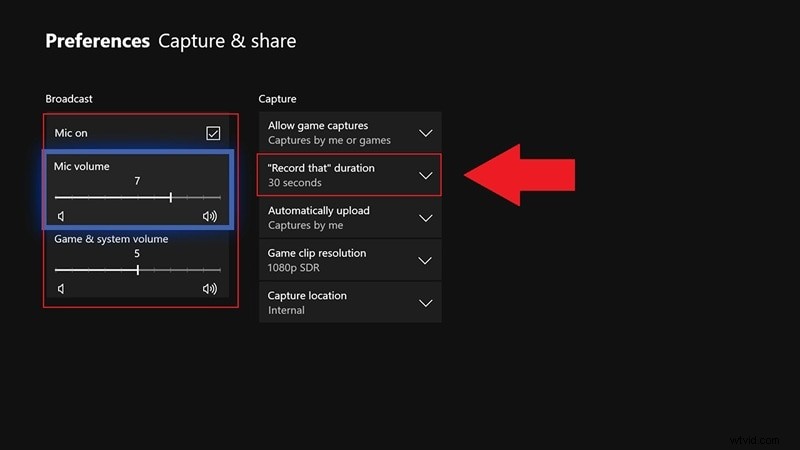
In the same panel, you’ll find options to set the mic volume relative to game audio and to select “Record that duration.”
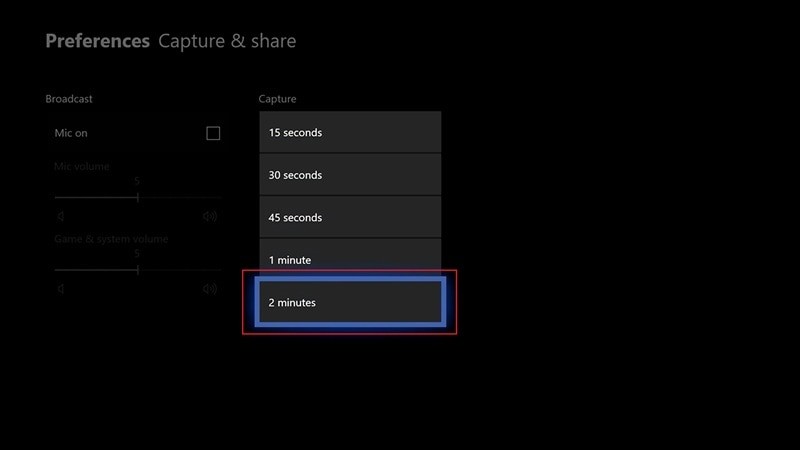
Step 3 – Start Recording
Choose the longest available duration (2 minutes) and hit the record button. The console will begin capturing your gameplay immediately.
Step 4 – Review Your Clip
After you’re done, press the Xbox button again, tap X, and navigate to Recent Captures to view and edit your footage.
While this method is incredibly convenient, it is limited to 30 seconds by default and up to 2 minutes if you adjust the settings. Pushing beyond 5 minutes forces the console to lower the resolution to 720 p, which is sub‑optimal for YouTube uploads.
Part 2. Record Xbox Gameplay for YouTube with Screen‑Recorder Software
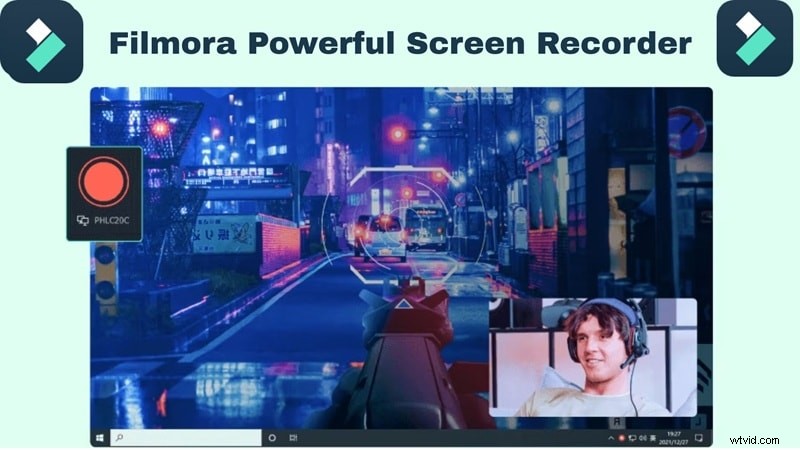
For creators who need longer sessions, higher resolution, and full editing control, a screen‑recorder paired with a capture card is the next step up. Wondershare Filmora’s Screen Recorder delivers 4K‑grade footage and an intuitive editing pipeline.
Step 1 – Connect Xbox to PC via Capture Card
Hook your Xbox One to a capture card using an HDMI cable, then plug the capture card into your PC with a USB data cable. If you prefer, connect the Xbox to your TV for in‑game play while recording.
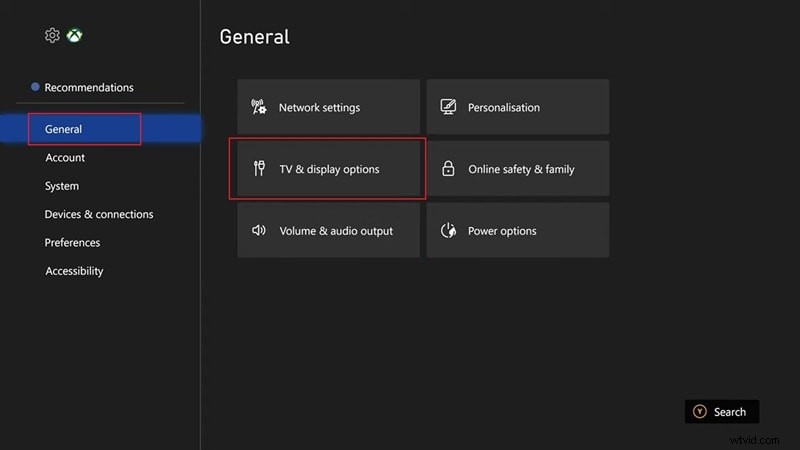
Power on the Xbox, press the Xbox button, go to General Settings > TV & Display to confirm your system is up‑to‑date.
Step 2 – Launch Filmora
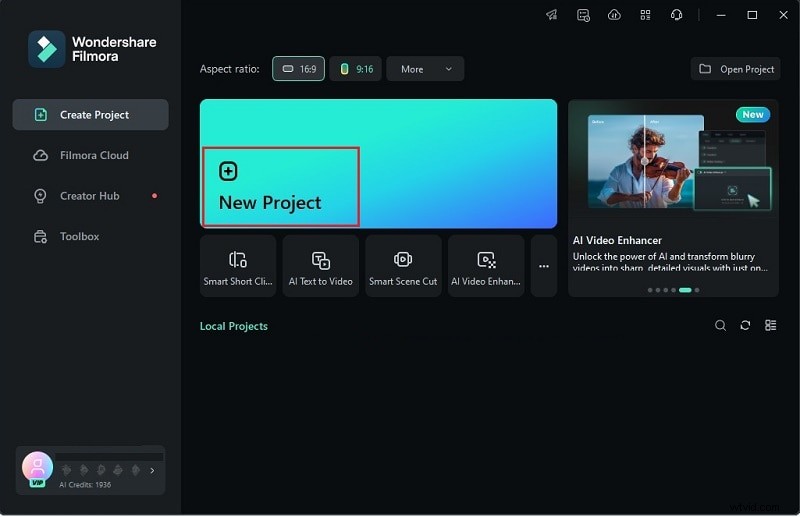
Download and install the latest Filmora version, then open the app and select New Project to begin.
Step 3 – Use the Screen Recorder
Navigate to the Media tab, click Record, and choose Record PC Screen. Enable your webcam and mic for a live‑commentary overlay, then hit the red Record button.

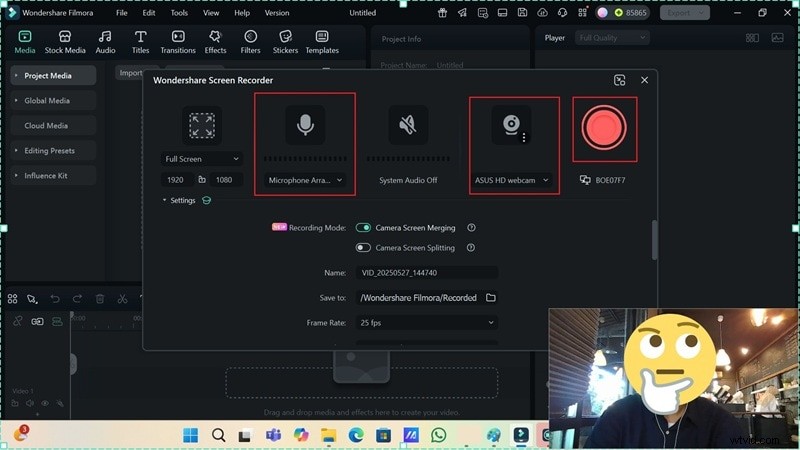
During recording, use the on‑screen controls to pause, stop, or restart. When finished, the clip is automatically imported into Filmora’s timeline.

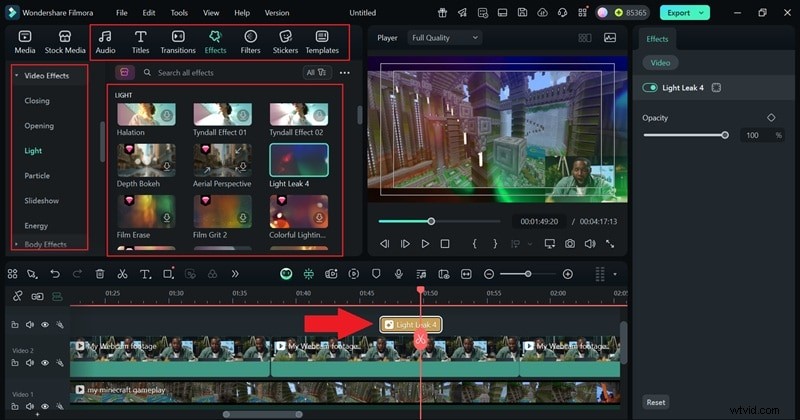
Step 4 – Edit Your Video
Filmora’s timeline lets you add transitions, stickers, filters, and sound effects. Drag and drop media from the built‑in library, and use the robust editing tools to polish your footage.
Once you’re satisfied, export directly to YouTube or save in any format you need. Filmora also offers AI features like automatic captions, smart cut‑out, and voice‑changer to make your clips even more engaging.
- Screen capture with webcam overlay for reaction videos and walkthroughs.
- Built‑in voice‑over tools, subtitles, transitions, and sound effects.
- Seamless integration with Xbox on PC via HDMI capture card or Xbox Cloud Gaming.
- AI‑powered tools: Automatic Caption, AI Smart Cutout, Voice Changer.
- Beginner‑friendly interface on Windows and macOS.
- High‑precision audio export for crystal‑clear sound.
- Direct upload to YouTube or export in any desired format.
Part 3. Capture Xbox Gameplay via the Xbox App (No Capture Card Needed)
If you’re looking for a cable‑free solution, the Xbox app on Windows offers a simple Game DVR that records gameplay directly from your console.
Step 1 – Access Game DVR
While in-game, press the Xbox button twice to open the sidebar. Under Snap an app, select Game DVR.

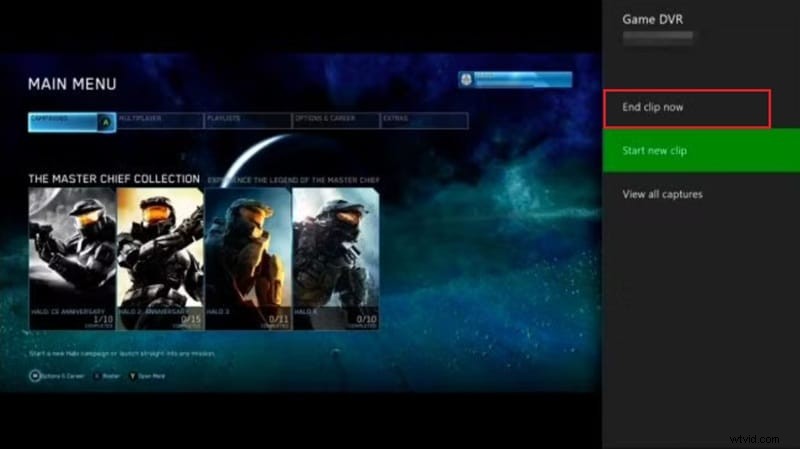
Step 2 – Record or Capture
Choose End clip now to save the last 30 seconds, 45 seconds, 1 minute, 2 minutes, or 5 minutes. For live recording, select Start recording and stop when finished. The maximum continuous length is 5 minutes.
Step 3 – Edit and Share
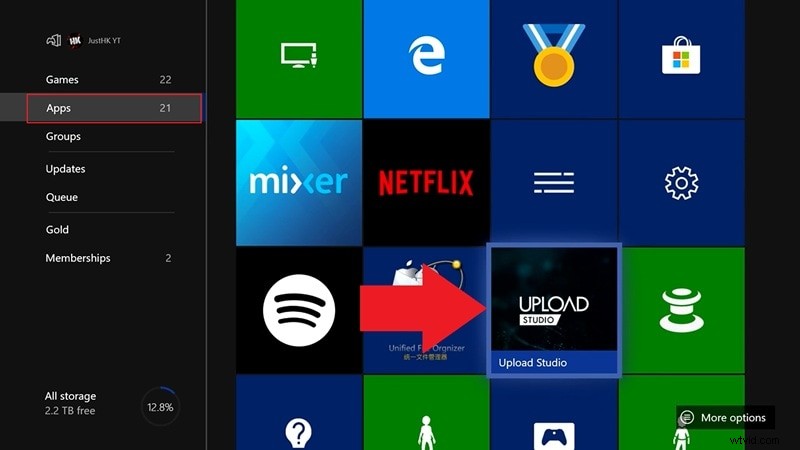
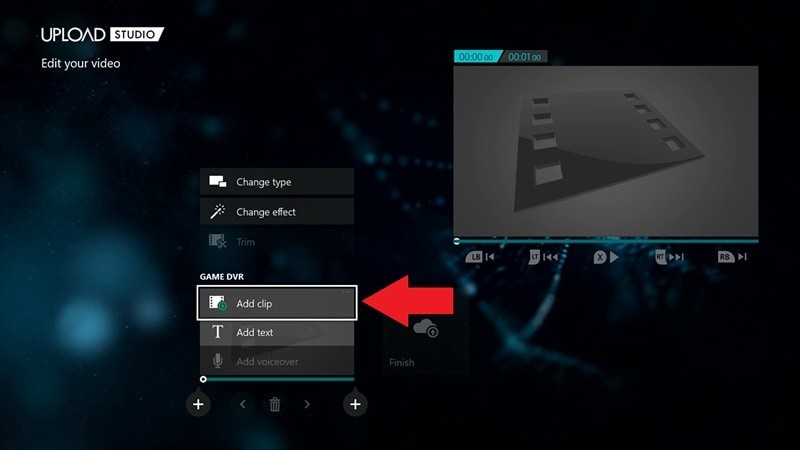
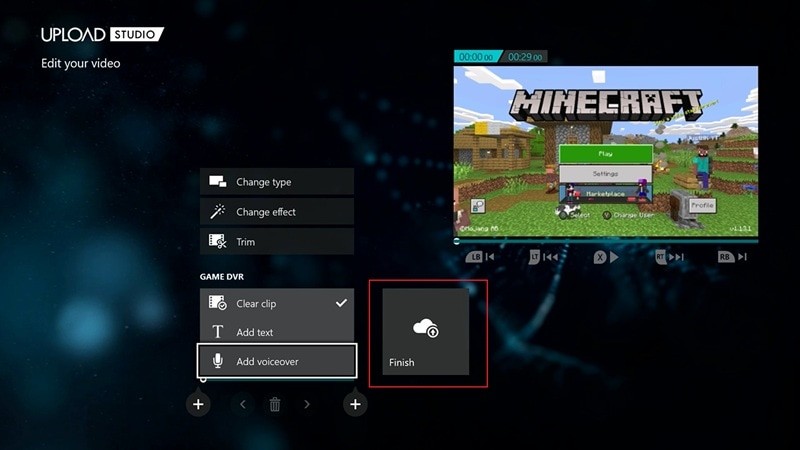
Open the Upload Studio app from My games & apps > Apps. Here you can trim clips, add voice‑overs, and assemble highlight reels. After editing, choose Finish to save or upload directly to OneDrive.
While convenient, this method still limits you to short recording times and may be affected by network speed or lower resolution when streaming.
Conclusion
For any Xbox creator, mastering how to record gameplay—whether for quick clips or polished YouTube content—is essential. Each method has its place: built‑in tools for spontaneous captures, Filmora for extended sessions and professional editing, and the Xbox app for a cable‑free workflow.
If quality and flexibility are your priorities, integrating Filmora’s Screen Recorder into your routine delivers unlimited recording time, high‑definition footage, and a powerful editing suite—all in one place.

Filmora – ⭐⭐⭐⭐⭐ – The Best AI‑powered Video Editing Software and App