
Smartphones have indeed transformed how we capture moments, but the magic of photography goes far beyond the convenience of a thumb‑press. While a phone’s built‑in camera is a powerful companion for spontaneous shots, a dedicated camera—whether DSLR or mirrorless—offers the depth, control, and potential to grow your creative vision.
In this first installment of our series, we’ll move past the quick‑snapshot mindset and explore the anatomy of a camera, the tools that power it, and the habits that turn a good image into a great one. Understanding your gear is the foundation for confident, intentional photography.
Professional photographers, whether working in news, fashion, or events, spend countless hours scouting locations, testing settings, and rehearsing techniques before the camera even clicks. The same preparation applies to beginners: the more you know your equipment, the more you can focus on storytelling and composition when the shutter opens.
Smartphones automate many steps—auto‑focus, exposure, white balance—making high‑quality images seem effortless. Yet reproducing that level of consistency often requires a camera that gives you manual control over shutter speed, aperture, ISO, and more. A DSLR or mirrorless body is the gateway to that mastery, allowing you to experiment, learn, and eventually develop a signature style.
Photography is ultimately about fun and discovery. The clearer you understand your camera’s dials, buttons, and functions, the more joy you’ll derive from each shoot. This guide is designed to walk you through those fundamentals. If you have questions, drop them in the comments below—I’ll be happy to help you navigate this journey.
Getting to Know Your Camera
Whether you’re unboxing a brand‑new body or reintroducing a second‑hand camera to your workflow, the first step is to familiarize yourself with its key components. Start by removing the packaging, attaching the lens, and making a mental map of the main parts.
CAMERA TERMINOLOGY
Body – The core of the camera, housing the electronics, sensor, and shutter mechanism. It’s the foundation that holds everything else together.
Body Cap – A small cover that screws onto the front of the body, protecting the sensor or shutter from dust and impact. Each manufacturer places the release button in a slightly different position, so consult your manual if you’re unsure.
Lens – The optical element that focuses light onto the sensor. Lenses come in various focal lengths and apertures, each suited to different shooting styles.
Lens Cap – Similar to the body cap, this protects the lens elements. Many lenses have a small screw at the mount that locks the cap in place, plus a front cap to shield the glass.
To remove a lens, locate the release button on the side or front of the body, press or slide it, then gently twist the lens counter‑clockwise. Remember to replace the caps immediately after shooting to keep dust and moisture out.
Shutter – The mechanical or electronic barrier that opens to let light hit the sensor and then closes again. The shutter’s speed determines how motion is captured.
Sensor – The light‑sensitive surface that records the image. Its size, resolution, and sensitivity to light directly influence image quality.
Understanding Batteries
Most cameras ship with a single battery that, when fully charged, can comfortably support hundreds of shots—ideal for a day’s shoot. Battery life will vary based on model, settings, and shooting mode, but a well‑charged unit typically outlasts a full daylight session.
If you anticipate extended use or travel, consider reputable third‑party options such as Hahnel or SmallRig. They often offer reliable performance at a lower cost, though always verify compatibility with your specific camera model.
Charging Your Battery
Charging methods differ between models. Some cameras feature a dedicated charger that plugs the battery directly into an outlet, while others allow in‑camera charging via a USB cable. The user manual will detail the exact procedure.
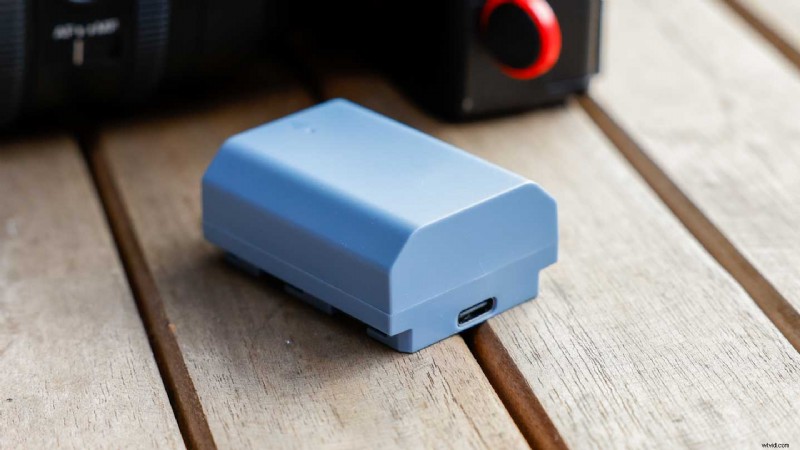
Tip: If you store your camera for extended periods, let the battery discharge to around 40% before putting it away. This practice helps maintain battery health and reduces the risk of a dead battery causing a messy cleanup.
Understanding Memory Cards
Memory cards are the digital equivalent of film—your images live here until you transfer them. Common formats include SD and CFexpress, each with distinct speed and capacity profiles.
CFexpress cards deliver higher write speeds, which is beneficial for burst shooting and 4K video. Brands like Lexar’s CFexpress Gold provide solid performance for most users, while the Diamond series is suited for demanding workflows.
SD cards remain the most widespread choice. For still photography, a 64 GB card rated V30 or higher offers ample storage and reliable speed. When shooting video, pay attention to the UHS-I or UHS-II rating and the associated write speeds (e.g., U30, C10). For more details on SD card speeds, see this guide.
CAMERA TERMINOLOGY
Transfer Speed/Rate – The rate at which data moves to or from the card. For photographers, the write speed is most critical, as it determines how quickly the camera can save images, especially in continuous mode.
Speed Ratings – Industry standards such as Class, UHS, and V denote minimum read/write speeds. Understanding these symbols helps you choose a card that matches your shooting style.
Now that you’re acquainted with the body, lens, battery, and memory card, it’s time to start shooting. If you’re new, set the mode dial to “P” (Program) or “Auto” to get a feel for the camera’s exposure controls, then step outside and experiment.
In the next part of this series, we’ll dive into camera handling and ergonomics—how to hold your gear comfortably and use it to its full potential.