Panasonic has given the Lumix S1 and S1R a really neat featured called Sheer Overlay which allows you to see a transparent version of a captured images while you frame a second. The cameras can do a similar trick in their Multiple Exposure mode, but you can layer up to 3 images over the original image.
However, you can also use your multiple exposure image as a base shot and hence capture more and more layers in a single file. It’s very easy once you know how.
Shooting Multiple Exposures with the Panasonic Lumix S1 and S1R
- Shoot the image that you want to use as your base shot.
- Press menu and find Multiple Exposure in the last section of the first tab of the menu – Others (Photo)2
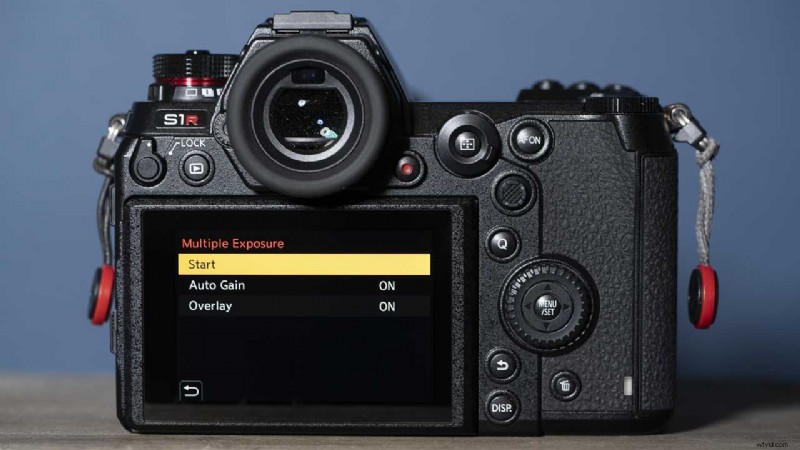
- Select Multiple Exposure and press Menu/Set
- Check that Auto Gain and Overlay are both set to ‘On’.
- Select ‘Start’ and press Menu/Set
- Navigate to your base shot and press Menu/Set or tap the Set icon on the screen
- You’ll now see a transparent version of the base image, but you can frame the second shot in the viewfinder or on the screen.
- When you’re happy with the composition and exposure, press the shutter release to take the shot.
- If you want to overlay another image, tap Next on the screen. If you want to shoot the second image again, tap Retake instead. If you’re happy with what you have, tap Exit.
- If you tapped Next, frame the third image and shoot it as before. After taking this shot, you’re able to capture one more image over the existing shots.
- Once you’re happy, or you’ve captured the maximum number of images, tap Exit.
- To build up more layers on your multiple exposure image, simply press the Menu button again and select Multiple Exposure. This time, after selecting ‘Start’, you should select your first multiple exposure image and repeat steps 7 to 11.
- Read our Panasonic S1 Review