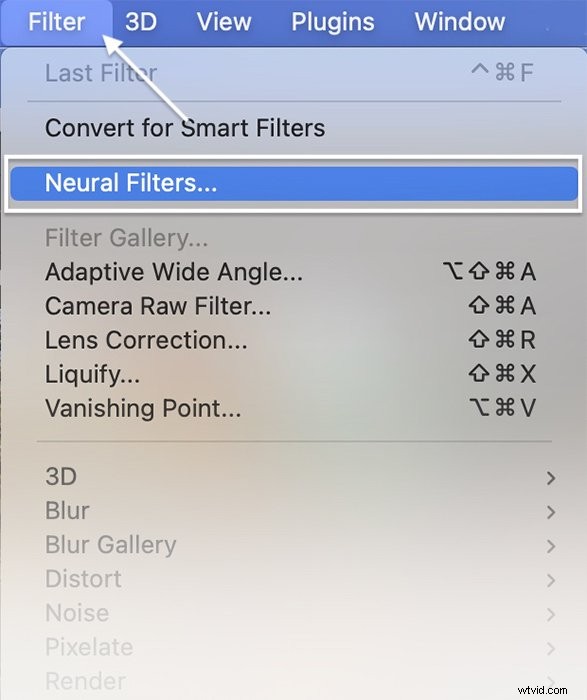
Adobe released Photoshop Neural Filters in October 2020. They sit under the Filter drop-down menu. The name is not very descriptive, and you may not have even noticed when the option appeared. But open the tool, and a magical, new workspace appears.
There, you have a set of easy-to-use filters. They are powered by Adobe Sensei. This artificial intelligence (AI) tool takes care of edits for you. Add snow to a mountain scene, change a person’s age or facial expression, or put colour in a black-and-white image!
We’ll look at how to use three of the featured Neural Filters and one currently in beta testing:
- Skin Smoothing
- Colorize
- Style Transfer
- Smart Portrait (beta)
What Are Neural Filters?
Neural Filters are AI tools that generate pixel content with just a couple of clicks. They create information that does not exist in your photo.
In this case, the AI looks at data of thousands upon thousands of images. The program then identifies patterns and creates rules for action. The more it practices, the better the results the AI creates.
After you use one of the Neural Filters, you will be asked if you are satisfied with the results. This helps the program learn just a little bit more. Some Neural Filters have received extensive testing, and Adobe is confident in the results.
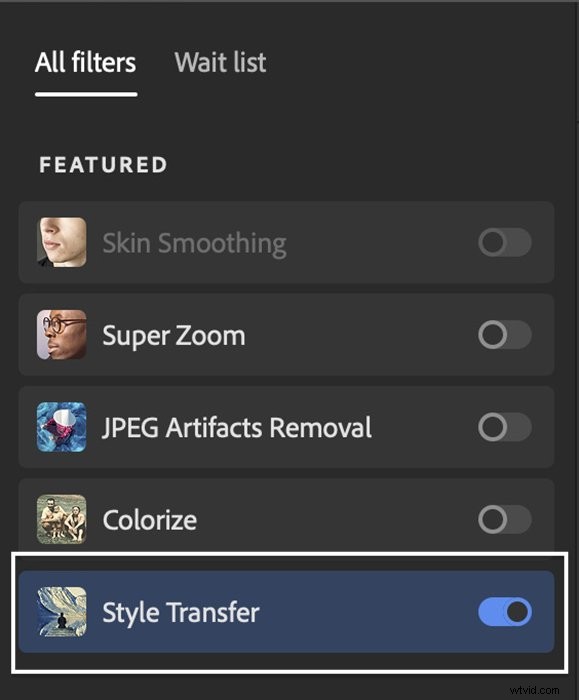
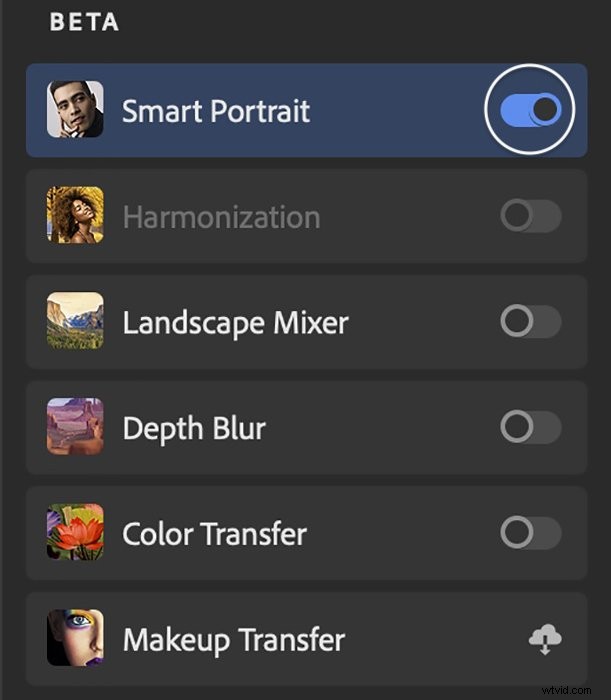
Other Types of Photoshop Neural Filters
Featured filters beside the ones mentioned above include the following:
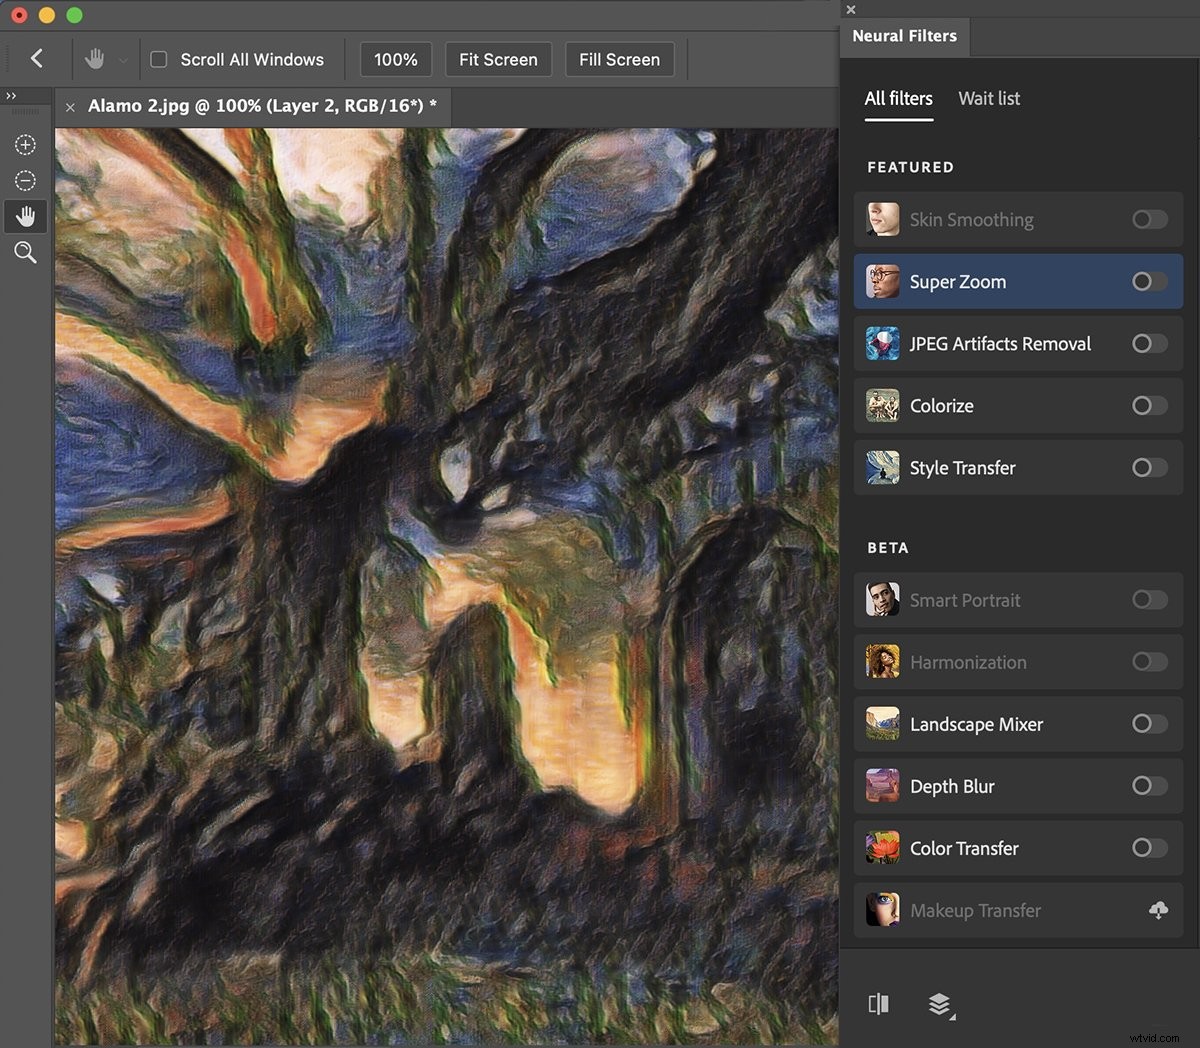
- Super Zoom—helps compensate for the loss of resolution
- JPEG Artifacts Removal
Other beta filters, whose results are less certain, include the following:
- Harmonization—matches colours and tones of two layers (useful for composites)
- Landscape Mixer—lets you change the season or add natural elements like mountains or trees. So far, the results in my testing have been disappointing.
- Depth Blur—simulates a shallow depth of field
- Color Transfer
- Makeup Transfer
Switching to the Wait List tab shows you other filters that are in development, and you can vote for:
- Noise Reduction
- Water Long Exposure
How to Use Photoshop Neural Filters
To use the Neural Filters, start by opening an image in Adobe Photoshop. Then go to the Filter drop-down menu and select Filter > Neural Filters.
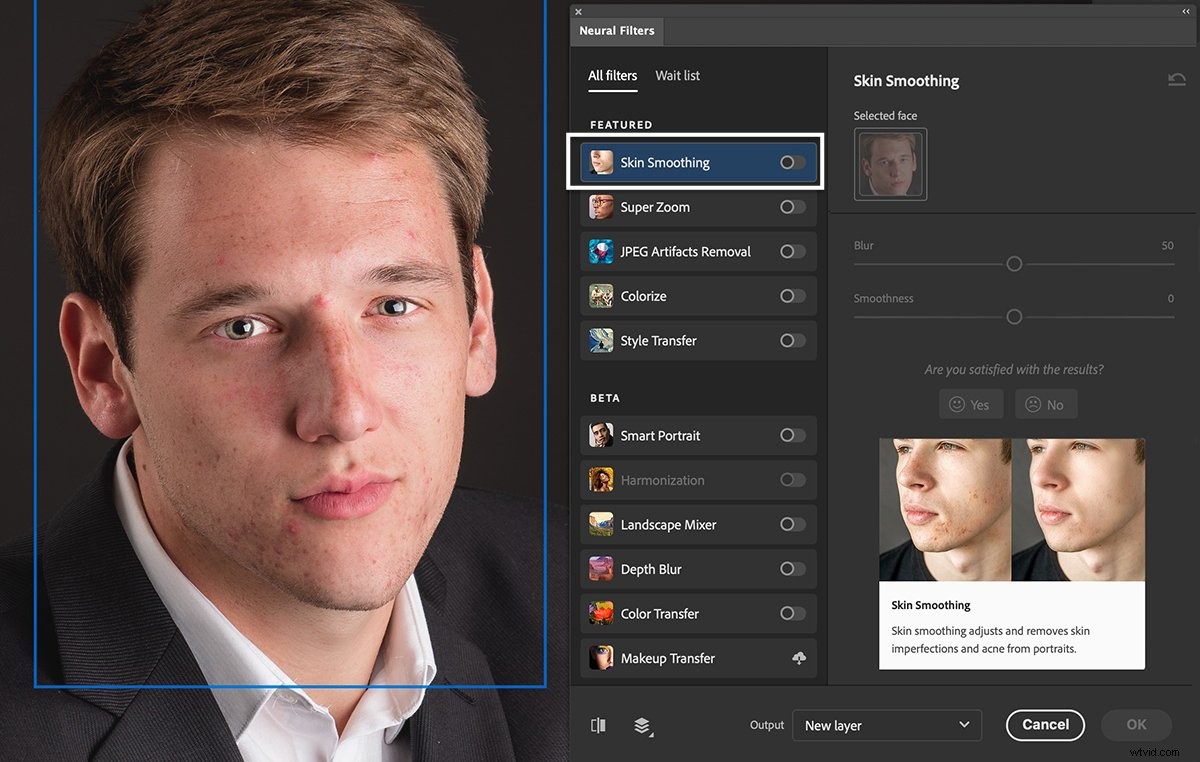
How to Use the Skin Smoothing Neural Filter
If Photoshop detects a face in the image, you can access the Skin Smoothing Neural filter. This filter takes all the work out of removing blemishes and acne from portraits.


Step 1: Select and Download the Filter
In the Neural Filters panel that opens, select the Skin Smoothing option. If it is greyed out, it means that Photoshop could not find a face in your image.
The first time you use each filter, you must download it. So, click the Cloud icon next to the filter.
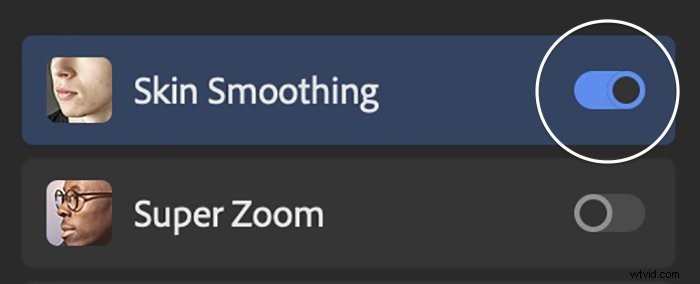
Step 2: Toggle On the Filter
Toggle on the switch next to Skin Smoothing. The switch turns blue, and the sliders in the work panel will activate. Photoshop will analyse your image and highlight all faces.
Step 3: Choose Blur and Smoothness
If there is more than one face in the photo, you can choose which face to work on at the top of the Skin Smoothing panel. Then, use the Blur and Smoothness sliders to smooth skin.
You can see the changes by clicking the Preview button in the bottom left corner of the workspace. The filter does a pretty good job. But you may need to manually clean up strong blemishes.
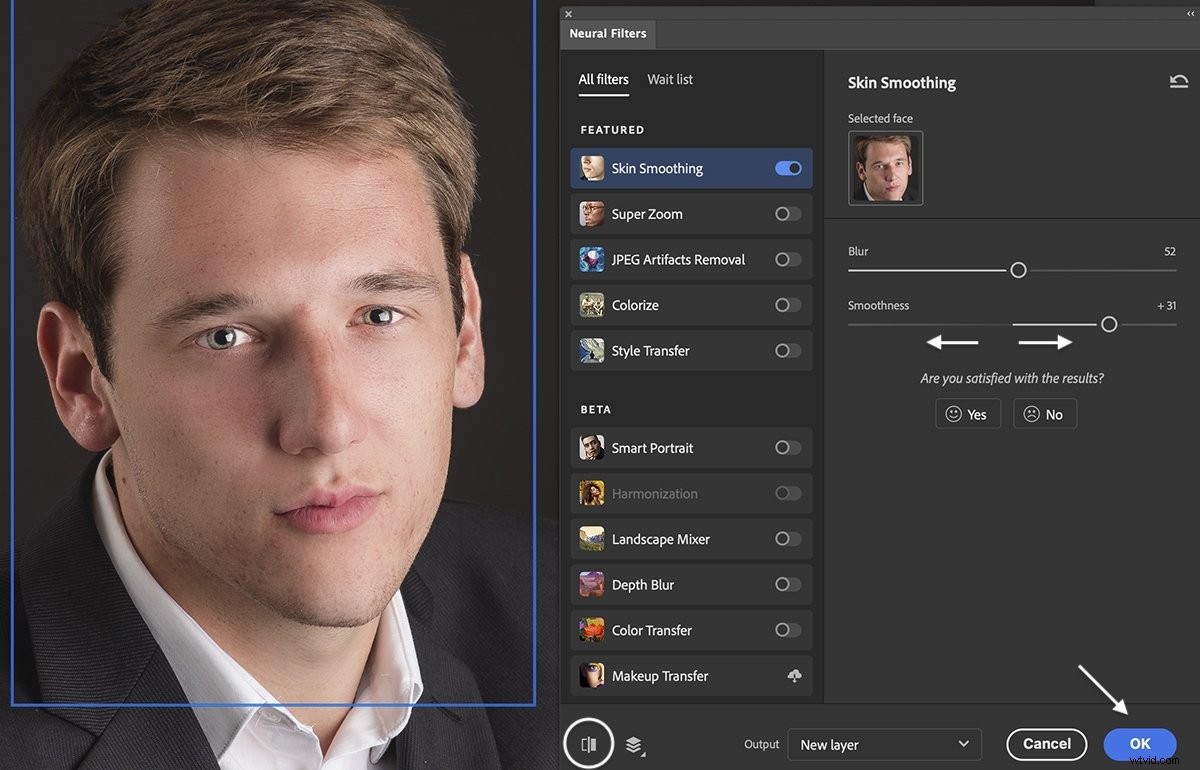
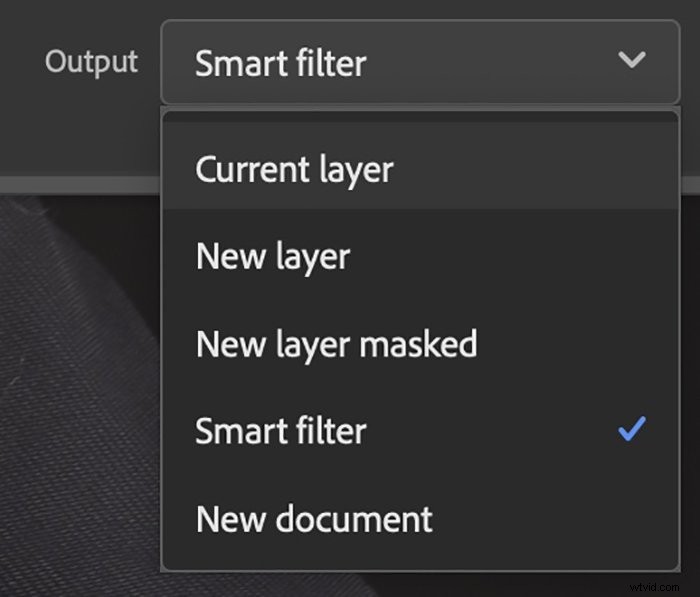
Step 4: Choose an Output Option
When satisfied with the results, choose an output option in the drop-down menu.
You can create a new layer, a mask, or a new file as an output option. Or, if you are used to working with Smart Layers, the Smart Filter option gives you the most flexibility to re-edit the filter.
Click OK.
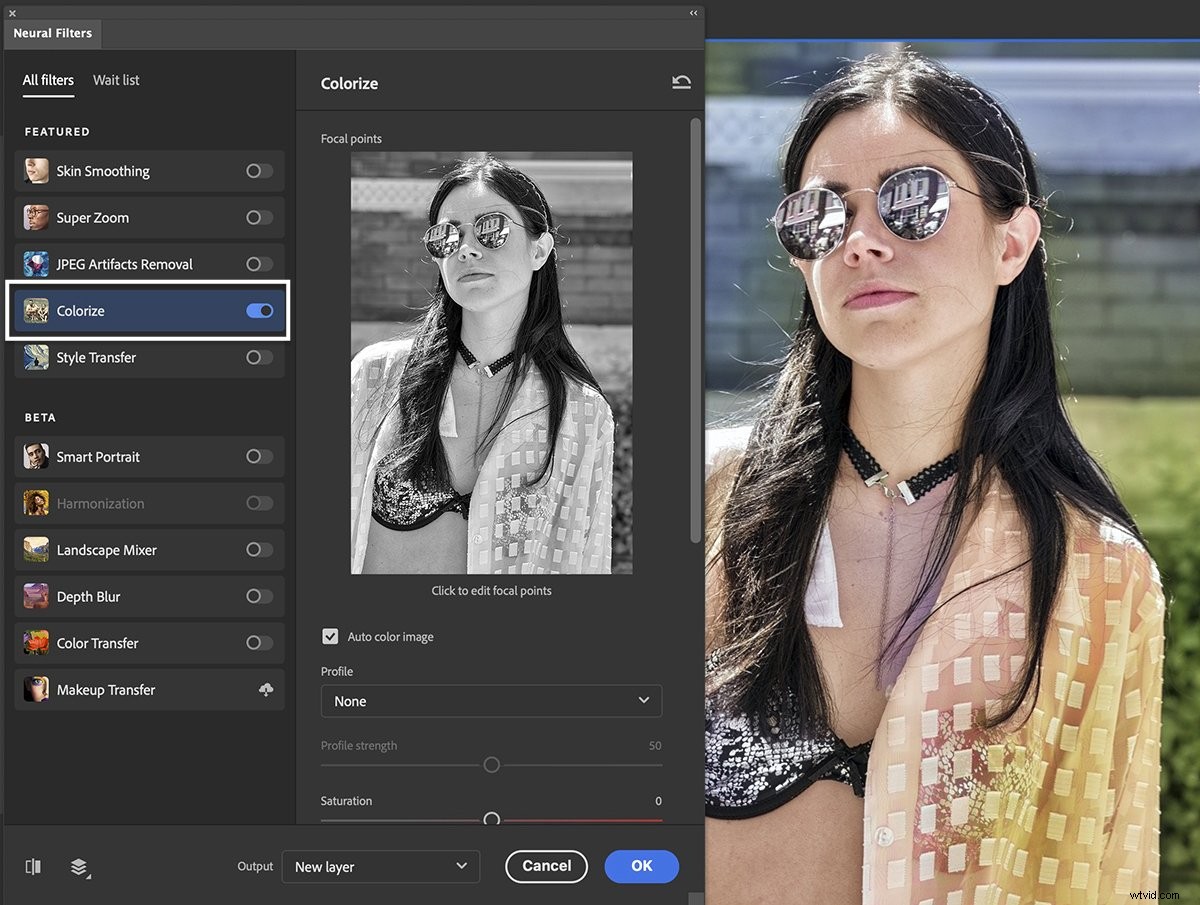
How to Use the Colorize Filter
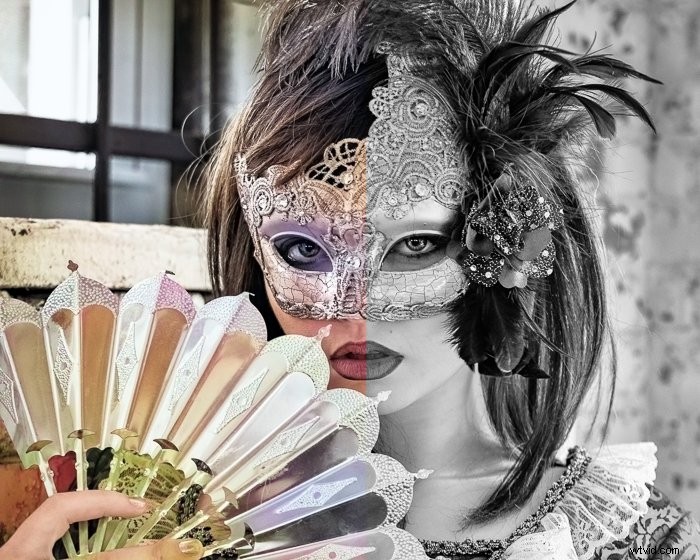
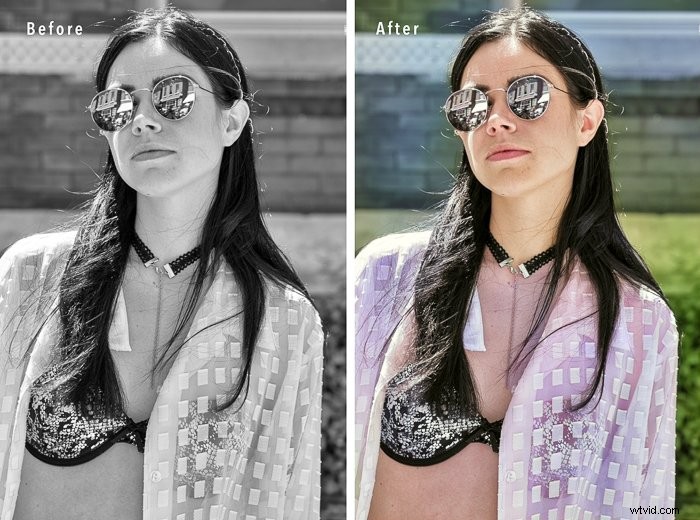
It is easy to go from a colour photo to black and white. But it is not so easy to do the reverse. With one click, Colorize adds colour to black-and-white images. This is a useful tool for anyone with a collection of vintage family photos.
Step 1: Turn On the Colorize Filter
Toggle on the switch next to Colorize. Download the filter by clicking the Cloud icon if using it for the first time.
The filter gets to work right away. Colours appear on your original image, though confusingly not on the preview image in Colorize panel.
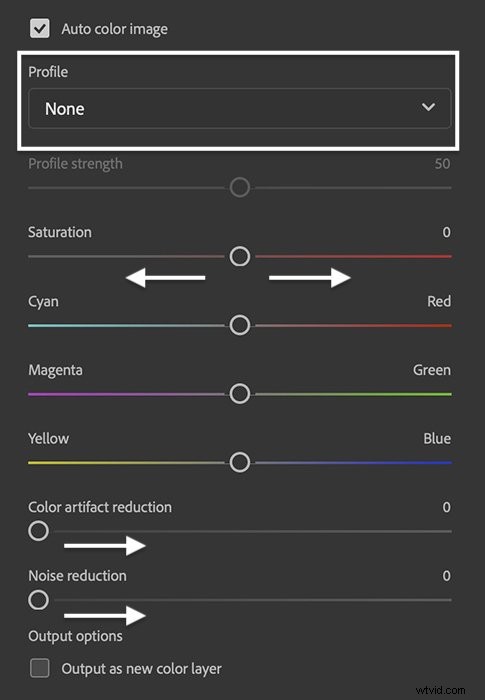
Step 2: Adjust Colour Settings
If you like the colours, choose an output option and click OK.
But you can also adjust the colours using the sliders in the Colorize panel. You can choose a Retro Profile, adjust saturation and use the sliders to add more or less of a particular colour. You can also reduce noise and colour artifacts.
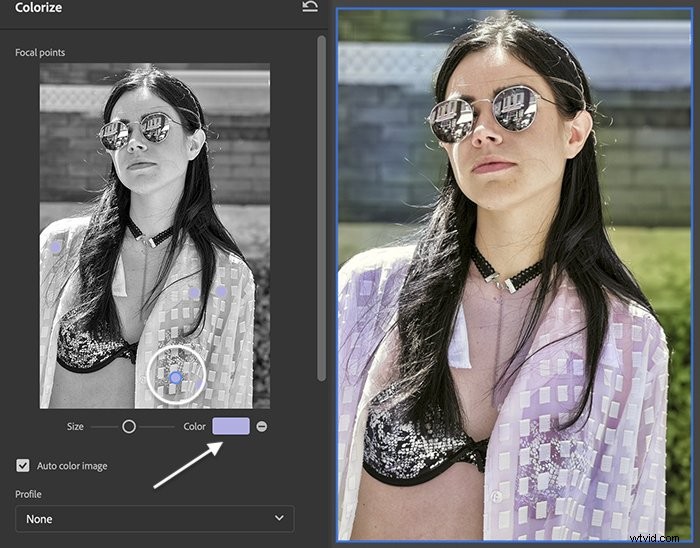
Step 3: Add New Colour with Focal Points
If you want to change a colour, select the colour picker box. Drop pins onto the preview image. You can change the size of the effect, but not the shape.
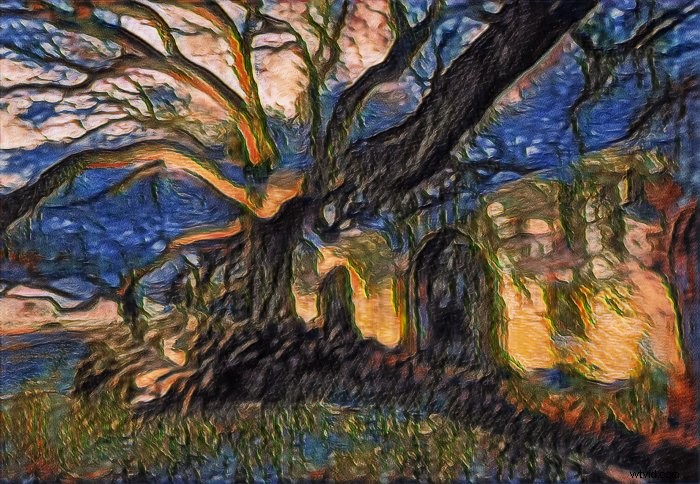
How to Use the Style Transfer Filter
The Style Transfer Neural filter adds an artistic effect to your image. Create a painting or drawing from your photo in a variety of styles.
Step 1: Turn On the Style Transfer Filter
Toggle on the switch next to Style Transfer. Download the filter by clicking the Cloud icon if using it for the first time.
Step 2: Choose a Style
The Style Transfer panel has ten master-painter preset styles such as Monet and Van Gogh. Select one to apply to your image. You can also select your own image as a style by choosing the Custom tab.

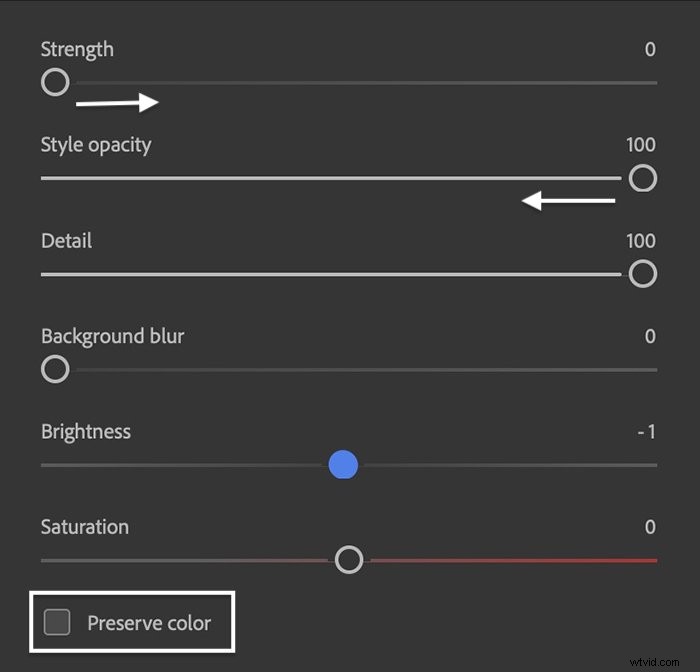
Step 3: Adjust Settings
If you like the result, choose an output option and click OK.
But you can also adjust settings like brightness and saturation. You can change the strength of the effect and opacity. You can also elect to preserve the colour of your original photo.
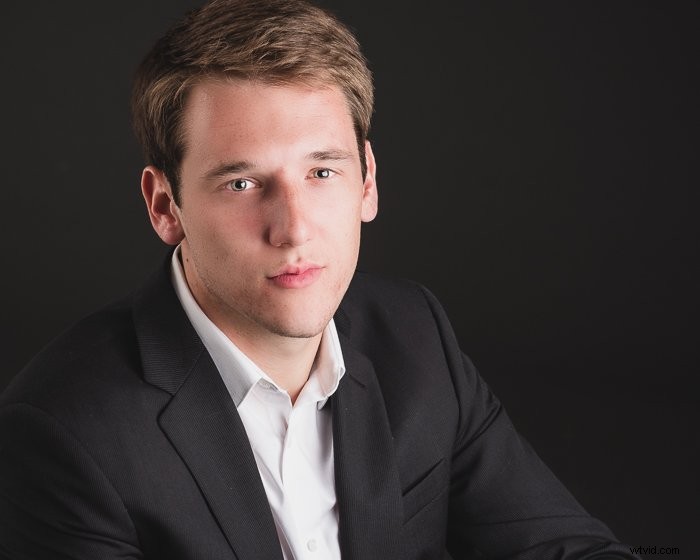
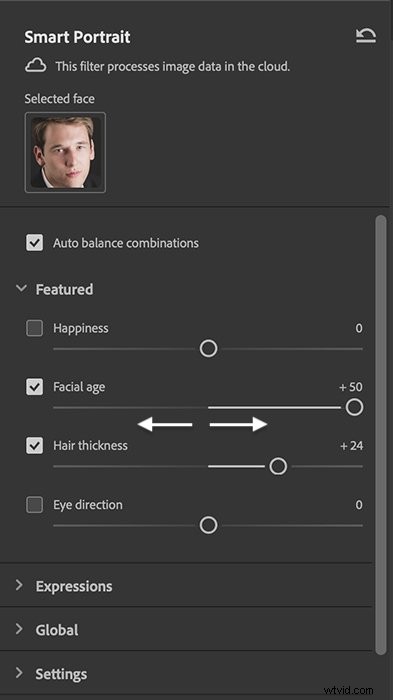
How to Use the Smart Portrait Filter (Beta)
Portrait photographers already have access to Photoshop’s Liquify Filter. Let’s explore what the Smart Portrait Neural filter has to offer. It goes beyond what is already included in the Liquify Filter.
The results are mixed, which might be why this Neural Filter is still in beta testing. A few of the changes looked natural, but others were artificial or downright bizarre.

Step 1: Turn on the Smart Portrait Neural Filter
In the Neural Filter panel, toggle on the switch next to Smart Portrait. Download the filter by clicking the Cloud icon if using it for the first time.
Step 2: Choose Facial Expressions and Other Features
You have many options in the Smart Portrait panel. Use the sliders to change emotional expression, facial features, age, hair thickness, and light direction. For this example, I aged the subject and thickened his hair.
Use the checkboxes to select which changes you want to keep. Choose an output option and click OK.
Conclusion
Photoshop’s Neural Filters are photo editing options powered by AI. The filters have different functions. But what they have in common is the ability to make changes beyond the content of your image. You can add pixels or colour information not present in the original image.
The filters use artificial intelligence to select edits. This means you can create an advanced effect with one or two clicks. Editing panels let you further refine the look.
Some tools work very well. Others, especially those still in beta testing, return unpredictable results. Most filters are quick and simple to use and worth exploring. One or two Photoshop Neural Filters may even find a permanent home in your workflow!
Try out our Dreamy Childhood Portraits e-book to create stunning photos you’ll cherish forever!