Have you ever taken a portrait and wished that the background were just a little bit more blurry? You can address background blur in-camera by changing either your aperture or the distance of your subject from the background. However, there’s also a relatively quick way to make slight adjustments to background blur in post-processing. In this article, we’ll be walking through how to use the Magnetic Lasso tool in Photoshop to slightly blur the background of your portraits and people photography.
Getting started
First, open your desired image in Photoshop, and duplicate your background layer (Layer > Duplicate Layer). Next, select the Magnetic Lasso tool. If you’ve not used this tool recently, you may need to right-click on the original lasso tool and then click on the magnetic lasso tool from the fly-out menu.

Selecting the subject
Using the Magnetic Lasso tool, begin by clicking at any point right next to your subject. You’ll notice that the magnetic lasso tool begins to “stick” to what it thinks is the outline of your subject. Continue to click your mouse to create anchor points periodically all around your subject.
If the magnetic lasso tool jumps somewhere you don’t want it to go, press the delete button on your keyboard to return to your last anchor point.

Definitely be aware that once you’ve started using the Magnetic Lasso tool, you’re pretty committed! You won’t be able to do much else with Photoshop until you’ve either completed the lasso loop by connecting your endpoint to your starting anchor point or until you hit “Esc” on your keyboard to delete all your anchor points.
Once you’ve closed your lasso loop, navigate to Select > Modify > Feather (or Shift + F6) and feather your selection by 5-10 pixels.
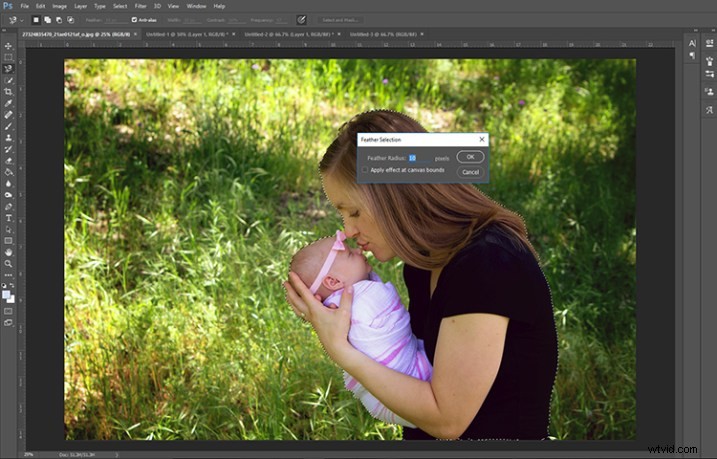
Feather your new selection 5-10 pixels.
Invert to select the background
Next, you’ll want to invert your selection so that you’ll be blurring the background rather than your subject. To do that, navigate to Select > Inverse (or Ctrl + Shift + I). If you see a dashed outline appear around the border of your image, then you’ve correctly inverted your selection.
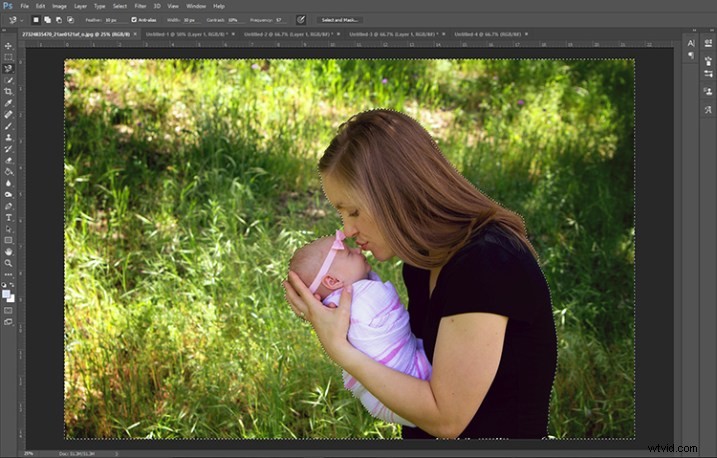
Notice where the marching ants are – if they appear like this around the outside of the image you’ve correctly inverted the selection.
Adding the blur effect
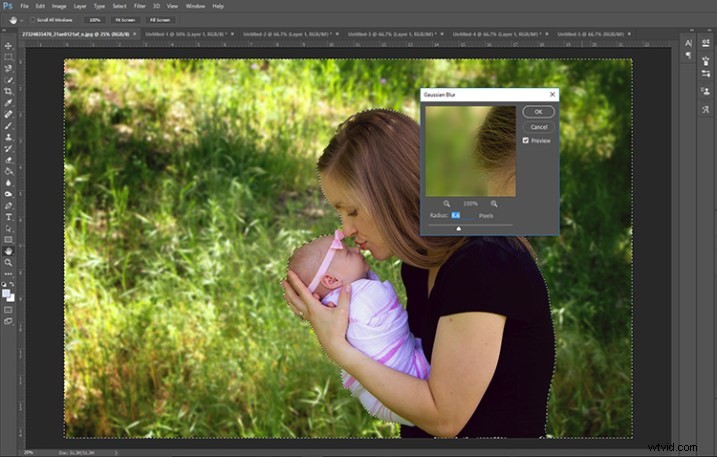
After you’ve inverted your selection, it’s time to blur the background of your image. Click on Filter > Blur > Gaussian Blur. Next, play with the radius slider a bit.
Please keep in mind that this technique isn’t designed to take a tack sharp background and transform it to the creamy bokeh of an 85mm lens. Rather, it’s designed to slightly enhance the bokeh that you’ve already got going on in your image. As such, I usually select a radius of 5-10 pixels for the blur filter.
Don’t be afraid to play around with this a bit. Utilize the preview check box, and see what your image looks like when using different amounts for the radius!
Gaussian blur added.
Finishing up
Once you’ve run the Gaussian Blur filter, press Ctrl + D to deselect your image, and you’re about finished! If there are any parts of your image that are blurry and shouldn’t be, go ahead and add a layer mask to your top layer, and mask off any of those blurry areas, and then you’re finished!
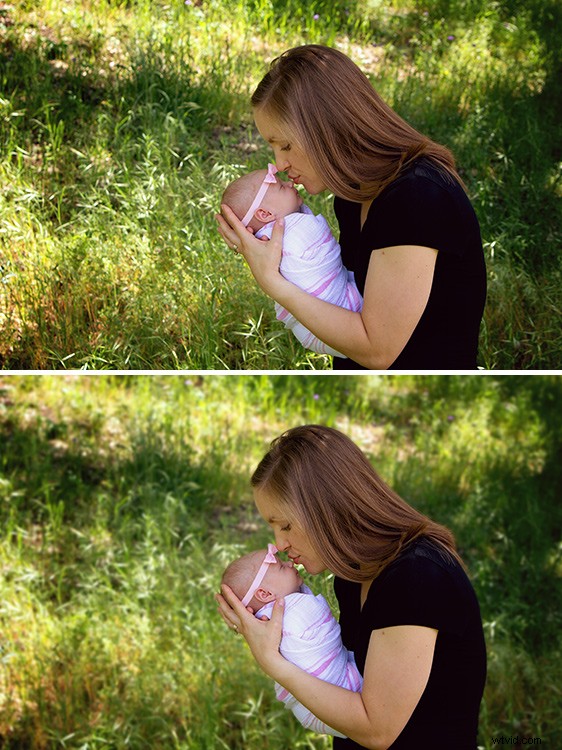
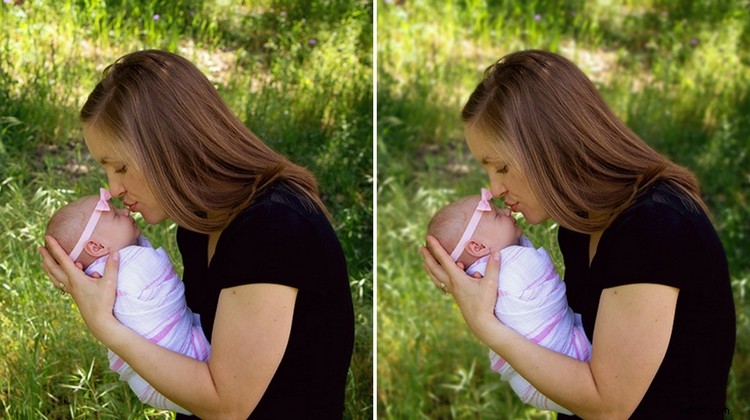
Original image on top; image blurred with magnetic lasso tool on the bottom.
As you can see, this technique is subtle, and helps to soften (but not eliminate) slightly distracting elements from the background of your image. I most often find myself using this technique on one or two person portraits, including newborns. It’s a really simple trick to have in your tool bag!
Have you ever utilized the magnetic lasso tool for people photography? What’s your favorite way to use it? Chime in below and tell us in the comments section.