A Guest Post by Sergey Sus/
Today I want to share a very simple way for improving a photo without having to change the exposure. I use this method quite often and sometimes even after adjusting exposure.
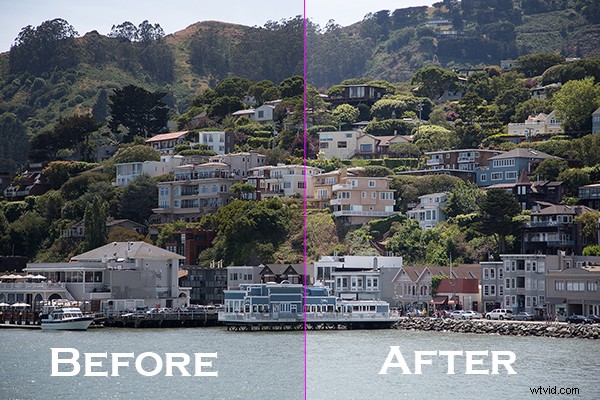
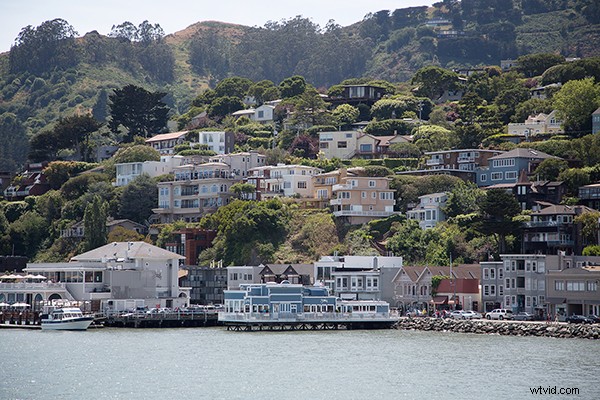
The image is of a small hillside town in North California called Sausalito taken while on vacation.
Here the SOOC (straight out of the camera) image before any adjustments are applied or any cropping. It is just a bit under exposed and very flat looking.
Certainly there are many ways to brighten a photo in Photoshop like using Curves, Levels or Shadow layers. For this tutorial, we will be using a duplicate layer and then change the overlay to Screen mode to brighten up and give it a bit of a punch. I’ve seen many professional photo retouchers use this technique on both landscape and portrait photography as a starting point for retouching. This method works really well on jpgs as well!
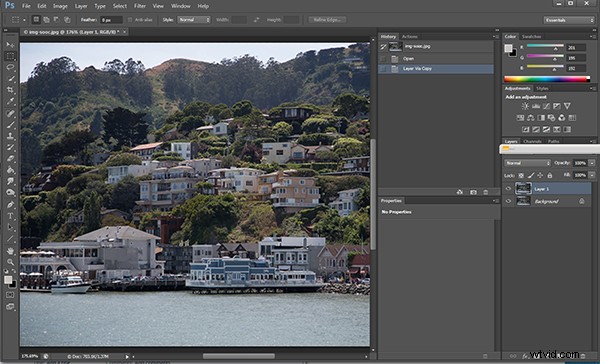
1. Open image in Photoshop. Then duplicate layer by pressing Ctrl+J (Win) / Command+J (Mac)
2. Change blend mode to Screen and and then set Opacity to 50%.
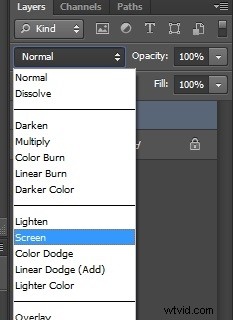
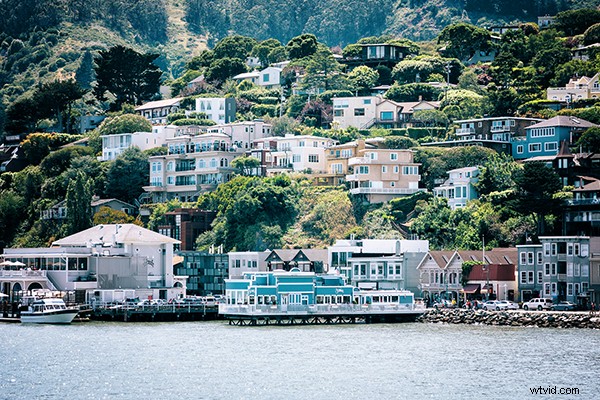
Starting out with Opacity set to 50% and adjusting the slider for more or less brightness. For this image the opacity is about right at 50% for my eyes. See how this new layer in Screen mode added a subtle contrast and brightness.
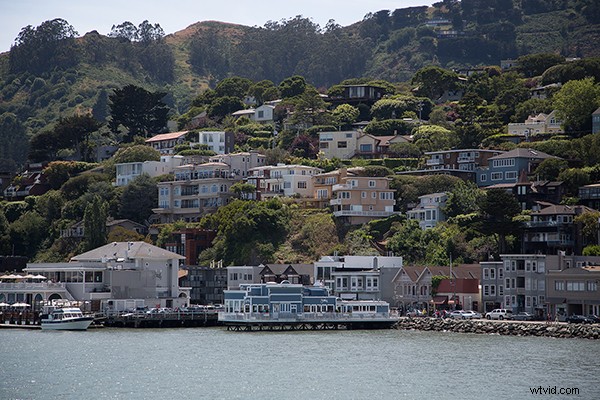
Give this technique a try even if the image is not under exposed as it will brighten up overall highlights and will slightly increase perceived contrast. Make sure to experiment with different opacity values for different looks. Here is the final image cropped and with a bit more processing – how I remember Sausalito looking that day.
Let me know in the comments how this has worked for you or if you have questions.
Sergey Sus is a Los Angeles based photographer telling telling real stories, individual, professional and family. Problem solver, artist and teacher. His work can be found on http://www.sergeys.us/.