When you take someone’s portrait you usually want to make their eyes pop out in the resulting photograph.
In this article, we’ll show you how to brighten and enhance eyes in Lightroom.
Lightroom Steps to Enhance Eyes
As with everything you can do in Lightroom there is always more than one set of steps to achieve a similar result. I’ll walk you through the best ways I know how to make eyes pop out using Lightroom.
I encourage you to experiment with different combinations of these steps. You may discover other ways to enhance eye color or correct unnatural eye colors.
Step 1: Adjustment Brush
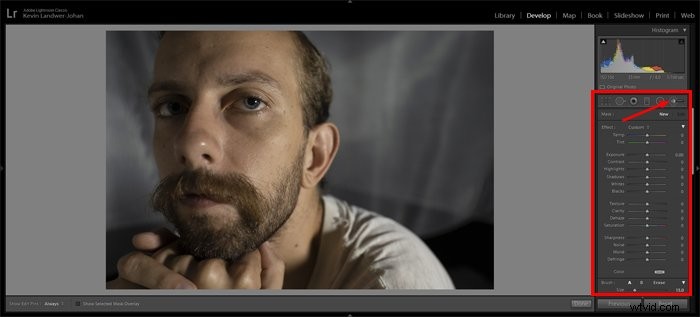
Open the photo you want to work on in the Develop Module. Select the Adjustment brush by clicking on it or press the ‘k’ key to select the brush.
Zoom into the eyes. Press the ‘o’ key to activate the Overlay. This will allow you to see the area you are painting as you work with the brush.
Now paint over the iris and the whites of the eye.
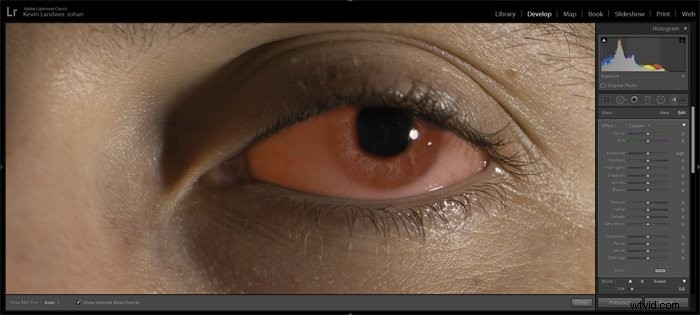 Step 2: Adjust the Exposure
Press the ‘o’ key again to hide the Overlay. Press the ‘h’ key to hide the small dot if you find it distracting.
Now use the slider and adjust the exposure for the area you have just painted over. Slide it to the right which will increase the exposure. You will most likely want to increase it minimally.
You can type in a number next to the slider instead of dragging. This way you can be more precise. If your mouse has a scroll wheel you can also click the slider and then use the scroll wheel to make the adjustment.
Zoom out and take a look at the effect of your adjustment on the whole image. You can use the toggle next to the Reset option at the bottom of the panel to turn off and on the adjustment to compare before and after.
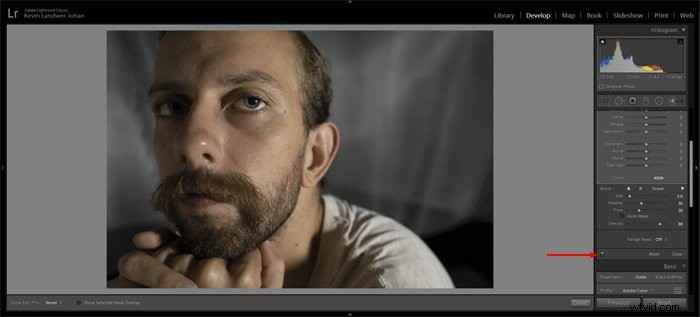
When you have a subject with both eyes evenly lit you can use the same brush to make adjustments to both eyes.
In my example image, I have used two separate adjustment brushes because the eyes are not lit the same.
Step 3: Additional Adjustments
In this step, you can create a new brush or use a Radial Filter mask to make adjustments to the iris. As you did in steps 1 and 2, select the adjustment brush and paint over the iris.
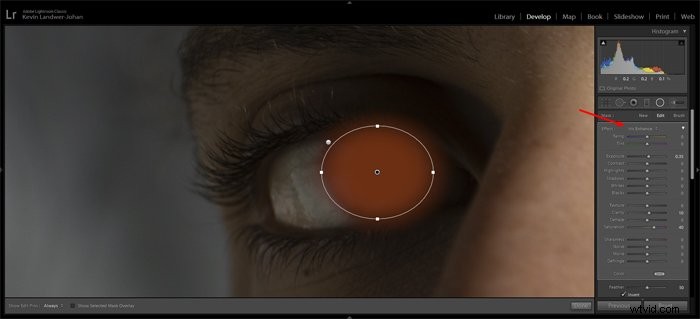
Alternatively, use the Radial Filter and drag an oval over the iris. If you use this method you need to check the Invert box so only the area inside the oval will be affected by changes you make.
In the Effect drop-down at the top of the panel you can select the Iris Enhance preset. Once you have selected this you can still make manual adjustments to any of the sliders to tweak the iris.

The main sliders to work with here are the:
- Texture,
- Clarity,
- Sharpness,
- Saturation.
You may also want to adjust the:
- Colour temperature,
- Exposure,
- Contrast,
- Dehaze.
Using this second set of adjustments you can enhance eye color. This is how to make eyes bluer.
As with any time you are making slider adjustments in Lightroom, avoid extremes. Making a combination of subtle changes will help keep the integrity of your images intact. Pushing sliders to the extremes can result in artifacts, banding and other technical problems.
Associated Questions About Making Eyes Pop Out
How Do You Whiten Eyes in Lightroom CC?
Further to the steps above you can continue to use the brush tool to remove or reduce blood vessels in the whites of the eyes.
Select the brush tool again (k) and bring the size of it right down. Zoomed in to the eye begin to paint over the vessels you want to work on. Don’t forget to have your overlay (o) turned on so it’s easy to see what you are painting.
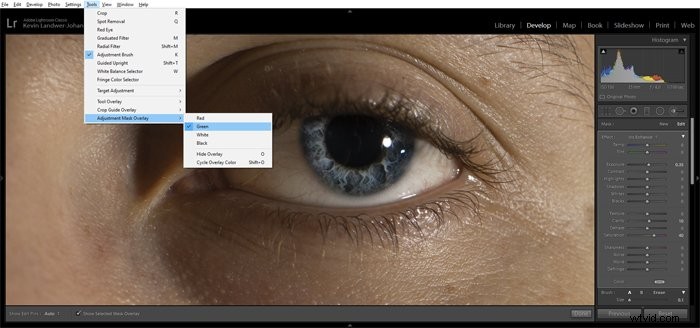
Tip: You can change the color of the mask overlay by going to Tools in the top menu and then Adjustment Mask Overlay. Switching it to Green will make it easier to see when painting over the blood vessels.
Once you’ve finished painting adjust the sliders for:
- Exposure (increasing it slightly)
- Clarity (reducing it)
- Sharpness (reducing it)
Aim to keep your adjustments subtle and keep the eyes looking natural, unless you are looking for a more cartoon-like result. Everyone’s eyes have visible blood vessels so to remove them completely looks unnatural.
How Do I Make My Eyes Pop in Lightroom CC Mobile?
In Lightroom Mobile, it is possible to make eyes pop out. Simply use the selective option and paint over the eyes in much the same way as I have described in the steps above.
Once you have your area selected use the sliders in the Light option. You can also find further tools under the Effects and Detail tabs.
Does Lightroom CC Fix Red-eye?
Problems with red-eye are not so common as they used to be, but you can use Lightroom to fix it when it does occur. In the Develop Module simply select the Lightroom Red Eye Correction tool.
Click on the affected area in the image and drag until the eye is covered by the circle. Make manual adjustments to the Pupil Size and also Darken the pupil.
Can You Whiten Teeth in Lightroom CC?
Yes, you can use much the same techniques I have outlined in this article to whiten teeth. Having painted over the teeth you will want to concentrate mainly on the Exposure and Saturation sliders to lighten the teeth.

Conclusion
Whenever you make adjustments to photos in Lightroom it is always good to keep your end goal in mind. Picturing the result you want before you start will help you be more accurate in the choices you make.
If you want a final image to look as realistic as possible you will make different edits than if you are going for a more poster or cartoon look. Keeping it real usually means making more minor adjustments.
Any radical movement of sliders can more easily create an unnatural looking photo.